First build Minicraft 1/350 Titanic (11320)

Joined
Mar 1, 2020
Messages
256
Points
238

Location
South Carolina, USA
This is my first model build in decades and it's slow going. These photos are over the past month or so. These are some tools and supplies I bought.20200210_144929.jpg20200302_102229.jpg20200302_103644.jpg20200302_103709.jpg20200302_104804.jpg20200302_105034.jpg20200302_105214.jpg
The kit number is 11320, I believe it is the newest version.0.jpg
I made the base out of a 30 inch 1 x 6 of mahogany1 Display Base.jpg
I primed the hull with Tamiya fine surface primer in grey2 Primed.jpg
I airbrushed it with Tamiya flat black and flat white. I really wanted to put the gold stripe on it but I could not figure out how to get a 3/64 stripe masked over the raised rivets on the hull. Maybe with more experience I will be able to accomplish things like that.3.jpg
I airbrushed the bottom with Tamiya hull red. I didn't putty anything as I am just trying to get used to actually building the model simply. In future projects I hope to.
4 Hull.jpg
The hull kit seems out of spec. I had to grind off the casting and use toothpicks as a stop to get it all lined up5 Toothpick Stops For Deck Placement.jpg
The model is also really warped, especially the main deck. I made a channel and glued steel stock to the deck to take out the flex and ease installation.6 Reinforcing Warped Decks.jpg
I am using Scaledecks wood deck. My first time with this also7 Clamping Wood Foredeck.jpg8.jpg9 Foredeck.jpg10 Wood Poop Deck.jpg11 Clamping Wood Welldeck.jpg12 Aft Wood Welldeck.jpg13.jpg14.jpg
I got the first deck on permanently17 First Deck Installed.jpg
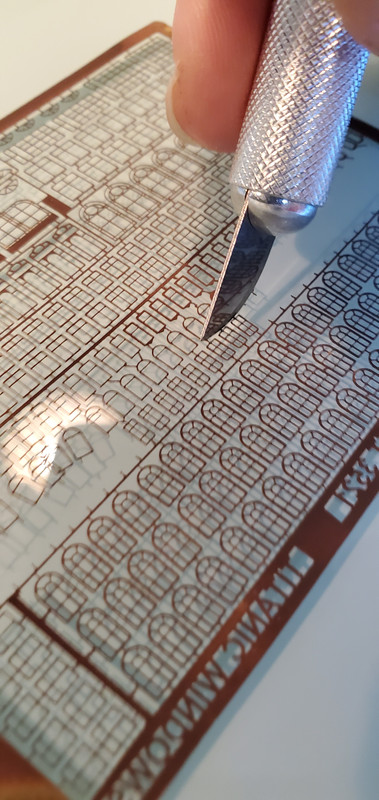
I also made my first try at photo etch. It's a real challenge for me.18 Attempting Photo Etch.jpg

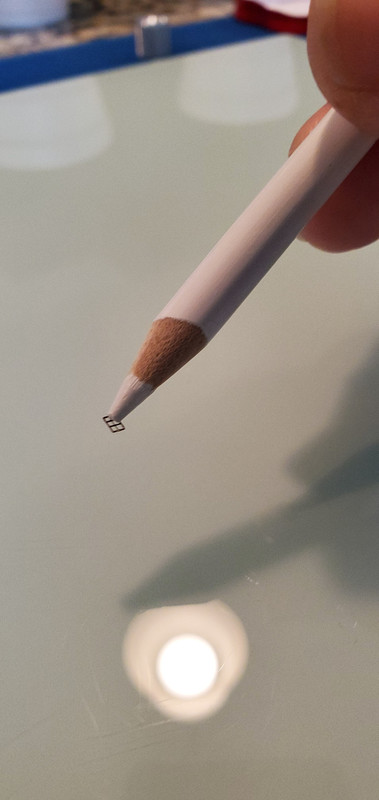
I have decided to redo the compass tower as I did not like the way it came out. This is the one I plan to use21 New Compass Tower.jpg
The forum says I can only attach 25 files and that's what I'm up to. I will try to continue in another post. Thanks for viewing.
 
This is where I'm at right now. The foredeck and poop deck are not permanently attached yet, they are just dry fit. I have made a lot of mistakes but I am looking at this model as a practice run. Everything I am doing is new but I am learning some techniques. I know the colors aren't correct but the historical accuracy isn't a concern on this model, learning how to do all this stuff reasonably decent is lol! I am hoping by the time I'm done I will be better as I have a 1/350 Lusitania coming and I purchased the Trrumpeter 1/200 Titanic as future builds. I will post updates as I move along but I am moving very slowly!! I have a ton of questions that always pop up on how to do things and I'm hoping I can get some input here on the forum. Thanks for viewing.19.jpg
 
Looks like you are loaded with all you will need to build her. I also see you are big fan of Tamiya products. Cannot go wrong with Tamiya, thought ;) Indeed very interesting build and I will aso watch. The deck looks fantastic (like real)
 
I am not looking forward to some of the photo etch. It is very time consuming and difficult to see and handle. I may be in over my head lol! There are some things that I will have to decide on as I get to them. As I had mentioned the gold stripe. I could not figure out how to seat any kind of masking on the surface where it needed to go. I will take the same approach to some of the photo etch. If it looks like it will ruin the model because I am not yet up to the level of skill needed I may go another direction. I am certainly going to try to get all the PE done. There are some things I already am debating about such as filing out some of the windows that are pretty much hidden. I bought microfiles but they are not even small enough to get in certain windows.. If it looks beyond my current capabilities maybe I'll see how they look glued over the mullions. My plan for this one is to learn so I can better build the Trumpeter 1/200 version. On that one I will do whatever it takes to complete all the detail. Just bending the benches has been a test of my older eyes. I just received this Lusitania today. That is another one I want to really try to do a good job on as I can't easily replace it. Thanks for all the interest.Lucy.jpg
 
Last edited:
Hello Chris. Working with the plastic kits in the past, specifically scale 1/350, I must admit that PE parts add lots of details, specifically to purly molded and often times oversized parts. Indeed, it requires some knowledge and specific tools to bend, but once you get a grasp - you will master it. It does require a good vision as well, this is one of the reasons I stop assembling at this scale. Check out this website and possibilities you may have with all resin and PE parts available at your disposal. :cool:
 
I bought a kit of turned brass which includes masts, bells, lamp and a photo etch crows nest. The masts are a much smaller diameter than the plastic kit masts and are supposed to be closer in scale to the real ship. That being so the holes in the decks are too big since they accommodate the larger plastic masts. I plan to glue a small block of wood under the foredeck and inside what I believe is called the second class entrance to seat the brass masts. I'll have to drill a hole in the wood at the right angle and depth. The kit comes with two brass bushings to cover the original deck holes. Hopefully these are also stronger to hold the rigging.22 masts.jpg23 masts.jpg
 
Thanks. As far as the photo etch I have only done benches, windows, and the compass tower. I cut it off by rolling a round blade over the attachment points as close as possible to the part
Then I'll pick up whatever part with a wax pencil
In the case of benches I'll place it in this bender if possible or bend it with a razor blade against a solid object.
The benches need to have certain pieces of them cut prior to placing them in the bender. Once that is done I line them up to be bent between the sixth and seventh slat on the bench. Only the center part of the bench gets bent at this time, not the legs so you have to make sure you are bending it up with something that fits between the legs. I just bend it up at 90 degrees.
Then I readjust the part in the bender and bend the legs up to meat the rest of the bench. There is a center leg that can be glued on after all else is done.
With the windows I will fill the opening from the back with Krystal K;ear and drop the window on with a wax pencil, adjusting it with a pin or toothpick. Some of the openings I've encountered on this model are already to big for the frames, that's why I drop them in onto the Krystal Klear. I am not going to file out the majority of the windows with mullions as most are hidden and it is too much for me at this point. I will glue them over what is already there unless it's a simple window to file out. Some of them are just too tiny for the tools I have to even get in there. That's about all I've done so far with photo etch. It's a struggle as it's very hard to see requiring me to wear a loupe and have a flashlight on the bending tool. I am bending the benches very simplistically as I'm new at it, most people who have done this before I understand make a jig to have everything come out uniform. For me it's all about learning and practice.
 
Last edited:
Hello Chris, If you don't mind, one of the suggestion working with PE parts is have a handy number of surgical blades (disposable). PE often made out of brass metal and blade become dull pretty fast. Sharp blade will help avoid the 'flying' or I called 'kneeling' event where cutting part gone 'flying'. :eek: 
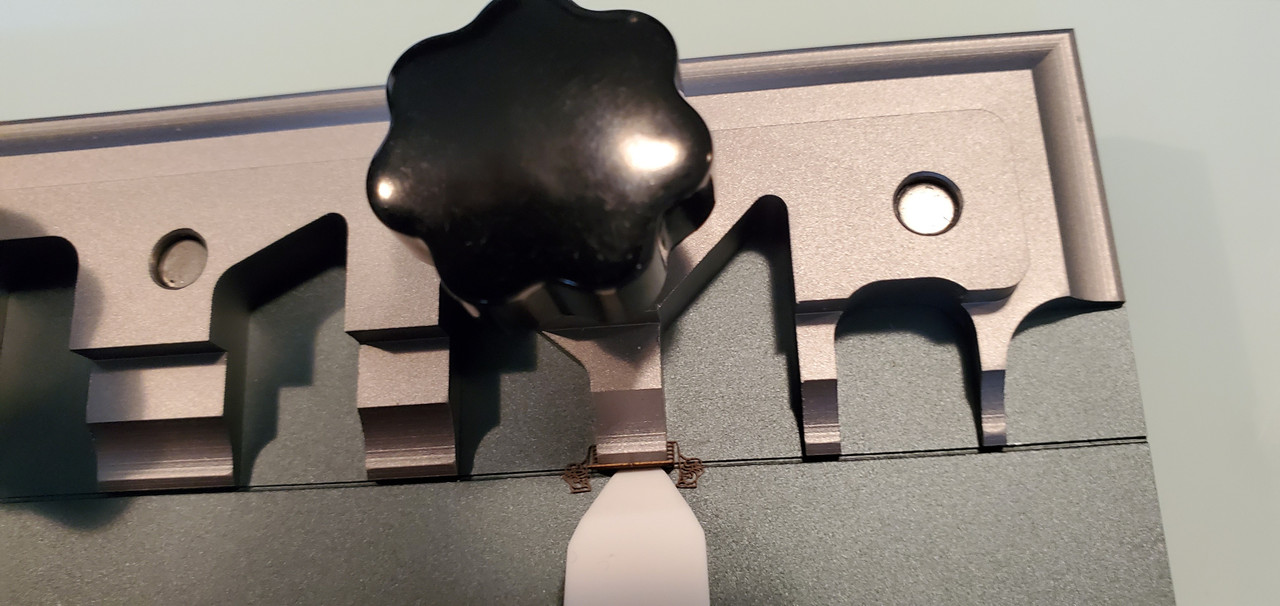
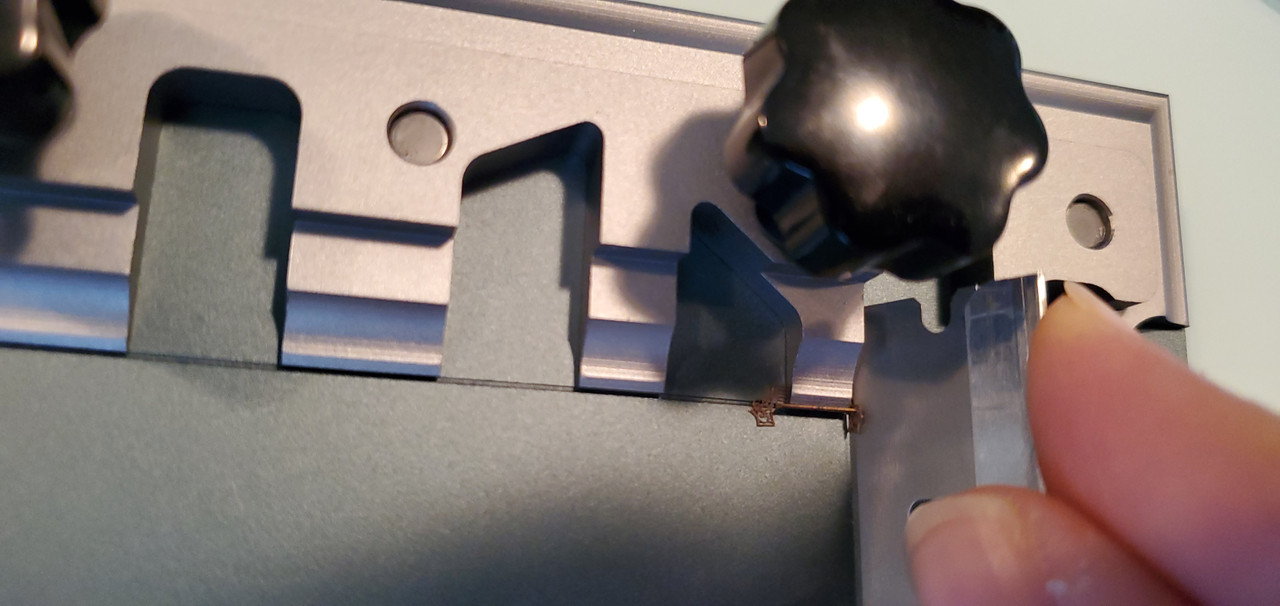
When release (cut) PE parts from the fret, avoid using a cutting mate, use plexiglass surface instead.
 
Thanks for the suggestions. I have had some things fly across the room lol. It has mostly been small plastic parts that I have grabbed with a tweezers. I guess I squeezed too tight! It has been a problem when I have applied glue and am ready to place the part and then it disappears leaving me empty handed with drying glue.
 
Thanks. As far as the photo etch I have only done benches, windows, and the compass tower. I cut it off by rolling a round blade over the attachment points as close as possible to the part
Then I'll pick up whatever part with a wax pencil
In the case of benches I'll place it in this bender if possible or bend it with a razor blade against a solid object.
The benches need to have certain pieces of them cut prior to placing them in the bender. Once that is done I line them up to be bent between the sixth and seventh slat on the bench. Only the center part of the bench gets bent at this time, not the legs so you have to make sure you are bending it up with something that fits between the legs. I just bend it up at 90 degrees.
Then I readjust the part in the bender and bend the legs up to meat the rest of the bench. There is a center leg that can be glued on after all else is done.
With the windows I will fill the opening from the back with Krystal K;ear and drop the window on with a wax pencil, adjusting it with a pin or toothpick. Some of the openings I've encountered on this model are already to big for the frames, that's why I drop them in onto the Krystal Klear. I am not going to file out the majority of the windows with mullions as most are hidden and it is too much for me at this point. I will glue them over what is already there unless it's a simple window to file out. Some of them are just too tiny for the tools I have to even get in there. That's about all I've done so far with photo etch. It's a struggle as it's very hard to see requiring me to wear a loupe and have a flashlight on the bending tool. I am bending the benches very simplistically as I'm new at it, most people who have done this before I understand make a jig to have everything come out uniform. For me it's all about learning and practice.
Great to see how small these parts are - thanks for sharing with us
 
Started setting up my brass masts. I glued down the wood blocks but I will get the masts straight when I put the decks on over the wood blocks. There are two brass bushings I'll glue to the decks above them for final adjustment. The masts right now are just sitting in the holes in the wood, they aren't permanently26 Masts.jpg27 Masts.jpg28 Masts.jpg attached.
 
Back
Top