
Generally, we don't post our work to expect others to evaluate it. We are sharing our work across the globe. Remember, we are here for a fun, it is our hobby!

-

SUBSCRIBE TO SHIPS IN SCALE TODAY!
The beloved Ships in Scale Magazine is back and charting a new course for 2026!
Discover new skills, new techniques, and new inspirations in every issue.
NOTE THAT OUR NEXT ISSUE WILL BE MARCH/APRIL 2026 -

Win a Free Custom Engraved Brass Coin!!!
As a way to introduce our brass coins to the community, we will raffle off a free coin during the month of August. Follow link ABOVE for instructions for entering.
You are using an out of date browser. It may not display this or other websites correctly.
You should upgrade or use an alternative browser.
You should upgrade or use an alternative browser.
french 64-gunner LE FLEURON in scale 1:48 by Joachim
- Thread starter Uwek
- Start date
- Watchers 68
-
- Tags
- ancre le fleuron

As I have not done a pintel and gudgeon brass strips set of rudder fittings, and without some of the more high end tools and bits that you have used, I appreciate being able to see the general process that you took. It answered some questions, such as drilling the holes in the small straps and how to secure them when doing that. My stock is 1/64 x 1/16 inch so this is going to really challenge me and probably lead to several learning failures along the way. I have never done a scratch build so you are ahead of me there also and the general appearance to my untrained eyes is very good overall. I can't criticize others work as my own is not at that level. I am learning as much as I can see and read building my tool box. Rich (PT-2)I've been working at the rudder for a week. It consists of two wooden parts, which are joined together. I paint the rudder with red shellac.
The hinges are labor-intensive. 2x1 mm brass rod loop I on the plate grinder a little thinner, also so that they become more flexible. One thorn must be soldered on one part of the hinge, on the other a sleeve (which I previously drilled from a round rod on the lathe). 0.5 mm holes for the nails are then drilled into the hinges. I'm not ready yet, but I'll show my first pictures.
View attachment 197039View attachment 197040View attachment 197041View attachment 197042View attachment 197043View attachment 197044View attachment 197045View attachment 197046View attachment 197047View attachment 197048View attachment 197049View attachment 197050View attachment 197051View attachment 197052

Very nice wood tones balance and detailing to my untested eye. Rich (PT-2)Thank you for all guys for all the good comments
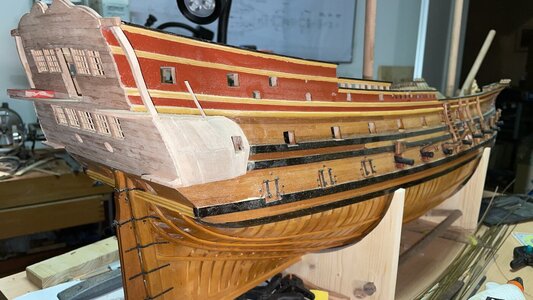
Today the Fleuron has left the slip for launching and new adventures
View attachment 198035

Wow! Beautiful, what a pleasure to look at.Thank you for all guys for all the good comments
Today the Fleuron has left the slip for launching and new adventures
View attachment 198035


It is enjoyable to watch your progress and as with the rudder items to keep in my own mind and Bluenose build. One thing that popped to mind was in seeing the lower gun deck with the ports open, barrels out, as with most big gun ships of war. From my limited reading and thinking I would think that in any kind of sea at all the lower gun ports would be shut tight so that seas would not wash aboard on either tack. Not as "showy" but closer to reality for most of the time when at sea. Just my speculation of course. Your ship will turn out very well. Rich (PT-2)
First of all - looking very good - and good to see your stern structure really during the construction
I like also you very fragile looking windows - how did you make them? Like gratings but with much bigger space in between?
when such a ship of the line was sailing in normal waters, means without "ready for action" the gun port lids were all closed, on every deck and the guns were secured inside the ship.
Only with "ready for action" and shortly before the first shots, the lids were opened and the guns moved out for the shots. Sometimes during action the lowest gun deck was not usable, due to the fact, that the ship was tilted by the wind, so the downwind-side was definitely closed. So , sometimes a twodecker was only effective like a frigate....
I like also you very fragile looking windows - how did you make them? Like gratings but with much bigger space in between?
Hallo Rich,It is enjoyable to watch your progress and as with the rudder items to keep in my own mind and Bluenose build. One thing that popped to mind was in seeing the lower gun deck with the ports open, barrels out, as with most big gun ships of war. From my limited reading and thinking I would think that in any kind of sea at all the lower gun ports would be shut tight so that seas would not wash aboard on either tack. Not as "showy" but closer to reality for most of the time when at sea. Just my speculation of course. Your ship will turn out very well. Rich (PT-2)
when such a ship of the line was sailing in normal waters, means without "ready for action" the gun port lids were all closed, on every deck and the guns were secured inside the ship.
Only with "ready for action" and shortly before the first shots, the lids were opened and the guns moved out for the shots. Sometimes during action the lowest gun deck was not usable, due to the fact, that the ship was tilted by the wind, so the downwind-side was definitely closed. So , sometimes a twodecker was only effective like a frigate....
- Joined
- Oct 31, 2019
- Messages
- 230
- Points
- 298

How to make the window frames: The starting material are 1mm pear tree sticks, they are the thinnest sticks from the Horschig carpentry in Berlin. I also use it as a starting material for wooden dowels. I leave the 1mm for the window frame. For the rungs I grind away the half by hand with file and emery paper. First I set the vertical rungs as you can see in the picture. Then I set the horizontal sprouts: Each one exists of 4 little parts.

Last edited by a moderator:
I think that most of the builds for a more impressive impact show the ship in the ready for action status which was a minor part of their time at sea but for their designed purpose. Thanks. RichFirst of all - looking very good - and good to see your stern structure really during the construction
I like also you very fragile looking windows - how did you make them? Like gratings but with much bigger space in between?
Hallo Rich,
when such a ship of the line was sailing in normal waters, means without "ready for action" the gun port lids were all closed, on every deck and the guns were secured inside the ship.
Only with "ready for action" and shortly before the first shots, the lids were opened and the guns moved out for the shots. Sometimes during action the lowest gun deck was not usable, due to the fact, that the ship was tilted by the wind, so the downwind-side was definitely closed. So , sometimes a twodecker was only effective like a frigate....
- Joined
- Oct 31, 2019
- Messages
- 230
- Points
- 298
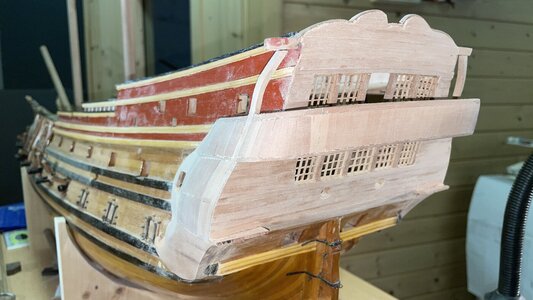
The windows are finished at the back and the balconies on the sides van be seen. If you look closely, you will also discover the outside toilet
There is also a vermilion color sample on the gallery for the rear and side galleries.


I wish you merry Christmas
There is also a vermilion color sample on the gallery for the rear and side galleries.
I wish you merry Christmas

That is a very fine looking stern and consistent windows as a present to yourself for your work. Merry Christmas. Rich (PT-2)Last work and picture before Christmas , have a peaceful calm evening and stay healthy
View attachment 201055
- Joined
- Oct 31, 2019
- Messages
- 230
- Points
- 298
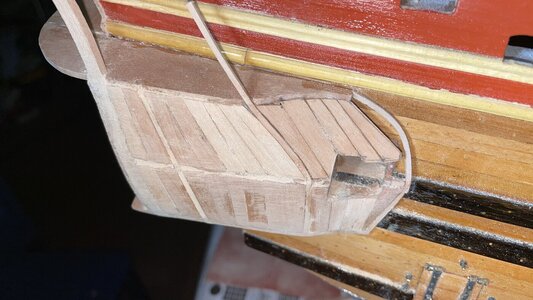
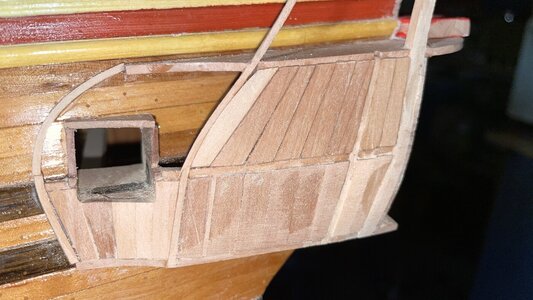
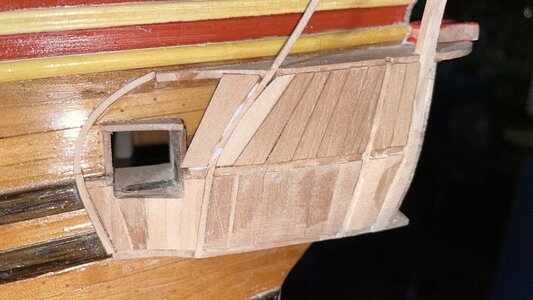
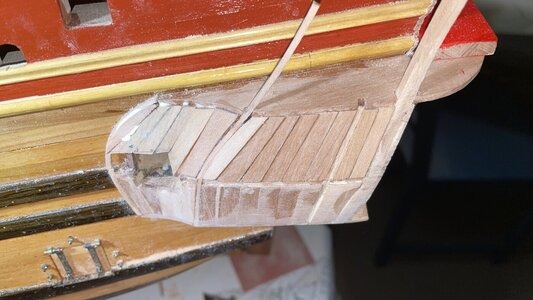
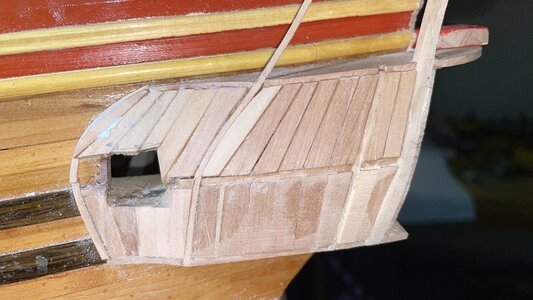
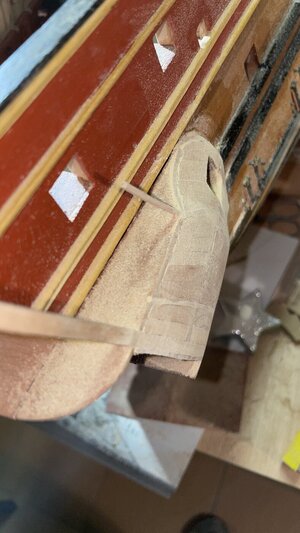
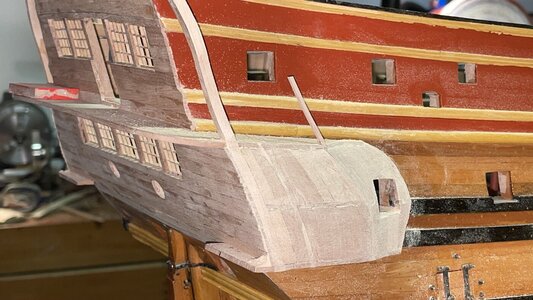
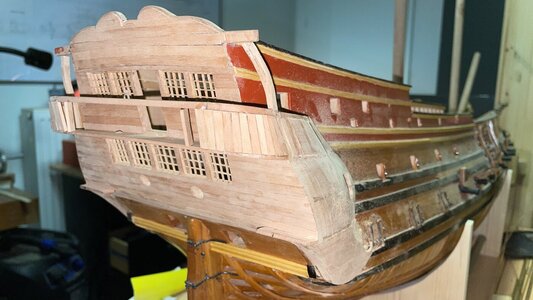
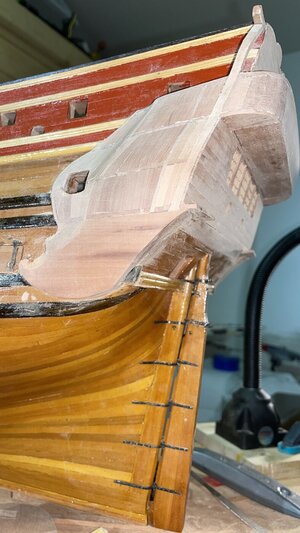
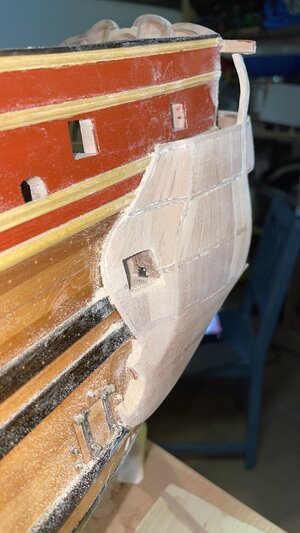
New pictures from the stern. The side gallery is tough because around the opening for the cannon hatch the balcony cladding is concave (or convex?) As with the bow, I use the technique of first installing thicker wooden sticks and then grinding them into the correct shape.
Attachments
-
 977C513D-9E7F-4164-9C0B-0D3E9D8E04A0.jpeg232.3 KB · Views: 31
 -
 23E6949A-C11F-4C36-B4FB-F9E7D5562469.jpeg230.1 KB · Views: 29
 -
 0F237AC2-61BF-42F4-A143-2273AAB0BE27.jpeg235.9 KB · Views: 28
 -
 174990DF-A03C-426B-93AB-2ACC634D5771.jpeg220.9 KB · Views: 29
 -
 50659EE0-7EDF-4E4C-A7CF-6FBEEE57E0F1.jpeg242.1 KB · Views: 29
 -
 383D0B16-61C7-48CC-92D9-E3E305C218F0.jpeg227.5 KB · Views: 27
 -
 F950D02C-2E01-4E62-8120-9D4180F769AC.jpeg178 KB · Views: 30
 -
 4B8B9677-057D-456A-BE30-5C230D499936.jpeg213.1 KB · Views: 28
 -
 C323C32B-7BF5-402F-A1F7-217DF06AF869.jpeg247.2 KB · Views: 34
- Joined
- Oct 31, 2019
- Messages
- 230
- Points
- 298
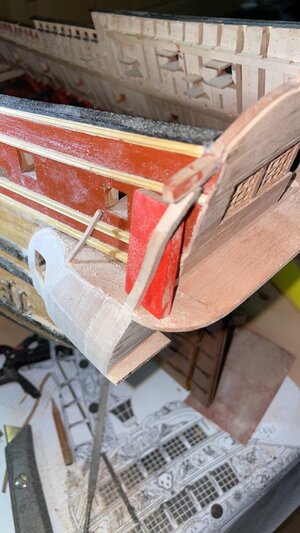
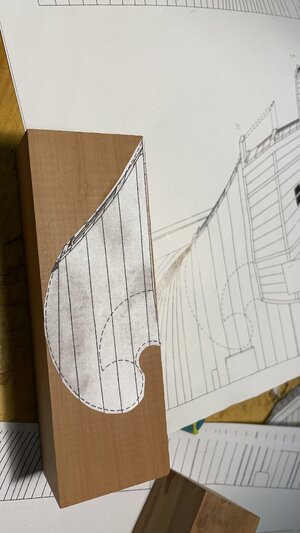
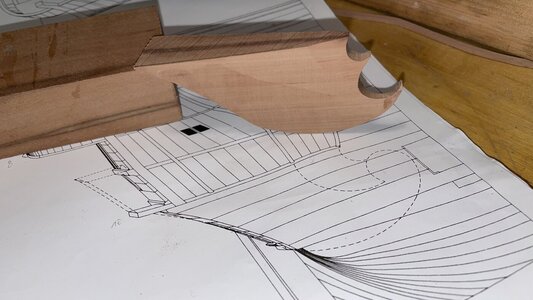
Today I cut out the "bottle neck" on the starboard side from a larger piece of pear wood and sanded it until it fits on the outer wall. I've already sanded the piece a bit on the outside, but it's not finished yet. I'll do the fine-tuning on the ship tomorrow.
Attachments
Looking very nice. Good work. RichToday I cut out the "bottle neck" on the starboard side from a larger piece of pear wood and sanded it until it fits on the outer wall. I've already sanded the piece a bit on the outside, but it's not finished yet. I'll do the fine-tuning on the ship tomorrow.
- Joined
- Oct 31, 2019
- Messages
- 230
- Points
- 298
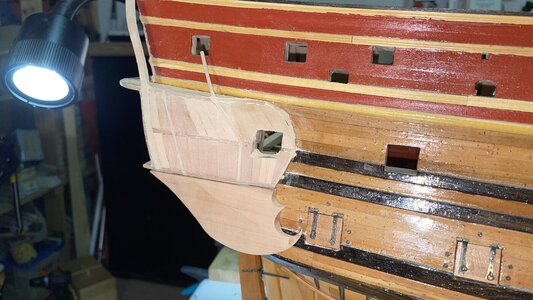
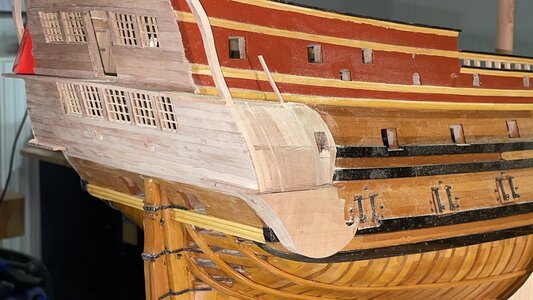
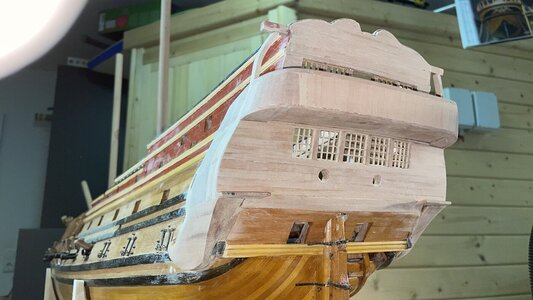
New pictures from the stern and the balcony
Attachments
-
 A110CFE0-1B0E-44C1-890C-51C1C2AC9FF0.jpeg185.9 KB · Views: 39
 -
 ED6C3676-24D4-4CEB-9DDB-3132959B3939.jpeg185.8 KB · Views: 37
 -
 EC441E19-9EBC-4912-B864-1D00B5D32BD9.jpeg193 KB · Views: 39
 -
 730A4255-5BA2-4363-B2F4-5CBAD7E9BD36.jpeg207.7 KB · Views: 42
 -
 0A538E3B-5598-4DD8-9780-1E0546E80476.jpeg208.6 KB · Views: 40
Hallo my friend,
Great progress - and looking very good
BTW: A Happy New Year - Health and Luck for you and your family
Great progress - and looking very good
BTW: A Happy New Year - Health and Luck for you and your family
Wow, just catching up on your latest photos. Excellent work.
.
.