Glad Tidings Pinky by DUncan - Model Shipways - 1:24 Scale

Well, it just arrived. I am very excited. This is going to be a challenge for me. I have read a lot of build logs and my conclusion is, when I finish this build, I will have learned much about model ship building. It look like only half of those that started this build acturally finish.

First question: how do you flatten out the plans?
Hallo @Duncan
we wish you all the BEST and a HAPPY BIRTHDAY
Birthday-Cake
Enjoy your special day
 
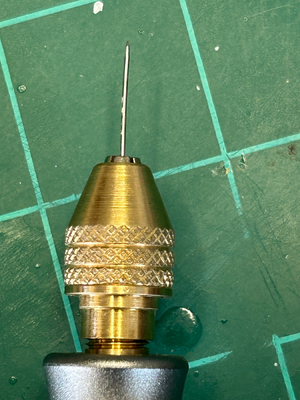
For me the ultra small drill bit only works using a drill press. I can’t hold a hand held drill straight and steady. The bit breaks too easily for me when it has to go more than a few mm.

When drilling into wood I have successfully used a common pin (0.65 mm dia.) as a drill. I’m using 0.68 mm nails. The pin is much more tolerant of my not so steady hand.

IMG_8685.heic
 
Mental stimulation. Where I come from, it’s called thinking. Not just, what am I going to do today or eat for supper but how did someone do that? Or how can I do that? Or why did they do it that way? Model ship building presents challenges that keep my mind busy when my body is too old to build and sail the real thing.
 
Mental stimulation. Where I come from, it’s called thinking. Not just, what am I going to do today or eat for supper but how did someone do that? Or how can I do that? Or why did they do it that way? Model ship building presents challenges that keep my mind busy when my body is too old to build and sail the real thing.
When im not working on a model I study Spanish. Same thing…mental stimulation
 
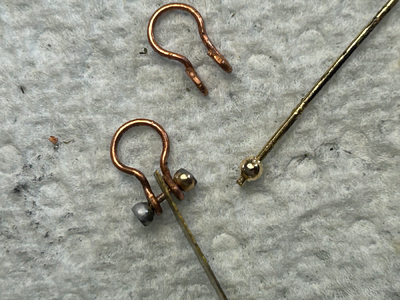
This is my rendition of a shackle. After bending the shackle itself from brass or copper rod, the bolt (which is the hard part) I fashioned by soldering a 2 mm jewelry spacer bead to each end of a .026 mm brass rod. They look ok from a normal viewing distance.

This model is 1:24. I have no idea how shackles are made for a 1:64 or smaller.

IMG_8706.heic
 
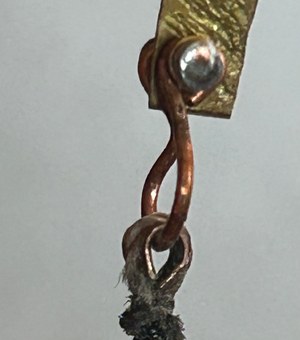
1721007413102.pngThis is my try at a thimble. The rope is .021” so the proportions seem to be right but I need to work on the eye splice. I watched a video from Tom Lauria and I will try his suggestion on the next one.
This rope seems to fray a lot. It’s what came with the kit. Any suggestions.
 
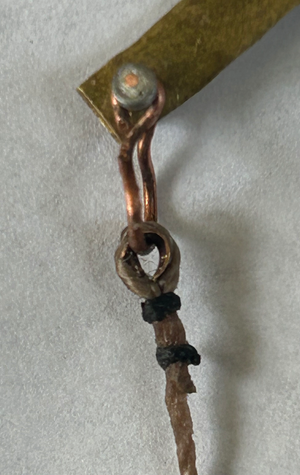
This is the best I can do with an eye and thimble. If I am going to progress with this model this will have to do. It’s going to take me a lot of practice to do it on the model itself. But I have got to move on.

IMG_8732.heic
 
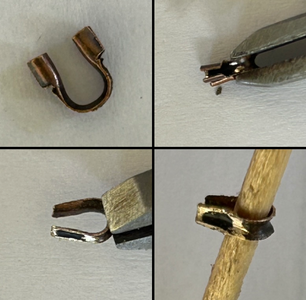
This is how I made this thimble. (I don’t have lathe.) Starting with a “Wire Guard Thread Protector” 4.5x4 mm bronze color from Amazon. Opened the closed ends with an Exacto knife and trimmed the excess with diagonal cutters. Filed off any excess material and burrs and reformed it around a toothpick. Took about 90 seconds to make. Should look ok after Brass Black treatment.

IMG_8743.jpeg
 
Duncan, when I put the “backbones “ on top of each other they didn’t align. Did yours?
 
Thanks for all the suggestions about the plans.

I am working on the starboard half of the hull. Almost have all the bulkheads glued in place. Not using CA makes the job much longer.

I’m thinking about the next phase, planking. I’ve been watching the Russian lady’s build log. She used pins to hold the planks in place. What is she using for glue? And why don’t the pins split the planks?

I’ll post some pictures soon.
Please, olha not from Russia
 
Maybe you could call it the inner keel. Im talking about the full length pieces with the holes for mounting the half bulkheads etc
 
Back
Top