Grants Xebec 1:60 (using Jabeque Cazador Occre1:60 kit) [COMPLETED BUILD]

Hi Grant. I like your k.i.s.s. design for the extension of the bulwark however, there isn't much "meat on the bone" to attach this piece. Hopefully it is sufficient to hold. You could rip off the veneer strips of the bulwarks and after gluing the extension, use veneer over the overall bulwark + extension and cover up the seam between both parts and add a little bit of strength to it. It's not much, but it may actually helps a bit.

Peter
 
Good afternoon
I am going to build a Xebec. Originally I was going to build the Jabeque Cazador from OcCre 1:60 scale, however as I will show I am going to change this up a little.

The kit :
As with most reasonably affordable kits there is nothing exotic about the Cazador from OcCre.

When my kit arrived the parts box had broken open and plenty tiny parts were strewn all over- I’m sure I did not achieve a 100% recovery- time will tell :D
View attachment 351990View attachment 351991View attachment 351992

The wood is mostly lime (L)(not my favorite) which is easily cut and sanded. It is a porous wood and difficult to get a realistic finish. I am going to have to research staining and wood finishing.

Certain parts e.g. the false keel, is African Walnut (Aw) which does not finish as good as the European Walnut however it is cool.

The second planking layer is veneer which looks good and easy to use. It Does limit certain details e.g. caulking and the treenail effect is different.
View attachment 351993
As with all modern kits in this price range many of the parts and decorations are molded metal where it would be so much better to have these wood. I guess a lot of scratch part building is in my near future. Going be fun.

View attachment 351995
The cannons are simply kak. (An Afrikaans word - translation obvious ROTF).The blocks and thread (which is a strange shade of green) will be replaced with the good stuff from Drydock. Pretty much stock standard for kits.

Occre got the instructions so good. Clear, concise and there is no confusion. Wow so different from my Mantua Victory ones.

Next up some history, ship research and Grants plans for a Xebec.

Cheers Grant

View attachment 351994
I had a similar situation with the Mantua ''President'' model, except that unfortunately a lot of the smallest parts were lost because the foil on the cardboard was cracked, but I dealt with this inconvenience.
Regards& Good luck
 
Good morning. I am completely stoked with the structural changes I have made. It’s exactly what I wanted:
View attachment 360802
View attachment 360801
Now it is time to go SLOW. Plenty of sanding - happens when you just go for it ROTF , however it’s going to come out awesome. Excited!

It is also time to research. No more Grants imagination, I need to find out more.

Cheers Grant
It seems that the work is going forward, with good results. Nice
 
Grant, it seems to me that this part should have been made as a whole part, and not assembled from pieces. So the design would be rigid. I will watch
Good morning Sasha. You are 100%. In my modifications of the Occre kit I just used the pieces provided , cut shaped and made longer. I should have remade the entire bulwark all the way to the end. Would have been easier and I would not be facing this right now. Rookie at scratch building parts.
Hi Grant. I like your k.i.s.s. design for the extension of the bulwark however, there isn't much "meat on the bone" to attach this piece. Hopefully it is sufficient to hold. You could rip off the veneer strips of the bulwarks and after gluing the extension, use veneer over the overall bulwark + extension and cover up the seam between both parts and add a little bit of strength to it. It's not much, but it may actually helps a bit.

Peter
Good morning Peter. That is a fine idea. It would certainly assist. I am questioning my strength process right now….it is a way off so have time to think:rolleyes:
Hello Grant,

Your Xebec is looking great. I am following your build, but I have not been getting notices for some reason. I will have to pay closer attention.

Bill
Good morning Bill. It is great to have you on board while I create this Xebec of sorts:D
Love the graceful lines of this ship - Looking excellent Grant...
Good morning John. Thank you. I am getting excited about her lines, I am blundering through all the “scratch additions” especially from a design point of view.
I had a similar situation with the Mantua ''President'' model, except that unfortunately a lot of the smallest parts were lost because the foil on the cardboard was cracked, but I dealt with this inconvenience.
Regards& Good luck
Good morning. These things happen. I am sure as I go I will discover some parts missing. I do think I got most of them tho.

Cheers Grant
 
I thought I would share my PM with Johan. This is my plan for the grated deck fitting:

Good morning Johan.

I agree with you- I am thinking of how to make this structure strong. It is a way off so have plenty time to think about it.

Here is the extension or sun deck as I like to think of it ;) . This is from the Le Requin drawings I have :
E7661628-EE4E-4408-9E95-3E87D3D15622.jpeg

27BAD96B-F0D4-4506-92E7-0B6914961232.jpeg

My construction thoughts at present :
2E968214-5C53-42D1-B822-E9B54A29D6D5.jpeg

I am going to make the entire “sun deck” as one unit.
1. The fore frame of the sun deck will be drilled and nailed and glued to the 2mm wedge as shown. A 5mm x1mm will be part of the unit and will fit over the transom as well giving more strength and finish of the transom onto the sun deck smoothly.

2. The outer “bulkwark “extension “ which will also be part of the unit will fit into the wedge shown. It will have vertical nails going into the bulwark as well as nails from the side. These will be planked to fit the bulwark also covering the nails and adding a little more strength. There will be decorative covers where the join is also giving a tiny amount of strength.

I will put two small knees on the underside.

The transom is small and I assume the crew just climb onto the “sun deck”.

Mine won’t look as good as thisROTF but hoped it will have a similar look.
49B8CA1E-068F-4FA1-935F-61C3208E6803.jpeg


Cheers Grant
 
Good morning.
Planking of hull above the wale:
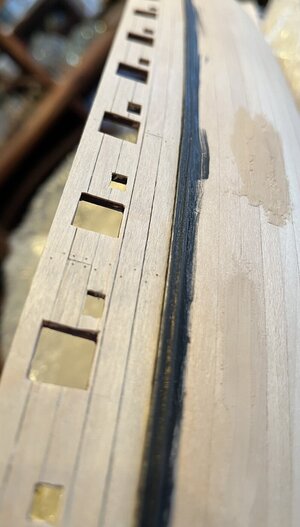
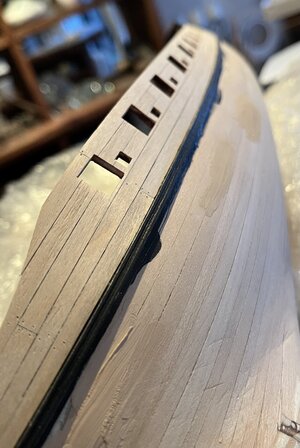
Lime Veneer does not give much plank definition so did some Grant creation.

Hull of ships do have caulking/sealing between each plank. It is not often used on models as due to scale it would not be very visible. Plank lines are evident tho.

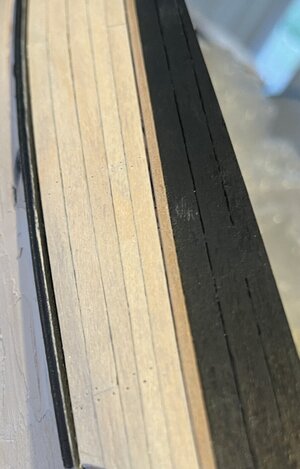
To get plank definition with this Lime veneer I ran a very light pencil “caulking” (not as evident as my decks).

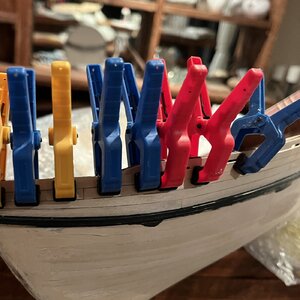
Bow and midships I used clamps while at the stern CA glue had to used.

WIP :
5ECEABAE-1863-4D7D-B907-08D351A6EB53.jpeg
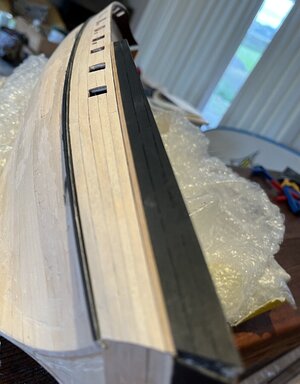
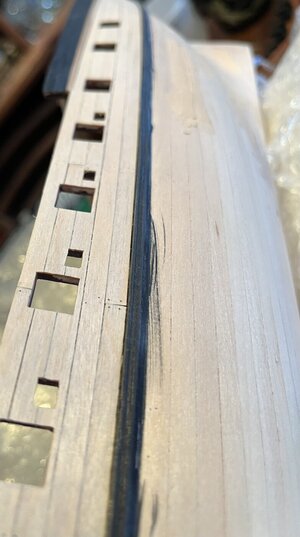
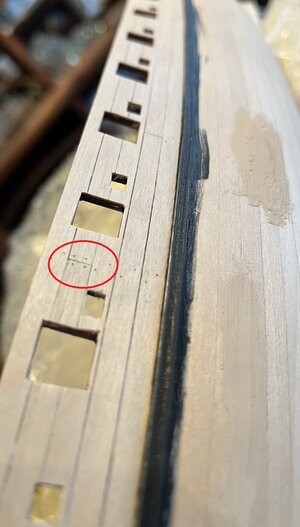
Gun ports cut(not completed) and treenail holes (0.4mm) drilled . Planks at stern above the gun port rail (still to be added) are tappered. Bow all planks tappered.

So far….here is what is happening:
24F6EF26-B677-4001-B409-07A117E8B8BB.jpegFFDABD07-3E0B-4529-8293-5521A7D0AA5B.jpegE6018B31-F100-4BEB-81E8-592AD9A720F2.jpeg8C9231FB-D79A-4F63-85AA-1534A8586F7D.jpegF6AC5471-DDCB-43AD-9049-D531F87F8386.jpeg
Cheers Grant
 
Grant, mate. Hello. There shouldn't be such "shorts" between the gun ports. Make it whole. board in this placeView attachment 363191
Good morning Sasha. I forgot about that.Redface.
I did know this and just went for itROTF and got it wrong. Oh well I’m not sure I’m going to make this a redo task. This Xebec is so way off historically thus far I’m not sure these shorts will do much to change it. Thanks for pointing this out for me . Cheers Grant
 
Good morning.
Planking of hull above the wale:
Lime Veneer does not give much plank definition so did some Grant creation.

Hull of ships do have caulking/sealing between each plank. It is not often used on models as due to scale it would not be very visible. Plank lines are evident tho.

To get plank definition with this Lime veneer I ran a very light pencil “caulking” (not as evident as my decks).

Bow and midships I used clamps while at the stern CA glue had to used.

WIP :
View attachment 363189
Gun ports cut(not completed) and treenail holes (0.4mm) drilled . Planks at stern above the gun port rail (still to be added) are tappered. Bow all planks tappered.

So far….here is what is happening:
View attachment 363188View attachment 363187View attachment 363186View attachment 363184View attachment 363185
Cheers Grant
What a nice touch adding the caulking Grant, I like the tree nails as well. Bravo!!
 
Finally, I have a moment to check up on my pirate ship. When it comes to the extension of the aft section, I am sure that a couple of well-drilled holes, toothpicks and wood epoxy will do the trick.
Good morning Heinrich. I’m living on a hope a prayer here. I never thought about wood epoxy? Is that a stronger bond than wood glue as I’m looking for anything to add strength to that structure when I get there?
 
First class work here Grant. The planking looks fantastic. Will you just leave the treenails as drilled holes? Not sure what your plan is but I find these very convincing.
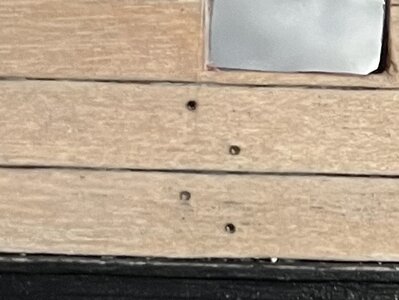
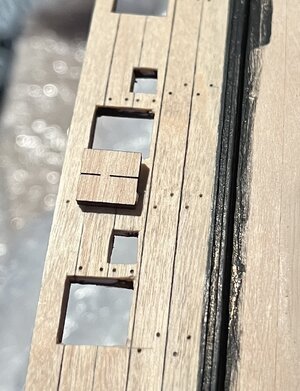
Good morning Paul. Thank you kindly:D. I did a couple of tests. The big issue was lime veneer. Too soft,chips and marks easily . Toothpicks did not work me,wood filler stained the surrounding veneer, filling the hole with polyurethane made them hardly noticeable. I lighty (very lighty) penciled each hole with HB and then filled with polyurethane.

Here is the result:
C2666BB9-C9C7-4CA8-96F9-5AACE2F51FD7.jpeg

Cheers Grant

F4C79A15-8BA3-4EC2-88B7-4445A941B41B.jpeg
 
Back
Top