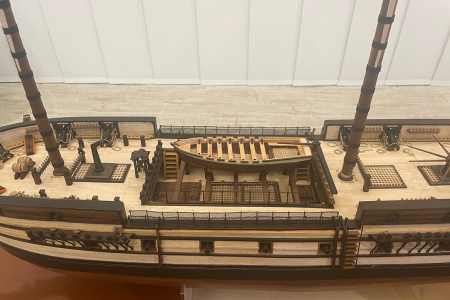
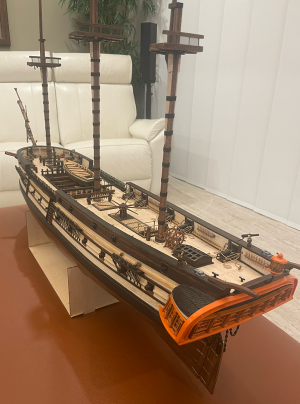
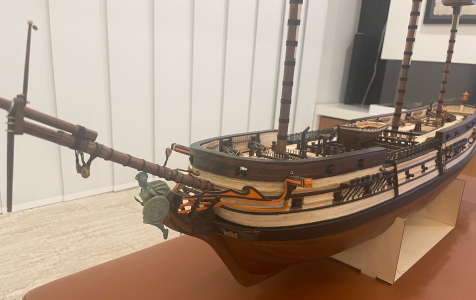
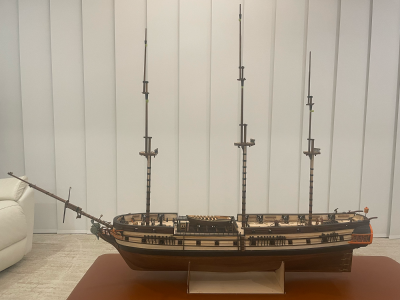
H.M.S. Surprise by Artesania Latina - Build log

From James Lees The Masting and Rigging of English Ships of War page 23 to compare with Artesania Latina's concept of tops. Note that the holes for crow's feet extend nearly to the outboard sides which you can add if you want to....


Yes, I saw this when I got that book, and thank you for recommending it to me. I may add a few more holes for the crows feet just to conform to that reference.
 
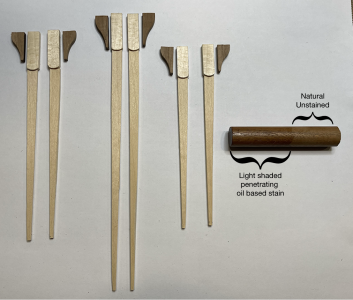
Time for a decision regarding the finish (treatment) of the masts. I've avoided the use of paint as much as possible and prefer the use of oil based (penetrating) stains. I know these are excellent wood preservatives and bring-out the beauty of fine wood grain. However, oil stains need to dry for several weeks before most glues will adhere. I'll be using trenails to attach the mast strengtheners, so this will not be an immediate issue. But the cheeks and hounds will require glue. I know I create these issues myself. Shrug.

Mast Strengtheners.png
 
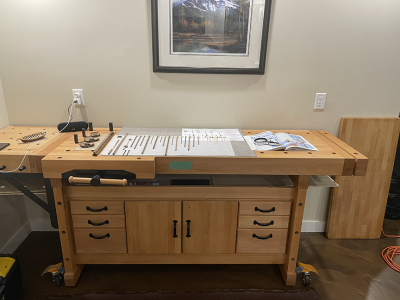
Cleaned up the mancave in preparation for making the ship yards and mast work. The kit masts were unusable due to warping, so I've ordered replacements - but those will take a couple of weeks to arrive. So, I'll work on the yards whenever I have the time.

Yard Prep-1.png
Clearly I made a big error when I chose the epoxy floor colour.... everything I drop disappears! Sure is easy to vacuum up important items if I'm not careful.

I managed to get the yards all trimmed to the correct length. Just need to figure-out which tools I'll use to taper them correctly.

Yard Prep-2.png
 
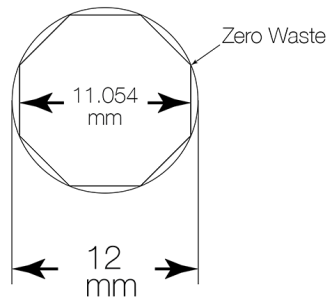
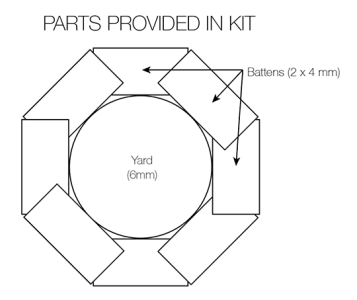
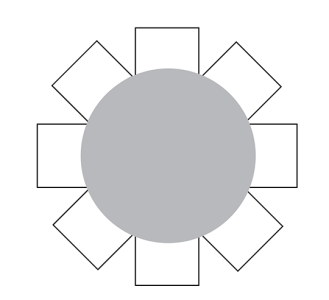
Work on the yards and masts is in progress. I found an error in the kit plans that is a personal head-scratcher. I'm not sure if this is an A.L. anomaly, or common with all kit manufacturers. So the following issue appears on several mast and yard items in this kit. In the example shown below, the kit provides a 6 mm walnut dowel that is fairly accurate in diameter for the length of it. However, the plan calls for this dowel to be "trimmed " to an 8 square profile with no loss of dimensioning. Magic?

8 Square Issue.png. Geometric Impossibility-.png

I'm sure this is obvious to all of the experienced builders here - it was obvious to me, and I'm new to this hobby. Shown in the image (above right) I used a 12mm dowel for example. If we take that 12 mm dowel and perfectly trim the sides to 8 square (without any waste) we will decrease the dimensioning from 12 mm
to approximately 11 mm.

So, I'll make some minor dimensioning changes to make my masts look fine. OCD is kickin' my butt. Ack!
 
Last edited:
Work has been keeping me away from home, but I've spent a bit of time on the ship this weekend. I've installed a number of parts that I knew were going to be difficult to do properly (considering my lack of experience with these). I completed the netting (screen) on the dec stanchions. Yay!
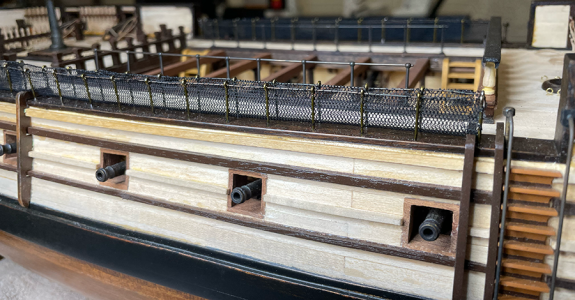
1-Rail Netting.png

Managed to get the yards and masts (which were delivered last week, and replaced the warped dowels from the kit) tapered on my lathe. I'm sure that a smaller lathe would make this easier, but the tool rest on my machine spans almost the entire length of the yards. This made it easy to get near-perfect tapers.
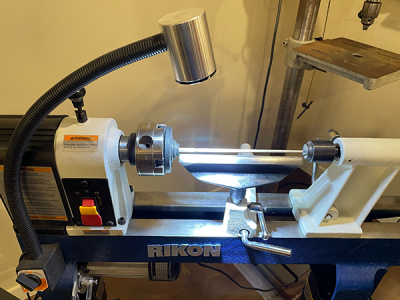
2-Lathework.png

I've made 8-square items before, but they were all furniture size. Doing these small units was a concern, however the 12-stops on the lathe made it a walk-in-the-park.

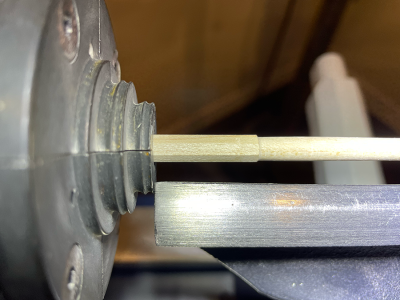
4-8 sq closeup.png5-8sq via lathe.png

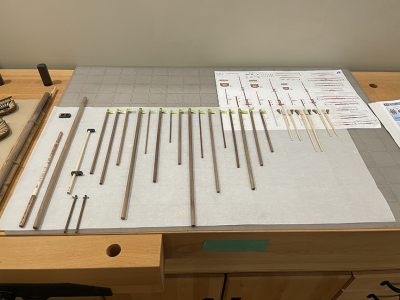
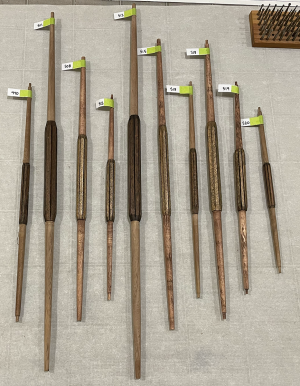
Work on the yards will take longer than I originally estimated as so many of these require battens. In the following image I've roughed-in 3 of these batten yards. All of the yards which have two parallel green masking tapes near the centre also require battens.
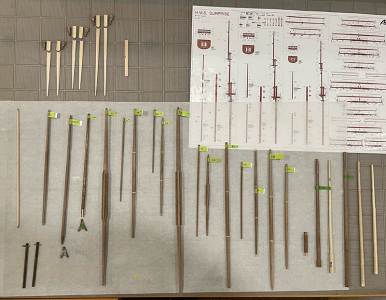
7-YardBasicForm.png

When I researched these "battened yards" using James Lees book I noticed that they should have iron rings around them to secure the battens. The A.L. plans do not include these and call for rope to be used instead. If I can find some thin brass sheets in my stored stuff, then I'll make these rings. Otherwise I'll just follow the kit plan.
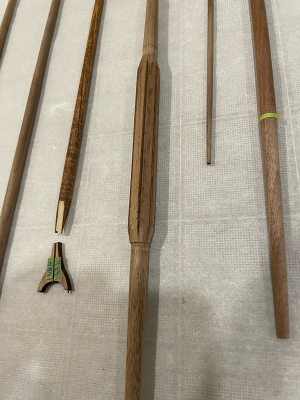
8-YardBattens.png

I couldn't find profile images or advice for exactly how these batten should appear (from the side). So I used my collection of router "rounding bits" to
make the side of the batten that contacts the yard the same profile as the yard. This avoided gaps. I like the look, but am uncertain if this is correct.
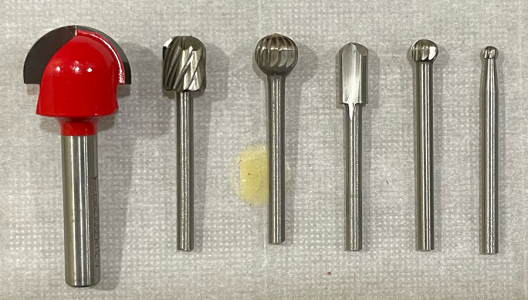
9-rounder bits.png

While working on the yard and mast "tapering", I made use of my smallest steady-rest. This unit saved me great frustration and permitted me to stick to my self-imposed accuracy limit of +/- 0.05mm for all measurements.
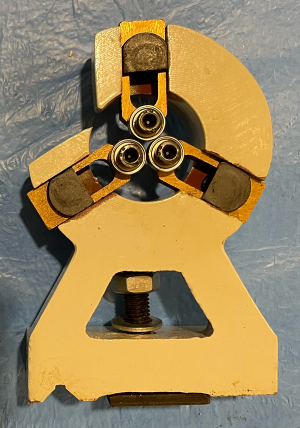
10-Steadyrest.png

3-8 sq Masting.png
 
The kit provided several different yard diameters, and 10 yards require battens. In my attempt to figure out the most accurate method of attaching battens I probably chose the most difficult way. I used some basic math to determine the circumference of the various yards in order to trim the battens so that each yard would have 8 battens set at 45º to each other.
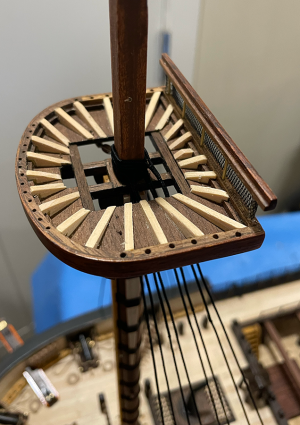
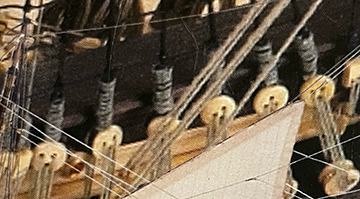
I know that Circumference = 2πr, and r = the radius (half the yard diameter).
For a yard dowel with a diameter of 5 mm the radius is 2.5 mm
C = 2 x 3.1415 x 2.5
C = 15.70 mm
For 8 battens to fit perfectly 15.7 ÷ 8 = 1.96 mm wide.
This yard will be the most difficult to assemble. The larger dowels will be easier (I thought).

The kit instructions do not provide any details for this part of the build. At first glance it appeared they wanted this:
Batten Gaps.png
But this would have gaps between the yard and the batten. So I knew that I would round the bottoms of the battens to fit without a gap.

Batten GapFree.png
And I trimmed the battens to permit each to fit the yard correctly (in my opinion).

Building these using the above method was a challenge for me. I can think of much easier ways to do this (now) LOL!
 
Here are the 10 yards with battens attached:

BattenYard-01.png

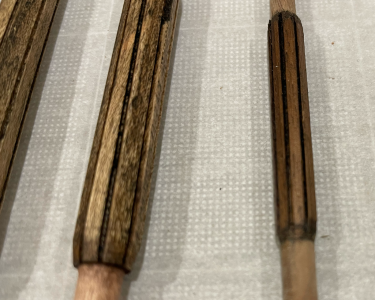
The smallest yard, show on the right below) tested my questionable skill:

BattenYard-02.png

Next step - rig the yards. I was hoping to use one of my semi-transparent stains on the yards, but some of these have strange wood grain anomalies which will probably be emphasized by staining. I may have to "throw in the towel" and paint these items. Oh darn
 
Here are the 10 yards with battens attached:

View attachment 514898

The smallest yard, show on the right below) tested my questionable skill:

View attachment 514899

Next step - rig the yards. I was hoping to use one of my semi-transparent stains on the yards, but some of these have strange wood grain anomalies which will probably be emphasized by staining. I may have to "throw in the towel" and paint these items. Oh darn
what about just painting the area where the battens are black and then staining the remaining part of the yards?
 
The wood construction phase of this build draws to a close with the mast rubbing paunch completion. I'll install these tomorrow and then take a deep breath...

IMG_6484.png

Here are a few photos of the ship with the vertical parts in place, but not permanently fixed in position.

IMG_6487.png IMG_6488.png
IMG_6489.png IMG_6491.png IMG_6492.png

IMG_6493.png

So now I move into the unknown build phase (for me). Rigging. I'll follow the kit's instruction for rigging order, but have decided on a number of additions to this phase that the kit does not include.

Before I commence the rigging I have a couple of questions that I will post on the "Help with Models" forum thread. Those questions are:

1. How far down the shroud lines does the top serving go? Past the iron bar futtock?

2. Is there a chart out there that indicates correct rope size for stropping the various blocks (seized to eyebolts etc) - looking for rope diameter specifically. I'm able to convert full scale size to this model (which is 1/48th scale). I'll be using the following block sizes and want to ensure that I select the correct diameter rope for each block :

3.0mm - single sheave
3.5mm- single sheave
4.5mm - single sheave
5.0mm - single sheave
5.0mm- double sheave
5.0mm - triple sheave
7.0mm - double sheave
8.0mm - triple sheave
 
Last edited:
Why does my lily HMS Surprise look so crappy compared to this model. Must be Scale. Well, we will call it that. Number eight plank went on port side today and all looked well. Till morning. From bulkhead five everything cracked and is well, ugly. Beyond ugly, sucked in between bulkheads and splintered. Too much glue? Perhaps the temp outside with the humidity played a roll. Did get hot sitting in the sun. Did not realize until the morning showed and had to kick my neighbors out. Love my neighbors but really, you have to take your kids with you. Even the ugly ones!

This Garboard strake is killing me, but I will find my way through. Perhaps, maybe, possibly or not.

The Northwest has been kind this year and brought a lot of Chinook Salmon our way. Good times, four on my card! Not done yet!
 
Why does my lily HMS Surprise look so...
When I planked this ship I strayed from the kit instructions and did not use the nails (pins) that the instructions suggested. I soaked each plank till water-logged then used a common heat-bending technique to get the shape correct while clamped in position. When the plank was fully dry I would remove it and apply a (very) small amount of glue to each frame where the plank would rest, and reclamped the plank in position. Using carpenters glue I could remove the clamps after 30 minutes and add the next plank. I alternated from port to starboard to keep the stress balanced. But what do I know? First ship for me.
 
I spent half of the afternoon enjoying this log. I like your style of writing and your modelling attitude too. It's been an entertaining read and a pretty good model too. I look forward to your rigging phase.
 
On subject of serving the shrouds, I am not sure of how far down from mast the serving goes on all shrouds, but on forward shroud, the serving normally goes all the way to deadeye, to protect from wear caused from sails rubbing on the shrouds.
 
On subject of serving the shrouds, I am not sure of how far down from mast the serving goes on all shrouds..,.
I was informed by Allan on this matter and it is covered in James Lees book "The Masting and Rigging of English Ships of War". You are absolutely correct according to this reference regarding the forward shroud. All of the other shrouds are served 8 feet down from the middle. So this is what I am in the process of doing. My serving is slow (as my wife so often says), but I expect a serving machine delivery in the near future. :) I'm uncertain whether she will be impressed with my serving speed after delivery, as she may have been referring to something else entirely. :cool:
 
Last edited:
Whenever I have walked through the airport terminal in uniform and I overhear a child saying "Mom, when I grow up I want to be a pilot", I usually stop, smile and say "Sorry, you can't do both".

My mother once told me that when I was young, I could entertain myself all day with a stick and string. If she could only see me now...
 
So, I have commenced the rigging. So much to learn, but before I show some update photos, here are some masting details. I have discovered that there is really no limit to the amount of detail a modeller can add to their build.

Here is an example of one of the three cap shore's completed.

Cap Shore Detail.png

I have managed to complete the serving and seizing of the foremast shrouds using James Lees reference.

ForemastShrouds.png
SeizedShroudsAtTop.png

Now I need to decide how I will strop the deadeyes. I have several references for this. The easiest, and least accurate is the A.L. kit photo:

KitPic-Deadeye Seizing.png

I probably have the ability to do that version justice, but it doesn't match the other reference documents that I looked at:

Deadeye Opt-01.pngJ.Lees Example.png

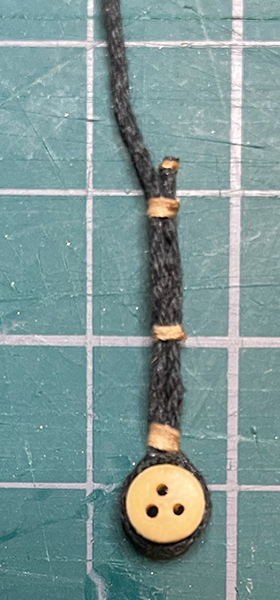
So I figured I should make an attempt to do this correctly and grabbed some of the thread?/twine?/yarn? that came with the kit to use as a skill test:

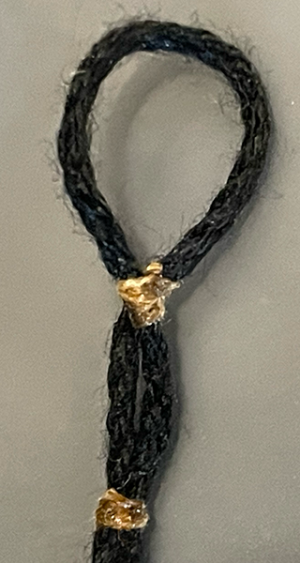
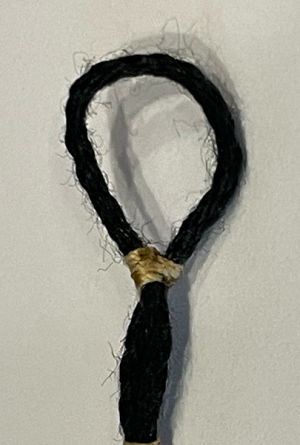
MyAttemtp Deadeye.png

So my attempt taught me three things:
1. I need practice in order to reach a satisfactory result
2. I should have listened to my mom when she offered to teach me some sewing techniques
3. Rigging the deadeyes correctly is not that difficult - but I'll cheat on the inboard side. LOL!
 
Your work in wood or rope is very tidy. I’m impressed.

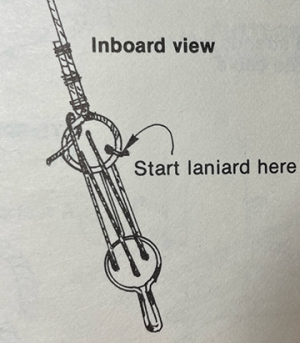
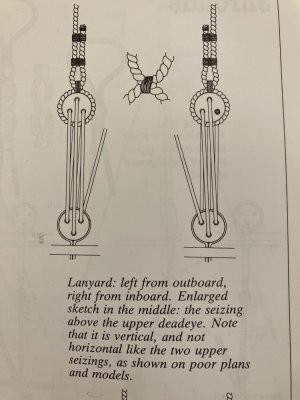
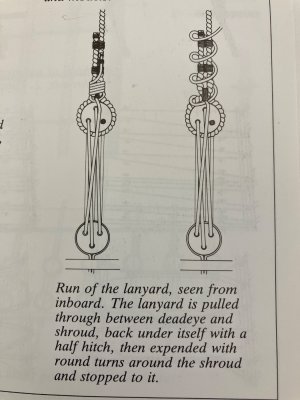
Concerning the last photo, the seizing immediately above the dead eye is I think, incorrect. The free end of the shroud crosses over the part descending from the masthead and then the seizing goes up and down rather than side to side.

Don’t take my word for that, there may well be exceptions so have a look at your references. Here’s mine from Historic Ship Models by Wolfram zu Mondfeld.

image.jpg

image.jpg

It’s my go to reference.

Of course, by creatively laying the lanyard it’s possible to hide the crossover almost entirely. ;)
 
from Historic Ship Models by Wolfram zu Mondfeld.
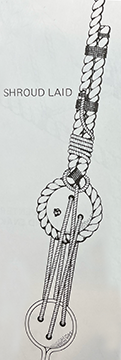
The lanyards and the seizings are a close match to the drawings from David Lees Masting and Rigging English Ships of War except for what might be an error concerning the shrouds themselves. The ones above may be correct for German ships but not for English ships. The shrouds in the drawing above show cable laid rope which was usually used for the stays, not the shrouds. Shroud laid rope was what was mostly used for shrouds as shown in Reg's post. I fully understand that this is so minor that not very many people would notice or even care, but as this is such a basic mistake I put more trust in Lees' work when it comes to rigging English ships.

Allan
 
Concerning the last photo, the seizing immediately above the dead eye is I think, incorrect.
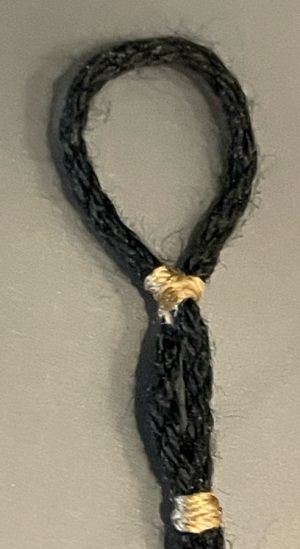
Thank you for your kind assessment of my work Smithy. I found several different references for this crossover seizing and each has a minor deviation from the next. I really like the image that you sent, and I think it would be far easier to do it correctly. I used a "crossover" knot which doesn't show up very well in my previous photo, and it doesn't keep the shroud tight to the deadeye - which I would like. Your version would do that much better, I think.

I removed the deadeye for clarity - but it still doesn't show the actual s-stitch crossover clearly:
IMG_6511.pngIMG_6512.pngIMG_6514.png

I will not be using this dog-haired yarn on my build, but it came with the kit and is useful for testing how to do this stuff. Thank you for sending this, and please continue to do so. I really appreciate the help!
 
Back
Top