H.M.S. Surprise by Artesania Latina - Build log

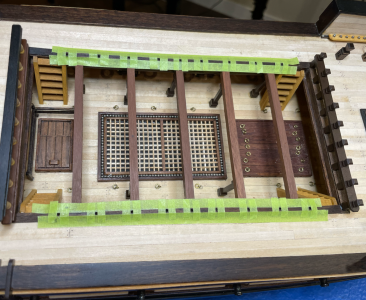
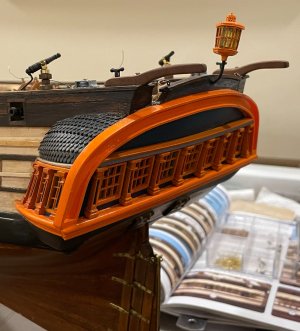
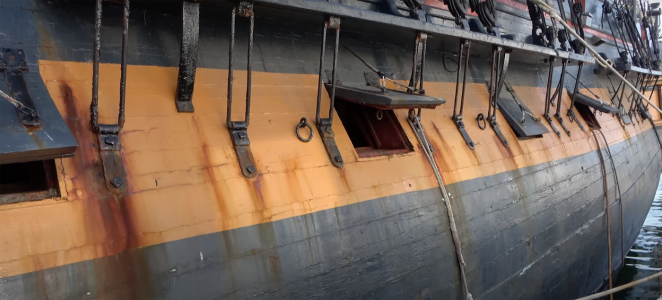
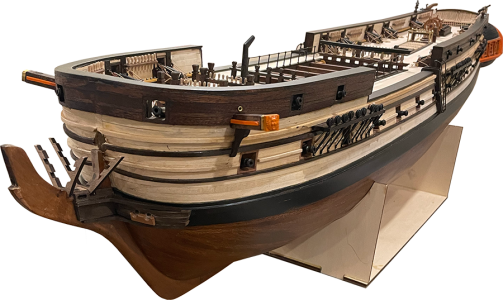
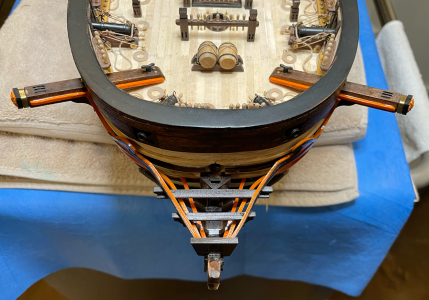
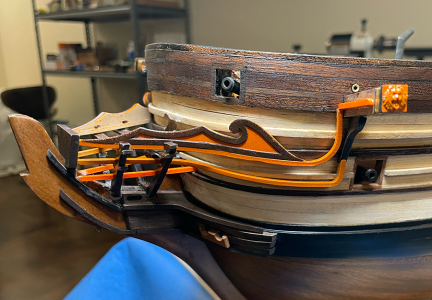
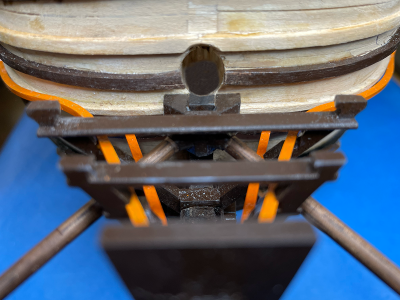
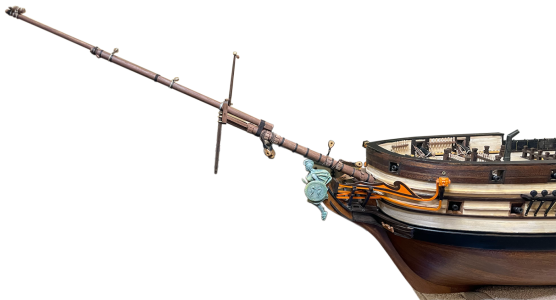
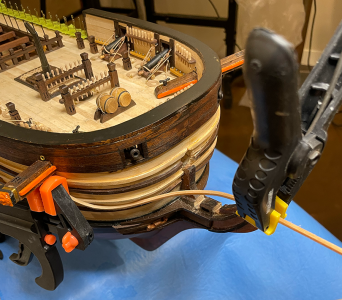
My job duties have kept me away from my build for too long. But a quick update here. I was about to spray the transparent orange stain when I decided to do a test on some scrap linden that was left over. The result was too yellow for me. So I adjusted the masking tapes and darkened the longitudinal rubbing strakes that are directly above and below the canon ports - and left the remainder unpainted. The only items I expect to paint from here to completion will be small decorations.

HullPaint-2.png
 
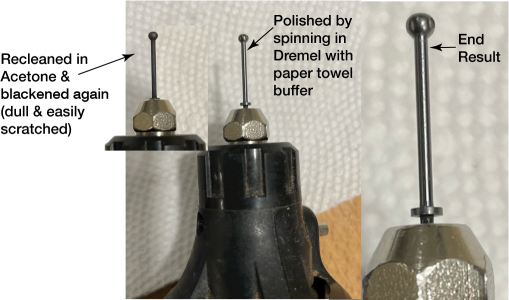
As you can see in the photo above, the cockpit metal rail was removed. That rail and stanchions were looking sad, scratched and dull. I needed to find a way to polish the brass rail and stanchions. Could not find any suggestions here, so I did it "my way". The rail was relatively simple to polish by rubbing it with a clean cloth after repeating the blackening process. The stanchions needed more effort, till I came up with my lazy-man method:

StanchionProg-1.png

In my research I found two things that I need to consider:

1. Ships of this vintage did not have metal rails around the cockpit. As this is my first ship, I decided to follow the A.L. plans with this.

2. Hexagonal (head) bolts were not invented till 1830 and not widely available till 1880. So I'll need to make some square head bolts.

The set-up I used for reattaching the cockpit railings, as I hate glue getting on my finished mouldings:
MetalRailMask.png

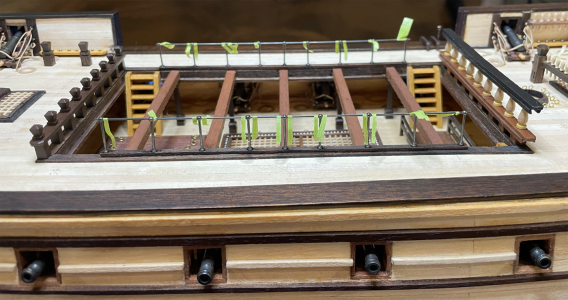
Now waiting for the adhesive to set before removing the stanchion separation masking.
Rails&Mask.png

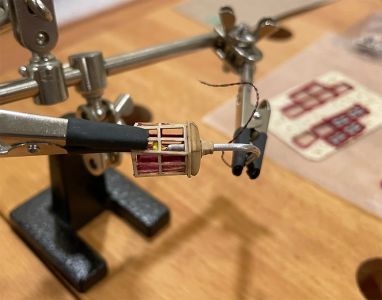
Working on the stern lantern with the electrical (candle) system. According to A.L. I'm supposed to mount this shortly. However, as it is a delicate piece, I'll wait till the chainplates are installed before I permanently attach it. I will use the kit provided lanterns for the tops, but this one will be fitted in the stern.
LampBuild.png
 
Last edited:
As you can see in the photo above, the cockpit metal rail was removed. That rail and stanchions were looking sad, scratched and dull. I needed to find a way to polish the brass rail and stanchions. Could not find any suggestions here, so I did it "my way". The rail was relatively simple to polish by rubbing it with a clean cloth after repeating the blackening process. The stanchions needed more effort, till I came up with my lazy-man method:

View attachment 469148

In my research I found two things that I need to consider:

1. Ships of this vintage did not have metal rails around the cockpit. As this is my first ship, I decided to follow the A.L. plans with this.

2. Hexagonal (head) bolts were not invented till 1830 and not widely available till 1880. So I'll need to make some square head bolts.

The set-up I used for reattaching the cockpit railings, as I hate glue getting on my finished mouldings:
View attachment 468808

Now waiting for the adhesive to set before removing the stanchion separation masking.
View attachment 468809

Working on the stern lantern with the electrical (candle) system. According to A.L. I'm supposed to mount this shortly. However, as it is a delicate piece, I'll wait till the chainplates are installed before I permanently attach it. I will use the kit provided lanterns for the tops, but this one will be fitted in the stern.
View attachment 468810
Good morning Reg. wonderful. Cheers Grant
 
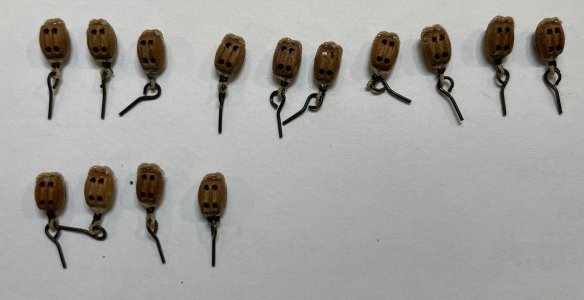
Made a number of blocks (14) before I decided my time is worth more. So I'll purchase these from drydock. The kit blocks were mostly unacceptable except for the deadeyes, which I will be using.

My DblBlocks.jpg

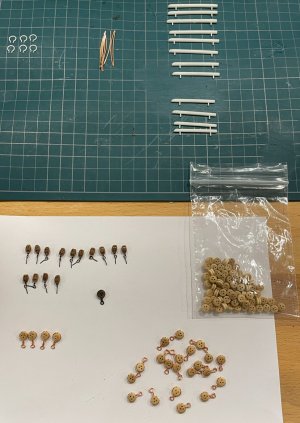
The deadeyes and tackle blocks that will be attached to the chainwales are in progress. I'll assemble all of them before I solder and blacken.

BlocksInProg.jpg

The stern lantern has been completed. I purchased this unit from syren and was impressed with the piece. The "candle" has been tested and
works well; however, the lantern is only placed and not fixed in position yet. A critical eye will note that the ship that I'm attempting to model
does not have a stern lantern like this - probably due to current port authority standards, and the ship from 1750 would not have the lantern
painted this colour. But I wanted it to match the stern arch. Shrug.

SternLantern.jpg
 
Made a number of blocks (14) before I decided my time is worth more. So I'll purchase these from drydock. The kit blocks were mostly unacceptable except for the deadeyes, which I will be using.

View attachment 470156

The deadeyes and tackle blocks that will be attached to the chainwales are in progress. I'll assemble all of them before I solder and blacken.

View attachment 470157

The stern lantern has been completed. I purchased this unit from syren and was impressed with the piece. The "candle" has been tested and
works well; however, the lantern is only placed and not fixed in position yet. A critical eye will note that the ship that I'm attempting to model
does not have a stern lantern like this - probably due to current port authority standards, and the ship from 1750 would not have the lantern
painted this colour. But I wanted it to match the stern arch. Shrug.

View attachment 470159
Good morning Reg, So very good. The details are specific and accurate. Very neat work as well. Cheers Grant
 
Made a number of blocks (14) before I decided my time is worth more. So I'll purchase these from drydock. The kit blocks were mostly unacceptable except for the deadeyes, which I will be using.

View attachment 470156

The deadeyes and tackle blocks that will be attached to the chainwales are in progress. I'll assemble all of them before I solder and blacken.

View attachment 470157

The stern lantern has been completed. I purchased this unit from syren and was impressed with the piece. The "candle" has been tested and
works well; however, the lantern is only placed and not fixed in position yet. A critical eye will note that the ship that I'm attempting to model
does not have a stern lantern like this - probably due to current port authority standards, and the ship from 1750 would not have the lantern
painted this colour. But I wanted it to match the stern arch. Shrug.

View attachment 470159
Very nice - I like the appearance very much
 
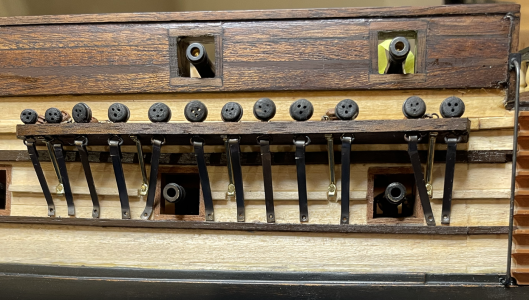
At the point of completing hull details as per the kit plan. However, my OCD habit kicked in and changes to the kit seemed appropriate.
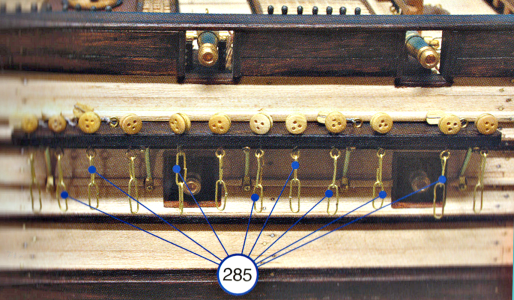
The kit calls for the chainplate to be assembled from brass wire (as shown in the plan image below)
Chain Plate-Kit.png

The actual ship chainplate is shown in the photo below:
ActualShipChainplate.png

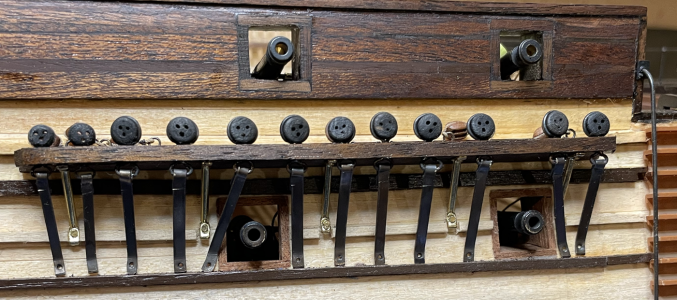
I decided to modify the actual ship's rig as the kit has some of the deadeye locations in the middle of the canon ports. I should have modified this fact before I
reached this point. So, I elected to proceed with the 1750 AD version that was probably correct back in those days:
My ChainPlate-02.png

My ChainPlate-03.png

The chain lower bolts are temporarily installed while I make square-head bolts for the final attachment.

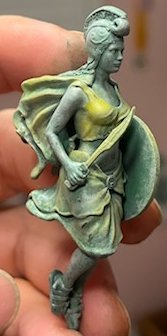
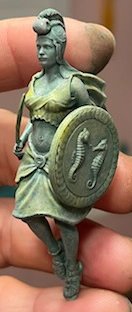
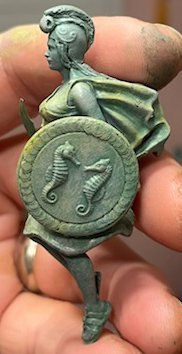
Since my fingers were getting "tired" of working with these small parts, I tried my hand at painting a
few details. Clearly I'm not an artist, but I attempted to make the figurehead accurately reflect the
actual ships version. This might not be the final version (as it only costs me 0.15 cents worth of resin
to print the lady):
F.Head-01.jpgF.Head-02.jpgF.Head-03.jpg
I gave her some hair and rust, as well as a modified helmet.
 
At the point of completing hull details as per the kit plan. However, my OCD habit kicked in and changes to the kit seemed appropriate.
The kit calls for the chainplate to be assembled from brass wire (as shown in the plan image below)
View attachment 474020

The actual ship chainplate is shown in the photo below:
View attachment 474021

I decided to modify the actual ship's rig as the kit has some of the deadeye locations in the middle of the canon ports. I should have modified this fact before I
reached this point. So, I elected to proceed with the 1750 AD version that was probably correct back in those days:
View attachment 474023

View attachment 474024

The chain lower bolts are temporarily installed while I make square-head bolts for the final attachment.

Since my fingers were getting "tired" of working with these small parts, I tried my hand at painting a
few details. Clearly I'm not an artist, but I attempted to make the figurehead accurately reflect the
actual ships version. This might not be the final version (as it only costs me 0.15 cents worth of resin
to print the lady):
View attachment 474025View attachment 474026View attachment 474027
I gave her some hair and rust, as well as a modified helmet.
Good morning Reg. 15c well spent. She is a lovely print - very nice. Cheers Grant
 
Working on the Bow details. Anchor davits installed permanently and waiting for the catheads.Anchor Davit.png

These new resin 3D printers are amazing. This was printed on a 14K unit and is 8mm square:
Cathead-01.png


Cathead attached:
Cathead-02.png

Working on the Head supporting structure. These V-shaped pieces have a horizontal wood grain which caused breakage.
Cathead-03.png


To solve this issue I laminated each piece with 0.25mm carbon fibre with resin, and added cross-braces:
Bow Decos-03.png

My wood bending skill is still dubious, but I had a lot of practice with the bow decorations:
Bow Decos-01.png

And after multiple attemps, I arrived at an acceptable bow detail:
Bow Decos-02.png


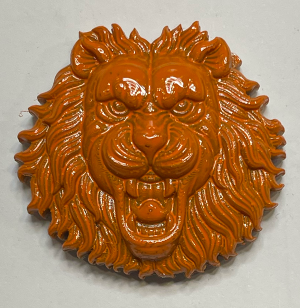
So the kit includes two "bow cleats" in the instruction manual, which includes the size details, but didin't mention how these were attached to the ship bow. I searched through my books (2) and could not find any mention of "bow cleats" anywhere. From the kit plans these clearly attach below the bowsprit. I didn't like the idea of drilling more holes in the hull, so I designed an attachment unit and had this"carved" using CNC:
Bowsprit Cleats-01.png
Bowsprit Cleats-02.png

Attachment unit installed:
Bow Cleats-03.png
Bow Cleats-04.png


My humble library was very helpful with the bowsprit details. I followed the kit instructions for exact locations of cleats and blocks, and the book details for the correct rigging of the blocks and hearts. I served the hearts by hand - and I damned near pulled out all of my hair. So I'll order a Serving Machine based on the recommendations that I have found here in SOS.

Bowsprit CloseUp-01.png


Bow Decos-05.png

Bow Decos-01.png
 
Last edited:
extravagant work you have going here. how is it that my HMS Surprise hull looks very different? mine has a gun deck bow platform open to the "head" with two doors for access to the open air. also, my Mamoli kit has more of a handrail for the quarter deck. plus, your gun port frames are exposed and mine are concealed. how is that possible? different year upgrades through time or just a kit builders' choice?
 
The Mamoli kit is based on a very different French ship than the real Surprise. If you can get your hands on The Frigate Surprise by Lavery and Hunt, they reproduce the Admiralty lines taken off the captured ship. Lots of good info in that book!
 
extravagant work you have going here. how is it that my HMS Surprise hull looks very different? ...
Hello Dale,
I appreciate your kind comments about my build. My wife purchased this kit for me a few years ago and I let it sit on a shelf for too long. I have only modified the kit in minor ways to more closely match the H.M.S. Surprise that was featured in the movie "Master and Commander". Other items that I changed were as a result of photos I have of that ship while I visited San Diego. I wish I had proper blueprints for these changes, but I "winged" it... a holdover from years of RC aircraft construction.
 
well, bust my buttons! surprised again. reminds me of my first truck. 1950 ford pickup with a cadillac 358 engine and pontiac re-end.
 
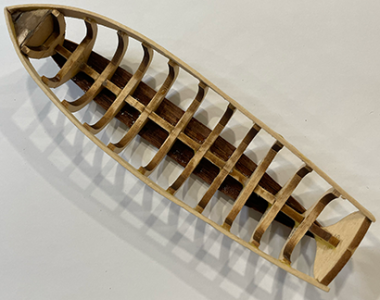
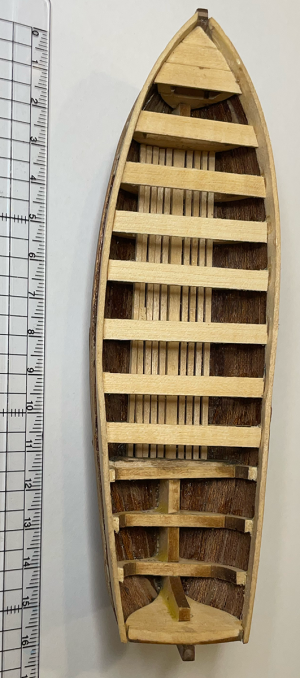
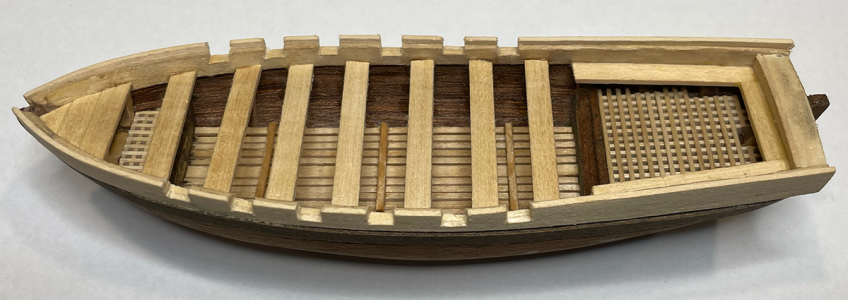
The kit plans call for construction of the longboat before the masts and rigging commences. I'm anxious for that phase to begin as I have never done that before., but I'll follow the instructions... So I found some scaling errors with the longboat, but decided to just go for it as instructed. I've read here on SoS that some experienced ship modellers can complete a longboat on a single weekend. I'm not one of those. Three weekends later :

Longboat 1.pngLongboat 2.png

Longboat 3.png

Longboat 4.png
Longboat 5.png

I stained the lower hull of the longboat with the same stain as the ship's lower hull. I'll add a few coats of spar varnish
before I call it completed.
Longboat 6.png

Still need to add the upper rubbing strake. It will be stained a "dark walnut" colour.
Longboat 7.png
 
I left mine til really late, it’ll probably be the last thing lashed down after all the other rigging. Looking good! I havent dared to cut the oar slots yet :)
 
The longboat looks great!
They probably have you do it now so it's easier to install on the deck without the masts and rigging getting in the way. Just a guess.
 
The longboat looks great!
They probably have you do it now so it's easier to install on the deck without the masts and rigging getting in the way. Just a guess.
Hi Jeff! Quick question for your knowledge of such things : were these longboats secured to the deck inverted, or upright? I figured they would be inverted to avoid filling with rain and/or sea water. But the plans call for it to be upright - which means the interior details of the longboat would be visible. Your thoughts?
 
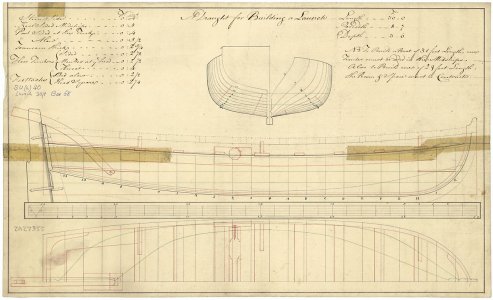
FWIW, assuming this is Surprise, 1796 rather than 1774, unless she was an exception to the other fifth rates at that time she would not have carried a long boat. From about 1780 32's carried up to six boats including a launch, a pinnace and at least two cutters. This is based on the list by W. E. May in The Boats of Men of War, page 57.

You might find the below plan for a launch showing the stern davit and winch helpful.
Allan
1740310077348.jpeg

I cannot find any contemporary plans or scantlings mentioning a rubbing strake. Were these actually used at that time? I have attached David Steel's list of scantlings circa 1795.

Allan
 

Attachments

Last edited:
Back
Top