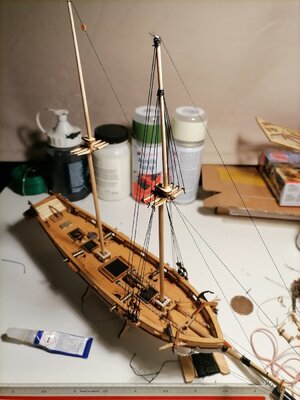
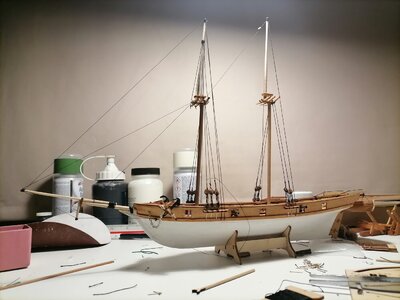
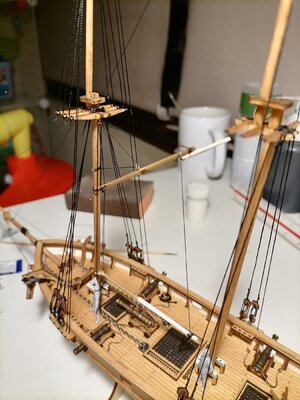
Halcon 1:100 Rookie way [COMPLETED BUILD]

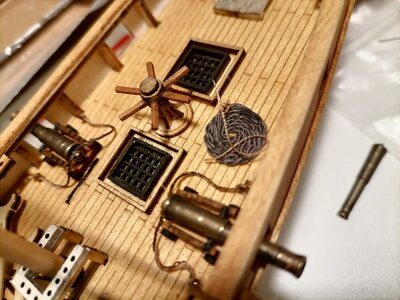
Looking good! One thing, though—are your gun carriages wider in the front than in the back? I did mine that way and was informed it was supposed to be the other way. It was too late by then; I was already committed.
XD I did it the same way you did.
Not a chance to correct that. For the next project, but for now im going with no cannons.
Going to make a little investigation about the subject.
Brilliant work, it looks amazing. I'm very new to building model ships and I chose the HALCON 1840 1/100 scale ship, but the instructions are useless they barely tell u how to put the hull and deck together, they don't tell u how to build the masts or sail's or how to set the rigging. I'm just about to attach the long 3mm piece that runs along the side of the boat where the canon's stick out and I was wondering if u have any suggestions on how to bend the piece of wood without breaking it as I need to get them on so I can start planking the hull
Feel free to ask! this the place to solve those "kit" questions.

For every piece of bended wood i used here did the following;

Soak in water-> microwave 30 seconds-> install with cloth clamps-> let dry-> glue.

Adding the right glue is a big help. Medium CA lets you fix and adjust the placement of every piece. When you are done, press the spot (watch your fingers)
 
Last edited:
XD I did it the same way you did.
Not a chance to correct that. For the next project, but for now im going with no cannons.
Going to make a little investigation about the subject.

Feel free to ask! this the place to solve those "kit" questions.

For every piece of bended wood i used here did the following;

Soak in water-> microwave 30 seconds-> install with cloth clamps-> let dry-> glue.

Adding the right glue is a big help. Medium CA lets you fix and adjust the placement of every piece. When you are done, press the spot (watch your fingers)
Cool, thanks. I have seen a few people say they used a microwave but I wasn't sure, I'll use some scrap piece's to practice and I'll put up some pictures when I'm done, thanks for the tip
 
Brilliant work, it looks amazing. I'm very new to building model ships and I chose the HALCON 1840 1/100 scale ship, but the instructions are useless they barely tell u how to put the hull and deck together, they don't tell u how to build the masts or sail's or how to set the rigging. I'm just about to attach the long 3mm piece that runs along the side of the boat where the canon's stick out and I was wondering if u have any suggestions on how to bend the piece of wood without breaking it as I need to get them on so I can start planking the hull
Sorry for that. I didn't see the previous post covering the same answer
I'm still on my first build but I watched a few videos on YouTube before I started. One of them suggested wrapping the wood in kitchen towel, soaking it well then put into a freezer bag and microwaving for about 15 seconds. I did this with the planks along the hull and it worked very well. They bend easily and I even got a curve into some. Hope this helps.
I got a similar answer from another person on the forum, thanks for the tip.
I'll post some pictures as I'm going and hopefully it will look ok
 
I got a similar answer from another person on the forum, thanks for the tip.
I'll post some pictures as I'm going and hopefully it will look ok
I clicked through and didn't see the other answer until after I posted mine. Oh well two folk saying the same thing isn't a bad thing. Looking forward to the pictures.
 
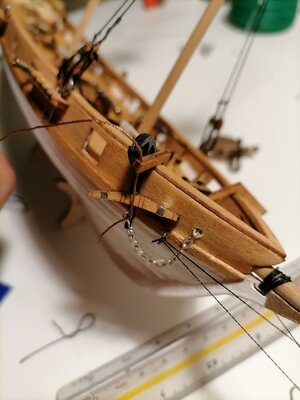
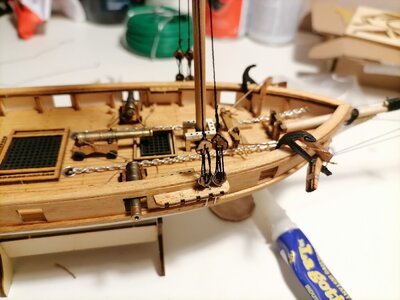
Update N4

Time for the anchors.
I have this chain in hands even though a SOS memeber told me that by this historical time they used big ropes or cables to hold the anchors.
Don't have thick rope for this
Got to kill that shiny look too.

IMG_20210509_221616.jpgIMG_20210509_223238.jpg
IMG_20210509_223928.jpg

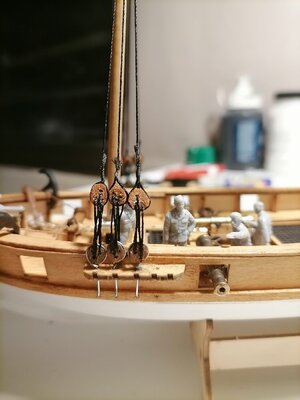
After that... Is time to fool around with the crew and a little rigging work
IMG_20210510_222037.jpg
IMG_20210510_223216.jpg
 
Good day fellow SOS members
Update N°5
Still working installing some lines and learning about rigging.

IMG_20210512_235003.jpg
IMG_20210512_002803.jpg

Both masts are new aligned and strong. I dont know how modellers do, but i used the ropes to make it all fit perfect and stay still.
¿Do you glue the masts and then set the lines?
IMG_20210512_233430.jpg
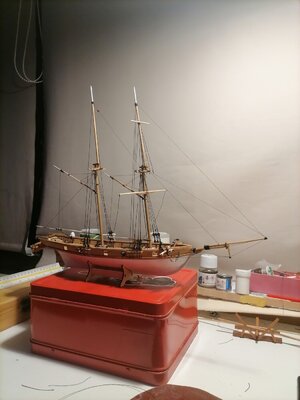
Now im in love with this white hull.

Have a good day!
 
You can glue the masts in place before beginning rigging. You should be able to add the rigging if you prioritize the lines (other than the shrouds) to allow access to the center of the ship for as long as you can. For the shrouds, work on them in pairs, port and starboard, to ensure the masts remain straight.
 
Fellow SOS members,
A "Beginner" here. Im Daniel Rubio, from Chile. Im an architect, so i have some experience in small models. Love boating, old ships and history.
ive taken pics of my build.

This is a Halcon 1840 1:100 kit, with the upgraded canons.
My intention is not to make it historic accurate, but making a beautiful objet, and learn the tecniques of ship model making.

Some comments about the kit.... It Sucks! xD but its a good start. I dont mind doing some parts by my own, or getting materials.
Watching pictures of other builds is very helpful because the instructions manual is a real joke.
You can see at this pictures a "sideproject", wich is a Bluenose II by ArtesaníaLatina. A present from my father.

Ive took a lot of pictures, so ill keep doing updates. on the project.
Next. The hull.

View attachment 231072View attachment 231119View attachment 231125


View attachment 231126View attachment 231127View attachment 231128
Very good work, I'm building the same boat as u but as I look at different pictures I've noticed my prow where the bowsprit goes onto it is very high compared to a lot, I'm wondering would it be a good idea to cut it down to look a bit better. I've just glued the bulwarks onto the sides and have to leave to dry overnight, I was just wondering did u have to soak the planks in water when u were planking the hull or did they bend easy enough for u? I'll send a picture tomorrow cos u can't see much with all the clamps in the way, but the planking is my next job.
I also have to figure out how to do the rigging and setting up the masts and it great to be able to look at ur's and other people's work so I have some sort of reference to go by, keep up the great work
 
Update N4

Time for the anchors.
I have this chain in hands even though a SOS memeber told me that by this historical time they used big ropes or cables to hold the anchors.
Don't have thick rope for this
Got to kill that shiny look too.

View attachment 232775View attachment 232776
View attachment 232777

After that... Is time to fool around with the crew and a little rigging work
View attachment 232778
View attachment 232779
Love the white hull, u done a great job on it pal
 
Following the rigging closely here. I'm building a similar model, not as detailed though. Some instructions are missing (rigging for instance ) or at best very vague. Many of the parts are missing so I'm having to adapt or make some. I knew it wasn't going to be easy but hey.. If we didn't like a challenge we would all be building Lego.
 
Very good work, I'm building the same boat as u but as I look at different pictures I've noticed my prow where the bowsprit goes onto it is very high compared to a lot, I'm wondering would it be a good idea to cut it down to look a bit better. I've just glued the bulwarks onto the sides and have to leave to dry overnight, I was just wondering did u have to soak the planks in water when u were planking the hull or did they bend easy enough for u? I'll send a picture tomorrow cos u can't see much with all the clamps in the way, but the planking is my next job.
I also have to figure out how to do the rigging and setting up the masts and it great to be able to look at ur's and other people's work so I have some sort of reference to go by, keep up the great work
I soaked the planks and microwaved them to make it easier, but I think it's not 100% necessary because of the material the kit includes is quite soft.
Happy to see your model pictures!
 
Following the rigging closely here. I'm building a similar model, not as detailed though. Some instructions are missing (rigging for instance ) or at best very vague. Many of the parts are missing so I'm having to adapt or make some. I knew it wasn't going to be easy but hey.. If we didn't like a challenge we would all be building Lego.
All reference is useful to figure all this out.
I found this guy in instagram that has a nice version of this ship, and it's working the same rhythm than we do.


Keep an eye on that. Loved that red on deck
 
Good morning SOS dudes.

One step at a time;
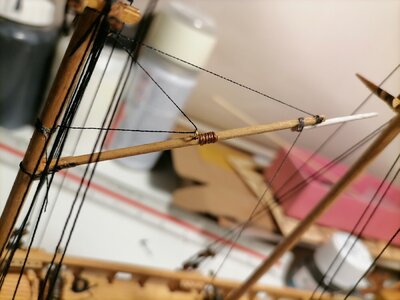
I'm installing the boom, (and the upper one which I don't know the name)
I'm mixing knowledge here. Photo references and blueprints are useful, but basic sailing techniques are too.
The key here is trying to find the right use of each line.

For example;
Height of the boom. (both of them)
Inclination
Sail "tensions" frome above and below.
Controlling all that adds a few lines and rings.
Im not a 100% convinced of making this all sails desplayed.

Perfect or not, I think it looks nice and scale....

IMG_20210514_235742.jpgIMG_20210515_001237.jpgIMG_20210514_235915.jpg
 
This should be update n7
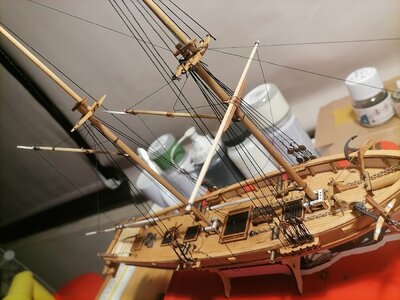
She's getting all dressed up.
More rigging.
Displaying the ship tilted by her side makes kind of sense to me since it's a dinamic object once in the water never stays still. It moves and changes it's shape.

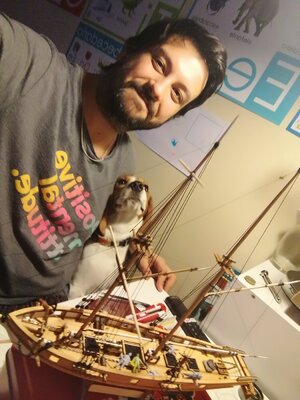
My assistant : Cali
IMG_20210517_004410.jpg
IMG_20210517_005231.jpg
IMG_20210516_223207.jpg
IMG_20210517_005620.jpg

The white tops of the masts
IMG_20210517_011022.jpg
 
Last edited:
All reference is useful to figure all this out.
I found this guy in instagram that has a nice version of this ship, and it's working the same rhythm than we do.


Keep an eye on that. Loved that red on deck

I've just started one of these kits, a basic one. It's so basic I'm quite disappointed in it. The parts are all cut reasonably well but some have no identification marks on them. Some parts I think should be there aren't and as for the instructions. Two badly photocopied sheets with such poor instructions that I will struggle to complete it. There are pictures of the sails to cut out but no details of rigging lines. I've taken to the internet to find pictures of a similar model to copy. This is by far the best be come across. Plenty of discussions and great pictures. I wrote to the seller asking for better instrucions. They did apologise saying this was all they had and sent me two better quality photographs of the instructions.
Thanks all for the pictures and details above, they will all come in very handy.

This should be update n7
She's getting all dressed up.
More rigging.
Displaying the ship tilted by her side makes kind of sense to me since it's a dinamic object once in the water never stays still. It moves and changes it's shape.

My assistant : Cali
View attachment 233792
View attachment 233761
View attachment 233762
View attachment 233763

The white tops of the masts
View attachment 233791
Looks fantastic, u should be very proud. Hopefully mine will be similar ✌️
 
Following the rigging closely here. I'm building a similar model, not as detailed though. Some instructions are missing (rigging for instance ) or at best very vague. Many of the parts are missing so I'm having to adapt or make some. I knew it wasn't going to be easy but hey.. If we didn't like a challenge we would all be building Lego.
The best way to get rigging correct and detailed and to learn what each line does is to find a book on schooner rigging. You would use it as a reference to add each line to your model. If you wanted to get detailed rigging, you definitely would do a better job by doing it using your own research than following any kit's instructions. You'll be more proud of the ship as a result too.
 
Ok, after seeing some of the photos some fully sailed some just rigging, I now have a dilemma. Sails or no sails with the rigging. Or do it with no full sails just some furrowed sails? I think I prefer not fully sailed as it allows you to see more of the deck. Also, do I paint and varnish it or leave it bare wood.
You know, for a cheap little kit bought to pass some time it's got me asking lots of questions and a fair bit of head scratching.
 
Looking very good - good work !!!!
and you have a real nice doggy friend - we modelers need as much assistance as possible ;)
 
Back
Top