Hannah by DocBlake. 1:32 Scale - Scratch Built, Plank-on-Frame, Admiralty Style

Thanks Lawrence.

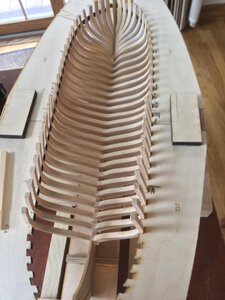
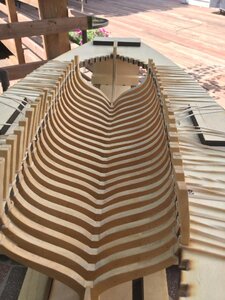
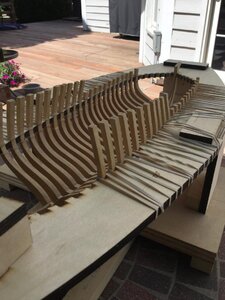
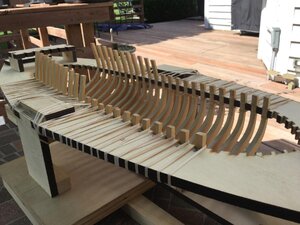
I've been busy prepping the frames, filing the seating surfaces for the keel and keelson flat. I also remade the first three cant frames, which are no longer too short! I also placed the treenails. Not counting the nails that will go into the fore and aft cant frames, there are 800 treenails in the full frames alone!

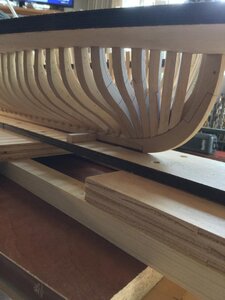
As you can see from the photos, the frame lofting was pretty well done on the plans, so fairing will be easier.Before I glue the frames in place I will give them all a couple of coats of poly on the for and aft surfaces, which will be hard to reach once they're glued in place.

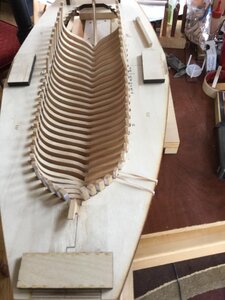
I did make one unfortunate discovery. The keelson plans show the entire keelson to be dead horizontal, but the model tells me that the keelson begins to rise at full frame #18 and continues rising until the cant frame begin at frame #24. I'm going to have to design a custom keelson for the model. This will slow things down a bit!


framed1.jpgframed2.jpgframed3.jpg
 
Last edited:
Good progress Dave, treenails look good, 800, are these also birch toothpicks, Greetings-
 
Looks like only a few more frames to go to have the jig full up!

Watching this build with interest as great learning experience for me to see what others can and have accomplished.
 
I've been very neglectful of this build, but for good reason. In looking to tasks ahead, I discovered that the plans call for the keelson, which comes in two parts, joined by a scarf to be completely straight and parallel with the false keel. In reality, the keelson has to rise over the last 7 frames or so moving aft. I've been trying to avoid thinking about a resolution, but I think I have one.

All the full frames are cleaned up and ready to glue to the keel/rising wood. More stuff coming!
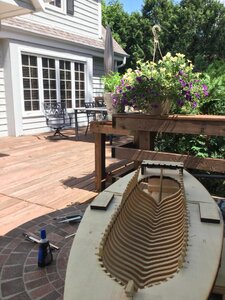
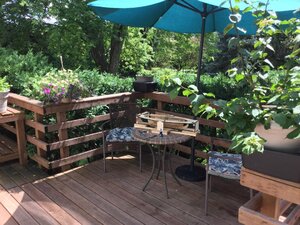
One thing I love about summer is that I can move the shipyard out on our deck and enjoy the great weather. Here are a couple shots of my summer work environment!


shipyard1.jpgshipyard2.jpg
 
Thanks. guys!

I spent a lot of time cleaning up the frames in preparation for glue up. But I also wanted to fit the keelson while I could still remove any frame I needed to for tweaking.

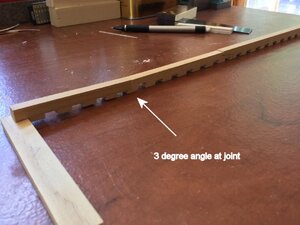
The keelson comes in 4 parts: two long ones, joined by a scarf, and 2 "extensions" that transition the keelson onto the dead wood both fore and aft. As I mentioned earlier, the keelson need to rise along the last 5 full frames, but the keelson in the plans is straight as an arrow, with no rise. After much thought I decided to redesign the keelson. My first step was to identify where the rise begins. It turns out that point is between full frames #18 and #19. So I remade the aft-most piece of the keelson in two parts: the straight part and the upward sloping part. After a lot of trial and error, and using a couple of mockup parts, I got it right. The rising portion of the keelson joins the straight piece at a 3 degree angle! Now I can go ahead and glue the frames in place. The keelson is installed after the hull interior is faired. I'll probably simulate a butt joint on the forward long keelson piece, making it look like the long keelson was built up of 4 timbers, not 3.


.keelson.jpg
 
So I finally glued all the full frames (#1 through #23) to the rising wood on the keel. The fit is snug, so no pinning or doweling will be necessary. I do want the hull to be sturdy, so I opted to use epoxy.

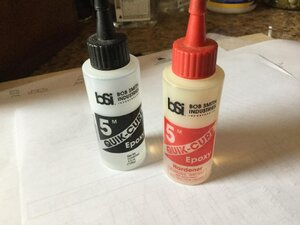
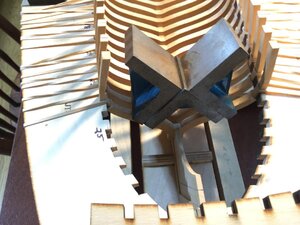
A problem with epoxy is that once it cures, it's virtually impossible to remove any squeeze out or smears. It often makes a mess, even though the bond is very strong. I like to use Bob Smith Industries Quick Cure 5 Minute epoxy. It has a 5 minute working time and fully cures in one hour. I put a little epoxy in the notch on the frame's bottom the set the frame in place on the "saddle" notch on the rising wood. I weigh it down with machinist right angle blocks for about five minutes. At that point, the epoxy has set up enough that you can't smear it, or draw it out in stringy tendrils like pizza cheese! If you take an X-Acto knife, you can pry away any squeeze out from the wood, leaving no residual. It works well. I then replace the weights and wait till the epoxy fully cure, then move on to the next. Slow going, but this isn't a race! If you plan to use epoxy in a highly visible area, try this technique. But practice a bit first to get the timing right!

Next up are the bow cant frames


epoxy.jpgweight.jpggluedframes2.jpggluedframes3.jpggluedframes4.jpg
 
Doc on the rubber bands to hold tops in jig, do you loop over frame underneath first, then bring around to top?

I see the top only and not how you are holding the bottom to keep tension as needed.

I assume you cut away when no longer needed.
 
Hi Doc :)
I read your blog With great pleasure and also learned allot from the beautiful pictures that illustrate your professional process & your Skills.
As someone who recently started building the same model based on the Practicum by Robert E. Hunt, I learn a lot from your blog.
I will continue to follow with great curiosity
 
Back
Top