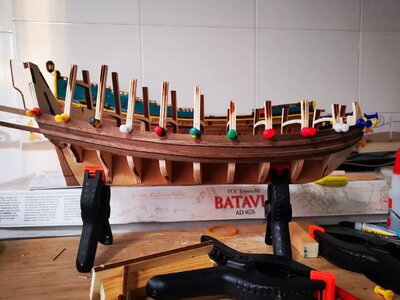
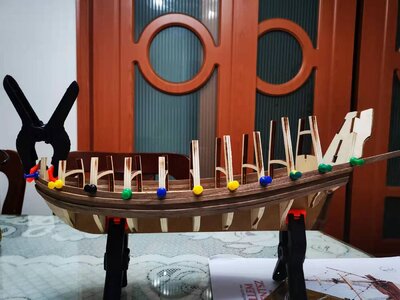
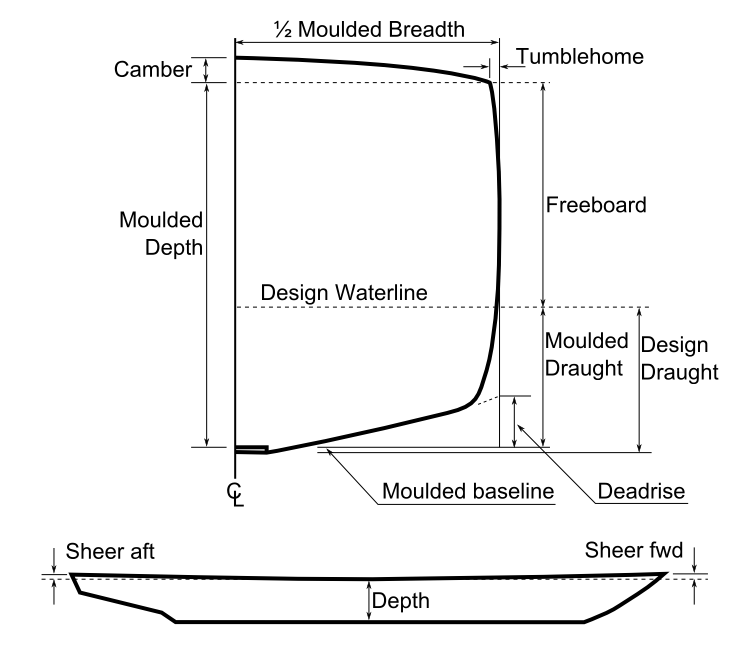
Hello Everyone
I will now take a step back and attempt to explain everything that has been done so far. This is as much of my thought process at this point as it is a build log so bear with me.
On this ship EVERYTHING is based on the position of the first 4mm plank which will also become the first wale. This plank is indicated by the yellow line on the picture below.
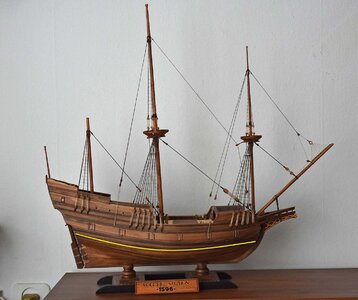
Photograph
@pietsan Piet Sanders.
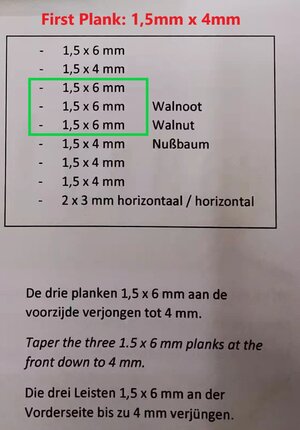
The instructions call for the installation of this plank first and from here this plank is regarded as the base plank. The instructions then list a very clear order in which the planking needs to take place from the base plank upwards on the hull.
 NOTE:
NOTE: The three 1.5mm x 6mm planks in the green block are to be tapered to 4mm. All the other planks, including the first 1.5mm x 6 mm plank, are installed untapered.
With that first base strake laid on my model, this is what it looked like.
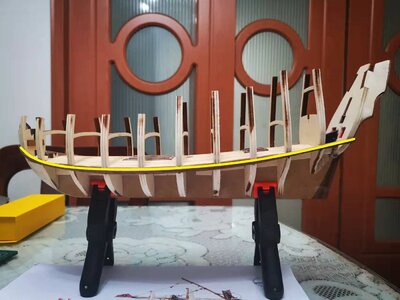
First Strake (4mm plank) Port Side
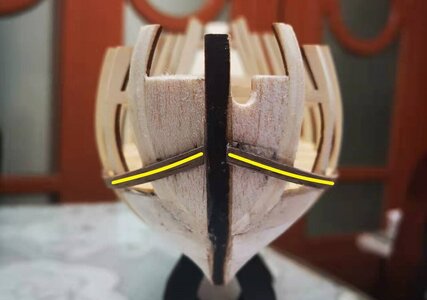
First Strake (4mm plank) Bow
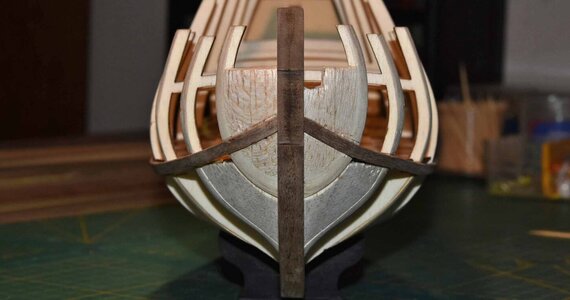
Verification picture of Piet's build.
Next up was an untapered 6mm Plank.
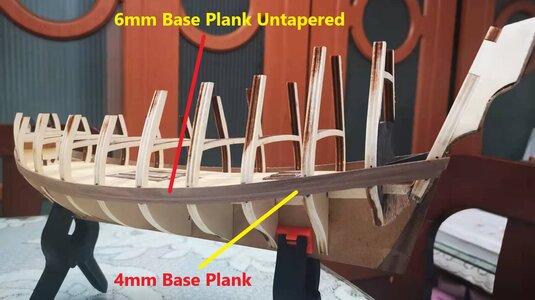
Port Side: Two planks installed.
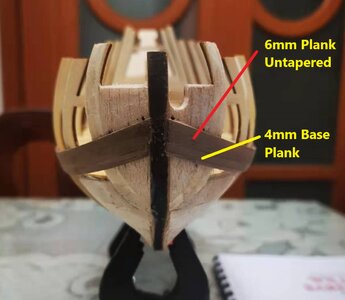
Bow Side: Two planks installed
Next up is another 4mm plank which will ultimately become the second wale.
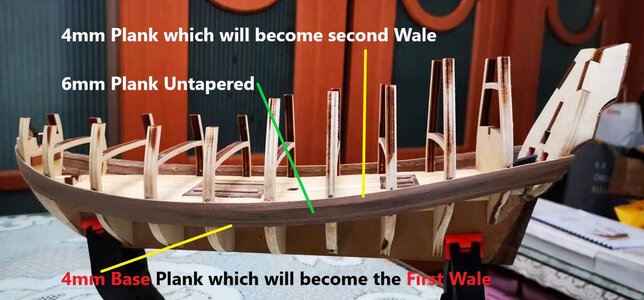
Port Side: Three planks installed

The same three planks viewed from the bow.
So now let’s move on to what I did the last two days.
- First off, I doubled the two 4mm planks so that they are now indeed Wale #1 and Wale #2. My reasons for doing this at this point have been discussed at length, but basically it boils down to easier access to the wales during installation.
- Next, I glued a 6mm plank – tapered to 3mm at the bow – BELOW the first base wale. This is out of sequence with the build instructions, but I followed @pietsan Piet’s build so that I could have an exact picture at any given stage of how my build looks compared to his.
- Now going back to planking upwards on the hull again, I laid down the next plank – a 6mm plank tapered at the bow to 4mm.
This is where I am now:
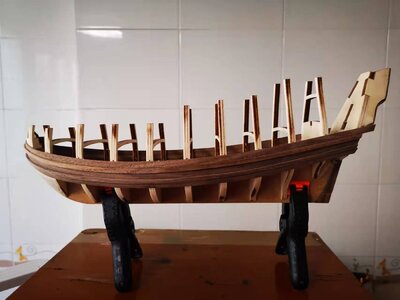
Four planks installed.
Please disregard the plank sitting below the wale at this stage. This is out of sequence with the build instructions at this point. And in case you have thought - why am I only showing you the Port Side - I will do the next explanation of the layout on the Starboard Side. (Counting that plank - it would be 5 planks in total).
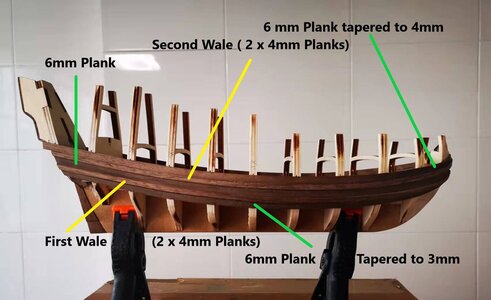
Starboard Side
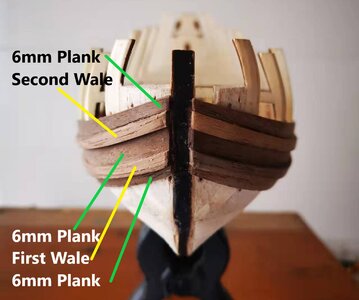
Bow. Please do not pay attention to the unfinished edges of the planks at the bow - that will all be nicely filed and sanded down. Also note that the keel will be covering that section in its entirety.
So this is all good then??? Have a look at the picture below:
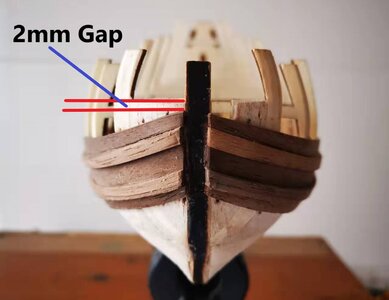 In that two mm gap, I still need to fit:
1 x 6mm Plank Tapered to 4mm
1 x 6mm Plank Tapered to 4mm
1 x 4mm Plank (Untapered)
1 x 4mm Plank (Untapered)
1 x 4mm Plank (Untapered)


