HIGH HOPES, WILD MEN AND THE DEVIL’S JAW - Willem Barentsz Kolderstok 1:50

Consider me stupid, but I never heard of (sanding) sealer. What the heck is that stuff, what is its use and why would one use it? What would be the dutch equivalent brand?
Johan, I have no idea what brands would be available in the Netherlands - I am not even sure how one would translate "sanding sealer" to Dutch - "afdichting vir schuurwerk" maybe?
 
@Philski Thank you very much for that informative answer Phil! That was also one of the sites I perused while checking it out. :)
 
With the planking now complete, I thought I would share - in summary - my planking recipe for the Willem Barentsz. For the prospective future builders of this superb kit it may be helpful, but other than that it also serves as my own record of what I have done.

I divided the planking into FIVE definite sections: The wales, planking above the wales, planking below them, planking the two garboard strakes and closing up the hull.

Planking the wales:

1. Lay an untapered 4mm x 1.5mm plank between the indicated lines on the bulkheads.
2. Lay an untapered 6mm x 1.5mm plank above that
3. Followed by another untapered 4mm x 1.5mm plank.
4. Now "double" the two untapered 4mm x 1.5mm planks by gluing identical 4mm x 1.5mm planks (untapered as well) on top of them.

That concludes the wales which consist of 6 planks in total (three on either side).

Planking above the wales:

The instructions stipulate that THREE 6mm x 1.5mm planks now need to be placed - all three tapered down to 4mm.

1. Lay 6mm x 1.5mm plank (which has been tapered to 4mm at the front).
2. Lay another 6mm x 1.5mm plank (which has been tapered to 4mm at the front).
3. DEVIATION FROM PLANS: Here, both Piet and I changed the third 6mm x 1.5mm plank, to a lost (dropped) strake which did not run all the way through to the stem.
4. Lay 4mm x 1.5mm untapered plank above the dropped strake.
5. Followed by another 4mm x 1.5mm untapered plank above the first one.
6. Followed by another 4mm x 1.5mm untapered plank above the other two.

A third wale will be created in future by laying another untapered 4mm x 1.5mm plank on top of the second (middle) one. This I have not done yet.
There are also a further two 2mm x 3mm planks which need to be placed horizontally above all of the planking that has been done so far, but this I will also do at a later stage.

This concludes planking above the wales which consists of 12 planks in total (six on either side).

Planking below the wales:

The instructions state that you need to plank below the wales with 6mm x 1.5mm planks which have been tapered down to 3mm at the front.
In each case, I have started the tapering from Bulkhead #2.

1. Lay 6mm x 1.5mm plank which has been tapered to 3mm at the front.
2. Followed by a second identical plank.
3. followed by a third identical plank.
4. Followed by a fourth identical plank.
5. POSSIBLE DEVIATION FROM INSTRUCTIONS: The fifth 6mm x 1.5mm plank was also tapered at the front to 3mm as per instructions, BUT also required a tapering at the stern in order to enclose the stern fully. It is impossible for me to give exact measurements here, as this will differ from builder to builder.

This concludes this section of planking below the wales which consisted IN MY CASE of 10 planks in total (five on either side).

Next I moved to the garboard strake to plank upwards of the false keel.

1. Garboard Strake. Lay an untapered 6mm x 1.5mm plank which was cut to size following the contours of the false keel at the bottom.
2. Follow this by another 6mm x 1.5mm plank which was tapered down to 3mm at the front.

That concludes the section of planking the garboard strakes which consisted of 4 planks in total (two on either side).

Closing up the Hull.

The last section deals with how I closed the hull. This is also highly individual and will differ from builder to builder.

1. DEVIATION FROM INSTRUCTIONS: At the stern use an insert which is cut from a 6mm x 1.5mm plank into a triangle-shaped taper so that it measure 6mm at the stern and 0.5mm at bulkhead # 9. This insert goes directly above the second garboard strake.
2. Above that lay a 6mm x 1.5mm plank which has been tapered to 3mm at the front.
3. DEVIATION FROM INSTRUCTIONS: Now lay the second insert which is cut from a 6mm x 1.5mm plank into a triangle-shaped taper so that it measure 6mm at the stern and 0.5mm at bulkhead # 10. This insert goes directly above the last 6mm x 1.5mm strake which had been placed.
4. DEVIATION FROM INSTRUCTIONS: Above the second stern insert, lay an untapered 4mm x 1.5mm plank.
5. DEVIATION FROM INSTRUCTIONS: The last full-length plank is a 6mm x 1.5mm plank which is placed in TWO sections. The front section consists of a dropped strake which ends/disappears at Bulkhead #1; the rear section consisted of the plank receiving a gradual taper to end at 4mm at the stern.


Deal with any small gaps that may remain by custom-shaping the planks.

That concludes the section on closing up the hull which consisted of 6 full-length planks in total (three on either side) and four inserts (two on either side) and any custom shaped sections which may be needed to close up the hull.

I know this was very technical and very boring, but in my mind, it will offer others an idea. A single-planked hull remains a dark art, mastered by few, so if this is of help to anyone, it has served its purpose. If you have no use for it, just read on to our next section on the actual expedition. :)
 
Last edited:
Thank you Phil. I understand the reason for your question perfectly well and it was a great one. If, for instance, I was going to paint the hull white (actually it's more of a creamy color - called "Harpuis" in Dutch) below the waterline which is historically the right thing to do, then I should have used sanding sealer. My Manadrin is very basic at best, so when it comes to those types of things, I am lost without the admiral. :)
My first wife was Chinese. I met her in Taiwan. My Chinese is very rusty now.....
 
With the planking now complete, I thought I would share - in summary - my planking recipe for the Willem Barentsz. For the prospective future builders of this superb kit it may be helpful, but other than that it also serves as my own record of what I have done.

I divided the planking into FIVE definite sections: The wales, planking above the wales, planking below them, planking the two garboard strakes and closing up the hull.

Planking the wales:

1. Lay an untapered 4mm x 1.5mm plank between the indicated lines on the bulkheads.
2. Lay an untapered 6mm x 1.5mm plank above that
3. Followed by another untapered 4mm x 1.5mm plank.
4. Now "double" the two untapered 4mm x 1.5mm planks by gluing identical 4mm x 1.5mm planks (untapered as well) on top of them.

That concludes the wales which consist of 6 planks in total (three on either side).

Planking above the wales:

The instructions stipulate that THREE 6mm x 1.5mm planks now need to be placed - all three tapered down to 4mm.

1. Lay 6mm x 1.5mm plank (which has been tapered to 4mm at the front).
2. Lay another 6mm x 1.5mm plank (which has been tapered to 4mm at the front).
3. DEVIATION FROM PLANS: Here, both Piet and I changed the third 6mm x 1.5mm plank, to a lost (dropped) strake which did not run all the way through to the stem.
4. Lay 4mm x 1.5mm untapered plank above the dropped strake.
5. Followed by another 4mm x 1.5mm untapered plank above the first one.
6. Followed by another 4mm x 1.5mm untapered plank above the other two.

A third wale will be created in future by laying another untapered 4mm x 1.5mm plank on top of the second (middle) one. This I have not done yet.
There are also a further two 2mm x 3mm planks which need to be placed horizontally above all of the planking that has been done so far, but this I will also do at a later stage.

This concludes planking above the wales which consists of 12 planks in total (six on either side).

Planking below the wales:

The instructions state that you need to plank below the wales with 6mm x 1.5mm planks which have been tapered down to 3mm at the front.
In each case, I have started the tapering from Bulkhead #2.

1. Lay 6mm x 1.5mm plank which has been tapered to 3mm at the front.
2. Followed by a second identical plank.
3. followed by a third identical plank.
4. Followed by a fourth identical plank.
5. POSSIBLE DEVIATION FROM INSTRUCTIONS: The fifth 6mm x 1.5mm plank was also tapered at the front to 3mm as per instructions, BUT also required a tapering at the stern in order to enclose the stern fully. It is impossible for me to give exact measurements here, as this will differ from builder to builder.

This concludes this section of planking below the wales which consisted IN MY CASE of 10 planks in total (five on either side).

Next I moved to the garboard strake to plank upwards of the false keel.

1. Garboard Strake. Lay an untapered 6mm x 1.5mm plank which was cut to size following the contours of the false keel at the bottom.
2. Follow this by another 6mm x 1.5mm plank which was tapered down to 3mm at the front.

That concludes the section of planking the garboard strakes which consisted of 4 planks in total (two on either side).

Closing up the Hull.

The last section deals with how I closed the hull. This is also highly individual and will differ from builder to builder.

1. DEVIATION FROM INSTRUCTIONS: At the stern use an insert which is cut from a 6mm x 1.5mm plank into a triangle-shaped taper so that it measure 6mm at the stern and 0.5mm at bulkhead # 9. This insert goes directly above the second garboard strake.
2. Above that lay a 6mm x 1.5mm plank which has been tapered to 3mm at the front.
3. DEVIATION FROM INSTRUCTIONS: Now lay the second insert which is cut from a 6mm x 1.5mm plank into a triangle-shaped taper so that it measure 6mm at the stern and 0.5mm at bulkhead # 10. This insert goes directly above the last 6mm x 1.5mm strake which had been placed.
4. DEVIATION FROM INSTRUCTIONS: Above the second stern insert, lay an untapered 4mm x 1.5mm plank.
5. DEVIATION FROM INSTRUCTIONS: The last full-length plank is a 6mm x 1.5mm plank which is placed in TWO sections. The front section consists of a dropped strake which ends/disappears at Bulkhead #1; the rear section consisted of the plank receiving a gradual taper to end at 4mm at the stern.


Deal with any small gaps that may remain by custom-shaping the planks.

That concludes the section on closing up the hull which consisted of 6 full-length planks in total (three on either side) and four inserts (two on either side) and any custom shaped sections which may be needed to close up the hull.

I know this was very technical and very boring, but in my mind, it will offer others an idea. A single-planked hull remains a dark art, mastered by few, so if this is of help to anyone, it has served its purpose. If you have no use for it, just read on to our next section on the actual expedition. :)

Excellent Heinrich. I copied this and will put it into my WB box for future reference. I know I jumped ship on you, but I will get to the WB or White Swan in my case. ;) That is assuming I can finish the Statenjacht. You've done everyone a service by your very comprehensive log of the WB. I know you are not finished and will look forward to the continued log of the build.

PS, not at all boring First Place Metal

Ron
 
Last edited:
My first wife was Chinese. I met her in Taiwan. My Chinese is very rusty now.....
I am very spoiled because I met the admiral when she was a student of mine - so she is basically fluent in English. At home we speak English and when I need something done in Chinese, I can just ask her. :)
 
Excellent Heinrich. I copied this and will put it into my WB box for future reference. I know I jumped ship on you, but I will get to the WB or White Swan in my case. ;) That is assuming I can finish the Statenjacht. You've done everyone a service by your very comprehensive log of the WB. I know you are not finished and will look forward to the continued log of the build.

PS, not at all boring First Place Metal

Ron
Then I am very happy that I could assist, Ron. I have specifically done this for you and @Pathfinder65 Jan and then, of course, any future builder of the WB. And relax, you are not a "droster" (deserter) at all. :) You are still building a Kolderstok model and adding to the Dutch fleet so all is good!Thumbsup
 
Those familiar with my logs, will know that I always try to include as much of the surrounding history of the ship that I am building as I possibly can. However, except for my introductory posting, I have focused on the basic assembly of the hull and the planking. With that now behind me, it is time to continue the story.

RECAP:

Willem Barentsz had already made two unsuccessful attempts at finding the Northern Passage to China, when he was given a third chance by the Admiralty of Amsterdam. After meticulous planning with Jacob van Heemskerck, the scene was now set for the actual expedition to start.

THE NEXT CHAPTER

Thanks to the journal of Gerrit de Veer we can follow all the action as it unfolded. For our Dutch members, I include the original old-Dutch script, taken directly from his diary.

01.jpg
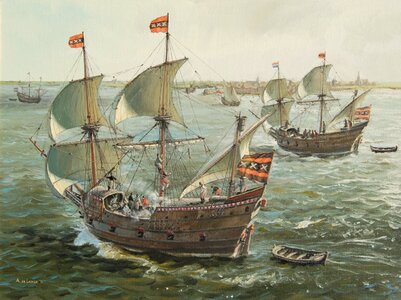
Painting by Arnold de Lange (De Lange Maritiem) http://arnolddelange.nl/willem-barentsz/

The departure: The ships of Willem Barentsz and Jan Corneliszoon Rijp left Amsterdam on the 10th of May 1596. The first leg of their journey took them to Vlieland where they would arrive three days later on the 13th.

De schepen van Willem Barentsz. en Jan Corneliszoon Rijp op weg naar `T Vlie. `Den 10.Mey des jaers 1596. zijnse van Amsterdam gheseilt ende quamen den 13. int vlie`….

Jan Cornelissen.jpg
Jan Corneliszoon Rijp captained the second ship in the expedition. Interestingly enough, the other ship was captained by Jacob van Heemskerck and not by Willem Barentsz. Barentsz was helmsman on the ship of Van Heemskerck.

02.jpg
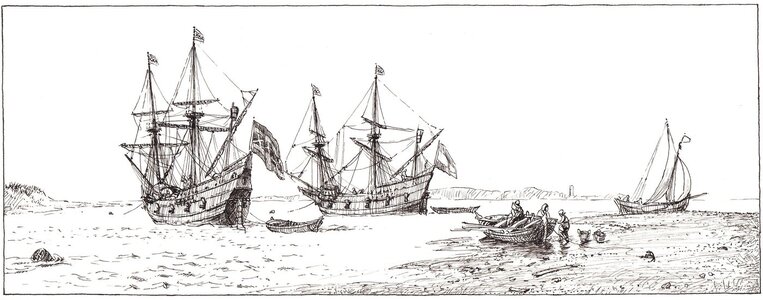
Art Work by Arnold de Lange (De Lange Maritiem) http://arnolddelange.nl/willem-barentsz/

Waiting for favorable wind – the fleet at Vlieland, May 1596.

Wachten op goede wind bij Vlieland, mei 1596…

As mentioned earlier, Barentsz took with him the experience of his previous two missions and this time it looked as if the third trip would be a charm. A month after they had left Amsterdam the expedition discovered Bear Island and, unbeknown to Barentsz at the time, also the Spitsbergen. Bear Island is the southernmost landmass in the Spitsbergen / Svalbard archipelago, which would be his most famous discovery.

He made this discovery less than a week later, on June 17, when he and his crew saw the main island of Spitsbergen itself, as well as a series of bays and fjords in the area.

03.jpg
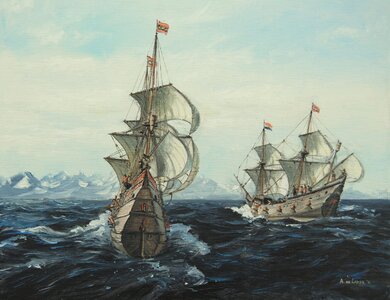
Painting by Arnold de Lange (De Lange Maritiem) http://arnolddelange.nl/willem-barentsz/

Discovering Spitsbergen. On the 19th of June the expedition saw land. By utilizing the height of the sun, they calculated that they were at a polar height of 80 degrees, 11 minutes. The land encompassed a substantial area and they sailed for days on end in a westerly direction of 79-and-a-half degrees. A very strong north-easterly wind that blew directly from the land, prevented the men from getting any closer to land.

De ontdekking van Spitsbergen…`Den 19.Junij sagen wy wederom landt. Doen namen wy der Sonnen hooghde/ en bevonden dat wy waren op des Poolshooghde van 80.grad. 11.minuten. Dit landt was seer groot/ ende wy seijlden dae by heenen westelijck aen totte 79.graden ende een half/ daer wy een goede reede vonden/ ende conden niet naerder het landt comen/ vermidts de windt n.o.waeyde/ recht van ´tlandt af/ ende die Bay streckte recht noorden ende zuyden in zee`…

Upon their arrival at Nova Zembla, the elements turned once more against Barentsz. The company was confronted by the one severe snowstorm after the other and had no other option but to seek refuge in one of the many bays.

07.jpg
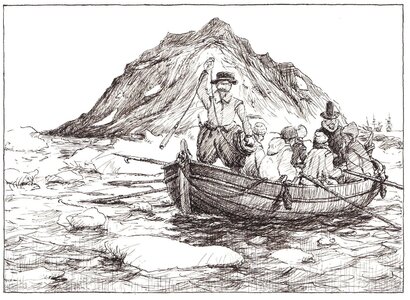
Art Work by Arnold de Lange (De Lange Maritiem) http://arnolddelange.nl/willem-barentsz/

About their reconnaissance of the bay at Spitsbergen, De Veer writes as follows: We rowed the sloop towards the land and spotted a bay which we deemed would serve as a good harbour. We cast the lead line and found the water depth ranged from 16 to 10 fathom. Towards the east we saw two smaller islands while a huge bay in the west actually turned out to be an island on its own upon closer examination. Here we discovered a number of rock geese in breeding season, sitting openly on their nests. We chased them away and collected approximately 60 eggs. We killed one of the rock geese with a stone and cooked it for supper.

Het verkennen van de baai op Spitsbergen…`Wy royden met onse schuijt wel een mijl te landtwaert in, daer was een goede haven, ende steeckgrondt, aende oostzyde wast sandtgrondt. Wy wierpent loot en daer was diepte 16.vadem, ende daer nae 10.ende 12.vadem. Ende al voort royende bevonden wy dat aende oostzyde twee Eylanden waren, die haer oost inde zee streckte. Aende westzyde wasser mede een geweldighen inham, en ´tleeck wel mede een Eylandt te zijn. Doen royden wy voort aen´t Eylandt dat inden midden lach, ende vonden daer veel eyeren van Rotgansen, die wy opt nest sagen sitten, ende haer daer van jaeghden, die daer riepen, Rot,rot,rot, ende smeten een Gans met een steen doodt, die wy coockten ende aten, met wel 60. eyeren die wy mede scheep brachten, ende quamen den 22. wederom tscheep.`…

With the men now underway, I will intersperse my actual building with historical updates too.

Thank you all for watching, following, commenting or just being here! It is sincerely appreciated and makes this build very special to me.
 
With the planking now complete, I thought I would share - in summary - my planking recipe for the Willem Barentsz. For the prospective future builders of this superb kit it may be helpful, but other than that it also serves as my own record of what I have done.

I divided the planking into FIVE definite sections: The wales, planking above the wales, planking below them, planking the two garboard strakes and closing up the hull.

Planking the wales:

1. Lay an untapered 4mm x 1.5mm plank between the indicated lines on the bulkheads.
2. Lay an untapered 6mm x 1.5mm plank above that
3. Followed by another untapered 4mm x 1.5mm plank.
4. Now "double" the two untapered 4mm x 1.5mm planks by gluing identical 4mm x 1.5mm planks (untapered as well) on top of them.

That concludes the wales which consist of 6 planks in total (three on either side).

Planking above the wales:

The instructions stipulate that THREE 6mm x 1.5mm planks now need to be placed - all three tapered down to 4mm.

1. Lay 6mm x 1.5mm plank (which has been tapered to 4mm at the front).
2. Lay another 6mm x 1.5mm plank (which has been tapered to 4mm at the front).
3. DEVIATION FROM PLANS: Here, both Piet and I changed the third 6mm x 1.5mm plank, to a lost (dropped) strake which did not run all the way through to the stem.
4. Lay 4mm x 1.5mm untapered plank above the dropped strake.
5. Followed by another 4mm x 1.5mm untapered plank above the first one.
6. Followed by another 4mm x 1.5mm untapered plank above the other two.

A third wale will be created in future by laying another untapered 4mm x 1.5mm plank on top of the second (middle) one. This I have not done yet.
There are also a further two 2mm x 3mm planks which need to be placed horizontally above all of the planking that has been done so far, but this I will also do at a later stage.

This concludes planking above the wales which consists of 12 planks in total (six on either side).

Planking below the wales:

The instructions state that you need to plank below the wales with 6mm x 1.5mm planks which have been tapered down to 3mm at the front.
In each case, I have started the tapering from Bulkhead #2.

1. Lay 6mm x 1.5mm plank which has been tapered to 3mm at the front.
2. Followed by a second identical plank.
3. followed by a third identical plank.
4. Followed by a fourth identical plank.
5. POSSIBLE DEVIATION FROM INSTRUCTIONS: The fifth 6mm x 1.5mm plank was also tapered at the front to 3mm as per instructions, BUT also required a tapering at the stern in order to enclose the stern fully. It is impossible for me to give exact measurements here, as this will differ from builder to builder.

This concludes this section of planking below the wales which consisted IN MY CASE of 10 planks in total (five on either side).

Next I moved to the garboard strake to plank upwards of the false keel.

1. Garboard Strake. Lay an untapered 6mm x 1.5mm plank which was cut to size following the contours of the false keel at the bottom.
2. Follow this by another 6mm x 1.5mm plank which was tapered down to 3mm at the front.

That concludes the section of planking the garboard strakes which consisted of 4 planks in total (two on either side).

Closing up the Hull.

The last section deals with how I closed the hull. This is also highly individual and will differ from builder to builder.

1. DEVIATION FROM INSTRUCTIONS: At the stern use an insert which is cut from a 6mm x 1.5mm plank into a triangle-shaped taper so that it measure 6mm at the stern and 0.5mm at bulkhead # 9. This insert goes directly above the second garboard strake.
2. Above that lay a 6mm x 1.5mm plank which has been tapered to 3mm at the front.
3. DEVIATION FROM INSTRUCTIONS: Now lay the second insert which is cut from a 6mm x 1.5mm plank into a triangle-shaped taper so that it measure 6mm at the stern and 0.5mm at bulkhead # 10. This insert goes directly above the last 6mm x 1.5mm strake which had been placed.
4. DEVIATION FROM INSTRUCTIONS: Above the second stern insert, lay an untapered 4mm x 1.5mm plank.
5. DEVIATION FROM INSTRUCTIONS: The last full-length plank is a 6mm x 1.5mm plank which is placed in TWO sections. The front section consists of a dropped strake which ends/disappears at Bulkhead #1; the rear section consisted of the plank receiving a gradual taper to end at 4mm at the stern.


Deal with any small gaps that may remain by custom-shaping the planks.

That concludes the section on closing up the hull which consisted of 6 full-length planks in total (three on either side) and four inserts (two on either side) and any custom shaped sections which may be needed to close up the hull.

I know this was very technical and very boring, but in my mind, it will offer others an idea. A single-planked hull remains a dark art, mastered by few, so if this is of help to anyone, it has served its purpose. If you have no use for it, just read on to our next section on the actual expedition. :)
Very good summary, thanks.
 
Those familiar with my logs, will know that I always try to include as much of the surrounding history of the ship that I am building as I possibly can. However, except for my introductory posting, I have focused on the basic assembly of the hull and the planking. With that now behind me, it is time to continue the story.

RECAP:

Willem Barentsz had already made two unsuccessful attempts at finding the Northern Passage to China, when he was given a third chance by the Admiralty of Amsterdam. After meticulous planning with Jacob van Heemskerck, the scene was now set for the actual expedition to start.

THE NEXT CHAPTER

Thanks to the journal of Gerrit de Veer we can follow all the action as it unfolded. For our Dutch members, I include the original old-Dutch script, taken directly from his diary.

View attachment 280655
Painting by Arnold de Lange (De Lange Maritiem) http://arnolddelange.nl/willem-barentsz/

The departure: The ships of Willem Barentsz and Jan Corneliszoon Rijp left Amsterdam on the 10th of May 1596. The first leg of their journey took them to Vlieland where they would arrive three days later on the 13th.

De schepen van Willem Barentsz. en Jan Corneliszoon Rijp op weg naar `T Vlie. `Den 10.Mey des jaers 1596. zijnse van Amsterdam gheseilt ende quamen den 13. int vlie`….

View attachment 280658
Jan Corneliszoon Rijp captained the second ship in the expedition. Interestingly enough, the other ship was captained by Jacob van Heemskerck and not by Willem Barentsz. Barentsz was helmsman on the ship of Van Heemskerck.

View attachment 280656
Art Work by Arnold de Lange (De Lange Maritiem) http://arnolddelange.nl/willem-barentsz/

Waiting for favorable wind – the fleet at Vlieland, May 1596.

Wachten op goede wind bij Vlieland, mei 1596…

As mentioned earlier, Barentsz took with him the experience of his previous two missions and this time it looked as if the third trip would be a charm. A month after they had left Amsterdam the expedition discovered Bear Island and, unbeknown to Barentsz at the time, also the Spitsbergen. Bear Island is the southernmost landmass in the Spitsbergen / Svalbard archipelago, which would be his most famous discovery.

He made this discovery less than a week later, on June 17, when he and his crew saw the main island of Spitsbergen itself, as well as a series of bays and fjords in the area.

View attachment 280657
Painting by Arnold de Lange (De Lange Maritiem) http://arnolddelange.nl/willem-barentsz/

Discovering Spitsbergen. On the 19th of June the expedition saw land. By utilizing the height of the sun, they calculated that they were at a polar height of 80 degrees, 11 minutes. The land encompassed a substantial area and they sailed for days on end in a westerly direction of 79-and-a-half degrees. A very strong north-easterly wind that blew directly from the land, prevented the men from getting any closer to land.

De ontdekking van Spitsbergen…`Den 19.Junij sagen wy wederom landt. Doen namen wy der Sonnen hooghde/ en bevonden dat wy waren op des Poolshooghde van 80.grad. 11.minuten. Dit landt was seer groot/ ende wy seijlden dae by heenen westelijck aen totte 79.graden ende een half/ daer wy een goede reede vonden/ ende conden niet naerder het landt comen/ vermidts de windt n.o.waeyde/ recht van ´tlandt af/ ende die Bay streckte recht noorden ende zuyden in zee`…

Upon their arrival at Nova Zembla, the elements turned once more against Barentsz. The company was confronted by the one severe snowstorm after the other and had no other option but to seek refuge in one of the many bays.

View attachment 280659
Art Work by Arnold de Lange (De Lange Maritiem) http://arnolddelange.nl/willem-barentsz/

About their reconnaissance of the bay at Spitsbergen, De Veer writes as follows: We rowed the sloop towards the land and spotted a bay which we deemed would serve as a good harbour. We cast the lead line and found the water depth ranged from 16 to 10 fathom. Towards the east we saw two smaller islands while a huge bay in the west actually turned out to be an island on its own upon closer examination. Here we discovered a number of rock geese in breeding season, sitting openly on their nests. We chased them away and collected approximately 60 eggs. We killed one of the rock geese with a stone and cooked it for supper.

Het verkennen van de baai op Spitsbergen…`Wy royden met onse schuijt wel een mijl te landtwaert in, daer was een goede haven, ende steeckgrondt, aende oostzyde wast sandtgrondt. Wy wierpent loot en daer was diepte 16.vadem, ende daer nae 10.ende 12.vadem. Ende al voort royende bevonden wy dat aende oostzyde twee Eylanden waren, die haer oost inde zee streckte. Aende westzyde wasser mede een geweldighen inham, en ´tleeck wel mede een Eylandt te zijn. Doen royden wy voort aen´t Eylandt dat inden midden lach, ende vonden daer veel eyeren van Rotgansen, die wy opt nest sagen sitten, ende haer daer van jaeghden, die daer riepen, Rot,rot,rot, ende smeten een Gans met een steen doodt, die wy coockten ende aten, met wel 60. eyeren die wy mede scheep brachten, ende quamen den 22. wederom tscheep.`…

With the men now underway, I will intersperse my actual building with historical updates too.

Thank you all for watching, following, commenting or just being here! It is sincerely appreciated and makes this build very special to me.
Background information of considerable value, at least I enjoyed reading it.
Thanks Heinrich.
 
Good morning Heinrich from a hot and humid Umhloti. Your hull and planking came out superb. Love the little note you insert prior to closing. Nice touch.
Thank you Grant! I am very happy with how the hull turned out - it's always a relief when in the words of the A-Team "A plan comes together" ROTF Thank you also for the kind comment on the little note - I guess I'm just sentimental about things like that.
Enjoy your time in KZN - I don't envy you the humidity though! :)
 
Those familiar with my logs, will know that I always try to include as much of the surrounding history of the ship that I am building as I possibly can. However, except for my introductory posting, I have focused on the basic assembly of the hull and the planking. With that now behind me, it is time to continue the story.

RECAP:

Willem Barentsz had already made two unsuccessful attempts at finding the Northern Passage to China, when he was given a third chance by the Admiralty of Amsterdam. After meticulous planning with Jacob van Heemskerck, the scene was now set for the actual expedition to start.

THE NEXT CHAPTER

Thanks to the journal of Gerrit de Veer we can follow all the action as it unfolded. For our Dutch members, I include the original old-Dutch script, taken directly from his diary.

View attachment 280655
Painting by Arnold de Lange (De Lange Maritiem) http://arnolddelange.nl/willem-barentsz/

The departure: The ships of Willem Barentsz and Jan Corneliszoon Rijp left Amsterdam on the 10th of May 1596. The first leg of their journey took them to Vlieland where they would arrive three days later on the 13th.

De schepen van Willem Barentsz. en Jan Corneliszoon Rijp op weg naar `T Vlie. `Den 10.Mey des jaers 1596. zijnse van Amsterdam gheseilt ende quamen den 13. int vlie`….

View attachment 280658
Jan Corneliszoon Rijp captained the second ship in the expedition. Interestingly enough, the other ship was captained by Jacob van Heemskerck and not by Willem Barentsz. Barentsz was helmsman on the ship of Van Heemskerck.

View attachment 280656
Art Work by Arnold de Lange (De Lange Maritiem) http://arnolddelange.nl/willem-barentsz/

Waiting for favorable wind – the fleet at Vlieland, May 1596.

Wachten op goede wind bij Vlieland, mei 1596…

As mentioned earlier, Barentsz took with him the experience of his previous two missions and this time it looked as if the third trip would be a charm. A month after they had left Amsterdam the expedition discovered Bear Island and, unbeknown to Barentsz at the time, also the Spitsbergen. Bear Island is the southernmost landmass in the Spitsbergen / Svalbard archipelago, which would be his most famous discovery.

He made this discovery less than a week later, on June 17, when he and his crew saw the main island of Spitsbergen itself, as well as a series of bays and fjords in the area.

View attachment 280657
Painting by Arnold de Lange (De Lange Maritiem) http://arnolddelange.nl/willem-barentsz/

Discovering Spitsbergen. On the 19th of June the expedition saw land. By utilizing the height of the sun, they calculated that they were at a polar height of 80 degrees, 11 minutes. The land encompassed a substantial area and they sailed for days on end in a westerly direction of 79-and-a-half degrees. A very strong north-easterly wind that blew directly from the land, prevented the men from getting any closer to land.

De ontdekking van Spitsbergen…`Den 19.Junij sagen wy wederom landt. Doen namen wy der Sonnen hooghde/ en bevonden dat wy waren op des Poolshooghde van 80.grad. 11.minuten. Dit landt was seer groot/ ende wy seijlden dae by heenen westelijck aen totte 79.graden ende een half/ daer wy een goede reede vonden/ ende conden niet naerder het landt comen/ vermidts de windt n.o.waeyde/ recht van ´tlandt af/ ende die Bay streckte recht noorden ende zuyden in zee`…

Upon their arrival at Nova Zembla, the elements turned once more against Barentsz. The company was confronted by the one severe snowstorm after the other and had no other option but to seek refuge in one of the many bays.

View attachment 280659
Art Work by Arnold de Lange (De Lange Maritiem) http://arnolddelange.nl/willem-barentsz/

About their reconnaissance of the bay at Spitsbergen, De Veer writes as follows: We rowed the sloop towards the land and spotted a bay which we deemed would serve as a good harbour. We cast the lead line and found the water depth ranged from 16 to 10 fathom. Towards the east we saw two smaller islands while a huge bay in the west actually turned out to be an island on its own upon closer examination. Here we discovered a number of rock geese in breeding season, sitting openly on their nests. We chased them away and collected approximately 60 eggs. We killed one of the rock geese with a stone and cooked it for supper.

Het verkennen van de baai op Spitsbergen…`Wy royden met onse schuijt wel een mijl te landtwaert in, daer was een goede haven, ende steeckgrondt, aende oostzyde wast sandtgrondt. Wy wierpent loot en daer was diepte 16.vadem, ende daer nae 10.ende 12.vadem. Ende al voort royende bevonden wy dat aende oostzyde twee Eylanden waren, die haer oost inde zee streckte. Aende westzyde wasser mede een geweldighen inham, en ´tleeck wel mede een Eylandt te zijn. Doen royden wy voort aen´t Eylandt dat inden midden lach, ende vonden daer veel eyeren van Rotgansen, die wy opt nest sagen sitten, ende haer daer van jaeghden, die daer riepen, Rot,rot,rot, ende smeten een Gans met een steen doodt, die wy coockten ende aten, met wel 60. eyeren die wy mede scheep brachten, ende quamen den 22. wederom tscheep.`…

With the men now underway, I will intersperse my actual building with historical updates too.

Thank you all for watching, following, commenting or just being here! It is sincerely appreciated and makes this build very special to me.
I always like the history , my ancestors came from the island of Texel, all seafarers and also related to the Brouwer , I am sure being related , Hendrik Brouwer the one who used and discovered the speedy route on the roaring forties from the Cape of Good Hope towards Australia and up to Strait Sunda between Java and Sumatra instead a route via Ceylon savIng time and lives .
 
I always like the history , my ancestors came from the island of Texel, all seafarers and also related to the Brouwer , I am sure being related , Hendrik Brouwer the one who used and discovered the speedy route on the roaring forties from the Cape of Good Hope towards Australia and up to Strait Sunda between Java and Sumatra instead a route via Ceylon savIng time and lives .
That is the kind of information and history that I absolutely love Robert. I have always maintained that without history we are simply like logs floating downstream - no origin, no background and no character.
 
Johan, I have no idea what brands would be available in the Netherlands - I am not even sure how one would translate "sanding sealer" to Dutch - "afdichting vir schuurwerk" maybe?
Thanks to Phil's post I checked some Dutch websites. There's no apparent Dutch translation for sanding sealer, but it is available: https://politoeren.com
I still need a little more research whether or not I need/want to start using it.
 
Thanks to Phil's post I checked some Dutch websites. There's no apparent Dutch translation for sanding sealer, but it is available: https://politoeren.com
I still need a little more research whether or not I need/want to start using it.
Very interesting Johan, thank you for that. I think if you want a super-smooth, shiny or painted finish, it is probably a good idea - but in my case, I prefer the more natural open-grained look of the wood - hence no sanding sealer.
 
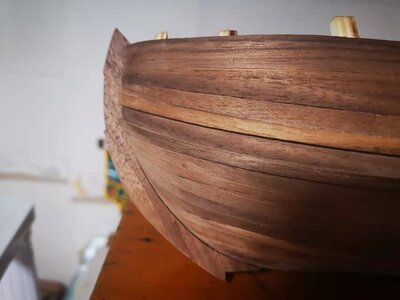
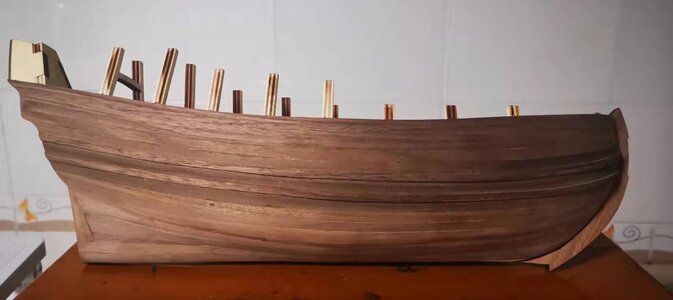
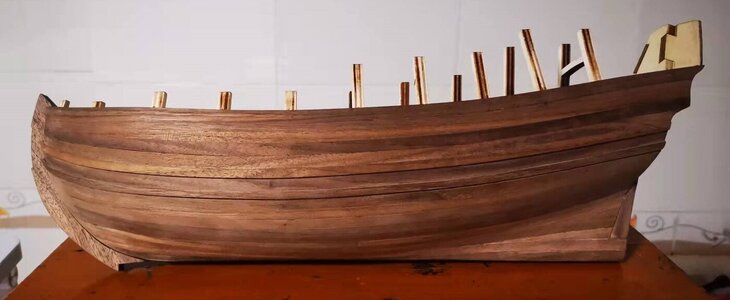
My update for the day. I have finished the sanding with the coarser grits and have also installed the stem part of the keel.

微信图片_20220105221623.jpg
Starboard Side

微信图片_20220105221609.jpg
The Port Side is definitely my favorite as far as the wood patterns and colors go.

微信图片_20220105221556.jpg
This is why I am installing the stem and keel after the planking has been completed. This way I ensure a seamless fit between the planking and the stem.

Tomorrow - if I have chance, because I'm doing some charity teaching again - I will put down the central keel underneath the ship.
 
Back
Top