- Joined
- Jan 9, 2020
- Messages
- 10,566
- Points
- 938

Yes Jan! Go to the next page of the instruction manual and carry out the next step!Is there a ”ten step” program?
Jan

 |
As a way to introduce our brass coins to the community, we will raffle off a free coin during the month of August. Follow link ABOVE for instructions for entering. |
 |
 |
The beloved Ships in Scale Magazine is back and charting a new course for 2026! Discover new skills, new techniques, and new inspirations in every issue. NOTE THAT OUR FIRST ISSUE WILL BE JAN/FEB 2026 |
 |

Yes Jan! Go to the next page of the instruction manual and carry out the next step!Is there a ”ten step” program?
Jan


In the past I enjoyed working on more than one ship, but now I am a devoted "one-ship" man!Based on what I sometimes see on this forum there is only a 'ten ship' program...

Pot, kettle, black?Acknowledging you have an addiction is the first step toward recovery Heinrich.

Tell him, Johan!Pot, kettle, black?


Which model's build instructions only has ten pages? That one is mine!Yes Jan! Go to the next page of the instruction manual and carry out the next step!

Hi Johan. I meant that when you are on step 10 of the instructions, turn to the next page and carry out the next step!Which model's build instructions only has ten pages? That one is mine!
 The WB's instruction book actually consists of 57 pages plus another four-page supplement!

In order to be complete:Hobby: "An activity or interest pursued for pleasure or relaxation and not as a main occupation"
Obsession: "The domination of one's thoughts or feelings by a persistent idea, image, desire' etc."
Hummm. Your choice

Ah Heinrich, at least you're in good company!
The one who's instructions are enough to actually build the model without lots of prior ship building knowledge.Which model's build instructions only has ten pages? That one is mine!

Pot, kettle, black?
True story


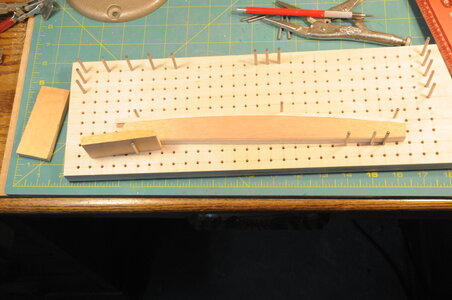
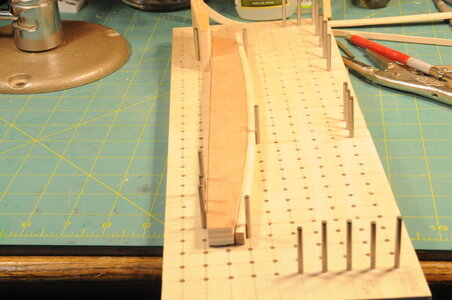
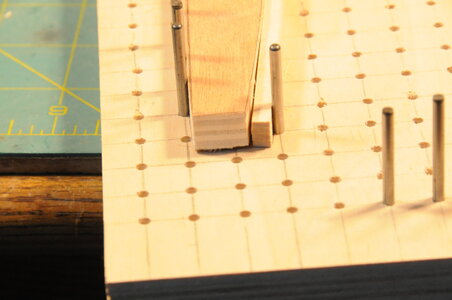
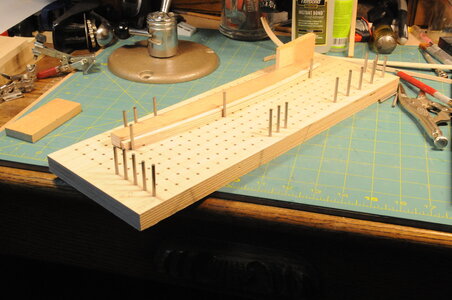
One method I found for bending long curves is to use a pin board. Steam or wet the wood then mount it to a board that emulates the curve. It can be held with a piece that also matches the curvature, then allowed to fully dry. By moving pins around and using a matching clamping piece, you can copy any curve....Hello Everyone.
After the humorous and most pleasant interlude of last night, it is now back to serious building again.
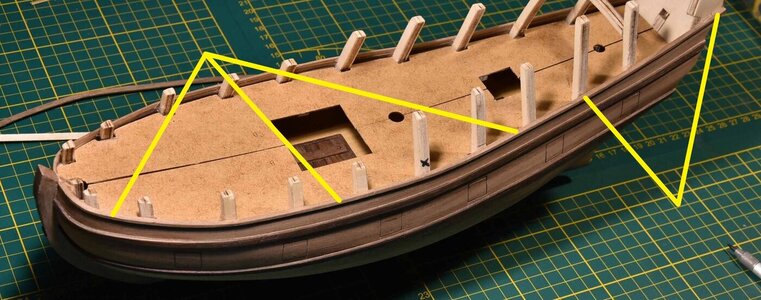
Strictly speaking, the next step would be to glue a 2mm x 3mm strake HORIZONTALLY on top of the uppermost plank of the existing planking.
View attachment 282718
Photograph: @pietsan Piet Sanders: The yellow lines indicate the 2mm x 3mm plank which was glued horizontally on top of the existing planking on the port side.
As you can well imagine this is not an easy task and after discussing with Piet what he did, the one thing that became abundantly clear was that pre-bending the plank was essential. This was not something I really wanted to do on the model, as it would require putting those two planks under a LOT of strain during the bending - strain and stress that I did not want to transmit onto the model. So I racked my brain and thought of something.
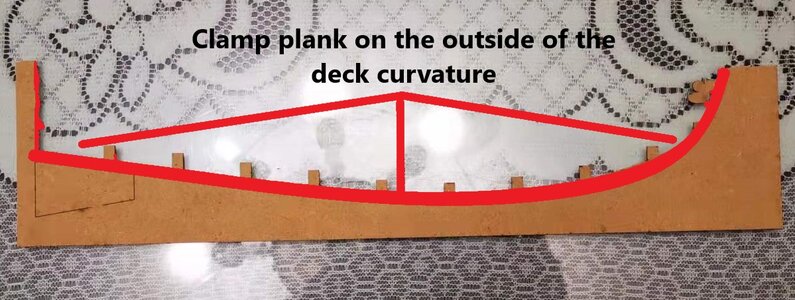
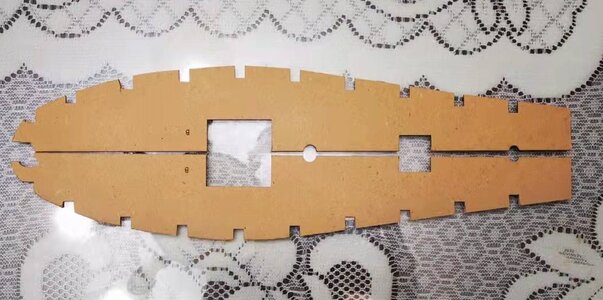
The upper deck of the Willem Barentsz comes in two halves. So - if I removed the two half-decks from their MDF sheet, I would be left with the perfect outline of the deck. Theoretically, I should be able to soak my 2mm x 3mm plank and afterwards with the plank still wet, I could then clamp it on top of the MDF sheeting so that it follows the deck curvature.
View attachment 282719
This is my idea of how to pre-bend the two 2mm x 3mm planks that will complete the first stage of the hull planking. At this stage it is just theory as I have no idea whether it will work or not.
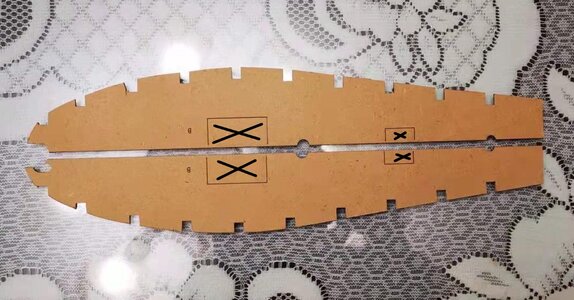
This idea of mine obviously required me to cut the two deck halves from their sheeting. With that done, this is what they look like:
View attachment 282721
The areas demarcated by crosses, need to be removed from the deck-halves. The larger opening falls right over the larger hatch in the lower deck while the smaller one coincides with the smaller hatch on the lower deck. Ultimately, the larger opening will be covered by a grating, while the smaller one will remain an open hatch with a ladder leading to the deck below.
With the deck-halves removed, I realized that I might just as well now glue the deck into position. This was confirmed by both the Kolderstok instruction manual and Piet's build log. So while this may sound like a very straightforward exercise, it is actually not. On many ships both lower and upper decks are placed before planking which allows the builder to sand the deck into shape when the hull is faired. However, on the WB, this cannot be done, because of the possible installation of cannons on the lower deck. Just imagine - if the upper deck has been installed prior to planking, I would have been unable to cut out the gunports.
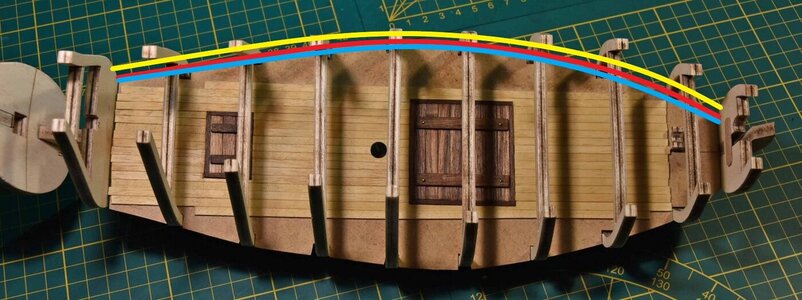
The challenge that @Kolderstok Hans now faces is this: He has no idea how wide or narrow the individual builder has built the ship. What do I mean by this? On the photograph of Piet's build below, you will see three lines. The red line follows his outline exactly. Depending on how much or how little material each individual builder removes from the bulkheads during the fairing process, will alter the outline of the ship. If a builder has removed less material than Piet did, he will have a wider hull (yellow line). If he has removed more material, his hull will be narrower (see the blue line). The lines are obviously exaggerated in my illustration, but you get the idea.
View attachment 282722
As Hans does not know which route the individual builder has followed, he has supplied an "oversized" deck or "wide" deck. Right from the outset I have tried to build a "narrower" WB (for reasons which I will explain later), which meant that I had to remove quite a bit of material from the outside edge of the deck - halves.
View attachment 282724
This shows the two deck-halves, with the openings cut-out and ready for installation.
Now I had to make a final call. If I installed the deck now, it would mean that I cannot install my cannons at the stern as the rear section of the deck extends over that portion of the stern. Decisions ... decisions ... In the end I decided to forego the cannons. Installing stern cannons while the rest of the gunports remain closed, just seemed out of kilter with the rest of the build. This of course means that I have created a lot of work, because now I still need to create two gunport lids for the stern gunports so that I can close them up properly. But ... so be it.
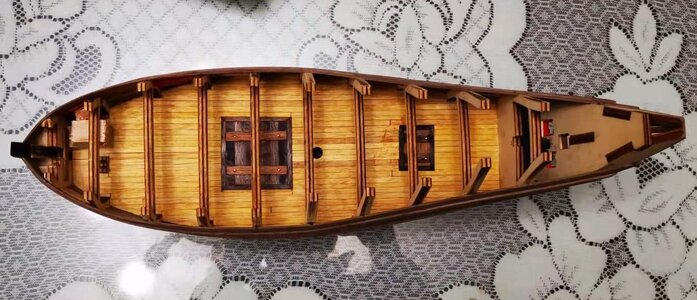
With the deck about to be glued on, it also meant that all work on the lower deck had now been completed so for protection purposes, I could now set the lower deck in tung oil. So, gents, here is the first taste of 100% natural tung oil on the WB. This is only one coat and consists of 40% tung oil and 60% mineral turpentine. I am obviously quite keen to hear what you think of it.
View attachment 282725
Ultimately this exact same finish will be applied to the upper deck as well, but obviously at a much later stage. Looking at the walnut hatches it also gives an idea of what the tung oil will do to the walnut of hull.
So ... at the moment, I am waiting for the first deck half to dry.
