HIGH HOPES, WILD MEN AND THE DEVIL’S JAW - Willem Barentsz Kolderstok 1:50

Hello Everyone - let me show you what I am up to today.

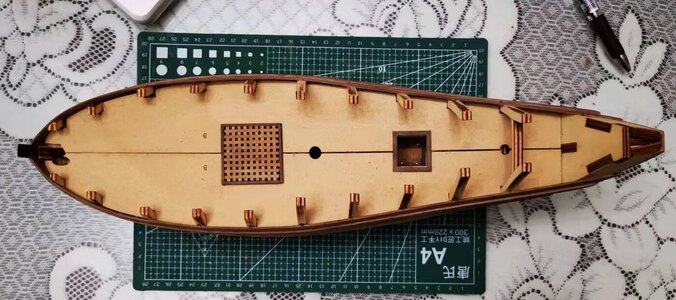
View attachment 283006
First on the agenda was removing the protruding deck beams (indicated in the previous photograph) from the deck hatches. For that my little saw from Kolderstok proved its worth once more.

Then I felt like making the deck grating today. I woke up late this morning and just felt like doing something small and precise - tomorrow I have a medical examination (all part of my residence-and work permit applications for the new school) and this was the ideal thing to take my mind away from that. I think I am as healthy as can be, but one never knows what the doctors may discover. Ah well ... back to the Barentsz.

View attachment 283007
The laser cut pieces that Kolderstok provides for this, consist of both toothed and straight pieces which are then interlocked.

View attachment 283008
The first step was to place four toothed pieces in a square conforming to the 4cm x 4cm square which is the size of the cut-out in the deck. Once that was done, I then filled up the one side with toothed pieces. The massive yellow arrow indicates the direction that the straight pieces need to follow on the deck of a Dutch ship, running in a bow-stern (lengthwise) direction.

View attachment 283009
Next, I concocted my home-brew solution consisting of PVA diluted with hot water in a 50-50 mix.

View attachment 283010
With an old paint brush this mixture is then brushed into the joints and left to dry.

View attachment 283011
When dry, the assembly is then turned out around and all the straight pieces are laid down into the now upwards-facing, toothed pieces (indicated by the yellow lines).

View attachment 283013
The PVA mixture is now brushed (liberally) into all the joints and left to dry.

View attachment 283014
When the glue has thoroughly dried, the extra pieces were sawn off (once again I used the handsaw for this) and sanded. Measuring against the cut-out on the deck, the grating is carefully sanded to size.

Now comes a tricky part.

View attachment 283015
The grating is trimmed further by removing all the straight pieces from the edges following the red cutting line as shown above. This is because i will be replacing the edges with a 2mm x 3mm strip of walnut which will then restore the size of the grating once more. This is done as a finishing touch and will just round-off things nicely when completed.

This is all for now, I will continue posting as I make progress.
Now they look like grates, beautiful.
I never knew or thought about using hot water to mix with PVA, I must have missed the memo on that one.
What does it help with compared to cold water?
 
Now they look like grates, beautiful.
I never knew or thought about using hot water to mix with PVA, I must have missed the memo on that one.
What does it help with compared to cold water?
Hello Richie. I just found that the PVA that I use, mixes much better with the hot water than with cold water. With the cold water, they tend to form lumps, but I get a very nice and smooth mixture when using the hot water.
 
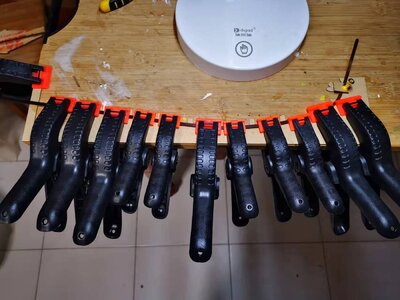
Clamps ...

微信图片_20220116191505.jpg
微信图片_20220116191457.jpg
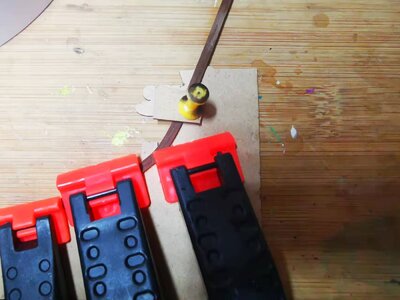
The 2mm x 3mm plank being bent horizontally. This one will stay in the clamps overnight or longer, so hopefully it will work. Luckily it has not broken, so that is a good sign.

More clamps:

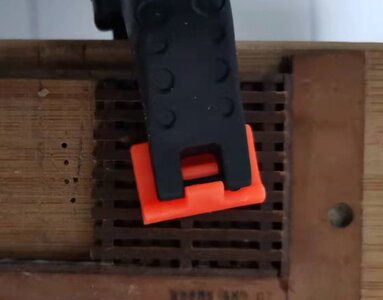
微信图片_20220116191442.jpg
The grating is getting its walnut surround.

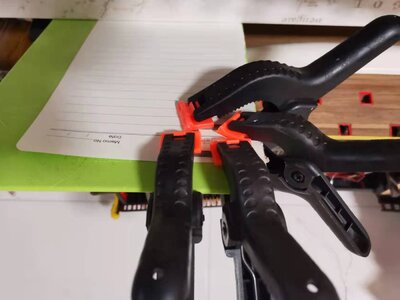
And more clamps ...

微信图片_20220116191449.jpg
The hatch frame has been mitre-cut, glued and is now drying in the clamps.

Every single, big clamp that I have is being used at the moment.
 
The preliminary work on the grating was first class Heinrich. Looking forward to seeing it in its frame.
Thank you Paul. The downside to this way is that it takes a long tome with the PVA glue, but I cannot afford any CA stains.
 
Good to see that your ideas about horizontal bending are working, by the looks of hit, i have used partly the idea of @Philski, but i took a kitchen board, where you normally cut your bread into slices.
In that board i drilled holes, and i used wooden pins, in Dutch, Deuvels. ( also used for furniture repairing )

But you have made some excellent looking grates
Thank you my friend. I have two of those boards - the large one is actually my building board to which I have clamped that plank for the horizontal bending! :)
 
Great idea on bending that long plank. It looks like a fairly tight radius at the bow, and horizontally, how long did you soak the wood? Walnut is so tricky to bend, sometimes I get in too much of a hurry and without warning "snap".
 
And then we come to the end of what has been a hectic, but productive day. Other people may wonder what the fuss about grates is all about, but I wanted it to look good as it forms of a focal point on the deck.

微信图片_20220116223406.jpg
The inside of the rear hatch frame still needs to be sanded, but that will only happen tomorrow when the glue is dry.

And now the next challenge is me and the doctors tomorrow! :(
 
Great idea on bending that long plank. It looks like a fairly tight radius at the bow, and horizontally, how long did you soak the wood? Walnut is so tricky to bend, sometimes I get in too much of a hurry and without warning "snap".
Daniel, I did not soak the plank at all. I boiled water in a kettle and while holding the tip of the plank between fingers, I poured the whole kettle of boiling water over the plank, making sure to run it up and down the full length of the plank. Then - soaking wet - straight onto the board and bent it starting at the rear and progressing towards the very acute curve at the bow.
 
Verry good work Heinrich, good luck tomorrow, and the Admiral just said : greet Heinrich from me, so i just did :):)
Thank you very much for the well wishes my friend - and please thank the Admiral for me for her good wishes. I appreciate it very much!
 
And then we come to the end of what has been a hectic, but productive day. Other people may wonder what the fuss about grates is all about, but I wanted it to look good as it forms of a focal point on the deck.

View attachment 283092
The inside of the rear hatch frame still needs to be sanded, but that will only happen tomorrow when the glue is dry.

And now the next challenge is me and the doctors tomorrow! :(
Heinrich it has been said before however wort repeat- the shape and swerves of your WB is beautiful. The grating is excellent.
 
Heinrich it has been said before however wort repeat- the shape and swerves of your WB is beautiful. The grating is excellent.
Thank you Grant! The grating still need to be set in tung oil, but that is for another day. I also love the shape of this little ship - bulbous and curvaceous.! :)
 
And then we come to the end of what has been a hectic, but productive day. Other people may wonder what the fuss about grates is all about, but I wanted it to look good as it forms of a focal point on the deck.

View attachment 283092
The inside of the rear hatch frame still needs to be sanded, but that will only happen tomorrow when the glue is dry.

And now the next challenge is me and the doctors tomorrow! :(
The frame around the grates looks very good. A nice personal touch, Heinrich.
Regards, Peter
 
View attachment 283013
The PVA mixture is now brushed (liberally) into all the joints and left to dry.

View attachment 283014
When the glue has thoroughly dried, the extra pieces were sawn off (once again I used the handsaw for this) and sanded. Measuring against the cut-out on the deck, the grating is carefully sanded to size.
Heinrich,
With the liberal application of your home brew doesn't fill the pores of the wood and restrict the absorption of the oil finish. Judging from the sanded picture it appears that the higher rails of the grating are sanded but not so much the lower in between areas.

 
The frame around the grates looks very good. A nice personal touch, Heinrich.
Regards, Peter
Dankjewel, Peter! (Thank you very much Peter).

Reducing the size of the grating so that the walnut border could be fitted was a lot of extra work. Whether it was worth it, one will only know once it has been set in oil and the rest of the deck planking has been completed.
 
Heinrich,
With the liberal application of your home brew doesn't fill the pores of the wood and restrict the absorption of the oil finish. Judging from the sanded picture it appears that the higher rails of the grating are sanded but not so much the lower in between areas.
Hi Ron. I am not sure whether you are referring to the earlier picture of the grating or the one installed on the deck. On the earlier picture you are right as I didn't want to sand before the walnut border was added.

As to whether the diluted PVA has filled the wood pores, thereby preventing the absorption of the oil - good question. The honest answer would be that I wouldn't know for sure until I have tried. Once the glue had cured fully, I will set it in oil and that will be the acid test.
 
Back
Top