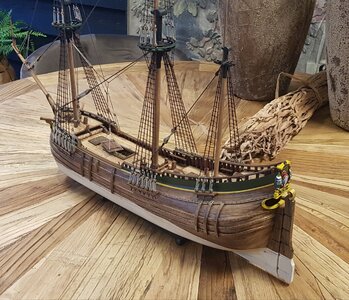
HIGH HOPES, WILD MEN AND THE DEVIL’S JAW - Willem Barentsz Kolderstok 1:50

Concurrent with the introduction yesterday to the construction of the Willem Barentsz replica, work in the Nantong Shipyard continues.

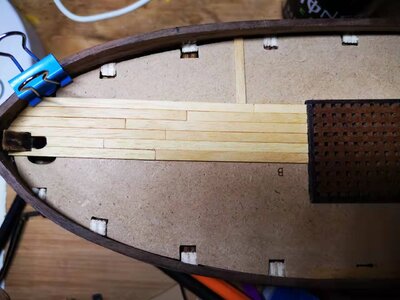
Following the conclusion of the grating and deck hatch, I started with the planking of the upper deck. Seeing that a good deal of this deck will be visible, it requires a great deal of care and good planning. For that I chose to emulate @pietsan Piet Sanders’s planking pattern as indicated below. I am only showing this section of the deck planking for the time being.
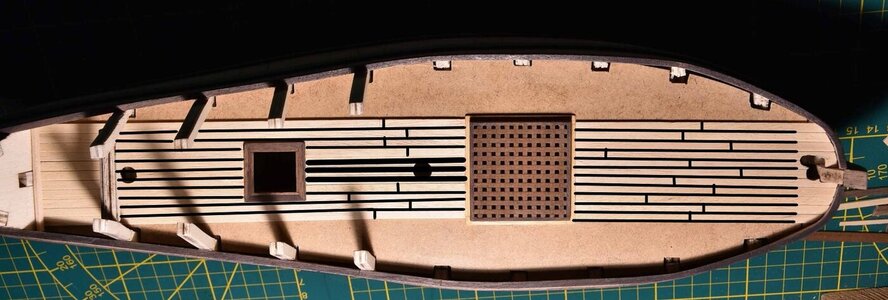
JPG_1393_6185_bewerkt-1 (1).jpg
Photograph: @pietsan Piet Sanders

The word “pattern” is a term that has to be loosely applied, as Piet decided to plank his deck according to a “wild” pattern – so typical of Dutch ships. This means that there is no fixed or prescribed pattern that will be adhered to, but that the planks will simply be placed at random. This is how the Dutch shipwrights did that using the planks that they had at their disposal at any given time.

By his own admission this is the first time in his 40-year modelbuilding career that Piet has done this. I decided that I wanted to emulate his pattern which of course meant that I had to plan very carefully to copy his look. Using the above picture, I carefully marked out his layout and got going. As usual for a Kolderstok model, 4mm Abachi wood is used for the deck planking.
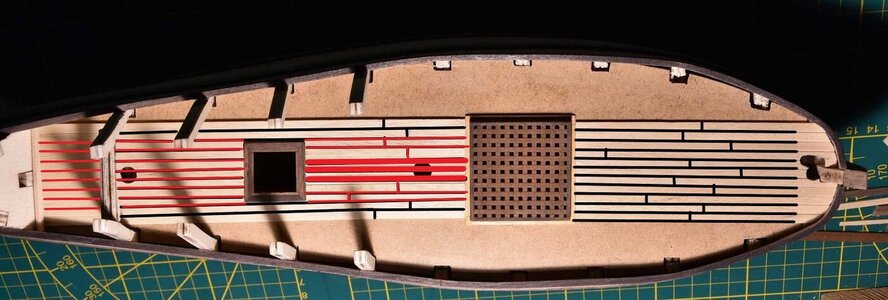
JPG_1393_6185_bewerkt-1 (1) - 副本.jpg

The picture above shows the current state of the deck planking with the red lines indicating the section completed. Obviously, no scraping, sanding, caulking or treenailing have been added at this stage. On the subject of treenailing - that is not something that you are likely to find in Piet’s builds, nor in mine.

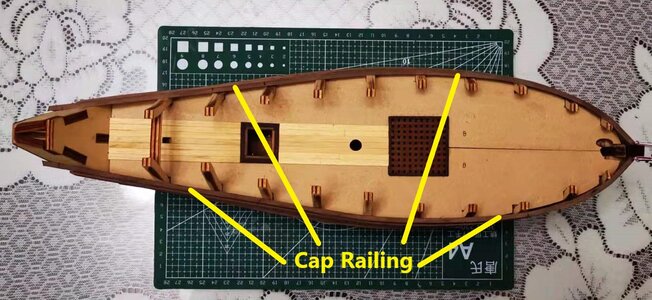
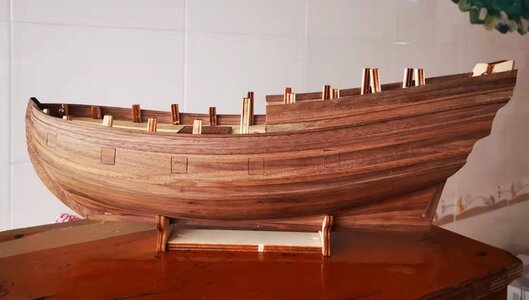
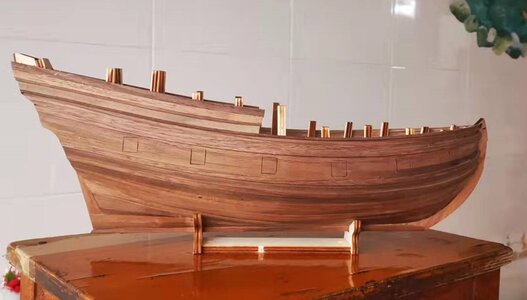
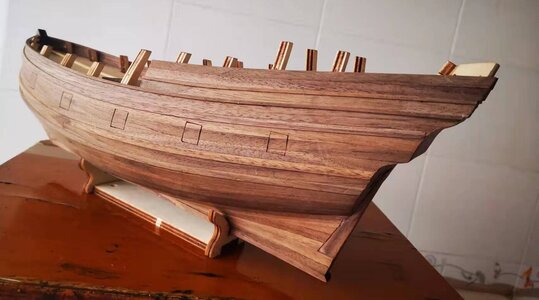
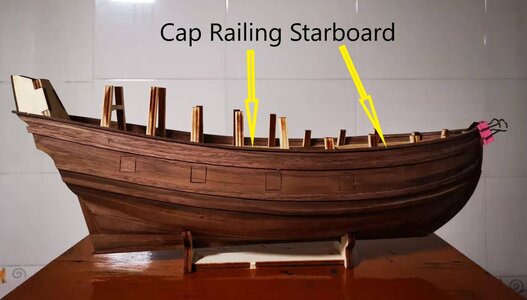
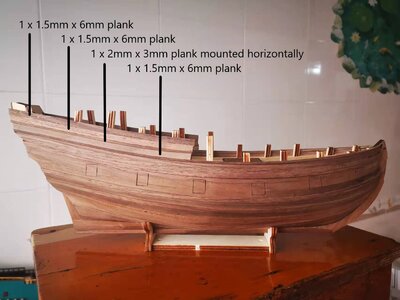
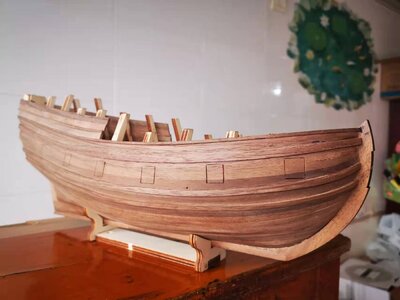
With the planking thus far, the next logical step would be to remove bulkheads 1-6 (the bulkheads from the bow to midships) to facilitate planking the bow area and the rest of the deck. BUT … before that could be done, it was now time for a step I was really not looking forward to – that of gluing the cap railing to the model. Bear in mind that this is a 2mm x 3mm walnut strake that has to be glued HORIZONTALLY on top of the existing planking. As these planks have to be edged-glued only, there is only a 1.5mm gluing area to work with and to get this plank to lie squarely on top of the edge of an upright plank was no easy feat. The other challenge was finding a satisfactory way to clamp and weigh down this plank sufficiently while the glue was drying. The port side caprail required two attempts before I was satisfied, while the starboard side went on beautifully and presented no problem.
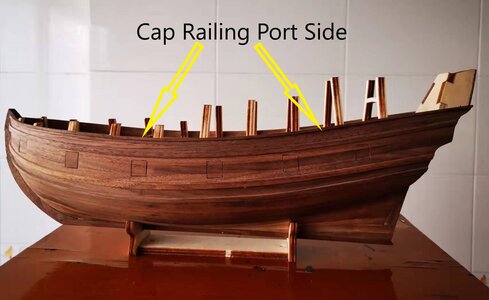
微信图片_20220119202337.jpg

微信图片_20220119202344.jpg

微信图片_20220119202328.jpg

This top view shows the two caprails installed and the state of the deck planking thus far.

The next three steps on the agenda are:.

Remove bulkheads 1-6.
Complete the deck planking.
Build up the bulwarks at the stern.

Hopefully, I will soon be able to show you some real visible progress. Until next time - thank you so much for visiting, commenting, liking, participating or advising. It is greatly appreciated.
 
I'm at the same point on my little Speeljaght although my cap rails are only 1.5 x 3mm and don't require quite the horizontal bend as do yours so I'm not dreading this.
However, I've been closely following Hans build of his Speeljaght and he mentioned that applying the wales were something he dreaded on all ships. At the time I didn't see that the wales would be that difficult. Wrong. I certainly mucked my lower wales up. Hopefully, I can remove what I have done without breaking them and try again. Unfortunately, I used a combination of both CA & PVA.
I'm too :mad:Redface to post a picture. My fault entirely as I was in a hurry.

Ron

Edit: wrote rails. should have been Wales
 
Last edited:
I'm at the same point on my little Speeljaght although my cap rails are only 1.5 x 3mm and don't require quite the horizontal bend as do yours so I'm not dreading this.
However, I've been closely following Hans build of his Speeljaght and he mentioned that applying the rails was something he dreaded on all ships. At the time I didn't see that the rails would be that difficult. Wrong. I certainly mucked my lower rails up. Hopefully, I can remove what I have done without breaking them and try again. Unfortunately, I used a combination of both CA & PVA.
I'm too :mad:Redface to post a picture. My fault entirely as I was in a hurry.
Ron
Hello Ron. In this instance, I will not press "Like". Cap rails are a pain in the "you-know-what". That is one aspect of the build that you simply cannot rush. It has taken me a day and a half to do these two rails - each time I allowed 3 hours' drying time for the PVA glue and even then there were some spots that I had to revisit and glue again (because I could not clamp the railing properly). CA glue is a no-go for me when it comes to any woodwork. I will begrudgingly use it on rope or ornamentation, but on wood it is a taboo in my shipyard.
 
Hello my Dear Friends

In between charity teaching ...

微信图片_20220121090203.jpg

And another all-nighter ...

微信图片_20220121090211.jpg

... the stern bulwarks have been built up to the next required level.

微信图片_20220121090218.jpg

微信图片_20220121090234.jpg

微信图片_20220121090226.jpg

Slowly, but surely the little ship is getting her definitive shape.

Now I am off to the bank in the next 15 minutes and when I return it is on to bulkhead removal and deck planking.

Until next time. :)
 
Good morning Heinrich. You must be super “chuffed” with those Wales (actually the whole process of your WB) thus far. Just so good to look at. Cheers Thumbsup
Thank you very much Grant - I am very chuffed with the whole build thus far. Progress will now slow down as I am approaching certain very detailed sections (courtesy of @pietsan Piet whose build sets such high standards), but if I want to continue in this way - that is what needs to be done. :)
 
I really like this ship! The craftsmanship is great! Combined with the pleasing lines and natural beauty of the wood this is continues to be one very fine build!!

Glenn

Thank you very much for the kind comments Glenn! I agree fully with the lines of the ship and the wood color. As far as the "craftsmanship" goes - I am just trying my best. :)
 
Hello Everyone.

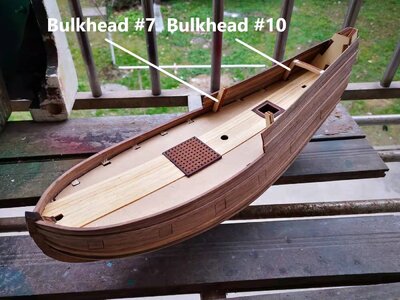
As I mentioned yesterday, the next task was removing the bulkheads and carrying on with the deck planking.

微信图片_20220122105633.jpg

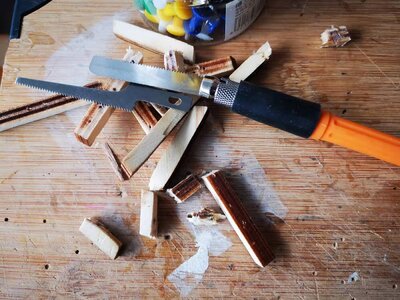
All the bulkheads - except number 7 and 10 have been removed. #7 will play an important role in locating the front wall of the canopy a little later on, while #10 will actually serve a triple purpose: that of brace, that of deck support and that of mast guide. Its role as mast guide - in particular - is ingenious and was conceived by @pietsan Piet during his build. I am only too happy to emulate his example and I will explain the function fully when we get to that point. For the removal of the bulkheads, the little Kolderstok saw with its flexible blade worked great!

微信图片_20220122110721.jpg

All that is left of the bulkheads (and to think that I was so careful not to break them during the hull construction! :))

微信图片_20220122111207.jpg
Planking the bow in and around all the nooks and crannies is a slow process which I am not going to hurry.

That is all for now - I will update the log as I go along.
 
This will be a really nice ship, really great job , if I had more time I would also look more into Dutch ships, a highly interesting area.
Thank you very much Adi. You know that I hold your work in high esteem (your build of Le Coureur has really piqued my interest in that Group Build), so I value your comments greatly. Dutch ships are indeed a fascinating subject because of the very wide variety of subjects.
 
Hello Everyone.

As I mentioned yesterday, the next task was removing the bulkheads and carrying on with the deck planking.

View attachment 284889

All the bulkheads - except number 7 and 10 have been removed. #7 will play an important role in locating the front wall of the canopy a little later on, while #10 will actually serve a triple purpose: that of brace, that of deck support and that of mast guide. Its role as mast guide - in particular - is ingenious and was conceived by @pietsan Piet during his build. I am only too happy to emulate his example and I will explain the function fully when we get to that point. For the removal of the bulkheads, the little Kolderstok saw with its flexible blade worked great!

View attachment 284893

All that is left of the bulkheads (and to think that I was so careful not to break them during the hull construction! :))

View attachment 284894
Planking the bow in and around all the nooks and crannies is a slow process which I am not going to hurry.

That is all for now - I will update the log as I go along.
Hi Heinrich, what a great photo of the ship showing that beautiful hull shape. Now I'm really leaning towards the Fluit for my next build (when it becomes available). There's something about the way the stern narrows up (viewed from any direction) that's appealing to my eye. Watching your ship take form with those beautiful lines and stunning wood is a real pleasure. Thanks for sharing.
 
Hi Heinrich, what a great photo of the ship showing that beautiful hull shape. Now I'm really leaning towards the Fluit for my next build (when it becomes available). There's something about the way the stern narrows up (viewed from any direction) that's appealing to my eye. Watching your ship take form with those beautiful lines and stunning wood is a real pleasure. Thanks for sharing.
Wow Daniel - that is high praise indeed, my friend! I love the lines of the WB but I have often thought that maybe it's case of "beauty is in the of the beholder". It is therefore very gratifying to hear that so many of our members share that opinion. I am also very pleased about the natural color of the walnut-covered hull.

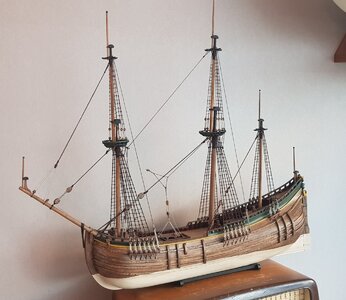
About the Fluit - I know that Hans is now adding final details, so it will not be long now before it becomes available. In the meantime, here are two of my favorite pics of the Fluit for you to enjoy! :)

20211225_155730.jpg

20211224_092459.jpg
 
Wow Daniel - that is high praise indeed, my friend! I love the lines of the WB but I have often thought that maybe it's case of "beauty is in the of the beholder". It is therefore very gratifying to hear that so many of our members share that opinion. I am also very pleased about the natural color of the walnut-covered hull.

About the Fluit - I know that Hans is now adding final details, so it will not be long now before it becomes available. In the meantime, here are two of my favorite pics of the Fluit for you to enjoy! :)

View attachment 285070

View attachment 285071
What an exquisite setting for photo number two. I’ve seen some awesome pedestals but this one takes it :)
 
What an exquisite setting for photo number two. I’ve seen some awesome pedestals but this one takes it :)
Hello Ron, Hans Groenenberg actually took photograph #2 at his work. From what I have gathered, Hans is a furniture maker, restorer and seller so the table on which the model is set, is one of his company's products. :)
 
Back
Top