- Joined
- Jan 9, 2020
- Messages
- 10,565
- Points
- 938

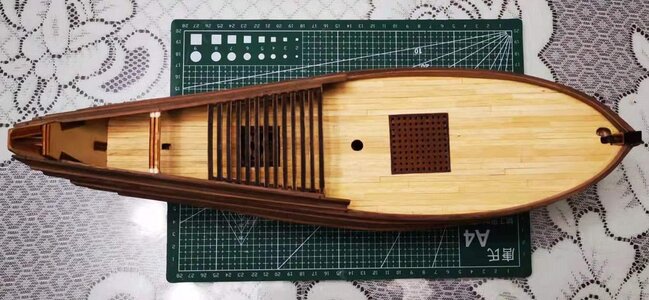
I suppose that is where the saying "broad in the beam" comes from!That overhead photo really shows how broad a beam and how very narrow the stern. Interesting
Ron
 |
As a way to introduce our brass coins to the community, we will raffle off a free coin during the month of August. Follow link ABOVE for instructions for entering. |
 |
 |
The beloved Ships in Scale Magazine is back and charting a new course for 2026! Discover new skills, new techniques, and new inspirations in every issue. NOTE THAT OUR FIRST ISSUE WILL BE JAN/FEB 2026 |
 |

I suppose that is where the saying "broad in the beam" comes from!That overhead photo really shows how broad a beam and how very narrow the stern. Interesting
Ron

Okiedokie
I promised an update on today's proceedings (not yet finished - there is still time for one plank to be glued) and here it is.
One thing I neglected to mention is how ingeniously the inner planking strengthens the bulwarks from midships to stern. Just to recap, the inner planking is indicated by the area marked in red.
View attachment 286310
Now if we look from the outside, this is the picture.
View attachment 286311
First off, notice the sequence of how the upper bulwarks are planked: A 6mm strip, then a 2mm strip and finally two 6mm planks again. But ... because the bulwark runs in a curve and because the inner planking is done with 4mm strips, it means that two of the planks overlap the joints of the previously planked strakes, adding great rigidity. The two solid, red lines indicate where the overlaps occur. However, this is not the end of the bracing - not even close. Hopefully I will be able to show you more bracing tomorrow night.
So, before I could do anything today, I had to complete the deck planking as that had to be done before the inner planking could take place and before the inner rails could be installed.
View attachment 286314
Deck planking has been completed and the inner rails on the port side have been installed.
View attachment 286315
And @RDN1954 Johan, just for you - note that the bowsprit opening has been "opened". Looking at the deck I have immediately decided against any staining or any type of finish that would change the color of the deck. That means that I will follow @Dean62 Dean's advice and apply a Polyurethane Varnish only to the deck.
Of course, finding a suitable product that I can trust is a different story altogether. In the end it seemed that my best bet would be Dulux Polyurethane Varnish with a Matte finish (obviously I don't want anything shiny on the deck). The added advantage of the poly is also that I will be able to glue the various deck items later without hassle. But - seeing that it is almost Spring Festival in China, all online shopping networks like Taobao and Jidong, have suspended their delivery services until after the 10th of February.Nothing is ever straightforward.
View attachment 286316
With the deck planking thus completed, I could start the inner planking of the port side bulwarks.
View attachment 286317
Happy shipbuilding until tomorrow everyone!

Well-spotted Johan!
 Actually, I wasn't going to comment on those just yet as I wanted to wait until the port side was also done, but in essence they provide the mounting pointing points for the roof beams of the canopy.
Happy if I have helped your wonderful modeling in some way. I love your log with its great detail both in construction and history. I am fascinated by Dutch ships of this Era and hope to do a representative model someday.Thank you very much for your contribution!

Hallo Ed. I am very happy that you find the log interesting. As I have mentioned before, I am trying my best to create a log that can be used by prospective builders in future while the historical background places the ship in context. I am also very glad to hear that you are fascinated by Dutch ships. If you need any help with future modeling subjects or information on Dutch ships, I will only be too happy to assist where I can.Happy if I have helped your wonderful modeling in some way. I love your log with its great detail both in construction and history. I am fascinated by Dutch ships of this Era and hope to do a representative model someday.
Fair winds, Ed


Slow maybe, but at least you're showing progress and with every step the beauty of the WB/WS shows more and more.Hello Everyone
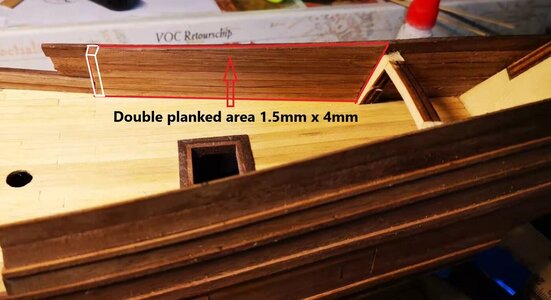
The double planking on the Port Side (area demarcated in red) has been completed. Slow work, but that is done now.
View attachment 286533

Thank you Johan. I agree - I don't mind going slow now, because these are all things that will have a great impact on the final appearance of the ship. I am glad that you like her looks as well - I think she is a very pretty little ship!Slow maybe, but at least you're showing progress and with every step the beauty of the WB/WS shows more and more.
Hi Heinrich,When I started this build, my first objective was to finish the planking of the hull before I return to work. When that was accomplished in little more than a month, I set a new goal – finish planking the deck. Now that that is also completed, I shifted the goalposts for a third time to a following objective – that of completing the rear “canopy” or “overkapping” in Dutch. Once again, I will follow both the @Kolderstok build instructions (which have been brilliant so far) coupled to @pietsan Piet Sanders’s exquisite build of the WB.
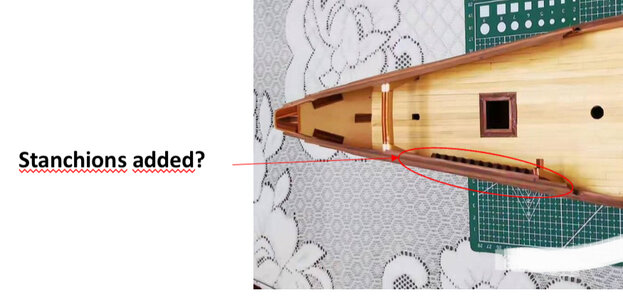
With the inner planking of the rear bulwarks (from midships to stern) completed, it was time for the next step.
View attachment 286541
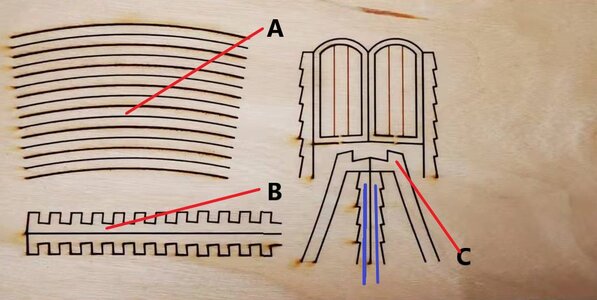
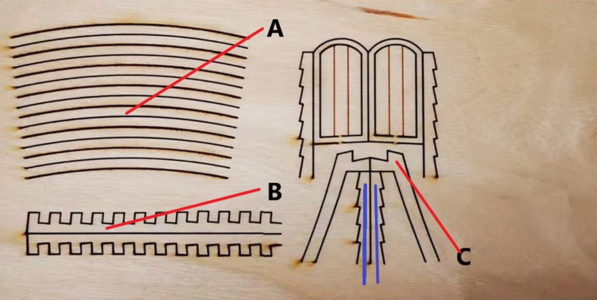
For that we need this 3mm, laser-cut from Triplex sheet. The parts that will be used for the first step have been identified:
A The spars that will run across the deck and will form the “roof beams” of the canopy.
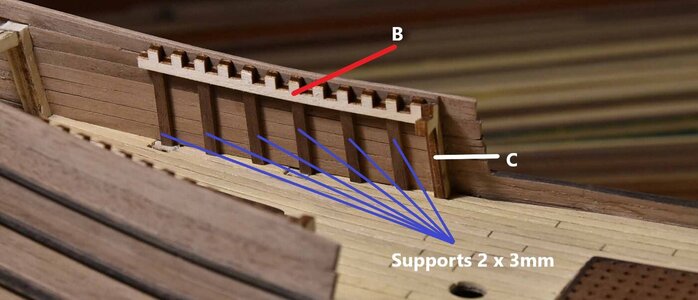
B The stanchions (the two notched sections) that will provide the mounting points for the roof beams.
C The two front wall posts. (Note that the two sections marked by the blue lines will not be used just yet, but will be vital in the construction of the front wall of the canopy later.)
View attachment 286542
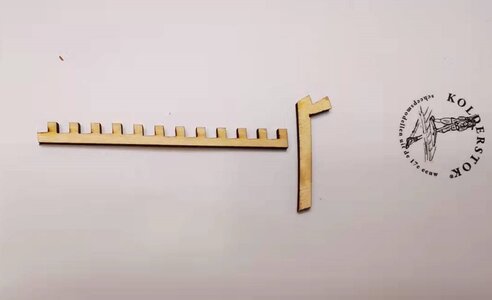
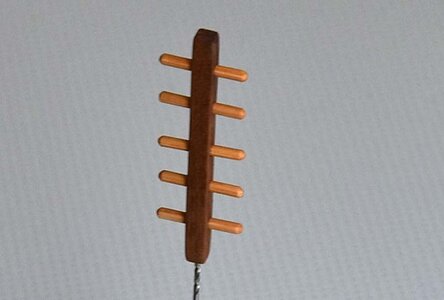
The doorpost and one stanchion removed from the laser-cut sheet.
View attachment 286543
In this picture that I posted earlier, you will remember that prior to removing the bulkheads, I first scribed the front of Bulkhead #7. That scribed line would serve two purposes:
View attachment 286544
The double planking on the inside of the bulwarks will extend to that line and it will also form the guiding line for mounting the two front wall posts (marked in white).
View attachment 286545
Photograph: Piet Sanders
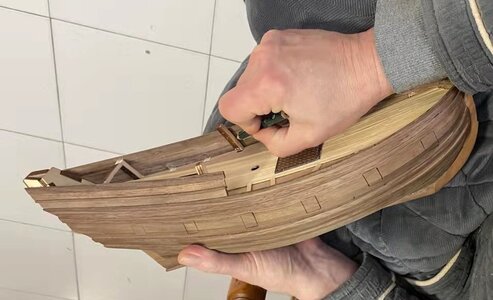
So on Piet’s build, you can clearly see the front wall post being installed so that they co-incide with the scribed lines (C) and then the stanchions (B) that are added behind them. Both the wall posts and the stanchions must be mounted so that they are level with the upper edge of the planking. The stanchions, in turn, are supported by six 2mm x 3mm supporting beams.
View attachment 286546
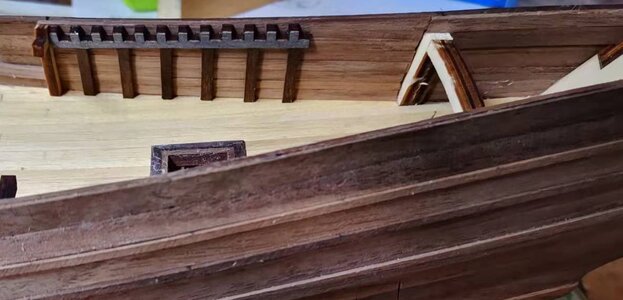
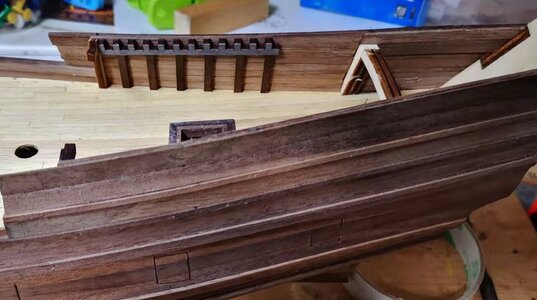
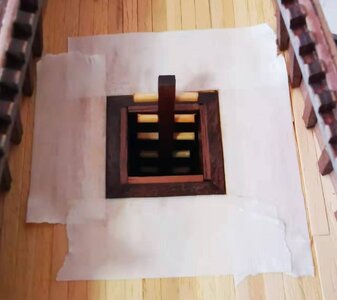
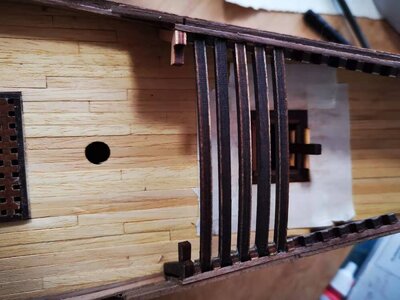
Here you can see that I have placed the wall post, the stanchions and the supporting beams on the starboard side. After the Admiral has arrived home, I will glue the port side stanchions so that she can help check that it is level with the upper edge of the bulwarks and perfectly straight - it is always great to have a resident QC!

Hi Stephen - I am very happy with the progress made so far. Obviously when I return to the classroom on the 10th of February, things in the shipyard will slow appreciably, so that is why I made most of the time I have available now. Thank you for your kind comments.Hi Heinrich,
That's great news, you have not only met your target but exceed it twice, great progress.
Cheers,
Stephen.
10th of February sounds like the real life goalpost to me! The others are just added hobby time rewards that can only be cashed in when they are recognized each moment of life. RIchHi Stephen - I am very happy with the progress made so far. Obviously when I return to the classroom on the 10th of February, things in the shipyard will slow appreciably, so that is why I made most of the time I have available now. Thank you for your kind comments.

I suppose it does Rich, but I am just honest when I tell you that I have enjoyed and am enjoying my time so much in the shipyard, that I look forward to the 10th with mixed feelings. But you are right ... that is the life goalpost - I am just very glad that I could spend so much time doing what I enjoy.10th of February sounds like the real life goalpost to me! The others are just added hobby time rewards that can only be cashed in when they are recognized each moment of life. RIch
Dear Heinrich, I hope it is ok for you to shortly be off-topic here, but ....Prima vakmanschap Heinrich, mijn vriend
Excellent craftsmanship Heinrich, my friend. She is looking beautifull.


No problem Uwe. Thank you for reminding me!Dear Heinrich, I hope it is ok for you to shortly be off-topic here, but ....
Hallo @pingu57
we wish you all the BEST and a HAPPY BIRTHDAY


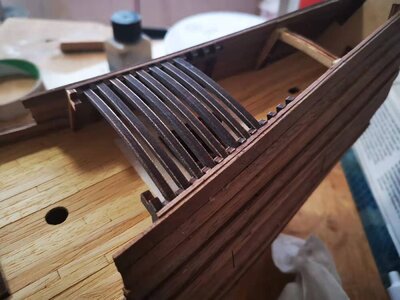
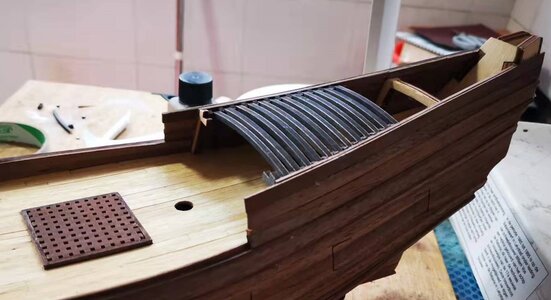
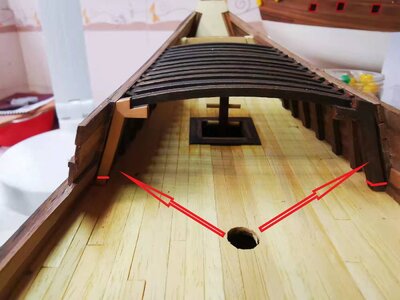
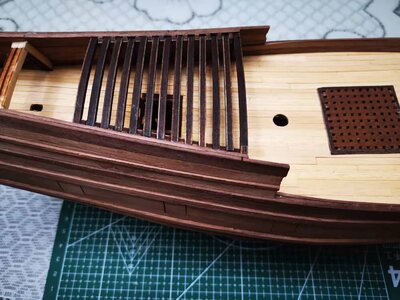

Thank you Ron. Unfortunately, there are only a few days left for me to continue at this rate - then - who knows what will happen?Lookin’ good Heinrich. At the rate you are building you’ll be ready for the Fluytschip before long. I really like the overhead photo.
Ron
