HMS Alert 1777 by Danielw

Joined
Sep 9, 2017
Messages
135
Points
133

Well here we are.. my kit arrived safe and sound and in a shorter time than I thought....I have spent every available moment checking it out...WOW!Is this the new face of model ship building?!!!!
So this is the start of my building log as promised...Be aware though, I am treating this project as one would treat a fine single malt whisky...slowly, deliberately and savoring every drop!
Pictures will follow at the appropriate time.
So if you will excuse me I'm off to study and research the cutter...perhaps with a single malt?
 
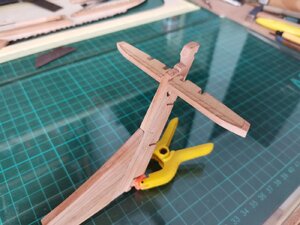
The build has started with the cradle almost complete and the keel, sternpost etc underway... Some lousy photos are attached.. Now for those not yet started their Alert be advised that there are some tight fits as regards tabs and slots.. This I reckon is not from inaccuracy, but from fantastically close tolerances.It is amazing work from Trident..
.The instructions are a bit ropey but hey, don't ask me to translate a technical document into another language...
When looking at the skeleton like cradle one is astonished at the attention to detail in the cradle itself...
20200902_071158[1].jpg20200902_071052[1].jpg
 
Great progress Daniel Very good wood contrast on the stempost. I can see there is no standard in timber selection (mine is a different scheme color). This is awesome it will make all of our builds the same...but different!
 
O.K. I'll blink first...My log will be delayed for a short while... It appears that I have completely ballsed up the stern and the bow...Somehow, probably through my interpretation of the instructions and the drawings , several parts did not or would not fit as expected..I have had to resort to hacking certain portions of the cradle and referring to the plans and the AOTS to make adjustments to allow fitting of various timbers.
The end result will still of course deliver the Alert as the plans indicated.
Has anyone else had a similar experience?
I believe it would be poor form for me to submit a log based on my mis- interpretations at this stage.
Don't get me wrong ..I'm loving this kit and the challenges it brings...When and if my hacking yields positive results I may be inclined to show that part as a "Don't do this " segment.
By the way ,the frames are going together really well and the rest of the construction should be fairly straight foward.
 
Hi Daniel, Creating a build log with warts and all also helps the Alert community pinpoint the potential mistakes so that we can avoid them.
Having said that, we don't want you to ruin your kit either.
If you run into problems and come up with solutions that would be very much appreciated here- especially with such a new kit.
But, you are right- it may be worth while to slow down a bit and take in the other builds and actually ask TridentModel here on the forums for advise and what the other Chinese builders (who have completed the kit) have done in problematic situations.
 
Hi JohnA,
My first consideration is that I did not want to appear to be discrediting Trident Studios possibly because of my blunder. Having said that I have been searching through previous builds trying to see what has happened to them...but the photographic evidence is hard to locate...I have a good supply of quality timber and am not averse to scratchbuilding or remaking a particular component.
I am working towards a solution but am not going publish it until I know if others have had a similar experience in the same area.
 
Hi Brian, I hear what you say, but it seems to revolve around the cradle part C16 C17 and their relationship with Bl30 etc.
I'm not particularly worried about it.. I will just do things a little differently than the instructions.
But I am interested to hear if it's just me...Redface
 
I understand the instructions say to build keel assembly before the Berth. In the light of the issue would you you advice to follow that sequence or doesn't it matter?
 
Hi PoulD,
I have followed Trident's instructions very closely and I recommend other participants do the same..It's just when I get to assembling the stern pieces and in particular the parts using C 16 and 17 as the jig that the fun begins.I would suggest as always that one should dry fit the relevant part and in this case dry fit parts that are adjacent to or part of the next process.
Gee I hope I am explaining this properly... another way of saying it would be
Don't only dry fit the part in question but also dry fit any adjoining part or
parts that will be fitted in subsequent actions.
Cheers, Danielw
 
Hi Daniel are you talking tolerances or height issues. The MDF pieces are all tight, but if you remove the Char the fit is snug. Does the keel fit flat to the bottom of the cradle. Mine sits nicely, but is not competed it yet. 1-2 days away. I'll let you know very shortly.

Poul, it does not matter what order parts are done, Ribs, Keel or Birth as long as they are followed numerically in the kit. I am working with Trident to improve the instructions as they can be a lttile hard to read in the current state. Bit like any Chinese / English produced manual. You have to learn how to read it.
 
@PoulD The building jig or the Berth is an independent assembly and can be assembled in any order but following an instruction manual. There are specific parts (berth column) that need to pay attention to. Everything else should be built in order, following the instruction manual. The entire keel assembly went well without surprises. It does require some sanding to fit the jig snug. However,...when I move to frames (ribs)...I've discovered... Did I said frames???? ;)
 
Hi Paulv,
Yeah, the cradle is quite a tight fit but it does fit after a bit of sanding of the char..Keel went together quite ok .I'm referring to the stern post and part bl30 and surrounding parts.
Yes, Jimsky I did say frames..Please forgive this transgression.. ;) BTW the ribs are going together quite well.
Cheers Danielw
 
Hello, Dan!! Nothing to forgive bro, I was talking about the frames I move to assemble. LOL
 
HI hi Daniel

Video coming in a few hours ( Got ta wait ill it dries), maybe it will help

Did you sand both sides, its opposite rear edge underneath and leading on top ( two stickers opposing edges ),look at lower birth holder slots. The instructions are not great, but you problem got me to look closer.
 
Last edited:
Back
Top