-

Win a Free Custom Engraved Brass Coin!!!
As a way to introduce our brass coins to the community, we will raffle off a free coin during the month of August. Follow link ABOVE for instructions for entering.
-

PRE-ORDER SHIPS IN SCALE TODAY!
The beloved Ships in Scale Magazine is back and charting a new course for 2026!
Discover new skills, new techniques, and new inspirations in every issue.
NOTE THAT OUR FIRST ISSUE WILL BE JAN/FEB 2026
- Home
- Forums
- Ships of Scale Group Builds and Projects
- HMS Alert 1777 1:48 PoF Group Build
- HMS Alert 1777 1:48 Group Build Logs
You are using an out of date browser. It may not display this or other websites correctly.
You should upgrade or use an alternative browser.
You should upgrade or use an alternative browser.
HMS ALERT 1777 cutter POF by shota70 [COMPLETED BUILD]
Wonderful work Shota, stay safe in these very troubling times.
- Joined
- Apr 20, 2020
- Messages
- 6,242
- Points
- 738

Having work is not the problem, but keep having work
Welcome in the world of many redo's
thank you very much my dear friend's for your kind words and supportWonderful work Shota, stay safe in these very troubling times.
- Joined
- Apr 20, 2020
- Messages
- 6,242
- Points
- 738

thank you very much my dear friend for your kind words and supportShota, I hope you’re doing well and staying safe my friend. God bless you and your family.
The buoys look very nice.
Dear Shota, I want to compliment you on your build. I am particularly impressed by your rope coils with the guns.Dear Friends
I finished installing the cannon carts about three days ago and only now found a few minutes to share the photos with you Thank you all so much for the support
Despite the difficult days and also to clear my head and reflect peace and normality to our young children, I dedicated several hours to start working on the anchors.
View attachment 398993View attachment 398994View attachment 398995View attachment 398996View attachment 398997View attachment 398998View attachment 398999View attachment 399000View attachment 399001View attachment 399002View attachment 399003View attachment 399004View attachment 399005
View attachment 399006
I don’t want to distract your thread, but I was wondering if you could share the details of how to create such nice rope coils. This is something that I have found difficult to do and other explanations of how to make them have not been easily reproducible.
Also I too hope you and your community in Israel are safe and remain so.
Regards
- Joined
- Apr 20, 2020
- Messages
- 6,242
- Points
- 738

Thank you very much my dear friend for the yuer kind words and what you wrote to meDear Shota, I want to compliment you on your build. I am particularly impressed by your rope coils with the guns.
I don’t want to distract your thread, but I was wondering if you could share the details of how to create such nice rope coils. This is something that I have found difficult to do and other explanations of how to make them have not been easily reproducible.
Also I too hope you and your community in Israel are safe and remain so.
Regards
I promise to do as soon as possible, when I can apply for work again
- Joined
- Apr 20, 2020
- Messages
- 6,242
- Points
- 738

The process for creating the rope coils
First select the Wire/rope of the appropriate scale in my case 0.45 mm .
Ordinary plastic Ac glue diluted with 30% water.
If you noticed in the pictures, the rope loops in the first loops were not of the required quality. After the 3rd time I was able to maintain the right quality and scale.
During the first attempts I reached the required length of the rope from end to end-about 16 cm (about two-thirds were used for anchoring to the ship's hull and rigging to the block), in the lower rear anchoring about 14 cm.
Next step: I wrapped the rope around a needle with a diameter of about 1.8 mm while applying the diluted glue and then circled it like an onion until the required radius of about 0.4 mm was reached and a layer of diluted glue was applied to both circles of the rope. The pictures in posts 1311, 1325 and 1333 will be able to help. I tried to reach a rope circle that varied between 0.65 mm and no more than 0.8 mm. This is a lot of delicate manual work that requires patience. I hope I gave a satisfactory answer to your question
Good luck friend
- Joined
- Apr 20, 2020
- Messages
- 6,242
- Points
- 738

hope that the details above are helpfulDear Shota, I want to compliment you on your build. I am particularly impressed by your rope coils with the guns.
I don’t want to distract your thread, but I was wondering if you could share the details of how to create such nice rope coils. This is something that I have found difficult to do and other explanations of how to make them have not been easily reproducible.
Also I too hope you and your community in Israel are safe and remain so.
Regards
- Joined
- Apr 20, 2020
- Messages
- 6,242
- Points
- 738

Hello dear friendsHallo my friend,
In principle a good solution and is looking good.
Unfortunately you made a small mistake with the ropes
When you take a close look at the red arrows painted at the sketch Paul alias @dockattner posted
View attachment 400960
The "green" rope is laying under the blue rope - with this way it is fixed and can not move so much
On your buoy I marked the wrong area with red arrow - they are above - the green arrow part is correct
View attachment 400959
Sorry to mention this detail
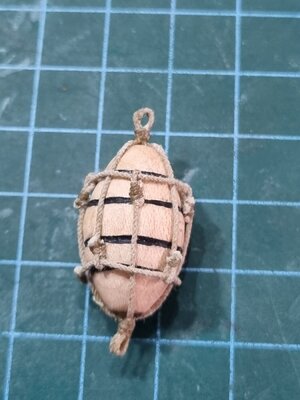
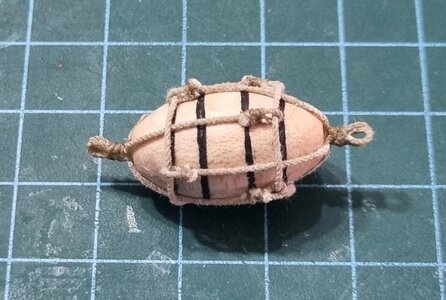
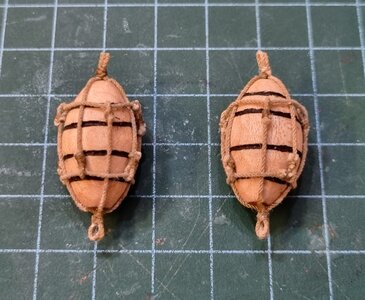
Today I focused on the ropes of the floats, correcting the mistake I made in the way of arranging and interweaving the rope network that wraps the floats.
I admit that was a little challenging for me, because of the tying/braiding work in tiny sizes. Don't worry, with patient and persistent work, I was able to learn the professional/ authentic standard.
I would like to share a little tip for dealing with the The open ends created when cutting the ropes.
To date I have used diluted plastic glue or liquid epoxy, but this has not always worked satisfactorily.
So today I came up with an idea that many soom of you are probably already applying. I dip about 0.5 cm of the rope in hot wax from a candle and gently soak it into the rope .
After the wax hardens, I cut the rope with a scalpel in the center of the area with the wax . if is necessary, I add another drop to strengthen the edges. The truth is that it works great.
I wish you all a good and blessed week
- Joined
- Apr 20, 2020
- Messages
- 6,242
- Points
- 738

good evening dear friends
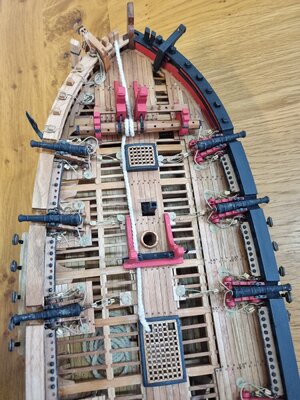
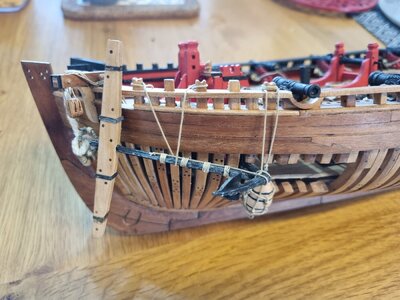
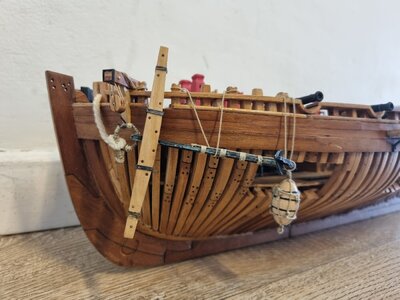
I am happy to update that the first anchor is almost completely installed in the ship.
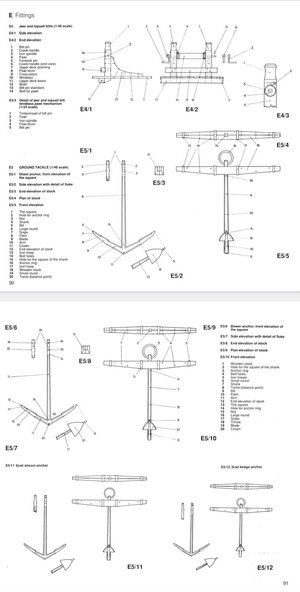
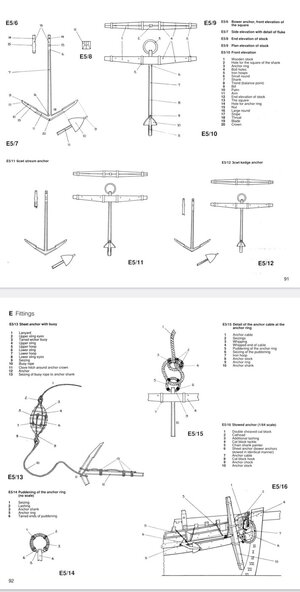
During the construction and installation process I used the drawings and information of the kit as well as the book about the ship. the main steps since the last update yesterday:
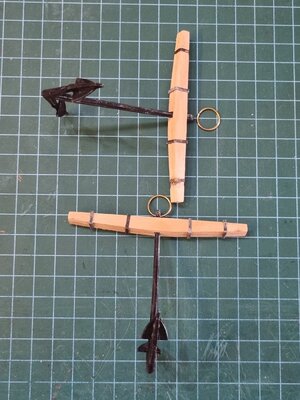
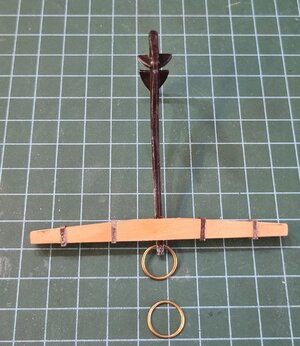
I found two brass rings of the diameter and scale required for making the ring.
ring.
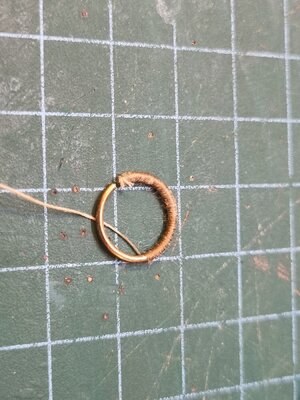
I wrapped a thin rope around the rings with the help of diluted plastic glue and, if necessary, liquid epoxy to produce the puddeing of the anchor ring.
Then I wrapped 4 sections of slightly thicker rope over it to create Seizing of the pudding.
next, I started preparing the anchor cable which was inserted into the anchor ring. If you look at the drawings of the anchor, you will see that here, too, tying and wrapping around the ring must be done in a unique way. I tried to get closer to the required and authentic result.
In the next step, I approached the creation of the connection between the buoy and the anchor, which requires individual tying of a thick rope to the central pole/column of the anchor. In the drawing, only 3 bindings appear, but I chose to make 4 of them because it seems more appropriate to me.
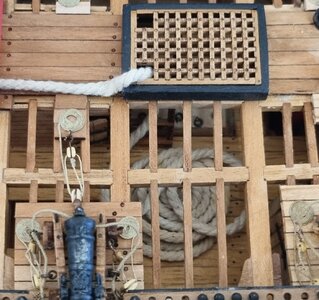
Then I install the anchor on all the parts accompanying it to the ship's hull, along the upper deck to the lower deck. The kit provides us with a white rope, but since it seems less appropriate to me, I added a shade of light brown to it that approaches the shade of the ship's deck. I did it with the oil that I used for the wood parts. I installed the block I made about a month ago that holds the anchor ring and other rope ties.
I tried to explain the process as possible I can , now I will let the pictures express the process. As I said at the beginning it is not fully installed yet, I am in the last line and after that I will install the second anchor
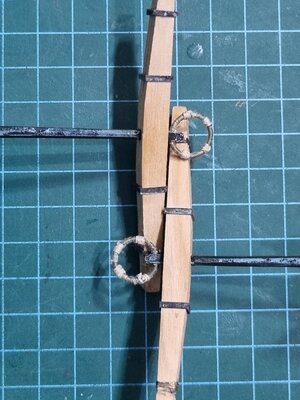
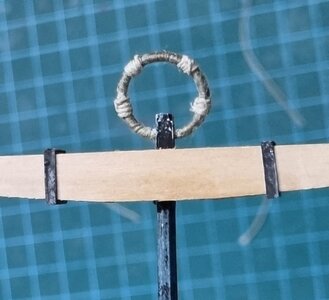
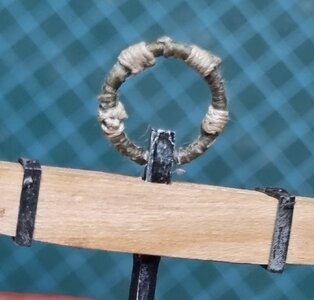
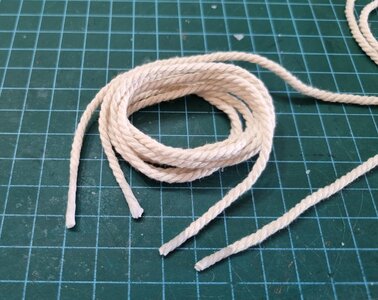
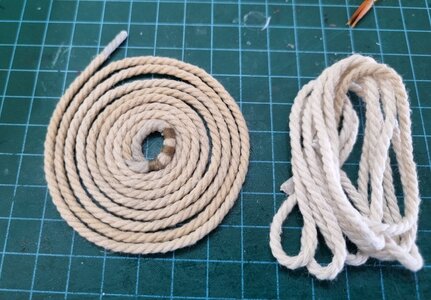
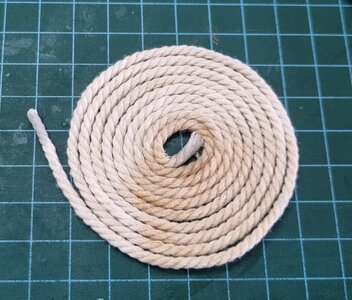
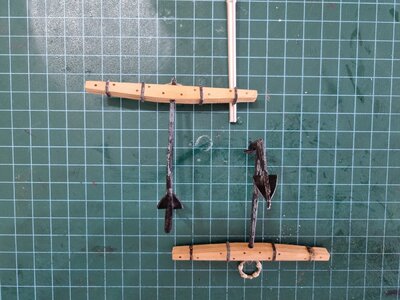
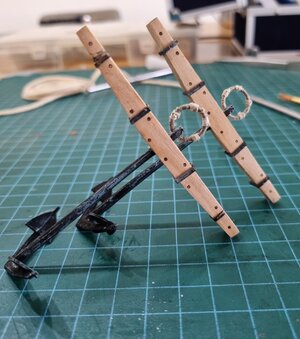
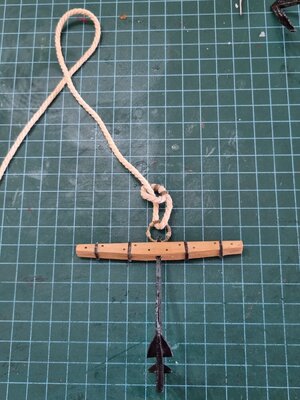
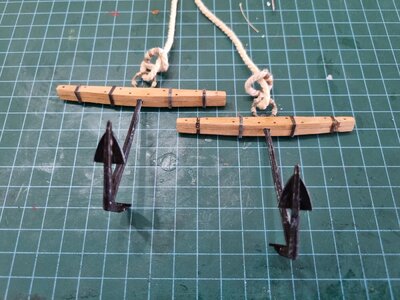
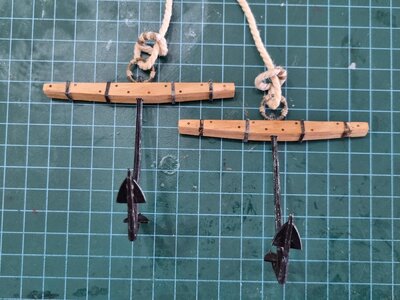
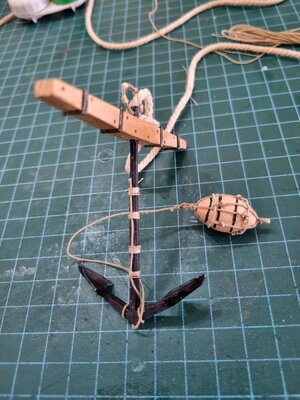
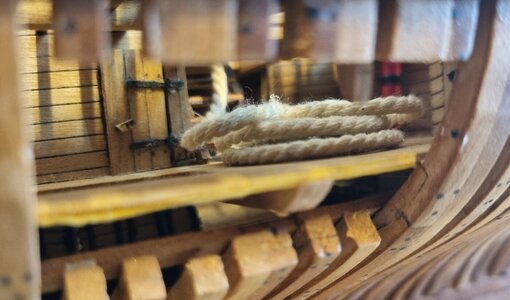
I am happy to update that the first anchor is almost completely installed in the ship.
During the construction and installation process I used the drawings and information of the kit as well as the book about the ship. the main steps since the last update yesterday:
I found two brass rings of the diameter and scale required for making the
 ring.
ring. I wrapped a thin rope around the rings with the help of diluted plastic glue and, if necessary, liquid epoxy to produce the puddeing of the anchor ring.
Then I wrapped 4 sections of slightly thicker rope over it to create Seizing of the pudding.
next, I started preparing the anchor cable which was inserted into the anchor ring. If you look at the drawings of the anchor, you will see that here, too, tying and wrapping around the ring must be done in a unique way. I tried to get closer to the required and authentic result.
In the next step, I approached the creation of the connection between the buoy and the anchor, which requires individual tying of a thick rope to the central pole/column of the anchor. In the drawing, only 3 bindings appear, but I chose to make 4 of them because it seems more appropriate to me.
Then I install the anchor on all the parts accompanying it to the ship's hull, along the upper deck to the lower deck. The kit provides us with a white rope, but since it seems less appropriate to me, I added a shade of light brown to it that approaches the shade of the ship's deck. I did it with the oil that I used for the wood parts. I installed the block I made about a month ago that holds the anchor ring and other rope ties.
I tried to explain the process as possible I can , now I will let the pictures express the process. As I said at the beginning it is not fully installed yet, I am in the last line and after that I will install the second anchor


- Joined
- Oct 9, 2020
- Messages
- 2,230
- Points
- 488

very detailed model. looking great!
It is nice to see the below deck anchor rope like that.good evening dear friends
I am happy to update that the first anchor is almost completely installed in the ship.
During the construction and installation process I used the drawings and information of the kit as well as the book about the ship. the main steps since the last update yesterday:
I found two brass rings of the diameter and scale required for making thering.
I wrapped a thin rope around the rings with the help of diluted plastic glue and, if necessary, liquid epoxy to produce the puddeing of the anchor ring.
Then I wrapped 4 sections of slightly thicker rope over it to create Seizing of the pudding.
next, I started preparing the anchor cable which was inserted into the anchor ring. If you look at the drawings of the anchor, you will see that here, too, tying and wrapping around the ring must be done in a unique way. I tried to get closer to the required and authentic result.
In the next step, I approached the creation of the connection between the buoy and the anchor, which requires individual tying of a thick rope to the central pole/column of the anchor. In the drawing, only 3 bindings appear, but I chose to make 4 of them because it seems more appropriate to me.
Then I install the anchor on all the parts accompanying it to the ship's hull, along the upper deck to the lower deck. The kit provides us with a white rope, but since it seems less appropriate to me, I added a shade of light brown to it that approaches the shade of the ship's deck. I did it with the oil that I used for the wood parts. I installed the block I made about a month ago that holds the anchor ring and other rope ties.
I tried to explain the process as possible I can , now I will let the pictures express the process. As I said at the beginning it is not fully installed yet, I am in the last line and after that I will install the second anchor
View attachment 401965
View attachment 401966
View attachment 401967
View attachment 401968
View attachment 401969
View attachment 401970
View attachment 401971
View attachment 401972
View attachment 401973
View attachment 401974
View attachment 401975
View attachment 401976
View attachment 401977
View attachment 401978
View attachment 401979
View attachment 401980
View attachment 401981
View attachment 401982
View attachment 401983
View attachment 401984
View attachment 401985
View attachment 401986
Looking good my friend. 
- Joined
- Apr 20, 2020
- Messages
- 6,242
- Points
- 738

very detailed model. looking great!
It is nice to see the below deck anchor rope like that.
thank you very much for your support and kind words my friendsLooking good my friend.
- Joined
- Apr 20, 2020
- Messages
- 6,242
- Points
- 738

thank you very much my dear friend for your kind words and complimenA feast for the eye. Nice work on the ring
A nice combination of different kinds of rope work, Shota. With nice pictures to show al the aspect of the anchor and ad-on’s.good evening dear friends
I am happy to update that the first anchor is almost completely installed in the ship.
During the construction and installation process I used the drawings and information of the kit as well as the book about the ship. the main steps since the last update yesterday:
I found two brass rings of the diameter and scale required for making thering.
I wrapped a thin rope around the rings with the help of diluted plastic glue and, if necessary, liquid epoxy to produce the puddeing of the anchor ring.
Then I wrapped 4 sections of slightly thicker rope over it to create Seizing of the pudding.
next, I started preparing the anchor cable which was inserted into the anchor ring. If you look at the drawings of the anchor, you will see that here, too, tying and wrapping around the ring must be done in a unique way. I tried to get closer to the required and authentic result.
In the next step, I approached the creation of the connection between the buoy and the anchor, which requires individual tying of a thick rope to the central pole/column of the anchor. In the drawing, only 3 bindings appear, but I chose to make 4 of them because it seems more appropriate to me.
Then I install the anchor on all the parts accompanying it to the ship's hull, along the upper deck to the lower deck. The kit provides us with a white rope, but since it seems less appropriate to me, I added a shade of light brown to it that approaches the shade of the ship's deck. I did it with the oil that I used for the wood parts. I installed the block I made about a month ago that holds the anchor ring and other rope ties.
I tried to explain the process as possible I can , now I will let the pictures express the process. As I said at the beginning it is not fully installed yet, I am in the last line and after that I will install the second anchor
View attachment 401965
View attachment 401966
View attachment 401967
View attachment 401968
View attachment 401969
View attachment 401970
View attachment 401971
View attachment 401972
View attachment 401973
View attachment 401974
View attachment 401975
View attachment 401976
View attachment 401977
View attachment 401978
View attachment 401979
View attachment 401980
View attachment 401981
View attachment 401982
View attachment 401983
View attachment 401984
View attachment 401985
View attachment 401986
Regard, Peter
Good evening Shota. Lovely post. All the details are very accurate. I love the way your anchor rope coils below the deck - impressive. Cheers Grantgood evening dear friends
I am happy to update that the first anchor is almost completely installed in the ship.
During the construction and installation process I used the drawings and information of the kit as well as the book about the ship. the main steps since the last update yesterday:
I found two brass rings of the diameter and scale required for making thering.
I wrapped a thin rope around the rings with the help of diluted plastic glue and, if necessary, liquid epoxy to produce the puddeing of the anchor ring.
Then I wrapped 4 sections of slightly thicker rope over it to create Seizing of the pudding.
next, I started preparing the anchor cable which was inserted into the anchor ring. If you look at the drawings of the anchor, you will see that here, too, tying and wrapping around the ring must be done in a unique way. I tried to get closer to the required and authentic result.
In the next step, I approached the creation of the connection between the buoy and the anchor, which requires individual tying of a thick rope to the central pole/column of the anchor. In the drawing, only 3 bindings appear, but I chose to make 4 of them because it seems more appropriate to me.
Then I install the anchor on all the parts accompanying it to the ship's hull, along the upper deck to the lower deck. The kit provides us with a white rope, but since it seems less appropriate to me, I added a shade of light brown to it that approaches the shade of the ship's deck. I did it with the oil that I used for the wood parts. I installed the block I made about a month ago that holds the anchor ring and other rope ties.
I tried to explain the process as possible I can , now I will let the pictures express the process. As I said at the beginning it is not fully installed yet, I am in the last line and after that I will install the second anchor
View attachment 401965
View attachment 401966
View attachment 401967
View attachment 401968
View attachment 401969
View attachment 401970
View attachment 401971
View attachment 401972
View attachment 401973
View attachment 401974
View attachment 401975
View attachment 401976
View attachment 401977
View attachment 401978
View attachment 401979
View attachment 401980
View attachment 401981
View attachment 401982
View attachment 401983
View attachment 401984
View attachment 401985
View attachment 401986


