- Joined
- Jan 10, 2022
- Messages
- 860
- Points
- 403

Thank you Jimsky. I appreciate the thought.Thank you, Keef. Your honest opinion is very valuable to our members. Thanks again for your feedback, and happy modeling.
 |
As a way to introduce our brass coins to the community, we will raffle off a free coin during the month of August. Follow link ABOVE for instructions for entering. |
 |
 |
The beloved Ships in Scale Magazine is back and charting a new course for 2026! Discover new skills, new techniques, and new inspirations in every issue. NOTE THAT OUR FIRST ISSUE WILL BE JAN/FEB 2026 |
 |

Thank you Jimsky. I appreciate the thought.Thank you, Keef. Your honest opinion is very valuable to our members. Thanks again for your feedback, and happy modeling.


Thank you very much Henk. It will great to have you on boardJust discovered and read your logbook
Nice work Keef, the frames look nice and clean and a and a great POF kit
There is still a lot to learn for me too
Keep posting your pictures, a pleasure to watch
I will follow you
Regards
Henk

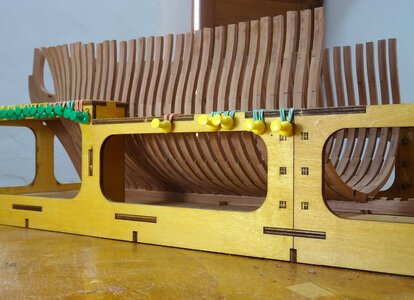
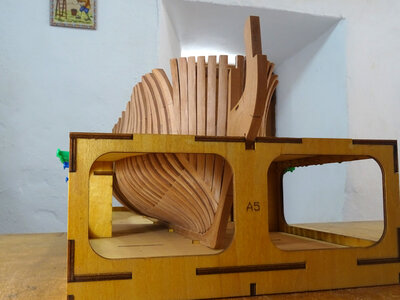
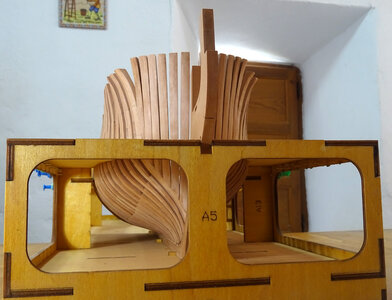
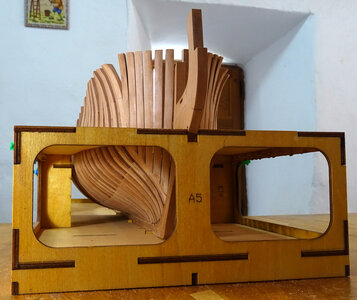
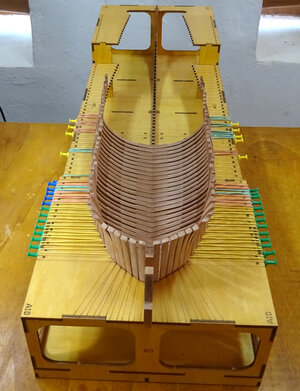
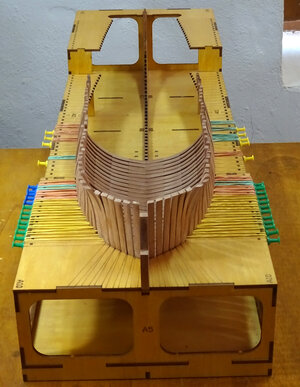
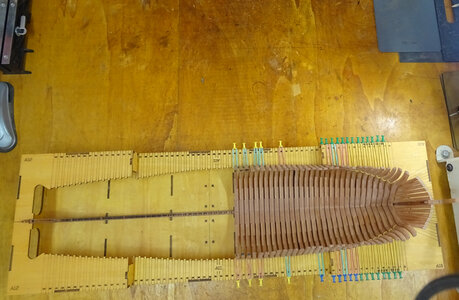
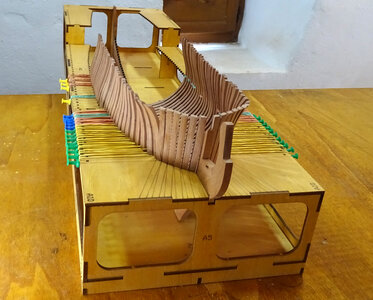
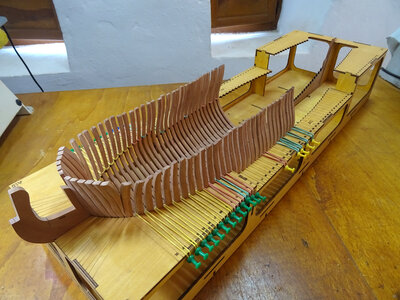
Looking very good - you are producing a very nice ships-hull my friend!l realised this with the first frame l made (No. 15) and l am not very happy with it as it stands a bit proud of all the others. With the exception of 1 other which stands out slightly from the others, they all seem to fit nicely and form a good shape


Thanks Kurt. l'll give that a goWell as you said the errors were on first frame built, you have learned to correct the errors very well based on look of all the others you have since completed.
If not to late to replace it, you might contact the manufacture and ask for a replacement set of frame parts for a new try at the bad frame.
Thank you for your comments Uwe. The hull frames will be straighten up with spacers placed between every one when they are all completed and trimmed to their correct heights against the drawing. Yes l did see your comment about spacers in the hawse pieces. There is not mention of them in the diagrams of the instruction sheet, nor in the 'Anatomy of the Ship' of the Blandford, so l emailed Victor at Modelship Dockyard and he replied that they are not necessary but l could put them in if l wanted. lt is a matter of preference. The pieces are stable, so l will leave things as they are but thanks for bringing it upLooking very good - you are producing a very nice ships-hull my friend!
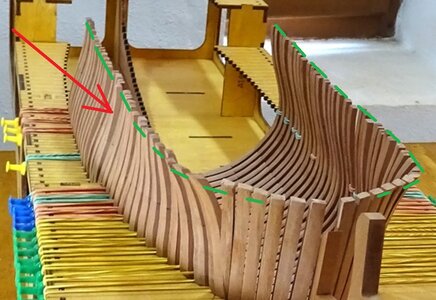
No.15 is this one, or (red arrow)?
View attachment 313774
Yes, this is the necessary learning curve.....
but I think it will be not a very big deal. The frames are long enough and flexibel, so I am pretty sure, that you can relatively easy bend the top of the frame 15 parallel with the others. I guess you have to fix all ends of the top timbers temporarely with a strip (green line) before you are able to make the internal sanding inside the hull.
BTW: Did you read my last question in post #84?


When one sees the frames coming together in a POF-build, there's only one option left and that is to become hopelessly addicted to this build-type.
Your build, Keef, is no exception to that rule; kudos on a beautifully performed job so far.
And as for deviations from nominal; although most of us strive for perfection, for the mere mortals among us that's an unachievable goal. It's something I have difficulty with, but it's a fact of life.
Fortunately it appears that most models have sufficient build-in robustness to account for at least some deviations.
Looking forward to your next posts.

Thank you very much for your comments. l really appreciate itWhen one sees the frames coming together in a POF-build, there's only one option left and that is to become hopelessly addicted to this build-type.
Your build, Keef, is no exception to that rule; kudos on a beautifully performed job so far.
And as for deviations from nominal; although most of us strive for perfection, for the mere mortals among us that's an unachievable goal. It's something I have difficulty with, but it's a fact of life.
Fortunately it appears that most models have sufficient build-in robustness to account for at least some deviations.
Looking forward to your next posts.

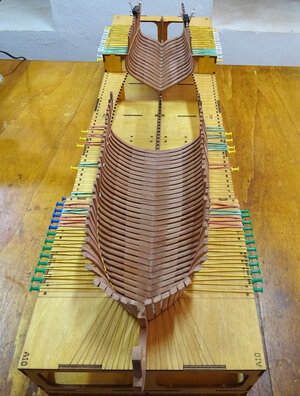
Thank you very much for you interest. l'm really glad you like it. l love the comment about the rubber bandsI too just discovered this great log. She's coming along beautifully!
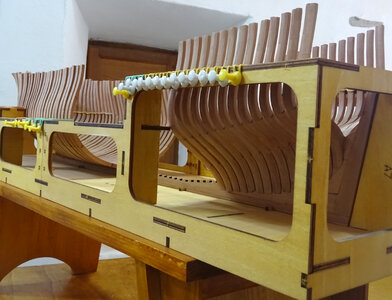
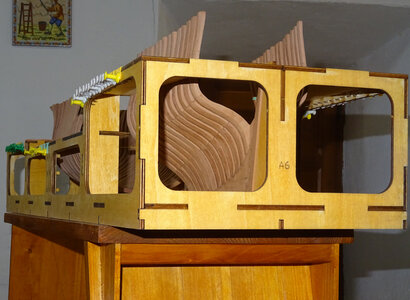
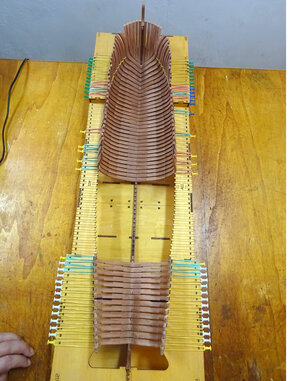
The fact you oiled the jig, the color it gave it and the contrast between the frames and jig are very pleasing to my eye. Even the patterns made by the rubber bands is cool.
Glenn

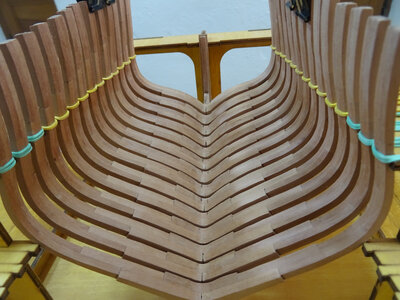
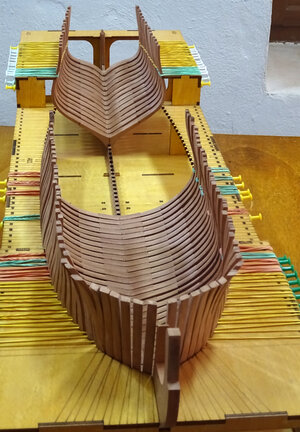
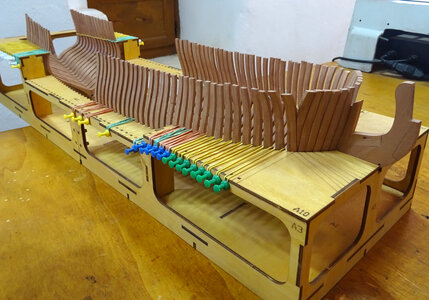
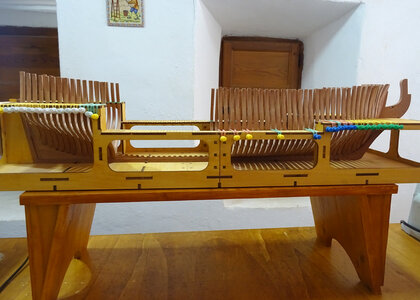
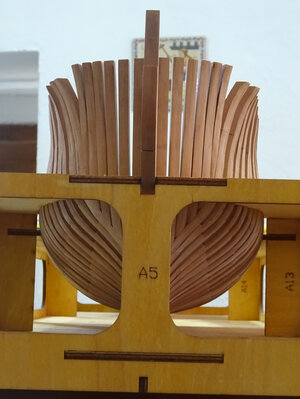
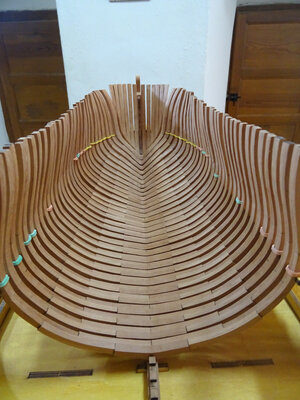
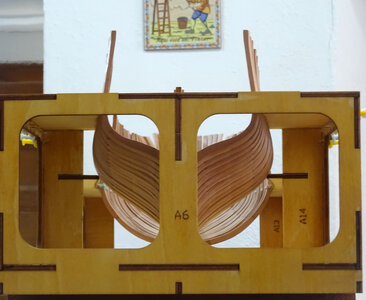
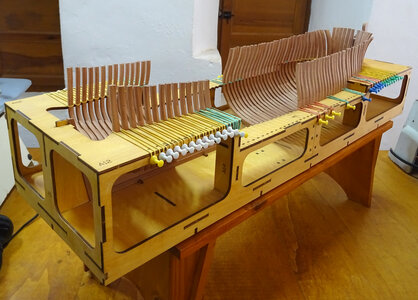

Thanks a lot Paul. Glad you like itReally beautiful work!

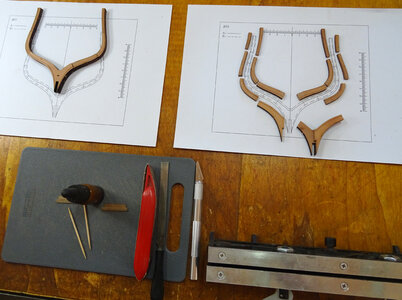
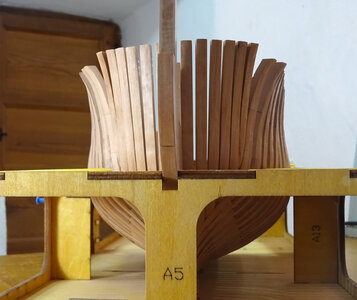
Those plank-on-frame kits are something else entirely.Hi everybody. I've been working on the stern cant frames and now they are finished l will enter some photos into my log. This is a very enjoyable experience for me. The kit is a joy to work with and l am very pleased with the result so far. None of these frames are actually glued yet, just dry fitted. l will do this next, apart from the last frame (No. 63) as this one will have the pieces for the transom attached when the hull frames are complete and taken out of the cradle for their final clean up. l have made the transom pieces but think they would be better fitted outside the cradle as the space is a bit limited.
View attachment 316318
View attachment 316319
View attachment 316320
View attachment 316322
View attachment 316323
View attachment 316324
View attachment 316325
View attachment 316326
View attachment 316327
View attachment 316328
View attachment 316329
View attachment 316330
View attachment 316331
View attachment 316332

it's simply a pleasure to follow your workHi everybody. I've been working on the stern cant frames and now they are finished l will enter some photos into my log. This is a very enjoyable experience for me. The kit is a joy to work with and l am very pleased with the result so far. None of these frames are actually glued yet, just dry fitted. l will do this next, apart from the last frame (No. 63) as this one will have the pieces for the transom attached when the hull frames are complete and taken out of the cradle for their final clean up. l have made the transom pieces but think they would be better fitted outside the cradle as the space is a bit limited.
View attachment 316318
View attachment 316319
View attachment 316320
View attachment 316322
View attachment 316323
View attachment 316324
View attachment 316325
View attachment 316326
View attachment 316327
View attachment 316328
View attachment 316329
View attachment 316330
View attachment 316331
View attachment 316332

