HMS Druid P.O.F. - Unicorn Models by Donnie [COMPLETED BUILD]

But isn’t planking a POF model more pleasant? Kind of takes some of the reluctance away. ;)
I think, it is the same and I have to agree with Donnie. It doesn't matter for the most part whether it is a POB or POF you have to 'fair' either frames or bulkheads before laying down planking. However, the make of the frames assumes you will assemble the frame with minimum tolerance for further processing, while the POB is designed for a double-plank hull and have more material to tolerate for the 'fairing' process.

But...isn't it the POF designed for the open frames, without planking (most times) :p
Good point Jimsky... POF models usually have a large portion of the hull unplanked, at least on one side, and sometimes both. ;)
From my limited experience with POF, I realized that the frames give you more area to glue planks, and a more precise hull shape if faired properly.
A POB ship has far more space between the bulkheads, and therefore the planks have a lot more averaging to do in the open areas, and the planks have more opportunity to have flats due to not curving in the open areas because they have no support or guidance. For example, My POB Cazador had 11 bulkheads, and the POF Bluenose had 55 frames! That is 5x as much averaging for the hull shape. Of course you can use filler blocks for the POB to eliminate this issue! :)
You are correct, my friend. the distance between frames in POF and bulkheads in POB plays a very important part in lying hull planks. But...with actual frames, as opposite to bulkheads, if the adjacent frames will not be inline (either way), fairing those frames may lead to a catastrophe: the frames become very thin and even lose the geometry.
For POBm specifically, when double-plank is used, the first layer can be used as the base. You can correct (add\remove) material to shape the perfect base for the final planking. It is suggested to lay down the first layer planking as the only one to archive the best results. In double-plank construction the filler blocks are optional. They would mostly benefit as reinforcement for a very long model.
 
all of you are correct - and thank you for the input. I am only planking from the Wales and upward to the Rails. I think that when scratch building, there is more freedom and control about how the Frames have a smoother transition from one to the next will very minimum fairing.

I witnessed this with a friend neighbor building the Le Fureon and his hull needed very little fairing because the transition from one frame to the next was incredible. The only major fairing that was done was on the bow and stern, but even then, these pieces were pre-sanded to shape before he installed them.
My assessment from any kit is that in my humble opinion, it is nearly impossible for any 2D drawing to represent a 3D curvature. Unless you have many views given to you. Most plans unless you purchase a monograph are going to do this for you. Back to my friends Le Freuron, His monograph came with 26 sheets of highly detailed plans and a book that was about 200 pages.

I am not complaining - however, I am just pointing out that 'several' frames did not seem to be CNC corrected according to the NUMBER they were assigned to.
For instance, lets say that from Frame 20 to Frame 22 --- well Frame 21 was somewhat wider and did not flow with the shape as the ones preceding and following.
So, I tried to move Frame 21 before and after and other combinations and still could not get the frames to do right. This was on several areas of the hull.
I can only say that perhaps a revisit to these trouble areas from the manufacture could improve. But it is probably not worth the trouble to do so. So, I did the best I could.

However, let me say that most ALL of the Frame fairing problems were from the INSIDE of the hull and not the outside. The outside was ok for the most part.
 
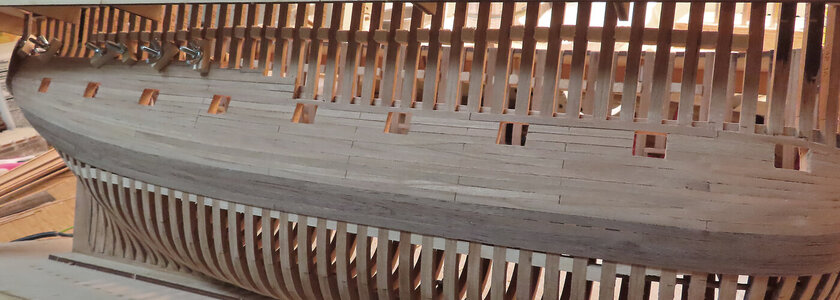
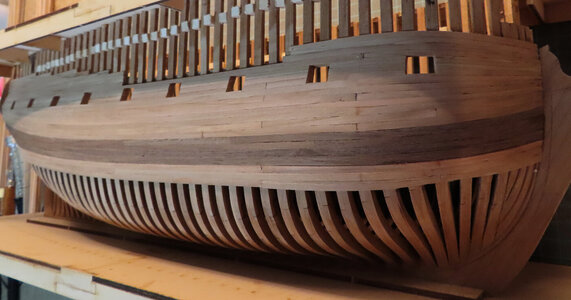
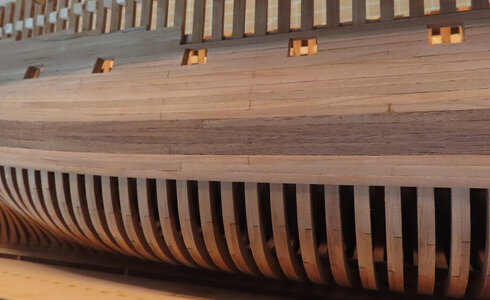
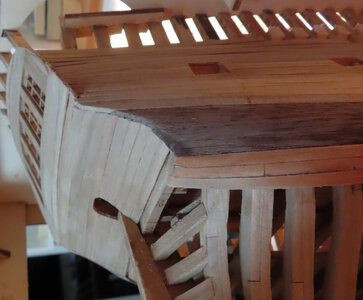
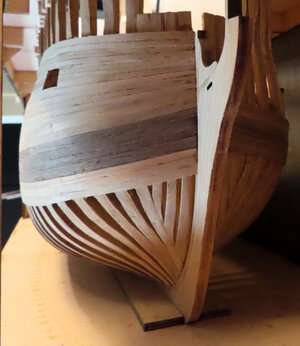
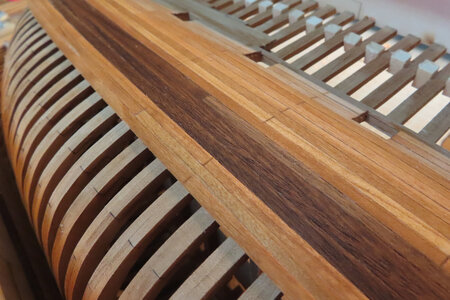
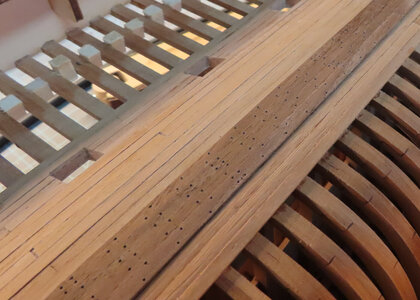
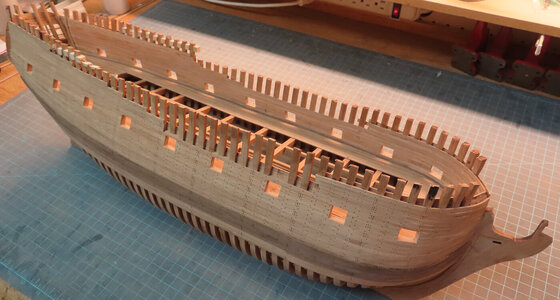
Finally got 90% of hull planking done. Now, I am going to work on the Wales. It will have another thin layer added to it. I also did a 'water test' to simulate natural stain. (last photo is water test)
I am not exactly happy about the hull butt joint configuration, but it will have to do.


hull-planking-10.jpg


hull-planking-11.jpg


hull-planking-12.jpg

hull-planking-13.jpg


hull-planking-09.jpg


'Water test' for a natural stain effect.

hull-planking-14.jpg
 
Thank you Paul - I found out that the camera does not lie - actually, I see things that I never noticed before until I looked at the pics -- LOL.
 
Finally got 90% of hull planking done. Now, I am going to work on the Wales. It will have another thin layer added to it. I also did a 'water test' to simulate natural stain. (last photo is water test)
I am not exactly happy about the hull butt joint configuration, but it will have to do.


View attachment 251833


View attachment 251834


View attachment 251835

View attachment 251836


View attachment 251837


'Water test' for a natural stain effect.

View attachment 251838
Looks great Donnie!
On the hull plank butt stagger, I assume you know it’s typically 3 planks between the butt before repeating again on that bulkhead.
If you use the water test, it raises the grain on the wood, and I would recommend a light sanding prior to any finish.
Hope i am not being rhetorical, but just in case you don’t know. ;)
 
Dean,
Yes, I messed up. I don’t know what I was thinking at the time. When I realized that I had the wrong stagger pattern, it was too late and I did not feel like redoing. I remember being overly concerned about having just enough planking strips as the bundle really look inadequate.
the planking strips should have been 650 mm long so that a single strip would reach from bow to stern. It would have been more relaxing to figure the layout of the butts. But w the strips only bring 500 mm, and having the better butt layout, it was going to cause me to have to cut up more strips than what came in box. The point is there were several factors playing in my mind at the moment, plus having a sense of confusion at that time made it worse. Lol.
well, there is alway the next model I guess.
Maybe treenailing the hull will divert the butt stagger problem unless I mess up the treenailing too !!!
 
Hi Henk,
the water test only simulates what a Natural wood stain would look like. I just take a damp paper towel and rub across the planking, then in about 5 min, the water has evaporated and all is back to normal.
 
thanks for all the advice, etc. At this point, the grain being risen or whatever is not my sole purpose. It is only to darken the wood to see if I want to stain it or not. Going back to sand before I add the stain or an oil is something that I would do anyways. At this point, I am probably leaning towards no stain, but all natural.
 
I REALIZED LAST NIGHT THAT I MADE A TERRIBLE OMISSION AND MISTAKE.

EDIT: IF YOU ARE FOLLOWING THIS LOG, YOU WILL SEE THAT I INSTALLED THE OLDER VERSION OF DECK #1 AND DID NOT INSTALL THE BONUS DECK THAT CAME WITH THE KIT. PLEASE TAKE TIME TO INVESTIGATE YOUR DECK #1 OPTION. MY KIT CAME WITH A MORE DETAILED DECK #1 WHICH HAS MORE CARLINGS AND MORE DETAIL. IT IS UNFORTUNATE THAT I FORGOT TO UNPACKAGE THAT OPTIONAL DECK. AT THIS TIME IT WOULD BE BEST TO INSTALL THE OPTION #2 THAT CAME WITH THE KIT --- IT IS CALLED THE BONUS DECK.

I FORGOT ABOUT THE DECK #1 BONUS THAT CAME WITH KIT. AGAIN, I HATE THAT THE DECK NUMBERING STARTS WITH DECK 0. THIS IS SO MISLEADING. WHEN I FIRST GOT THE KIT AND SAW THE BONUS DECK #1 --- IT JUST DID NOT MAKE SENSE AND THE DECK WAS LABELED AS DECK #1 WHICH IS THE SECOND LEVEL. IF THEY HAD LABELED THE DECK AS 1, 2, AND 3 --- , THEY THE LABELED THE DECK AS 0, 1, AND 2 WHICH HAS BEEN A THORN IN THE FLESH AS I KEEP FOLLOWING BY HABIT 1,2, AND 3.

The pictures of the NEW BONUS DECK only show from the top view and it is also misleading. The deck LOOKS like it is installed at the very TOP and the photos are not clear at all. They should have taken pictures of the BONUS DECK from an angle level with the ship and it would have been very clear what level this is. However, the common sense of shipbuilding should have taken over, however, at the time, I just put the DECK OPTION which was separately packaged away - so in all regards, it is totally my fault for NOT paying attention. I was so caught up in going through the manual that I completely forgot about the new BONUS DECK.

I am NOT going to pull out all of Deck #1 just to install the new BONUS Deck - just too much work and A LOT of deck planking has been used and installed. I have to just carry on.

This is a major discouragement for me, but I must just go on and finish this kit. It seems as if I have been plagued by one thing after the other and this build has not had a good "flow" of a building progress, but sorting out problem after problem ( most of which I do not even mention in my log, but just fix and carry on) :(
 
thanks for all the advice, etc. At this point, the grain being risen or whatever is not my sole purpose. It is only to darken the wood to see if I want to stain it or not. Going back to sand before I add the stain or an oil is something that I would do anyways. At this point, I am probably leaning towards no stain, but all natural.
I know you're an old hand at model building. One other thing to consider: Try your selected finish(es) on a scrap first. Water is clear, but most clear finishes as far as oils are concerned, have a somewhat amber hue. Just a thought.
 
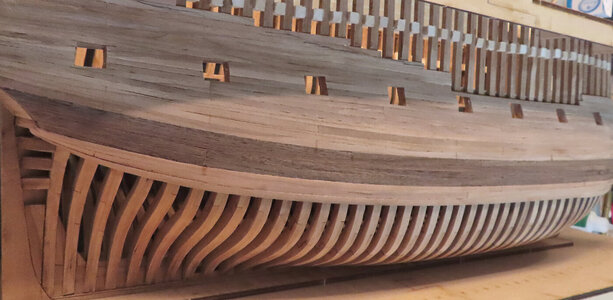
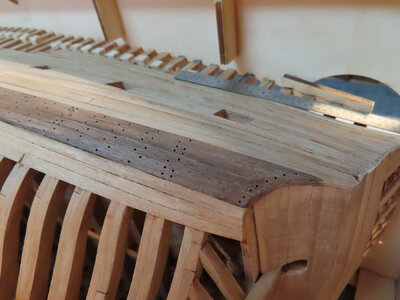
I did not post the planking for the other side as it is just repeating everything. The same goes for treenailing. Here I am only drilling holes. I can not decide to use black nails or pear, so for now, I will leave the holes a little recessed and just go for the 'look' instead of installing treenails.
I have already experimented with both pear nails and toothpicks soaked in India Ink and did not like the look of either one. This is as you know, one of these decisions that once you start you have to finish and to be careful as if you do not like it, then you are either stuck with continuing or removing the plank(s) that you do not like and starting over.

When I do the other side, I can show you my technique of lining up the holes and drilling.

hull-planking-15.jpg


hull-planking-16.jpg
 
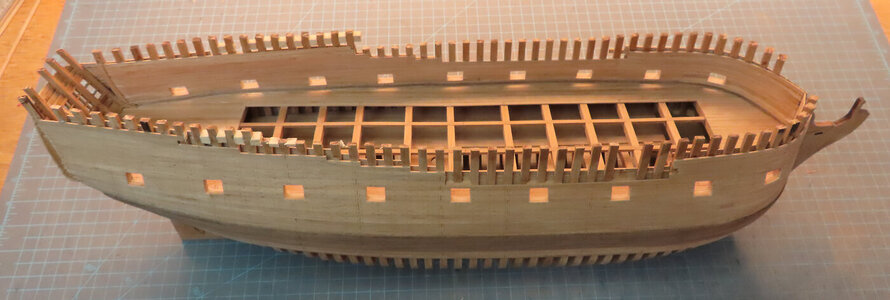
Finally, it is released from the Jig. I see that somehow a frame got broken off near Port #3 Starboard, but either I can find it, or it will be covered up with the cap rails. It is a tiny piece. Then part of the center strut at the stern in the middle where the windows are got broken too. Maybe too much power on the Dremel Tool Saw. But I found the piece for the stern and it is no problem gluing that back on.
Final shaping and removing frame ends will be next. I have a Jig to help form the slope (shape) of the Stern to Mid Ship.

hull-planking-17.jpghull-planking-18.jpg
 
Finally, it is released from the Jig. I see that somehow a frame got broken off near Port #3 Starboard, but either I can find it, or it will be covered up with the cap rails. It is a tiny piece. Then part of the center strut at the stern in the middle where the windows are got broken too. Maybe too much power on the Dremel Tool Saw. But I found the piece for the stern and it is no problem gluing that back on.
Final shaping and removing frame ends will be next. I have a Jig to help form the slope (shape) of the Stern to Mid Ship.

View attachment 256760View attachment 256761
Despite all the setbacks, Donnie, this still looks beautiful. Always nice to see when a hull is free from its jig.
Regards, Peter
 
Last edited:
Back
Top