• LUCZORAMA SHIPWRECK SCAVENGER HUNT GIVEAWAY. 4 Weeks of Fun • 1 Legendary Prize ((OcCre’s Fram Ship)) • Global Crew Welcome!
    **VIEW THREAD HERE**

HMS ENTERPRISE 1774 by RichardJJS 1:48 scale. New Kit from M.D

Useful but is anyone doing it
Hi Richard,

Some builders would not consider this important, others do, but it is your model, so go with what you want. The keel is tapered forward and aft with the dimensions you show above. Keep in mind that if you ignore the actual dimensions of the keel but the knee of the head is properly tapered it will not match up with the boxing joint, and if you taper the stern post properly but not the keel, there will be a shelf on top of the keel at the post.

Your model, your call.

Allan
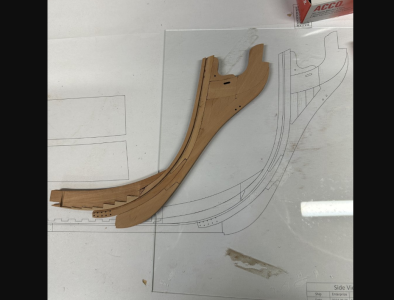
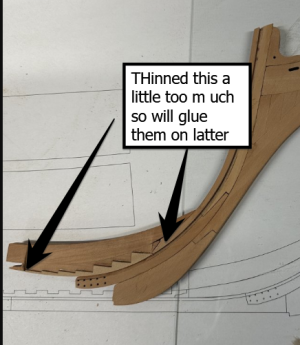
Totally Agree Ive Not tapered the Keel at the bow - still waiting for replacement parts for Knee
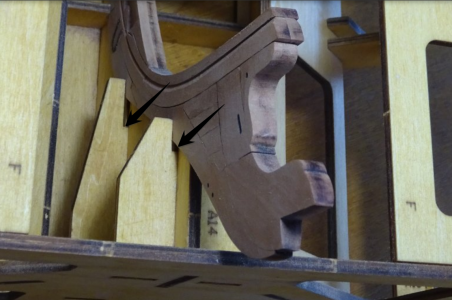
Photo shows Stern Keel where it does have a shelf but told not too worry
Might just taper the stern of the Keel before i finally fix te Ribs
THanks

IMG_20250722_101727[1].jpg
 
Last edited:
Really getting on with the Ribs
By weekend 1 - 17 will be completed (except 15 Waiting for new upper Futtock
Hopefully ive got over the problem of joint snapping - really strange as ive use Titebond Ultimate ! (Always 24 hours before the next stage)
Will drop 15 in to make sure it all fits before building 18 - 37
It is much easier on the middle ribd with little or not much to remove other than the chard (Waiting for the stern ones!!

For those following my build make sure you remove the Black chard on the slot that goes into the keel BEFORE fixing them together
I know my learned colleagues will do that but just a suggestion

Again ive found very thin Tamiya type tape holds the lower section of the front and back frame together while it set allow a little adjusting of the upper frames
 
Last edited:
Not at that stage yet but a iasked Victor about Fillers at the top of the completed Frames and this was his anthis was his answer
Hi Richard,

The fillers should be 1mm and 2mm strips from the laser cut sheets. You can cut them to appropriate length and place them between the frames. They are not like the fully filled type that we had on Blandford.

Kind regards

Victor

I am wondering how far from the top of the frames they would go

My Gut is to where the THe Gun Ports are cut

Any thoughts please as it wil finish the tops of the Futtocks
Lots of help on this but it appears to be about a cube if that makes sense Thanks to Arbon and others
 
First Fix of the First 30 Ribs
All Fitting Nicely Occasional snapping of a Futtock Still sorting earlier problems
Ive started using more glue
Black could be Carceagenic
Onward and certainly UPward
 
Hey Richard,
Nevertheless, it looks really great. Be careful with the glue, otherwise all the work will be for nothing!

Cheers

Günther Ship-1
 
A couple of questions about this so far
A) It looks like KEEF has a slight gap between the front of the Bow and the Frame (First PIcture) I have similar although the Keel is Exactly placed on the Plan

B) You see he has placed the ODD numbered Cant X frames in first and the na added the Rear EVEN frames ois this what you recommend
AGAIN THANKS

Keffs Gap!.png
 
Bit late now but when i build my first POF model Brandford I put the sheets for the frames in those plastic folders that go in binders had ne real problems

Since ive started using them again iv had very litte problem with the Futtock joints breakin
So If It Aint Broke Dont Fix It
 
Wow, you have passed my point. :)
Yes but ive Not had your problems
I really hope you are much better
I am finding it more difficult to get out to do things and spend more time at the bench
I force myself to do what hurts Ive had two new knees and they are now Knackered so waiting to see specialist
But need to put it off as longs as i can because the pain on recovery is BAD
Everything seems to be fitting ok
But as you said a heat gun can allow moving of antythhing thats not quite right
Thanks to this Forum its given me a lot of help
 
I have heard others once explain the difference between Knowledge and Experience: Knowledge we learn from other research and mistakes, Experience we learn from our own mistakes.

Its like learning what finish works on each stage of building, I know some oils or varnishes seal the wood and prevent CA or PVA from holding well after the fact, so you have to be careful what to use on installed subassemblies.
 
Suddenly got something different
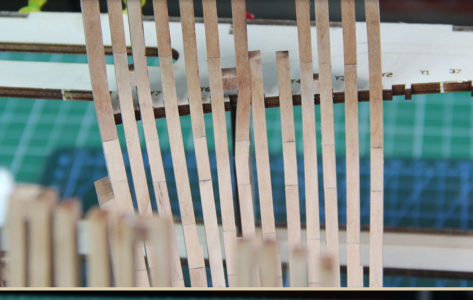
Frame 37 has a cut out marked on the A side of the central Section
Do I turn it over and look at shapping it

Not sure what to do

IMG_20250806_161124[1].jpg
 
Back
Top