Should have been chugging
-

Win a Free Custom Engraved Brass Coin!!!
As a way to introduce our brass coins to the community, we will raffle off a free coin during the month of August. Follow link ABOVE for instructions for entering.
-

PRE-ORDER SHIPS IN SCALE TODAY!
The beloved Ships in Scale Magazine is back and charting a new course for 2026!
Discover new skills, new techniques, and new inspirations in every issue.
NOTE THAT OUR FIRST ISSUE WILL BE JAN/FEB 2026
You are using an out of date browser. It may not display this or other websites correctly.
You should upgrade or use an alternative browser.
You should upgrade or use an alternative browser.
HMS Fly 1:64 - Amati/Victory Models by CaptainsCabin
- Thread starter CaptainsCabin
- Start date
- Watchers 14
-
- Tags
- amati fly victory models
- Joined
- Jun 17, 2021
- Messages
- 134
- Points
- 113

Hi Will, Yes, it is a bit like a snail with an X-ACTO Knife! My next post will be to permanently fit the Cabin Furniture and Cannon Carriages to the Gun Deck, and this will be a culmination of over 10 years work, and I am hoping it will all go as planned! Best wishes, LloydShould have been chugging
- Joined
- Jun 17, 2021
- Messages
- 134
- Points
- 113

PS - thank you for your compliments, it is much appreciated! LloydShould have been chugging
- Joined
- Jun 17, 2021
- Messages
- 134
- Points
- 113

When I started my HMS Fly build, Nick Mott who ran www.hmsfly.com gave me one very good piece of advice; this was to ensure the Cannon Carriages were well secured to the deck, as Nick had one come adrift from under the poop deck! As can be seen in the photograph below, my carriages have all been secured from beneath the deck, so there is no glue to be seen and they are very secure.
When I started my build over 10 years ago, I had the idea of incorporating ‘The Great Cabin’ ‘Stateroom’ and ‘Coach Cabin into my model, but furthermore I wanted to furnish the cabins! This section of my build has brought this idea to fruition, and now all is left is to fit the lights in ‘The Great Cabin’, which will be seen through the windows. This will be covered in my next section.
My notes are attached below - "35 - Hull Planking and Fibre Optics Step 6 of 10"
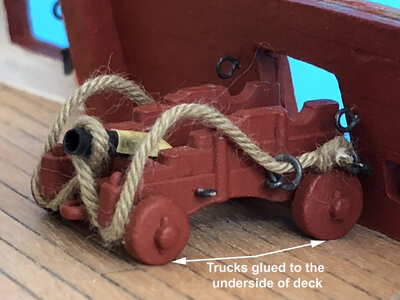
Carriage is fully secured from beneath the deck
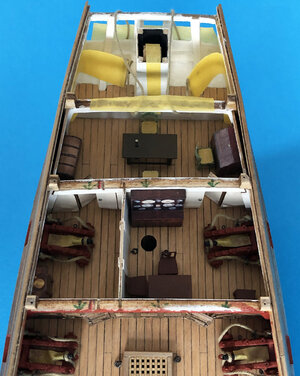
View of the Stateroom, Coach Cabin and The Great Cabin from bow to stern
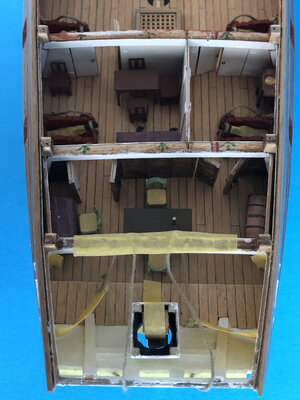
View of The Great Cabin, Stateroom and Coach Cabin from stern to bow
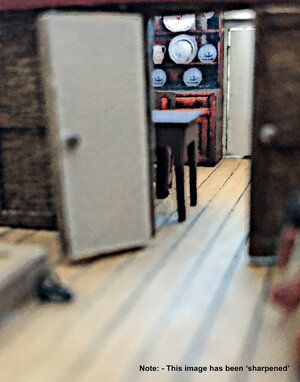
'Glimpse' of the Welsh Dresser through the Coach Cabin door
When I started my build over 10 years ago, I had the idea of incorporating ‘The Great Cabin’ ‘Stateroom’ and ‘Coach Cabin into my model, but furthermore I wanted to furnish the cabins! This section of my build has brought this idea to fruition, and now all is left is to fit the lights in ‘The Great Cabin’, which will be seen through the windows. This will be covered in my next section.
My notes are attached below - "35 - Hull Planking and Fibre Optics Step 6 of 10"

Carriage is fully secured from beneath the deck

View of the Stateroom, Coach Cabin and The Great Cabin from bow to stern

View of The Great Cabin, Stateroom and Coach Cabin from stern to bow

'Glimpse' of the Welsh Dresser through the Coach Cabin door
Attachments
Good to see an update. Love that it looks like the walls are removable during battle excellent representation.
- Joined
- Jun 17, 2021
- Messages
- 134
- Points
- 113

Thanks Will; yes the walls would have been removable for battle, and thank you for noticing this small detail! - LloydGood to see an update. Love that it looks like the walls are removable during battle excellent representation.
Hallo @CaptainsCabinCabin Furniture
In my, HMS Fly build I have incorporated the Great Cabin, Stateroom, and Coach Cabin, and into each of these cabins I have constructed 1:64 scale furniture using acetate film, and a combination of Paint Shop Pro graphic design and origami with a plastic film.
A sharp craft knife and good eyesight are essential and lots of patience. I have made 9 pieces of furniture for the three cabins and this has taken me 2 years, and the irony is they will only really be seen by “God”!
Any member considering a cabin diorama, the techniques I have developed would be ideal, and I would be happy to talk about them with this community.
I have attached a photo of the Table which will be eventually fitted into the Great Cabin, and on it can be seen a three-candle stand. These candles are lit and flicker, and this is done with Fibre Optics; they will be seen through the Great Cabin windows.
The chairs are 1:64 scale replicas of a set owned by Lord Nelson, and this is a good example of how using a graphic design package can give a different perspective to modeling. My wife and I went to see the actual chair at the Royal Maritime Museum Greenwich, London, so the dimensions would be correct.
Whilst the items may look difficult to make, they are in fact relatively easy to construct, but has previously said a lot of patience is required. I think most members have this, and some of the models I have seen on this forum are superb!
Please contact me if further information is required; I have made a Sea Chest and Bureau for the Great Cabin, Sea Cot and Wash Basin for the Stateroom, and a Welsh Dresser, Table, and four Chairs for the Coach Cabin.
we wish you all the BEST and a HAPPY BIRTHDAY

- Joined
- Jun 17, 2021
- Messages
- 134
- Points
- 113

Thank you Uwek! - Lloyd
- Joined
- Jun 17, 2021
- Messages
- 134
- Points
- 113

Thank you! - LloydHAPPY BIRTHDAY
- Joined
- Jun 17, 2021
- Messages
- 134
- Points
- 113

When the Forecastle Bulkhead was constructed in July 2015, it was just assumed it would be glued into position as part of the build. During the intervening years the cabin partitions for the Great Cabin, Stateroom and Coach Cabin have been fitted, so the techniques developed for this part of the build has been applied for fitting the Forecastle Bulkhead. In the photograph shown below, the only glue used was for the centre joint.
The Forecastle Bulkhead doors will still open and close, as shown in the video of the Port Doors opening and closing (click link).
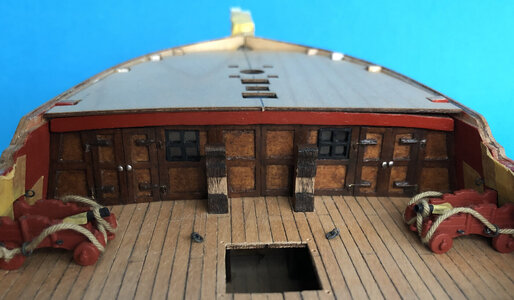
Forecastle Bulkhead fitted into position
The Forecastle Bulkhead doors will still open and close, as shown in the video of the Port Doors opening and closing (click link).

Forecastle Bulkhead fitted into position
Attachments
Last edited:
Good Morning Lloyd and oh yes Happy New Year. The ingenuity with witch you use on this model has never ceased to amaze me during the 5 plus years of following.
- Joined
- Jun 17, 2021
- Messages
- 134
- Points
- 113

Good morning Will,
Yes, a Very Happy and Healthy Chinese New Year, or as my wife would say, "Kung Hei Fat Choi" as the Chinese New Year has just passed.
Thank you for following my build; yes some of the techniques I have used may seem strange, but not ever having built a model like this before, I am learning all the time! My next task is to put in the Fibre Optic Lights into the Great Cabin, and to be honest I have no clear picture of how this is going to be achieved. All I know, it has got to be completed before the hull planking is finished.
As they say Will - WATCH THIS SPACE!
Hope you are keeping well.
Best wishes,
Lloyd
- Joined
- Jun 17, 2021
- Messages
- 134
- Points
- 113

FIBRE OPTIC CABLES
Fitting the Fibre Optic Cables into HMS Fly has been very challenging, and lots of mistakes have been made, which have all been detailed in my attached notes. I hope these notes will be useful to any modeller who is thinking of using them in their model.
What I have written has been split up into 3 parts: -
Part 1 covers preparations for the Hull and Cradle, experimenting with fitting Candle Lanterns and making Door Stops!
Part 2 covers fitting of the Candle Stand / Candelabra, then preparing the Oil Lantern and Candle Lanterns for going into the Great Cabin.
Part 3 covers the fitting of Oil Lantern and Candle Lanterns.
These Guidance Notes do go into a lot of detail, and as much as they have been checked many times, I am sure there are still mistakes waiting to be found, for which I apologise.
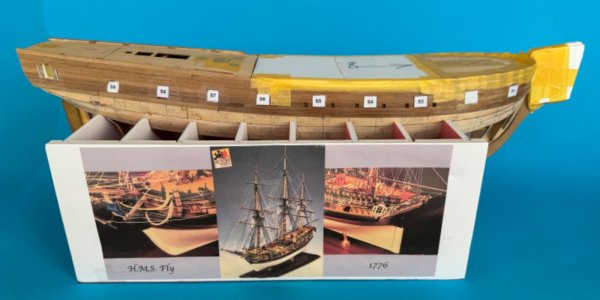
PART 1 (37A)
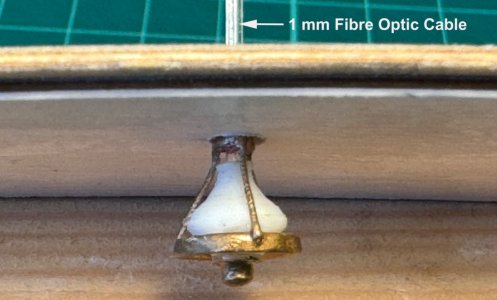
PART 2 (37B)
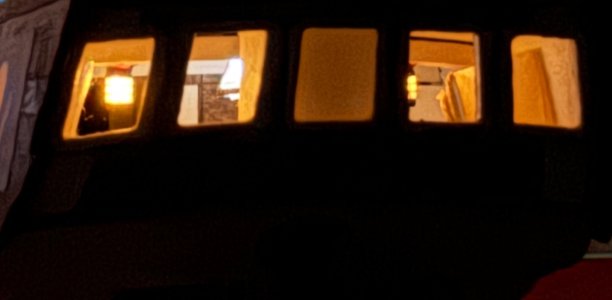
PART 3 (37C)
Fitting the Fibre Optic Cables into HMS Fly has been very challenging, and lots of mistakes have been made, which have all been detailed in my attached notes. I hope these notes will be useful to any modeller who is thinking of using them in their model.
What I have written has been split up into 3 parts: -
Part 1 covers preparations for the Hull and Cradle, experimenting with fitting Candle Lanterns and making Door Stops!
Part 2 covers fitting of the Candle Stand / Candelabra, then preparing the Oil Lantern and Candle Lanterns for going into the Great Cabin.
Part 3 covers the fitting of Oil Lantern and Candle Lanterns.
These Guidance Notes do go into a lot of detail, and as much as they have been checked many times, I am sure there are still mistakes waiting to be found, for which I apologise.

PART 1 (37A)

PART 2 (37B)

PART 3 (37C)


