I continue to be impressed with the quality of your work, Mark. This is just very, very fine modeling!
-

Win a Free Custom Engraved Brass Coin!!!
As a way to introduce our brass coins to the community, we will raffle off a free coin during the month of August. Follow link ABOVE for instructions for entering.
-

PRE-ORDER SHIPS IN SCALE TODAY!
The beloved Ships in Scale Magazine is back and charting a new course for 2026!
Discover new skills, new techniques, and new inspirations in every issue.
NOTE THAT OUR FIRST ISSUE WILL BE JAN/FEB 2026
You are using an out of date browser. It may not display this or other websites correctly.
You should upgrade or use an alternative browser.
You should upgrade or use an alternative browser.
Nice informative post about the use of the deadeyes and chainplates, Mark. They are nicely aligned.Channels, chainplates and deadeyes. The sets of channels are painted dull black and attached to the sheer rails on either side with headless nails and glue. Strips of natural walnut are used to trim each channel edge and effectively seal the openings that will accommodate the deadeyes. The three masts are stepped temporarily and rope threads from the topmasts are used to emulate the shroud lines and determine the angle with which to attach the chainplates to the hull below.
View attachment 420103
Amati provides a very nice set of brass links with which to assemble the chainplates and the upgrade kit also came with improved strops for the deadeyes. Blackening all the brass bits isn't much fun at the best of times but I did at least heed the kit's inspired advice to blacken them in place in the template rather than remove and paint them all individually.
View attachment 420104
The kit-supplied 5mm deadeyes seemed far too big for this assembly and I used 5mm deadeyes that I had purchased from Dry Dock previously instead. These looked a lot better and, interestingly, were a far better fit for the strops supplied in the upgrade kit. The smaller, 3mm deadeyes and strops supplied in the kit were just fine.
View attachment 420105
As mentioned earlier, the Amati's chainplate links are well designed and fit very snugly together. For instance, the ends of the preventer plate and loop link that receive the upper bolt are both recessed to make the connection seamless and flush with the hull. However, care must be taken to position the channels accurately; some of the chainplates came perilously close to gunports, row ports and port lids
View attachment 420106
It is yet to be seen whether the angle of each chainplate will match the eventual angle of the corresponding shroud line. Holding thumbs on that one. All in all, the channel and chainplate installation was a fun exercise. The only issue was making sure that the preventer plate bolts do not interfere with anything inside the hull. Some of the bolts came very, very close to the gun-rigging ring bolts on the hull interior. A miss, however, was as good as a mile
View attachment 420108
Thanks for checking in
Mark
Regards, Peter
An extraordinal well built. A lot better accessories are now available today -not in my time - but expect too, that this will influence the final price. Anyway again an extraordinary buildChannels, chainplates and deadeyes. The sets of channels are painted dull black and attached to the sheer rails on either side with headless nails and glue. Strips of natural walnut are used to trim each channel edge and effectively seal the openings that will accommodate the deadeyes. The three masts are stepped temporarily and rope threads from the topmasts are used to emulate the shroud lines and determine the angle with which to attach the chainplates to the hull below.
View attachment 420103
Amati provides a very nice set of brass links with which to assemble the chainplates and the upgrade kit also came with improved strops for the deadeyes. Blackening all the brass bits isn't much fun at the best of times but I did at least heed the kit's inspired advice to blacken them in place in the template rather than remove and paint them all individually.
View attachment 420104
The kit-supplied 5mm deadeyes seemed far too big for this assembly and I used 5mm deadeyes that I had purchased from Dry Dock previously instead. These looked a lot better and, interestingly, were a far better fit for the strops supplied in the upgrade kit. The smaller, 3mm deadeyes and strops supplied in the kit were just fine.
View attachment 420105
As mentioned earlier, the Amati's chainplate links are well designed and fit very snugly together. For instance, the ends of the preventer plate and loop link that receive the upper bolt are both recessed to make the connection seamless and flush with the hull. However, care must be taken to position the channels accurately; some of the chainplates came perilously close to gunports, row ports and port lids
View attachment 420106
It is yet to be seen whether the angle of each chainplate will match the eventual angle of the corresponding shroud line. Holding thumbs on that one. All in all, the channel and chainplate installation was a fun exercise. The only issue was making sure that the preventer plate bolts do not interfere with anything inside the hull. Some of the bolts came very, very close to the gun-rigging ring bolts on the hull interior. A miss, however, was as good as a mile
View attachment 420108
Thanks for checking in
Mark
very accurate work - Very good
I fully agree.very accurate work - Very good
Mark, every update just further complements all your previous work!The upper quarterdeck rails run the full length of the quarterdeck at a gentle but ever-increasing angle to the capping rails below. They are supported by a host of swivel gun posts and each have a belaying pin-rack installed aft. The drift rail on the hull exterior forms a baseline for all the swivel gun posts, which are in turn notched to accommodate the upper quarterdeck rails. Getting the drift rail positioned properly goes a long way to ensuring the accurate alignment of the upper rails.
View attachment 415411
The swivel guns are blackened and inserted into receiving holes drilled into the top of each swivel gun post. They are only dry fitted at this stage. Sixteen swivel guns adds another sixteen snag-magnet opportunities to the hull, so they will be removed and re-installed in the posts at a later stage.
View attachment 415412
The ship is fitted with enough armoury to fight a battle, if only she could sail! Next up will be the channels, chainplates and deadeyes in preparation for the rigging that is to come.
View attachment 415413
Thanks for checking in
Mark
In my case I did NOT INSTALL the swivelMark, every update just further complements all your previous work!
GUNS- MAYBE A FEW IN SUCH A SMALL SHIP IT IS EASY TO OBDERDO things, WHICH LATER ON WILL TAKE THE BEAUTIFUL BUILT. It is the same with naIls -both Hull and Deck. Overdoing the chalking
Good morning Mark. Wow you are owning this HMS Fly. Cheers GrantChannels, chainplates and deadeyes. The sets of channels are painted dull black and attached to the sheer rails on either side with headless nails and glue. Strips of natural walnut are used to trim each channel edge and effectively seal the openings that will accommodate the deadeyes. The three masts are stepped temporarily and rope threads from the topmasts are used to emulate the shroud lines and determine the angle with which to attach the chainplates to the hull below.
View attachment 420103
Amati provides a very nice set of brass links with which to assemble the chainplates and the upgrade kit also came with improved strops for the deadeyes. Blackening all the brass bits isn't much fun at the best of times but I did at least heed the kit's inspired advice to blacken them in place in the template rather than remove and paint them all individually.
View attachment 420104
The kit-supplied 5mm deadeyes seemed far too big for this assembly and I used 5mm deadeyes that I had purchased from Dry Dock previously instead. These looked a lot better and, interestingly, were a far better fit for the strops supplied in the upgrade kit. The smaller, 3mm deadeyes and strops supplied in the kit were just fine.
View attachment 420105
As mentioned earlier, the Amati's chainplate links are well designed and fit very snugly together. For instance, the ends of the preventer plate and loop link that receive the upper bolt are both recessed to make the connection seamless and flush with the hull. However, care must be taken to position the channels accurately; some of the chainplates came perilously close to gunports, row ports and port lids
View attachment 420106
It is yet to be seen whether the angle of each chainplate will match the eventual angle of the corresponding shroud line. Holding thumbs on that one. All in all, the channel and chainplate installation was a fun exercise. The only issue was making sure that the preventer plate bolts do not interfere with anything inside the hull. Some of the bolts came very, very close to the gun-rigging ring bolts on the hull interior. A miss, however, was as good as a mile
View attachment 420108
Thanks for checking in
Mark
Great job, Mark! Everything is done neatly and beautifully

She looks wonderful !!
Jeff
Jeff
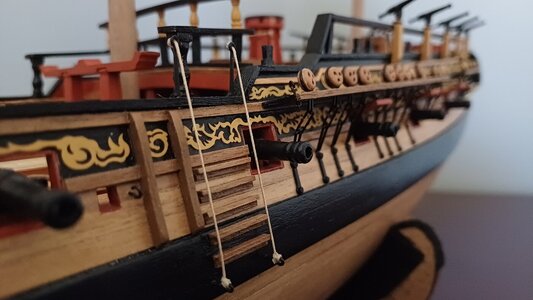
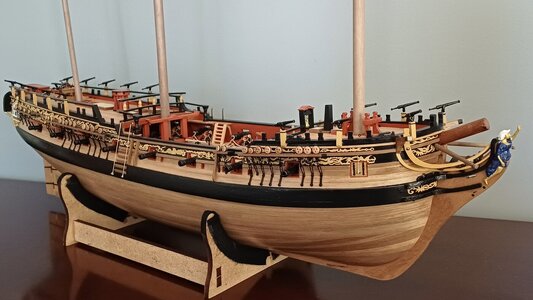
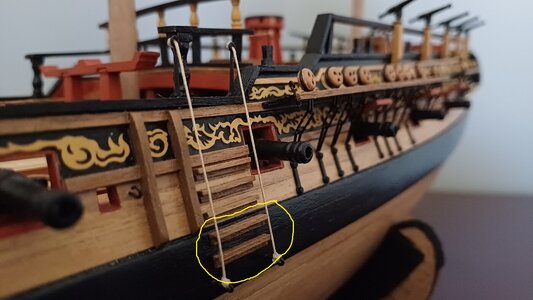
The hull of my HMS Fly is finally on its short final approach towards completion. There were just a few bits and bobs left to install, or at least prepare for later installation. The side steps, for instance, each received a pair of handy guideropes...
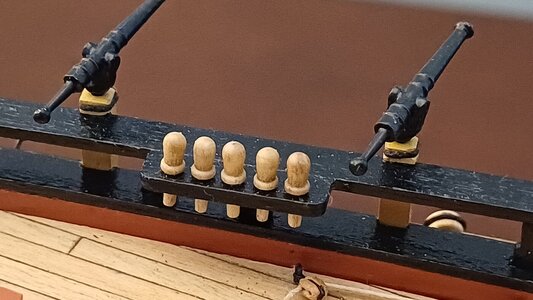
Belaying pins and racks were installed on the quarterdeck...
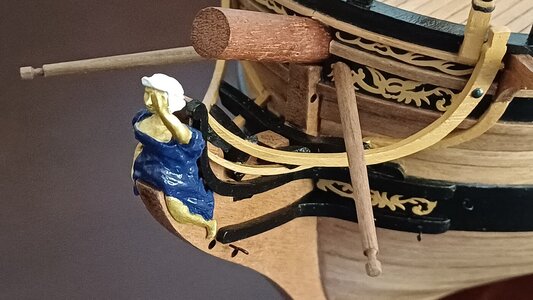
A pair of boomkins to extend from the bow and, of course, a lovely figurehead to adorn the prow...
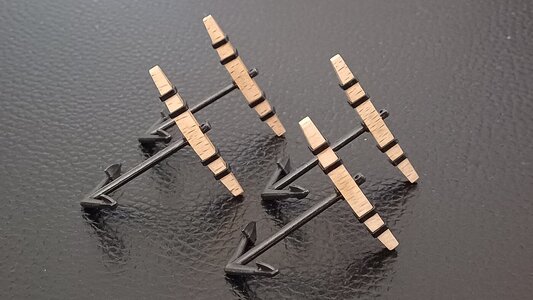
... and finally a set of anchors that will be rigged on the fore channels later in the build.
The kit suggests that the estimated build time for the HMS Fly is 'between 100 to 120 hours'. I'm not sure whether to laugh or cry. It has taken me this long to finish her hull and fittings and I can't imagine that the rigging effort will be any quicker.
It is, after all, all about the journey
Thanks for checking in
Mark

Belaying pins and racks were installed on the quarterdeck...

A pair of boomkins to extend from the bow and, of course, a lovely figurehead to adorn the prow...

... and finally a set of anchors that will be rigged on the fore channels later in the build.

The kit suggests that the estimated build time for the HMS Fly is 'between 100 to 120 hours'. I'm not sure whether to laugh or cry. It has taken me this long to finish her hull and fittings and I can't imagine that the rigging effort will be any quicker.
It is, after all, all about the journey

Thanks for checking in
Mark
Mark, you are doing an excellent job assembling your Fly! Great job!
absolutely beautiful !The hull of my HMS Fly is finally on its short final approach towards completion. There were just a few bits and bobs left to install, or at least prepare for later installation. The side steps, for instance, each received a pair of handy guideropes...
View attachment 423031
Belaying pins and racks were installed on the quarterdeck...
View attachment 423032
A pair of boomkins to extend from the bow and, of course, a lovely figurehead to adorn the prow...
View attachment 423033
... and finally a set of anchors that will be rigged on the fore channels later in the build.
View attachment 423034
The kit suggests that the estimated build time for the HMS Fly is 'between 100 to 120 hours'. I'm not sure whether to laugh or cry. It has taken me this long to finish her hull and fittings and I can't imagine that the rigging effort will be any quicker.
It is, after all, all about the journey
View attachment 423035
Thanks for checking in
Mark
Mark, good job.The hull of my HMS Fly is finally on its short final approach towards completion. There were just a few bits and bobs left to install, or at least prepare for later installation. The side steps, for instance, each received a pair of handy guideropes...
View attachment 423031
Belaying pins and racks were installed on the quarterdeck...
View attachment 423032
A pair of boomkins to extend from the bow and, of course, a lovely figurehead to adorn the prow...
View attachment 423033
... and finally a set of anchors that will be rigged on the fore channels later in the build.
View attachment 423034
The kit suggests that the estimated build time for the HMS Fly is 'between 100 to 120 hours'. I'm not sure whether to laugh or cry. It has taken me this long to finish her hull and fittings and I can't imagine that the rigging effort will be any quicker.
It is, after all, all about the journey
View attachment 423035
Thanks for checking in
Mark
And if these two steps are painted black, like velvet, it will be even better.
Hi Mark,
This surely is a fantastic build! Will you be following the Amati rigging instructions on this one?
This surely is a fantastic build! Will you be following the Amati rigging instructions on this one?
Good afternoon Mark. It is so good.The hull of my HMS Fly is finally on its short final approach towards completion. There were just a few bits and bobs left to install, or at least prepare for later installation. The side steps, for instance, each received a pair of handy guideropes...
View attachment 423031
Belaying pins and racks were installed on the quarterdeck...
View attachment 423032
A pair of boomkins to extend from the bow and, of course, a lovely figurehead to adorn the prow...
View attachment 423033
... and finally a set of anchors that will be rigged on the fore channels later in the build.
View attachment 423034
The kit suggests that the estimated build time for the HMS Fly is 'between 100 to 120 hours'. I'm not sure whether to laugh or cry. It has taken me this long to finish her hull and fittings and I can't imagine that the rigging effort will be any quicker.
It is, after all, all about the journey
View attachment 423035
Thanks for checking in
Mark
The kit suggests that the estimated build time for the HMS Fly is 'between 100 to 120 hours'


Hi Nomad, beautiful work! I'm looking to start doing the Fly myself and your thread will be of invaluable help to me. I'm currently getting together some bits and pieces. Where did you get the Upgrade Kit from? I'm yet to find a supplier in OZ that has the upgrade kit in stock. I can get it from Italy but the quoted shipping price is ridiculous ($255 + the cost of the kit). When questioned they stand by the quote, which is the same shipping price they quote for the whole HMS Fly kit?!. Anyway... Also who is your preferred go-to supplier in Oz for tools and accessories? Thank you so much for sharing your knowledge and skills. I'll go back to lurking.


