Ahhh…that gives me some encouragement to attempt a POF for my next ship. I guess it is also kit dependant. Nonetheless, It must still be difficult to plank with that angle to get it all neat as you have done. Lovely work. Cheers GrantHi Grant. Thank you very much. I would gladly take the credit but the inner planking is supplied all preshaped and only a small amount of adjustment is necessary to get the correct fit. So although a little tricky it's not beyond most people's ability.
-

Win a Free Custom Engraved Brass Coin!!!
As a way to introduce our brass coins to the community, we will raffle off a free coin during the month of August. Follow link ABOVE for instructions for entering.
-

PRE-ORDER SHIPS IN SCALE TODAY!
The beloved Ships in Scale Magazine is back and charting a new course for 2026!
Discover new skills, new techniques, and new inspirations in every issue.
NOTE THAT OUR FIRST ISSUE WILL BE JAN/FEB 2026
You are using an out of date browser. It may not display this or other websites correctly.
You should upgrade or use an alternative browser.
You should upgrade or use an alternative browser.
Also my congratulations for reaching this working step - you are on a very good way my friend
- Joined
- Jan 10, 2022
- Messages
- 860
- Points
- 403

Thank you Paul. As you can see I've only just started and not found any issues so far, but early days yetNice interior planking - I found that quite challenging...
- Joined
- Jan 10, 2022
- Messages
- 860
- Points
- 403

I do hope you decide to give it a go Grant. I'm sure you'll manage admirablyAhhh…that gives me some encouragement to attempt a POF for my next ship. I guess it is also kit dependant. Nonetheless, It must still be difficult to plank with that angle to get it all neat as you have done. Lovely work. Cheers Grant
- Joined
- Jan 10, 2022
- Messages
- 860
- Points
- 403

Thank you very much Uwe. Your fantastic build log of this kit has been and still is giving me some really good tips and advice on how to proceed. I don't think I could do it so easily without youAlso my congratulations for reaching this working step - you are on a very good way my friend
- Joined
- Jan 10, 2022
- Messages
- 860
- Points
- 403

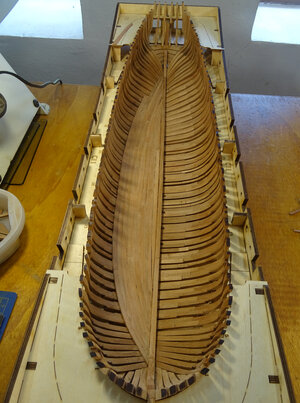
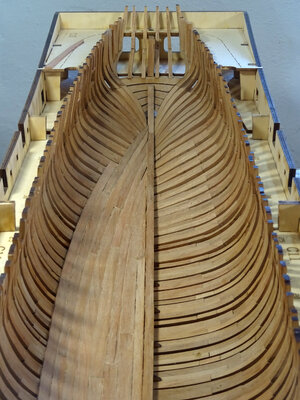
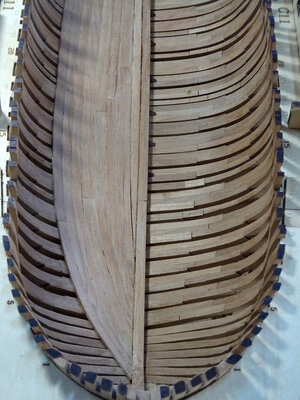
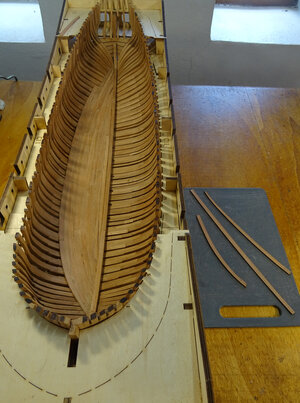
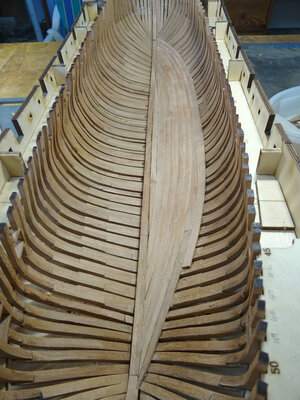
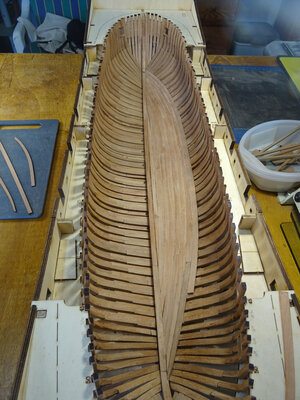
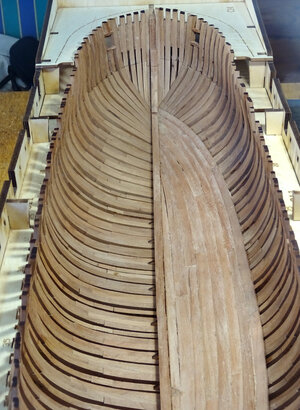
Hi Friends. Thank you for your interest in this build log and for your comments and likes. They are very much appreciated. I am continuing work on the inner hull planking, and must say it is getting more difficult as each level is complete. The lines for the treenails for these planks still need to be marked, which must be done before l go any further. I think there's another 4 or 5 rows left to be done after completing this last one.


With the nailing or treenailing of the inner planking - take a look at this photo so you can get a good impression where it makes sense, and where definitely not, because they will be covered by the interior

but everything depends on the way you want to present the ship - on mine off course they are more visible because I made the cut - without cut the nailing of the internal planking will be hardly visible

but everything depends on the way you want to present the ship - on mine off course they are more visible because I made the cut - without cut the nailing of the internal planking will be hardly visible
- Joined
- Jan 10, 2022
- Messages
- 860
- Points
- 403

Thanks for the photo. Your work is fantastic and l can see how much treenailing detail to include as l shall not be cutting the hull. l think only the hold section will be anywhere near visible, so only that part will be necessaryWith the nailing or treenailing of the inner planking - take a look at this photo so you can get a good impression where it makes sense, and where definitely not, because they will be covered by the interior
View attachment 443305
but everything depends on the way you want to present the ship - on mine off course they are more visible because I made the cut - without cut the nailing of the internal planking will be hardly visible
This may be a really stupid question, but did you glue the cradle together, or just assemble it without glue? Just got my kit today, and starting to think about all of this.The building cradle, dock, jig or whatever you want to call it is now constructed and l must say, it all went together very well. All the laser cut 4 mm plywood components fitted perfectly and you end up with a very rigid construction in which to build the hull. Well done CAF Models on this excellent (l think from now on l'll refer to it as a cradle). The keel fits into it nice and tightly as it should, so it looks like the way is clear now to build the rest of the hull which is part 1 of this 3 part project.
View attachment 421392
- Joined
- Jan 10, 2022
- Messages
- 860
- Points
- 403

Not a stupid question at all. I have glued all joints of the cradle. I'm not sure if the instructions tell you to but l'm pretty sure this is the thing to doThis may be a really stupid question, but did you glue the cradle together, or just assemble it without glue? Just got my kit today, and starting to think about all of this.
There are never stupid questionsThis may be a really stupid question, but did you glue the cradle together, or just assemble it without glue? Just got my kit today, and starting to think about all of this.
I glued the cradle together, yes - but very late - especial the center part had to wait - so you have much better access to some parts, or the stern structure is partly better to be made outside of the cradle
The cradle is very riggid and stabile without glue .....
- Joined
- Jan 10, 2022
- Messages
- 860
- Points
- 403

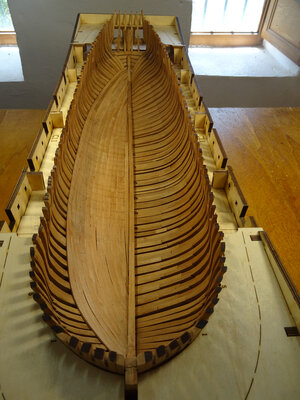
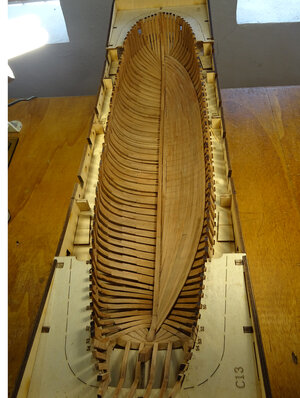
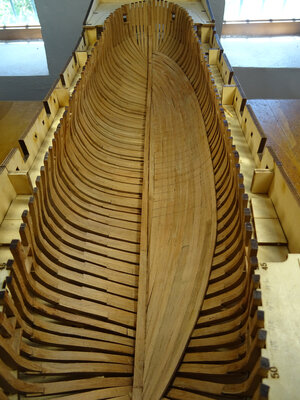
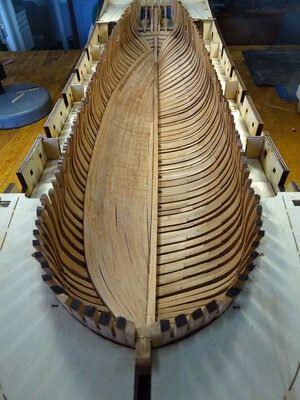
The interior planking for one side of the hull is complete as far as can be done before the upper deck clamps and mortar beam clamps are positioned and fitted, then the planking is finished up to the level of the mortar beam clamp. Another 2 rows. As mentioned l was going to represent the treenailing of the central section of the hull planking using toothpicks. l marked and drilled the first couple of rows for the first triple rib with a 6 mm drill bit and glued the toothpicks in the holes. After sanding, they completely disappeared, even after using my planned wood finish you couldn't see them. So there will be no treenails on the inner planks
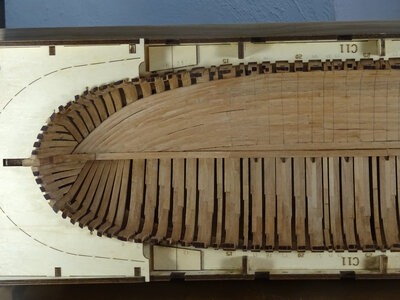
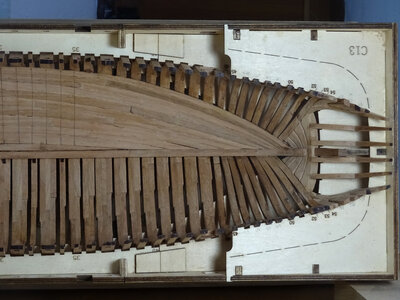
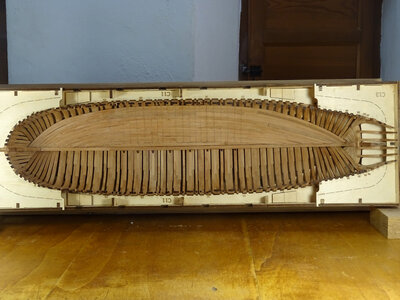


- Joined
- Jan 10, 2022
- Messages
- 860
- Points
- 403

The next stage of the build is to mark the position of the upper deck and mortar beam clamps. This is where these ingenious jigs come into play. They are fitted into the front edge of the gun port slots of the building cradle and expanded to fit up the hull frames. They fit perfectly. There are notches cut out to show the position of the lower edge of the clamps and you mark this against the frames giving the correct height for the clamps. Great idea. All the complicated working out or guesswork is taken away to ensure a good result for the modeller
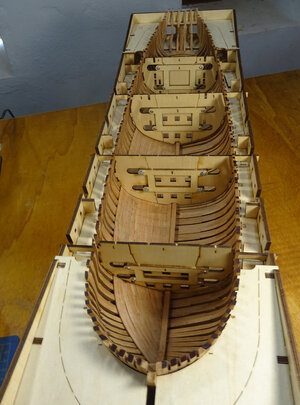
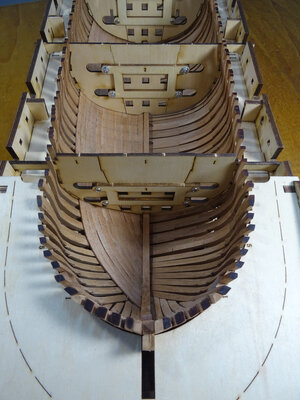
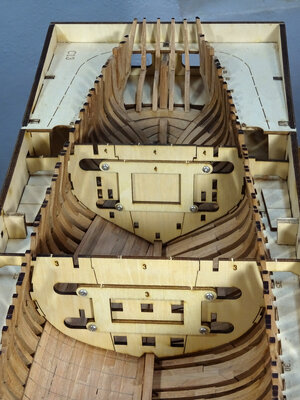
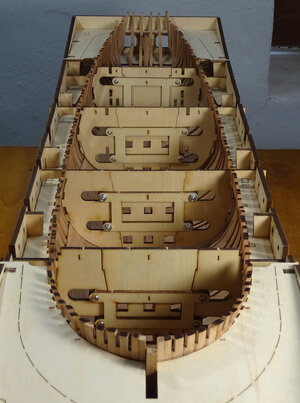
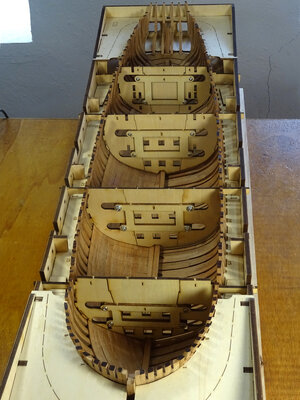


Looks great! That inner planking took its toll on me!
- Joined
- Jan 10, 2022
- Messages
- 860
- Points
- 403

Thanks Paul. Yes, l know what you mean. First couple were OK but got steadily more difficult as it went up. It's the bending and twisting of the deck clamps I'm not looking forward toLooks great! That inner planking took its toll on me!
Good morning Keith. Well done with the inner planking - you owned it. You are right those jigs are a brilliant idea. Cheers GrantThe next stage of the build is to mark the position of the upper deck and mortar beam clamps. This is where these ingenious jigs come into play. They are fitted into the front edge of the gun port slots of the building cradle and expanded to fit up the hull frames. They fit perfectly. There are notches cut out to show the position of the lower edge of the clamps and you mark this against the frames giving the correct height for the clamps. Great idea. All the complicated working out or guesswork is taken away to ensure a good result for the modeller
View attachment 444338
View attachment 444339
View attachment 444340
View attachment 444341
View attachment 444342
My congratulations for reaching this step - we all can see, that you have a lot of fun with this kit
- Joined
- Jan 10, 2022
- Messages
- 860
- Points
- 403

Thank you very much Grant. While we're talking of the jigs can l just mention, although the instruction manual suggests fitting the gun port sills at the end of part 1, l have left them until after fitting the deck clamps as they will prevent the tabs of the positioning jigs sitting correctly into there slots on the building cradle, especially jig number 4, as it has to fit into a window in the cradle and you won't be able to do that with the sills fitted, as l found out to my costGood morning Keith. Well done with the inner planking - you owned it. You are right those jigs are a brilliant idea. Cheers Grant
- Joined
- Jan 10, 2022
- Messages
- 860
- Points
- 403

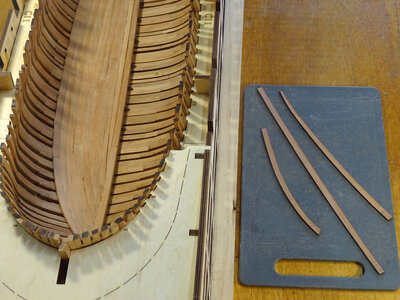
Thank you Uwe. l am enjoying this build immensely, but l must admit to not looking forward to the fitting the clamps for the deck and mortar beams. They are 2 mm and 3 mm thick and have to take on some very tight curves at the bow and stern and l don't have a plank bending tool, so will have to resort to soaking and trying to clamp them in to position somehow. You obviously managed this OK with the use of a plank bender? The centre sections are easy as the curves are quite minor and l have completed this with a good result. Did you find this much of a problem? Do you think excessive soaking will damage the wood?My congratulations for reaching this step - we all can see, that you have a lot of fun with this kit
Hi Keef, you can use a soldering iron to aid in making bends. Or even sweeping the strakes along the edge of a hot iron. Or even a hot air gun (paint stripper).Thank you Uwe. l am enjoying this build immensely, but l must admit to not looking forward to the fitting the clamps for the deck and mortar beams. They are 2 mm and 3 mm thick and have to take on some very tight curves at the bow and stern and l don't have a plank bending tool, so will have to resort to soaking and trying to clamp them in to position somehow. You obviously managed this OK with the use of a plank bender? The centre sections are easy as the curves are quite minor and l have completed this with a good result. Did you find this much of a problem? Do you think excessive soaking will damage the wood?
Maybe something here to help?


