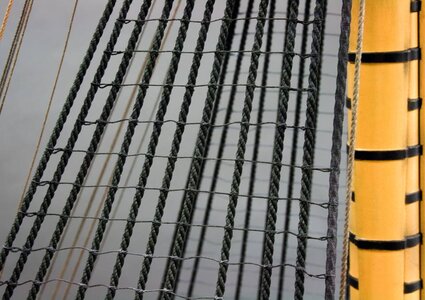
Finished the lower ratlines and installed the lift blocks. Stays are next. Trying a few ideas for a mouse. Really small stuff to work with.


")
Same here. I take breaks and read a little of my Hornblower series. Love that nautical talk.It looks like you have a handle on it! My eyes go blurry for a while after I do magnifying work like such!
Bottom "line": Very fine work Sir! (no pun intended)
Dan
Never heard of a mouse before this either. It goes on the stays. Looks a little odd. Will post a photo when I finish the mizzen stay.This is great, I have lots of builds to watch and learn before I dive into my next voyage. I now know a process for making a mouse, though I have no idea where this goes yet. I’m guessing I’ll find out soon enough...
Absolutely! Me too!Same here. I take breaks and read a little of my Hornblower series. Love that nautical talk.


And there’s that mouse you showed us how to construct.Had a few problems with the mizzen stay and crowsfeet. Directions not very clear so had to cut off the line and start over a couple of times. Here’s what finally worked. First attach a single block to the mizzen stay because it will be hard to get to after the crowsfeet is rigged. Don’t glue yet so its position on the stay can be adjusted later if needed. Take about a yard of line and tie a knot in one end, apply CA, and trim. Come up through the outermost portside hole in the top. Now go through the first hole in part number 182 and down through the outermost hole on the starboard side. Next come up through the second hole, the one right next to it, and back to part 182. Continue the back-and-forth rigging working towards the center hole until the last hole has a line going down through it. I tied part 182 and its associated block on a temporary line to the main mast to make things easier to rig. When the crowsfeet was adjusted to the right tension I removed the temporary line and rigged the two blocks together. The main and foremast crowsfeet should a lot easier.
View attachment 203437View attachment 203438View attachment 203439
EXCELLENT. The only thing I can complain a little is that to me the foot roop is too thick. generally, 1/3 parts of the thoughts. this will give minor knots. be aware- which can be seen on blown up fig of the Fuzz. Generally doing this work, I mixed carpenter glue, a little water `plus some black paint -as aff this parts were coated with a special black mix-sorry I have forgotten the English name -Deep you finger in that mix and then starts from top downward. This will give -apart from protecting -a nice look to the Strouts and weblink- it came- and it will give all the weblinks an equal or a downward image. Not what I have seen in some builds, where the weblinks are curved upwards. I have to learn a new word -the Mouse-. They are not- if they are not in the kit, difficult to make. Cut a piece of the wood prepared for the mast- Ø-the maximum seize. Drill with the correct mm a hole thru the piece. does who loke me do nat have a Lathe, I cut some part wik an x-knife, the I used an OLD PENCIL SHARPER from School- it worksHad a few problems with the mizzen stay and crowsfeet. Directions not very clear so had to cut off the line and start over a couple of times. Here’s what finally worked. First attach a single block to the mizzen stay because it will be hard to get to after the crowsfeet is rigged. Don’t glue yet so its position on the stay can be adjusted later if needed. Take about a yard of line and tie a knot in one end, apply CA, and trim. Come up through the outermost portside hole in the top. Now go through the first hole in part number 182 and down through the outermost hole on the starboard side. Next come up through the second hole, the one right next to it, and back to part 182. Continue the back-and-forth rigging working towards the center hole until the last hole has a line going down through it. I tied part 182 and its associated block on a temporary line to the main mast to make things easier to rig. When the crowsfeet was adjusted to the right tension I removed the temporary line and rigged the two blocks together. The main and foremast crowsfeet should a lot easier.
View attachment 203437View attachment 203438View attachment 203439-before the grows to heaven -is that
.jpg")
.jpg")


.jpg")

AMAZING work. Appreciate all the help. I'm still new to model ships but have always been handy with my hands so I've done lots of different hobbies. Built a lot of Spanish gun kits in the 70's then built them from scratch. Here is one of my Kentucky long rifles. Wish I could stick with one hobby and get really good at it but my interests seem to jump from one thing to another. I've tried more the 30 different hobbies since I was a teenager. I'm afraid I'm not bothered with trying to be historically accurate. All my family I give the finished ships to don't know port from starboard. I get a little better with every build so when I do the last one I'll keep that for myself.EXCELLENT. The only thing I can complain a little is that to me the foot roop is too thick. generally, 1/3 parts of the thoughts. this will give minor knots. be aware- which can be seen on blown up fig of the Fuzz. Generally doing this work, I mixed carpenter glue, a little water `plus some black paint -as aff this parts were coated with a special black mix-sorry I have forgotten the English name -Deep you finger in that mix and then starts from top downward. This will give -apart from protecting -a nice look to the Strouts and weblink- it came- and it will give all the weblinks an equal or a downward image. Not what I have seen in some builds, where the weblinks are curved upwards. I have to learn a new word -the Mouse-. They are not- if they are not in the kit, difficult to make. Cut a piece of the wood prepared for the mast- Ø-the maximum seize. Drill with the correct mm a hole thru the piece. does who loke me do nat have a Lathe, I cut some part wik an x-knife, the I used an OLD PENCIL SHARPER from School- it works
f
Finally your "little mistake with main mast, I have two solution for that -send me an E-Mail to peandersen@telefonica.net or over messenger. I am saying this -if you are like me -knowing a moitake has been (where 90%) will ever see it, BUT ONE PERSON WILL AND "that is you"
THE LAST PIC. WAS FROM MY LAST BUILD- i SAY WAS, AS OFTER SEEING SOME HEAVY FAILURE DO DELIVERED-QUARTELTY, MISTAKE INSTRUCTION and the final building plant came to the end. The deliveries took 3 Years with a final cost of 900 € plus another 200 €or more in extra planks etc. The main MISTAKE was the Mesan Mast, where sails was not correcly mentioned in instruktion. The Lower main sail shouh not have added to the mainyars, but added to the topgallant yard. After 6 Month lookung at it, I ndesmanteled it compleatly, recovering all metal parts, fig etc, which i still heve for free, the rest went to the wast mill- end of story.
View attachment 203568View attachment 203569View attachment 203570View attachment 203571View attachment 203572View attachment 203574


As I already have mentioned an AMAZING WORK. The stays now look correct, except a little lack on the Mitzen mast Stay- a little vinegar is always good. In fact, I have made a copy of all your images, which are going into my HUGH database. Build like yours over 50 from start to end. over 100 build instruktion and about 2-3000 images again from A-Z. So if you need some info. or help, just ask. For the moment I am helping 4. mainly over Messenger- phone- but may by a camara to or a tablet for direct connection .Completed the lower stays. The crowfeet were fun after I figured out the steps in the rigging. I'll finish up the bowsprit next then move on the the topsail masts and rigging.
View attachment 203611View attachment 203612View attachment 203613View attachment 203614
Always appreciate your help. As to the ratlines, I used the smallest thread I had. Will try to find something smaller for the remaining ratlines on the upper mast sections.As I already have mentioned an AMAZING WORK. The stays now look correct, except a little lack on the Mitzen mast Stay- a little vinegar is always good. In fact, I have made a copy of all your images, which are going into my HUGH database. Build like yours over 50 from start to end. over 100 build instruktion and about 2-3000 images again from A-Z. So if you need some info. or help, just ask. For the moment I am helping 4. mainly over Messenger- phone- but may by a camara to or a tablet for direct connection .
Stay Safe and Happy building.
El Capi
Any big storehouse has it. We called Chinese tread-both black and white. A good Nail cutter will snip off the small rest on either side. be careful with an X-KnivesAlways appreciate your help. As to the ratlines, I used the smallest thread I had. Will try to find something smaller for the remaining ratlines on the upper mast sections.
I think your rat lines look fantastic. Much better then my 1st set on the Bluenose. If I can get anything close to this on my Fly I will be over the moon.Always appreciate your help. As to the ratlines, I used the smallest thread I had. Will try to find something smaller for the remaining ratlines on the upper mast sections.