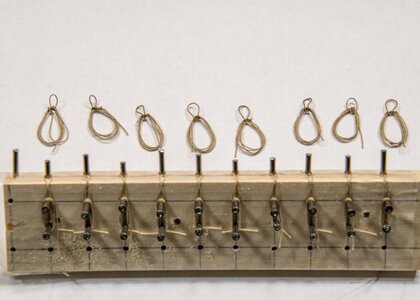
Looks fantastic! You’re getting way ahead of me, I’m still building the masts. The rigging really looks complicated. I’m glad that I can see what you did and what problems you encountered ahead of me. Keep up the excellent work!I like to work aft forward and top down. At this point I'm on the main topsail yard. I mounted a pair of blocks to low on the aft main shroud so one pair of lines is rubbing against another. Will have to remove that set of blocks and move them higher up so everything is in the clear. Hate having to rip stuff out but this isn't too bad a job. Not real happy with the supplied tan thread. It's really fuzzy even after running it through bees wax. Should have used my Hobby lobby nylon thread but to late in the game to change. (1402 Tan Extra Strong Bonded Nylon Upholstery Thread). I still use it for seizing because it slides into position nice and easy. I use the black for most of my standing rigging. Also found some .1mm black thread on Esty MYSLOWTIME that is perfect for foot-ropes on shrouds. More to scale and you get like 2000 yards for 7 bucks. I'll never run out. Things are getting a little confusing now and I spend more time studying the plans than working on the rigging and still make a mistake now on then.
View attachment 209758View attachment 209759View attachment 209760View attachment 209761View attachment 209762
-

Win a Free Custom Engraved Brass Coin!!!
As a way to introduce our brass coins to the community, we will raffle off a free coin during the month of August. Follow link ABOVE for instructions for entering.
You are using an out of date browser. It may not display this or other websites correctly.
You should upgrade or use an alternative browser.
You should upgrade or use an alternative browser.
She's turning into a real beauty.
Thanks Jan - Been a real learning experience. Wish I'd started this years ago.Wow, that looks awesome, very nice indeed.
Jan
All my rigging is complete, unless I find a mistake somewhere. Still quite a bit to do. Long boat, spare masts, anchors, etc. I'll take a lot of close-up photos when it's complete. Waiting for a quote from local plastics fabricator for a box to keep it in. A couple of my other uncovered model had become a playground for tiny spiders. Need to find a way to kill them off without spraying the ships with an oil based insecticide.
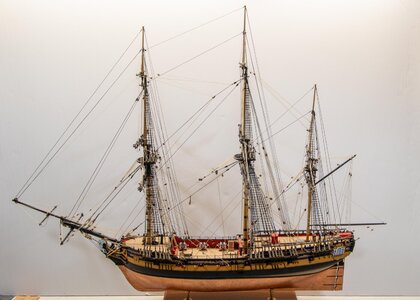

Wow! Looks fantastic! I can’t believe how quickly you completed the rigging! I can tell that your previous ship building experience really helped. I finally finished the masts and bowsprit. I will be studying your rigging notes as I install my rigging. Looking forward to seeing your closeup photosAll my rigging is complete, unless I find a mistake somewhere. Still quite a bit to do. Long boat, spare masts, anchors, etc. I'll take a lot of close-up photos when it's complete. Waiting for a quote from local plastics fabricator for a box to keep it in. A couple of my other uncovered model had become a playground for tiny spiders. Need to find a way to kill them off without spraying the ships with an oil based insecticide.
View attachment 213058
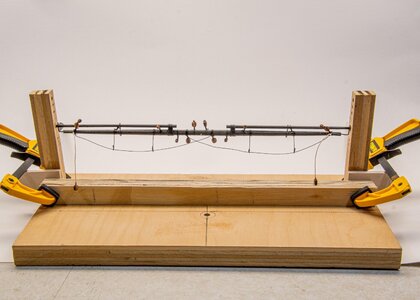
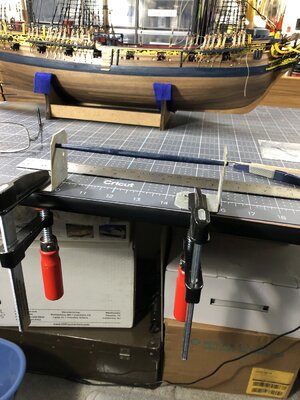
Hi Charlie,Main yard on my yard building jig.
View attachment 209965
What a beautiful ship you made. Here's my version of a yard jig thanks to your idea. I'm still quite behind you on my build but will be posting more on my build soon.
Thanks Dan. Seems like we spend a lot of time making jigs. I get strange ideas at night when I'm trying to sleep. Sometimes they actually work.Hi Charlie,
What a beautiful ship you made. Here's my version of a yard jig thanks to your idea. I'm still quite behind you on my build but will be posting more on my build soon.
View attachment 213200
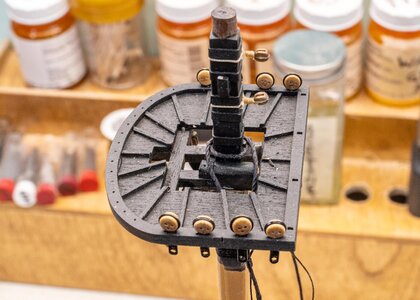
Thanks for the comment - Are your upper mast sections glued in or just fitted? Easier to put the loop for a shroud over the mast with out the next section in place.Wow! Looks fantastic! I can’t believe how quickly you completed the rigging! I can tell that your previous ship building experience really helped. I finally finished the masts and bowsprit. I will be studying your rigging notes as I install my rigging. Looking forward to seeing your closeup photos View attachment 213169
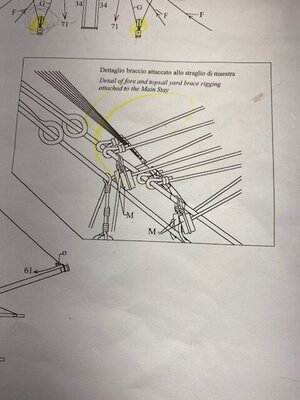
I spent a lot of time studying the rigging sheets and it turned out to be not as hard as I figured it would. One place that slowed me down was the yard bracing on sheet 12 of the plans. (see photo)
I also used Swiss pear blocks from Model expo. Item L on the plans are 3mm single sheave blocks. Kind of small for me so I went with 3.5mm, not a big different but a little easier to work with. The ones from the kit were not the best. Holes not centered etc. The kit tan thread was "fuzzy" and even beeswax didn't help much. Will change out the thread to another manufacture next time also. Nylon is much better. Not as authentic but I like it better. Afraid I'm not a stickler on historical accuracy.
Feel free to ask anything as you work your way through sheet 10, 11 and 12. Good luck. Charlie
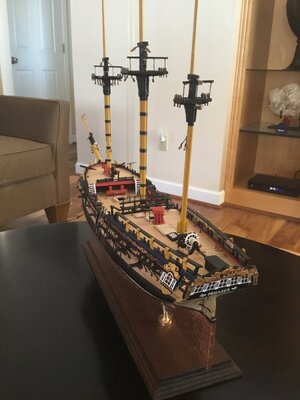
I glued the mizzenmast together and then realized that this will make things difficult for the shrouds so I kept all of the other sections unglued and only dry fit them together for the photo.Thanks for the comment - Are your upper mast sections glued in or just fitted? Easier to put the loop for a shroud over the mast with out the next section in place.
View attachment 213204
I spent a lot of time studying the rigging sheets and it turned out to be not as hard as I figured it would. One place that slowed me down was the yard bracing on sheet 12 of the plans. (see photo)
View attachment 213205
I also used Swiss pear blocks from Model expo. Item L on the plans are 3mm single sheave blocks. Kind of small for me so I went with 3.5mm, not a big different but a little easier to work with. The ones from the kit were not the best. Holes not centered etc. The kit tan thread was "fuzzy" and even beeswax didn't help much. Will change out the thread to another manufacture next time also. Nylon is much better. Not as authentic but I like it better. Afraid I'm not a stickler on historical accuracy.
Feel free to ask anything as you work your way through sheet 10, 11 and 12. Good luck. Charlie
I'm working on the hammock netting now. When I used to make my own fishing lures, I needed to air brush a scale patterns on the body of the lures. The store I used had fine netting that you could wrap around the body and spray, thereby getting a nice scale pattern. For the ship I sprayed the netting black and installed it. Works great and looks scale correct. Installing it however is tricky. Not much to glue to and it's flimsy. You can find it at Janns Netcraft.

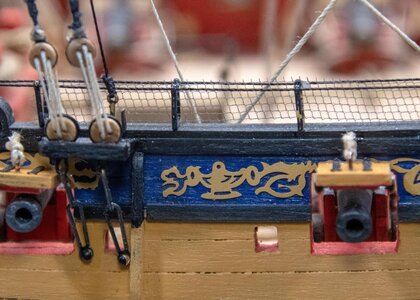


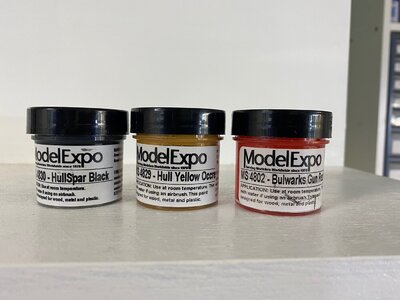
Beautiful ship. I'm going to build the same kit. What are the colors you used on it?
Dave
Dave
Anyone know of a source for cloth flags? Kit flags are nowhere close to real looking.
Try Cast yourAnyone know of a source for cloth flags? Kit flags are nowhere close to real looking.
 , in Canada great selection of flags.
Thanks - I get my blocks from them. I'll check it out.Try Cast your, in Canada great selection of flags.
Well I've come to the end of the build. Kind of miss working on it. I still need to work on my rope hanks. That's about the only thing I'm not satisfied with, but overall I've really surprised myself with the final result. When I saw the plans for the rigging I was kind of intimidated. All that's left is finding the correct flags. Tom V gave me a suggestion and I've ordered some. We will see when it comes in if it hangs correctly. Also ordered a display case from my local plastics fabricator. $225 is a good deal and I don't have to build anything but the base. I'll post that process when it comes in. It's a 4 - 6 week wait. They are building lots of shields etc. for local business because of Covid and they are really backed up. Thanks to everybody for your suggestion and comments. It really helped a lot.
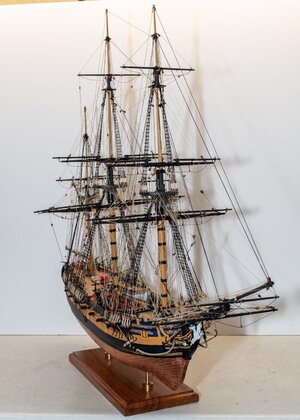
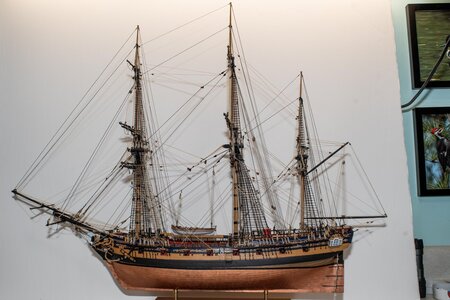
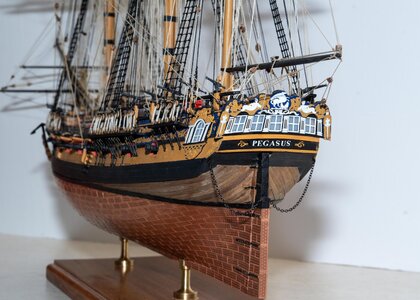
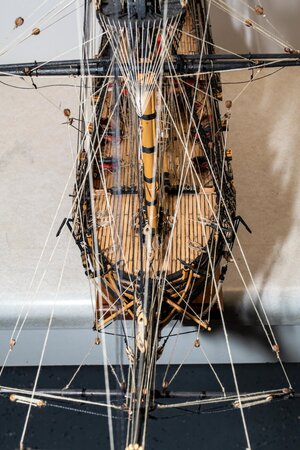
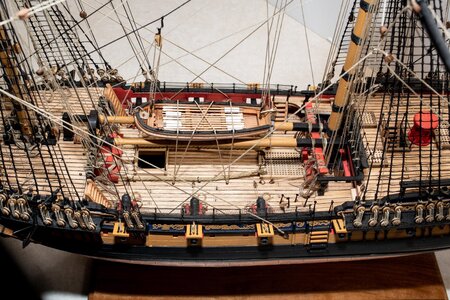
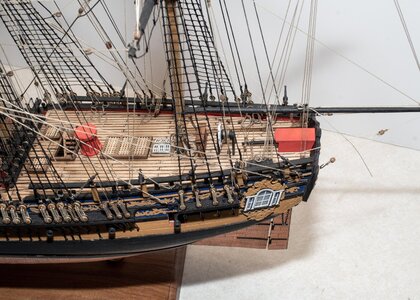


Well... whether you didn't expect.... the outcome is great, you made a fantastic job!! Your attention to detail speaks for itself. Congratulations on your accomplishment. What is next, if not a secret?
I was undecided about my next build until I came across your log. The end result tipped the balance and I am ordering it today. Was your life boat from the kit or ordered extra?


