HMS Prince - Amati 1:64 by Vince P. Original 1978 Version

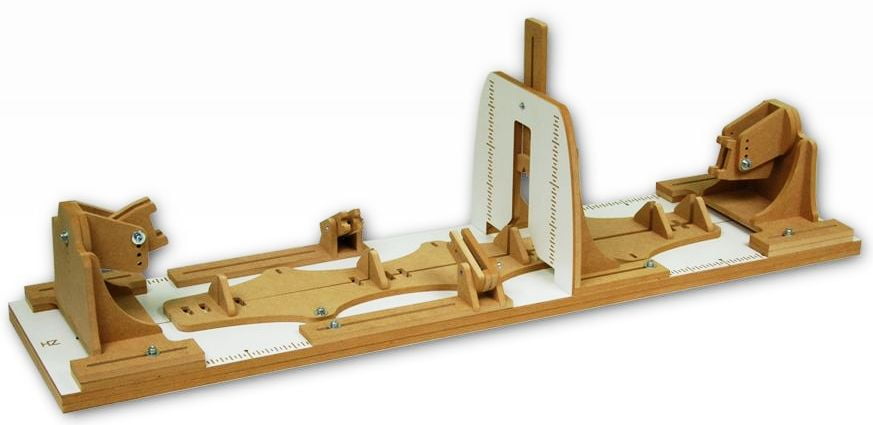
Working on the frame. I decided to make all of the small cutouts even though they are not needed. It will decrease the weight of the finished model, and with all of metal decorations, this model will be quite heavy. The process of making all of these cuts will take considerable time.

I made a little milling machine by mounting my Dremel to the stand and attaching a milling bit. It cuts quickly and accurately. I just drill a starter hole in each area to be cut out.

Vince P. Ship-1

pict0027.jpgpict0028.jpgpict0029.jpg
 
Howdy donfarr. Wow what a cool kit. I just ordered the same Professional Build Slip from the UK. I have the smaller one and have used it numerous times w/great results. I just subscribed to De Agostini for the Sovereign of the Seas, and this is a daunting task for me. So I figured a good building slip was needed. Is there any tips on assembly. Another member suggested to ask you about the correct way to assemble. I never ever thought of using a Dremel as you have shown. Taught me a new trick already. Your build is off to a great start and I will follow along.
Rick
 
Hi Neophyte,
The building slip is easy to assemble but you have to carefully follow the instructions. The instructions are just small photos in sequence. I used a magnifier because it can be confusing in some areas. The one critical part is the assembly of the three piece base. There are 2 thick pieces and 1 thin piece. The thick piece with the cutouts for the hex nuts should be glued to the thin piece with the cutouts for the nuts on the bottom and the thin piece on top. The second thick piece should NOT be glued and goes on the bottom of the 2 glued pieces and is held in place with speed nuts and screws. Press all of the hex nuts in place before securing the bottom piece. This is so if you strip any of the nuts you can remove the bottom piece and replace them.
Good luck.

Vince P. Ship-1
Howdy donfarr. Wow what a cool kit. I just ordered the same Professional Build Slip from the UK. I have the smaller one and have used it numerous times w/great results. I just subscribed to De Agostini for the Sovereign of the Seas, and this is a daunting task for me. So I figured a good building slip was needed. Is there any tips on assembly. Another member suggested to ask you about the correct way to assemble. I never ever thought of using a Dremel as you have shown. Taught me a new trick already. Your build is off to a great start and I will follow along.
Rick
 
Looking good Vince and an interesting way to cut the holes out,It will save quite a bit of weight given there are probably triple the amount of bulkheads compared to a normal kit.Fairing will take a little longer,but you will have an excellent base for planking,

Kind Regards

Nigel
 
I am still working on the bulkheads. I have about 6 more to go. I found out the reason this kit has so many bulkheads which is about double of most kits. Since this kit will not have the lower decks installed even as false decks. The lower deck gun ports are located to butt up against each pair of bulkheads. This make locating them much easier and you don't have the problem of gunports locating right in the middle of a bulkhead. This problem was frequent in building the Royal William and resulted in closing those ports in order to not have to cut away some bulkheads.

I am also placing some stabilizing boards between each pair of bulkheads both port and starboard to make the frame more rigid. It is so long and heavy that it flexes way too much. Once the upper decks are placed and the planking is done, that will also help.

Vince P. Ship-1

pict0030.jpgpict0031.jpg
 
G'day Vince this is a lovely model to build, and I will follow along if you don't mind, I built her approx 40 years ago but I could only afford the plans, so I scratch built her using whatever came to hand, one thing at the time puzzled me and that was that the scale was put at 1/64, but I think they made a mistake, all my working out put her at 1/84, any way I had a great time building her and I wish you the same,

best regards John,

PS I will attach one pic of efforts,

1 (Copy).jpg
 
G'day Vince this is a lovely model to build, and I will follow along if you don't mind, I built her approx 40 years ago but I could only afford the plans, so I scratch built her using whatever came to hand, one thing at the time puzzled me and that was that the scale was put at 1/64, but I think they made a mistake, all my working out put her at 1/84, any way I had a great time building her and I wish you the same,

best regards John,

PS I will attach one pic of efforts,

View attachment 108382
Nice job. There was some dispute about how they determined scale back then. There are different ways to do it and I don't believe they ever came to an agreement. Based on the the size of the Royal William I built I believe your scale numbers are closer. I put her at about 1:78.

Vince
 
The framing is completed. The Birch plywood is pretty tough stuff. In making all of those cutouts I dulled 6 router blades and wore out a couple of collets.

This building slip I am using is fantastic. The last photo shows that the whole hull can be rotated to facilitate planking and all of the hull construction without removing it from the slip. It appears that the entire model can be constructed while in the slip. :p

I am contemplating on what is next. I think that the lower deck gun blocks must be created and inserted after marking the location of the gun ports. Since this model does not have actual lower decks, it would be impossible to place these blocks once the hull was planked. I am only guessing here, but I think this is the way to go.

Vince P. Ship-1

pict0032.jpgpict0033.jpgpict0034.jpgpict0035.jpgpict0037.jpgpict0038.jpg
 
Good old modelling! Congratulations. I still remember when my gliders were built in a similar way: saw, ply, a set of plan, lots oof dust ans elbow grease. No pre-cuts and no laser.

It is a joy to look into such a model. The best of lucks and courage, it deserves it.

Regards

JL
 
Congratulations on the completion of a mammoth cutting and assembly job Vince Thumbsup I take it the ply had faired well given it is over fourty years old.A testament to the quality of the materials used back then.

Kind Regards

Nigel
 
Good to see, that they used a huge number of bulkheads, so the hull will be stiff and the planking works can be done much more accurate.
I guess it will be a single planking layer, or?
The plans don't really reflect the number of planking layers, but the materials suggest 2 layers. I would do 2 layers no matter. It makes for a better and cleaner model to do 2 layers. The first inner layer can be adjusted to cover up any flaws and the finish outer layer will be neat and clean.

Vince P. Ship-1
 
All of the gunports are located and the dummy gun blocks are placed. Locating the ports was fairly easy since they all butt up against a bulkhead. I added planks that follow the deck lines to mount the blocks to. I also noticed that if I want to keep most of the ports open with protruding gun barrels, there are not enough guns supplied. They figure on only having about half of them open. I do have a good supply of gun barrels that are similar in my stash. I will use those.

Next up is to bevel the fore and aft bulkhead ends and begin the first layer of hull planking. A hull this size that also has a complex curved stern and a bluff bow will take a considerable time to plank.

Vince P. Ship-1

pict0039.jpgpict0040.jpgpict0041.jpgpict0042.jpg
 
Back
Top