You are using an out of date browser. It may not display this or other websites correctly.
You should upgrade or use an alternative browser.
You should upgrade or use an alternative browser.
HMS Revenge 1577 by Amati , Victory Models
- Thread starter mallacoota
- Start date
- Watchers 12
-
- Tags
- amati revenge victory models
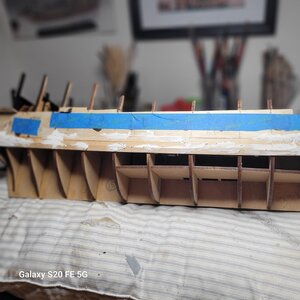
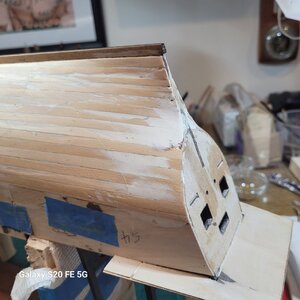
Back at the Revenge project after a few weeks away. Have finished the first planking and keel installation. Pretty happy with how fair it is, top planks should go on OK. I am going to install top planks to scale ( well sort of ) I am making my planks 145mm so I can get 4 out of a 600 piece which scales up to a 9.2M plank on the real ship. Who knows if they could get 9M oak planks in 1577..? I am saying they did.
The silly looking junk on the bowsprit is just to make it obvious to me when turning the model so I am a bit less likely to break it off. It has worked so far. I have stained the keel with Brown Japan spirit stain and will matt clear seal it. This will be what I do with the yards. ...masts in Oak stain. I am unaware of any known colour scheme for the ship so if anyone has anything to advise it would be most welcome. It certainly will not have a white bottom no matter how often kit examples do that for appearance in spite of it being knowingly wrong. I guess below the waterline it would have been "brown stuff" ....tar, horsehair, etc etc
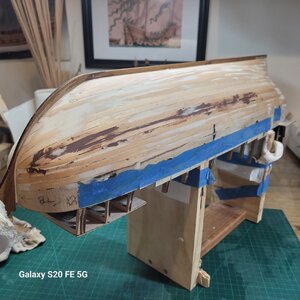
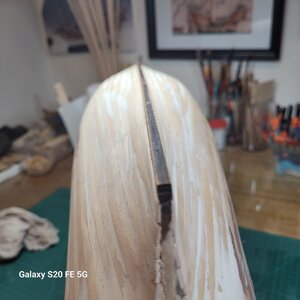
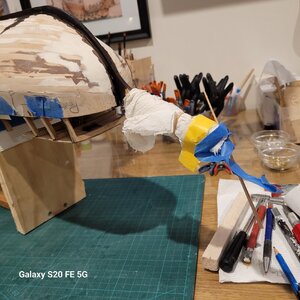
The silly looking junk on the bowsprit is just to make it obvious to me when turning the model so I am a bit less likely to break it off. It has worked so far. I have stained the keel with Brown Japan spirit stain and will matt clear seal it. This will be what I do with the yards. ...masts in Oak stain. I am unaware of any known colour scheme for the ship so if anyone has anything to advise it would be most welcome. It certainly will not have a white bottom no matter how often kit examples do that for appearance in spite of it being knowingly wrong. I guess below the waterline it would have been "brown stuff" ....tar, horsehair, etc etc


I think that if that approach works for you than it is not dumb. We all have our own way of doing things. And what matters is the finished product! Looks good so far!Got about 4 planks on and planed/sanded and filled. I like to do it in small bands as I go because it enables me to focus on the small area just planked. I know others think this is a dumb approach but it works for me.
View attachment 431299
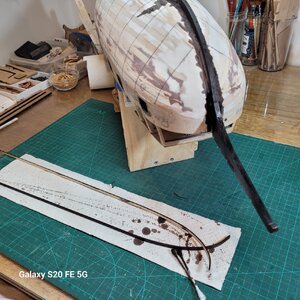
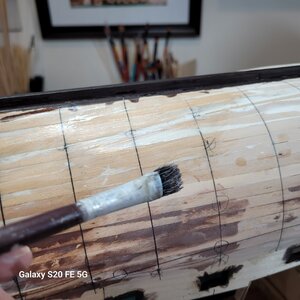
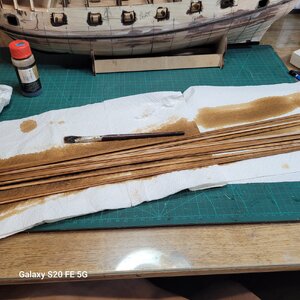
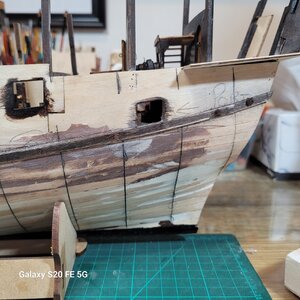
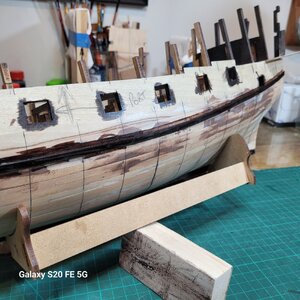
Sanding and staining the Tanganyika main planking...grrrr.. coming out OK though . I use Old Baltic spirit stain as it looks more like Oak than the Oak tint. The ;lower Wale installed, pins removed, holes filled and finished. My first real dispute with the instructions/plans... you are asked to raise the aft end of this wale to a height which I think is impossible without spiling which I am not doing...so I have ]just lifted it as high as I could with minimum edge set.


Now following, very enjoyable build. Lovely steady work.
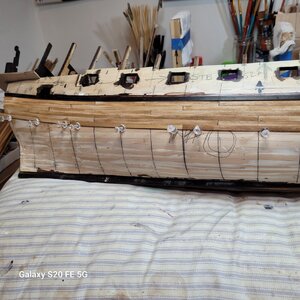
Finished the second layer of planking ...the main part from the lower wale to the keel. I am the first to admit I am a rubbish planker...or as the Brits would probably say..." a plonker of a planker". No matter how many spiling instructions i read it all just gets too damn hard. One thing I have done which has made a huge difference is to mark out the sections on the first layer and then plank using scale pieces ( In this case I used 140mm planks...equiv 9.0M on the ship). This made a huge difference to the speed and difficulty of planking and personally I would never go back to full strip planking again.To each his own very much in a thing like this.
The bow is a cow...like Endeavour... lots of tight crowding, bending, and drop planks if you are so inclined. I did end up with some poor plank/stem junctions but after a number of experiments with spirit stain and woodfiller I have patched it acceptably.
I seem to have got to this point without breaking the bowsprit which frakly I am amazed at...and very pleased. Now to stain and finish the lower hull and them turn it over. I was planning on using Boiled Linseed Oil... but I have been putting it on my walking stick ( dont laugh) and it does mark very easily so I am still thinking about that. I really like Admiralty paints Satin Matt it has a finish I really like so I might use that. I love Admiralty paints, apart from the fact that you get 18mls for the price of 10 from others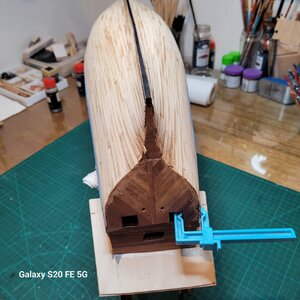
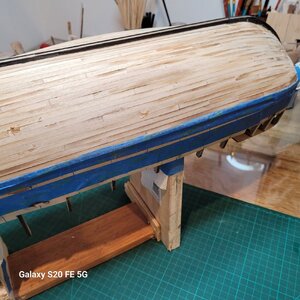
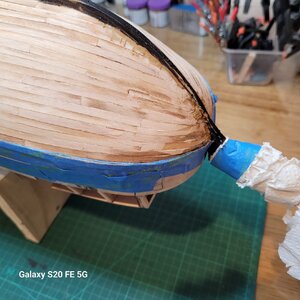
The material on the bowsprit is just so I can see it so well I dont turn the boat and hit it on something...believe it or not it has worked.
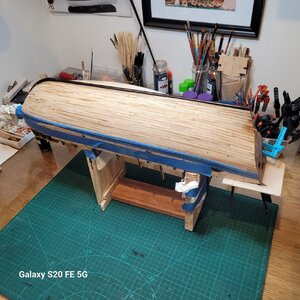
PS...many thanks to the member who posted his build using a similar stand with surplus Covid masks...I forget who it was, but I copied your excellent idea and did all my hull workl upside down without breaking off any of those high bulkhead extensions.... so well done and thanks for the idea.
The bow is a cow...like Endeavour... lots of tight crowding, bending, and drop planks if you are so inclined. I did end up with some poor plank/stem junctions but after a number of experiments with spirit stain and woodfiller I have patched it acceptably.
I seem to have got to this point without breaking the bowsprit which frakly I am amazed at...and very pleased. Now to stain and finish the lower hull and them turn it over. I was planning on using Boiled Linseed Oil... but I have been putting it on my walking stick ( dont laugh) and it does mark very easily so I am still thinking about that. I really like Admiralty paints Satin Matt it has a finish I really like so I might use that. I love Admiralty paints, apart from the fact that you get 18mls for the price of 10 from others


The material on the bowsprit is just so I can see it so well I dont turn the boat and hit it on something...believe it or not it has worked.

PS...many thanks to the member who posted his build using a similar stand with surplus Covid masks...I forget who it was, but I copied your excellent idea and did all my hull workl upside down without breaking off any of those high bulkhead extensions.... so well done and thanks for the idea.
Hehe... we use what we have at hand. Have a great time building. It is fun! I agree with you about using scale planks for the second planking. It is indeed so much easier to do. Those are the tips/tricks that we develop with time as we gain experience. Reading logs help speed up the process. Thanks to all who post logs... it really makes a difference for people like me that love the hobby, want to build something more difficult, but may not have a lot of experience building models.
Last edited:
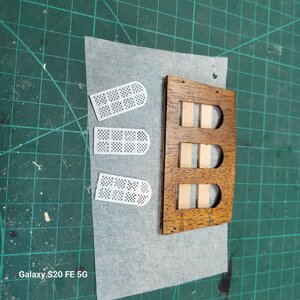
Nah.... you can do it. Did you see the link above? It's not difficult. Consider it a foray into the world of scratch building! Take some clear plastic from some packaged too you bought at the store, scribe lines with a ruler and razor knife , but not too deep, wipe black acrylic paint into the lines, use a damp cloth to wipe off the excess paint before it dries leaving some on the lines, and VIOLA! Leaded glass! After carefully cutting out the horrid white panes, glue the plastic panel to the back of the window frames Using "canopy glue" (NOT CA GLUE). CA glue will fog the windows. Now you have really nice windows, begging the viewer to peep inside. If you make a mistake and cut the crossmembers of the frames by accident, replace the sections with very thin strips of real wood, and improve them all the more. Better LINKOoooh...think that might be above my pay grade..?..but I agree the white looks a bit unauthentic doesnt it
View attachment 440683
Last edited:
Thanks heaps...thinking about thatNah.... you can do it. Did you see the link above? It's not difficult. Consider it a foray into the world of scratch building! Take some clear plastic from some packaged too you bought at the store, scribe lines with a ruler and razor knife , but not too deep, wipe black acrylic paint into the lines, use a damp cloth to wipe off the excess paint before it dries leaving some on the lines, and VIOLA! Leaded glass! After carefully cutting out the horrid white panes, glue the plastic panel to the back of the window frames Using "canopy glue" (NOT CA GLUE). CA glue will fog the windows. Now you have really nice windows, begging the viewer to peep inside. If you make a mistake and cut the crossmembers of the frames by accident, replace the sections with very thin strips of real wood, and improve them all the more. Better LINK
- Joined
- Aug 30, 2020
- Messages
- 639
- Points
- 308

Very nice
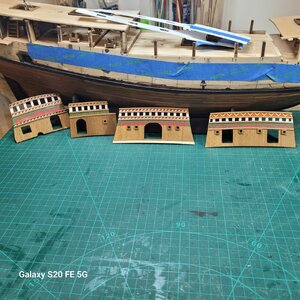
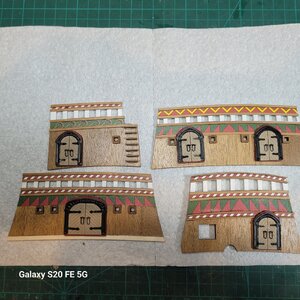
I want my model of Revenge to look this good when I get around to building it. Saving your bulkhead pictures for reference... 

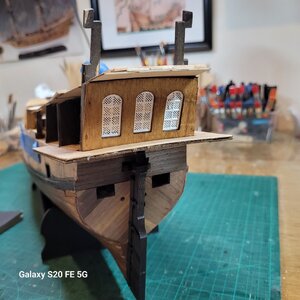
Question on one of the features: The bottom of this door does not follow the camber of the deck. Have you or any of the members here seen a 16th century example from any ship in this size category how the builders of that time actually designed the shape of the threshold for doors relative to the deck?
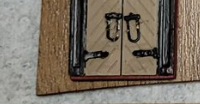
Have you done any research on this feature, mallacoota?

Question on one of the features: The bottom of this door does not follow the camber of the deck. Have you or any of the members here seen a 16th century example from any ship in this size category how the builders of that time actually designed the shape of the threshold for doors relative to the deck?

Have you done any research on this feature, mallacoota?
Last edited:


