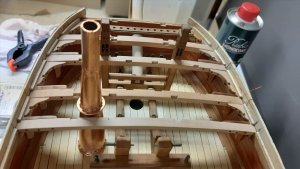
HMS Royal Caroline kit ZHL 1/30

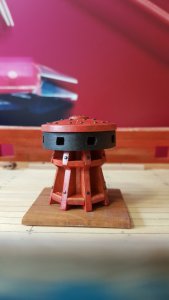
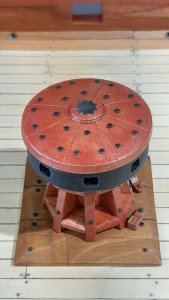
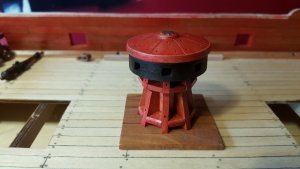
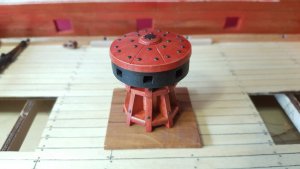
The capstan is now oiled which gives it a nice smooth satin finish.
20190319_174116.jpg
Followed by adding the iron parts gives it a nice contrast.
20190320_100535.jpg
20190320_124614.jpg
Now it is finishing the bedplate for the capstan which shows 6 laser cut planks in the surface. I think this is wrong and it should be build of less parts, so I think I will reverse it and give it a different appearance.
 
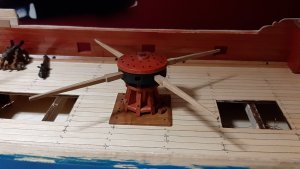
Finally the capstan is finished. As mentioned I turned the bedplate up side down and carved lines for a three planks construction according the drawings. Nails and clamps are fitted and oiled.
20190324_131247.jpg
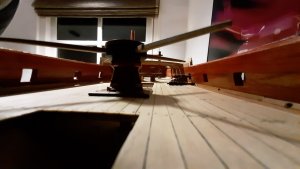
Of the 8 bars I have carved now 4 pieces, took them with me while travelling. Perfect job for a hotel room workshop.:)
I still don't know if I paint the bars red or black or just only oil them.
20190328_205744.jpg

20190328_205813.jpg
 
The next step is the foremast bits.
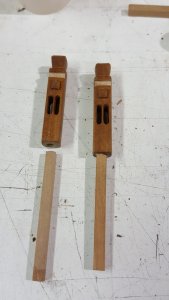
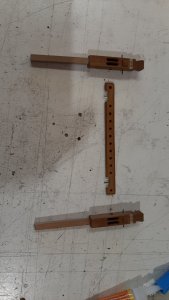
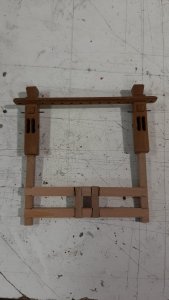
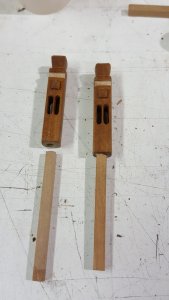
The bit are build from two cnc carved halves which glued together create a very nice result. Originally the bits are in the kit to high above the deck and as I build the deck contruction I will fit them to the side of the deckbeams and lengthen them to fit also on the main deck.
20190315_174829.jpg


The sheaves for the bits are from brass which I lightly burnished.
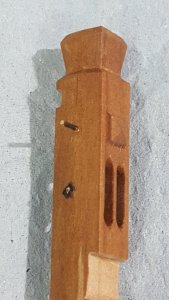
To fit the sheaves I used burnished brass nails for which I cut brass plates to fit on each side of the nail and on these I riveted the end of the nail to close up the nail between the two plates.
20190318_215510.jpg
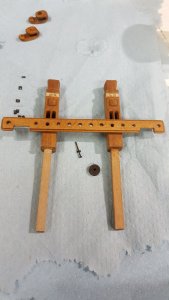
The belay pin rack was cnc finished on one side, I finished the other side equally on the milling machine.
20190318_214125.jpg
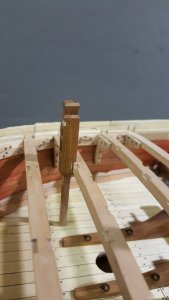
The sheaves are fitted and the bit is dryfitted to the deck beam.
20190318_213528.jpg

Te belay pin rack I fit with counter sunk brass pins to get a ridged construction as these racks will be used.
20190329_152350.jpg

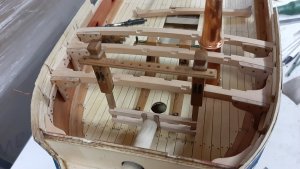
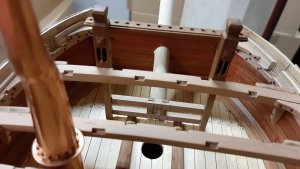
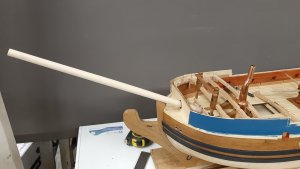
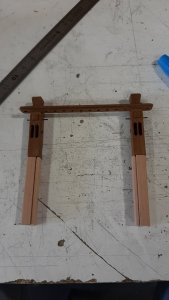
At the foot of the foremast bit there is a construction to lock up the bowsprit. As my forecastle deck will be partly open I build this construction according the aots book.
For this the bowsprit foot is carved with a square at the correct angle.
20190329_163432.jpg

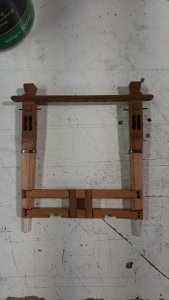
Then the construction at the foot of the bits is build, I made this of strips of pear.
20190329_173307.jpg

Nicely locking the bowsprit in place, before finall fitting the height should be correctly set to give the bowsprit the proper angle.
20190329_213646.jpg
20190329_213659.jpg
20190329_213727.jpg
The bowsprit will be removed again for finall fitting in a much later stadium. You see here that the laser cut hole for the bowsprit is too large, the bowsprit diameter is accrding to the aots drawings correct.
 
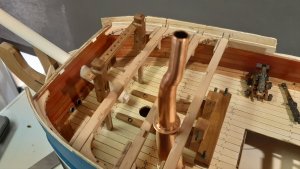
Looks really great, and by the way, I am in love with the furnace chimney, especially flange!! ...and not to mention your new avatar. Is that a bowsprit from Friech Boeir Yacht you want to borrow from Alexsander? :p
Gents many thx. The picture is taken on the Statenjacht Utrecht. Have been sailing with it for a day last year.
 
At the moment I am testing with tar to tar the ropes for my RC. I am working with Stockholm Tar which is the same product as originally used in the 17th and 18th century. Stockholm Tar is destilled from pine wood and has a fantastic smell, same like the ropes at the Batavia yard which is close to my home. It can be bought at every horse specialty shop as it is used for treating horse shoes.
The tar ai mix with one part tar, one part turpentine (natural pine) and one part boiled linseed oil. To quickly dry add a drop of siccative per 100ml of mixture, add to much siccative and it will never dry.
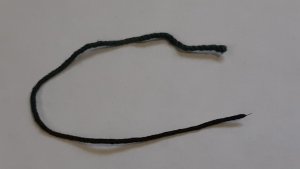
A test below on black rope from the kit which I will not use. Black rope is to dark and incorrect, I will tar natural rope creating a dark brown color.
This rope dried in half an hour.
See top untarred and bottom tarred.
20190404_170825.jpg
More to follow.
 
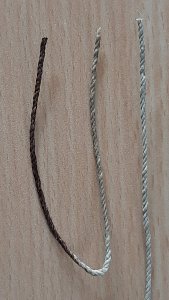
A second test on natural colored rope.
Left tarred, middle with beewax and right untreated.
20190405_102428.jpg
I will use beewaxed for all running ropes and tarred for all standing rigging.
And I can tell you the smell of the tarred rope is fantastic, close your eyes and yu are onboard of a historic ship, except the horrible smells coming from the bildge off course :).
 
Bringing the new tarring process to action.
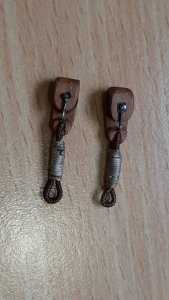
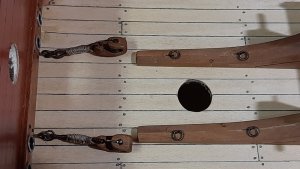
Two blocks for the winch rope are tackled and fitt3d to eyebolds in the fwd bulkhead.
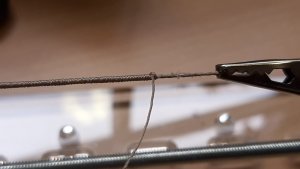
For tackling I used 0,5 mm rope which I served with a 0,25 mm rope.
20190405_144317.jpg
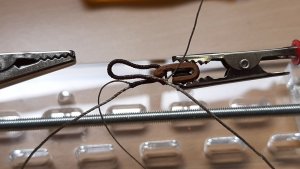
The served rope is tarred and fitted to the block.
20190405_142027.jpg
Followed finishing the rope with a 0,25mm untarred rope.
20190405_150227.jpg
These blocks are then fitted to rings which again are fitted to the eye bolds.
20190405_155223.jpg
 
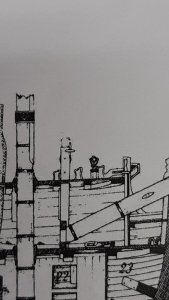
As I wasn't satisfied with the kits setup of the fwd mast bitt I decided to change these acoording to the AotS drawings.
The setup according the kit
20190315_174829.jpg
Or as on the drawings with a tapered bitt end towards the lower deck.
20190330_121800.jpg
And the solution a doubling with pear strips.
20190330_121820.jpg
These of course further cut and sanded towards a tapered shape fitting the bowsprit base and adding two iron belts to mask the color difference in the two different wooden parts.
20190405_171627.jpg
Now the bitt with the bowsprit basis can be dry fitted. To strengthen the construction I use wooden dowels.
20190405_175848.jpg
 
Last edited by a moderator:
The next step is the foremast bits.
The bit are build from two cnc carved halves which glued together create a very nice result. Originally the bits are in the kit to high above the deck and as I build the deck contruction I will fit them to the side of the deckbeams and lengthen them to fit also on the main deck.
View attachment 85654


The sheaves for the bits are from brass which I lightly burnished.
To fit the sheaves I used burnished brass nails for which I cut brass plates to fit on each side of the nail and on these I riveted the end of the nail to close up the nail between the two plates.
View attachment 85656
The belay pin rack was cnc finished on one side, I finished the other side equally on the milling machine.
View attachment 85655
The sheaves are fitted and the bit is dryfitted to the deck beam.
View attachment 85657

Te belay pin rack I fit with counter sunk brass pins to get a ridged construction as these racks will be used.
View attachment 85658

At the foot of the foremast bit there is a construction to lock up the bowsprit. As my forecastle deck will be partly open I build this construction according the aots book.
For this the bowsprit foot is carved with a square at the correct angle.
View attachment 85659

Then the construction at the foot of the bits is build, I made this of strips of pear.
View attachment 85660

Nicely locking the bowsprit in place, before finall fitting the height should be correctly set to give the bowsprit the proper angle.
View attachment 85661
View attachment 85662
View attachment 85663
The bowsprit will be removed again for finall fitting in a much later stadium. You see here that the laser cut hole for the bowsprit is too large, the bowsprit diameter is accrding to the aots drawings correct.
Hello Maarten ,I will build my Ontario exactly the same way ,the lower deck will be exposed to show the guns,.the upper deck will be partially planked showing the deck beams and horizontal knees.
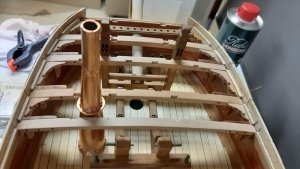
 
Hello Maarten ,I will build my Ontario exactly the same way ,the lower deck will be exposed to show the guns,.the upper deck will be partially planked showing the deck beams and horizontal knees.
I think I will do the waterways and maybe just a view planks like admirality style and keep the deck construction exposed.
Your ontario is really becoming a gem.
 
Back
Top