HMS Royal Caroline kit ZHL 1/30

I am sure we all know how talented you are when it comes to building ship models, but building the furniture, a miniture furniture - this is something new. Very nice and stylish. King would be happy for sure. But wait...when did you build the chair?
Hi guys thx again for your compliments.
The chair is part of the kit, however I made some changes. Build this one when working the great cabin to get the proper dimensions for the benches.
 
Fantastic work Maarten.It has to be said there is no comparison between this kit and the Panart offering I am building.Yes it is considerably more expensive,but at least you are just adding details,not chucking most of the kit away.

Slighty off topic,what do you think to the Saint Phillipe monograph?It ain't cheap but I fancy this one,the vessel is stunning.

Kind Regards

Nigel
 
Last edited:
Time for the sofa.
As a model I selected a georgian sofa from 1772 which I found in an online auction house.
The basis is plywood, as I make two sofas, two bottoms and two backs
View attachment 82946
On top of the plywood I added some foam to create the cushions.
View attachment 82947
I will cover it with a type of silk cloth fixed with double sided carpet tape.
The sides of the sofa are also made from plywood, again covered with cloth.
View attachment 82948.
On the cloth I will add the george II monogram and embroided flowers which are also shown on the cabins wallcoverings. The decorations I do with very fine 0.7 mm paint markers.
View attachment 82956
Now time to add wood, the sides of the sofa I cover with pear wood. I also build a bottom frame with pear wood strips.
View attachment 82957
Fitting all together and this is the result.
View attachment 82959
Finally dry fitting the first sofa in place.
View attachment 82962
View attachment 82963
First sofa finished a second will follow.

I need a table and sofa like this in my living room Lol,very nice work Maarten.
 
Fantastic work Maarten.It has to be said there is no comparison between this kit and the Panart offering I am building.Yes it is considerably more expensive,but a least you are just adding details,not chucking most of the kit away.

Slighty off topic,what do you think to the Saint Phillipe monograph?It ain't cheap but I fancy this one,the vessel is stunning.

Kind Regards

Nigel

Hello Nigel,if you have not read it,we have a review by Uwe ot the St Philippe monograph

 
The sainte phillipe is fantastic. Sometimes the translation is a little bit Frenglish but that most probably its the first release.
Drawings and details are great.
I think it will be my next build in 1:48 scale a great and hudge model.
 
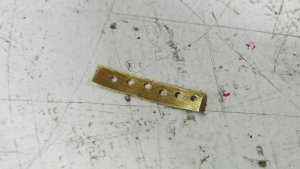
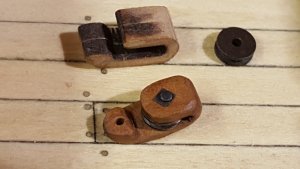
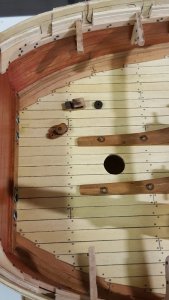
Back to the forcastle for the anchor- capstan wire there are two blocks to guide the wire around the bitt. These are carved from two pieces of laser cut pear. The sheaves are brass which I burnished black. The sheaves I fitted with a nail and a square shaped plate which I cut from brass sheet.
20190315_172515.jpg
20190315_161334.jpg
20190315_161401.jpg
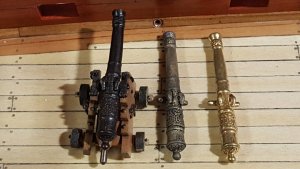
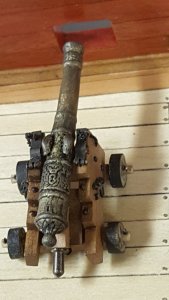
As my old burnishing fluid was not working anymore it was only oxidizing instead of blackening. The old fluid I used for a test on a gun barrel and I am quite satisfied with the result. I think I even sand down the burnished gun and give it this new treatment resulting in a nice brass gun barrel.
Below the three guns original and the two different burnished ones.
20190315_143723.jpg
And the new gun on the cariage.
20190315_175605.jpg
 
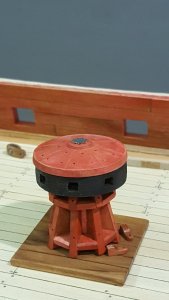
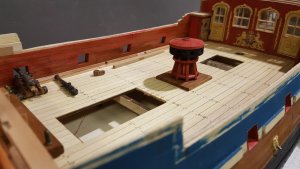
My next step is building the capstan.
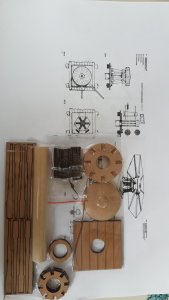
It is build as a small kit at its own, which shows the amazing detail of this kit.
20190317_134406.jpg
First all the laser char had to be removed which took me almost all Sunday afternoon, scraping, filing, sanding.
I decided not to leave it only in wood colours but to give it the colours according the aots book, this means red with the ring on the top black.
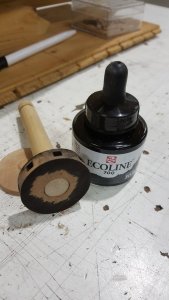
As I start to dislike actual thick paints I use for the red my mixed red paint with clear varnish, which is more like a wash. For the black I use a new technique, this is colouring the wood with Ecoline. This is a very thin fluid pigment like an ink which penetrates into the wood. I finish it in the end with oil to give it a nice warm black appearance.
Below the edges sanded after applying a first treatment.
20190318_194709.jpg
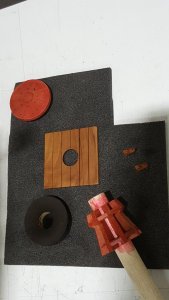
Here all the parts treated with ecoline and my red stain.
20190318_210602.jpg
And dry fitting the individual parts.
20190318_220543.jpg
Now I have to fit all iron and finish it by adding some layers of oil.
20190318_220604.jpg
20190318_220549.jpg
And finally build and fit the spokes.
 
Back
Top