You are getting more and more skills, Maarten! Great job, mate!!
-

Win a Free Custom Engraved Brass Coin!!!
As a way to introduce our brass coins to the community, we will raffle off a free coin during the month of August. Follow link ABOVE for instructions for entering.
-

PRE-ORDER SHIPS IN SCALE TODAY!
The beloved Ships in Scale Magazine is back and charting a new course for 2026!
Discover new skills, new techniques, and new inspirations in every issue.
NOTE THAT OUR FIRST ISSUE WILL BE JAN/FEB 2026
You are using an out of date browser. It may not display this or other websites correctly.
You should upgrade or use an alternative browser.
You should upgrade or use an alternative browser.
HMS Royal Caroline kit ZHL 1/30
- Thread starter Maarten
- Start date
- Watchers 112
-
- Tags
- royal caroline zhl
Splendid work Maarten.The black and Boxwood looks fantastic on the head rails,plain boxwood would have been too much and the details would have been lost.
Kind Regards
Nigel
Kind Regards
Nigel
Just beautiful Maarten, your skills are amazing, enjoy and have a wonderful Merry Christmas and a Healthy Prosperous New Year,
best regards John,
best regards John,
Looking very good - would like to be also able to make such carvings
Hi uwe, thx for the comments. It is not so difficult as it looks, just try.
Dear Maarten,
I was overimpressed with this blog and your passion and creativity. Thank you, it was quite an experience to review it!
As a result, I have just ordered the same kit, so I will have a pleasure of building it with my father (we work together on ships).
I am not sure I am ready to go to the extent you demonstrated but I will definitily use many of you techniques and I think I will decorate the aft rooms, but with much less quality. Because your level is simply unreachable.
As I live in NL, I suggest I will invite you for a drink to tell you "thank you" in person. It is the best ship-building blog I have ever seen.
Hi Alex,Dear Maarten,
I was overimpressed with this blog and your passion and creativity. Thank you, it was quite an experience to review it!
As a result, I have just ordered the same kit, so I will have a pleasure of building it with my father (we work together on ships).
I am not sure I am ready to go to the extent you demonstrated but I will definitily use many of you techniques and I think I will decorate the aft rooms, but with much less quality. Because your level is simply unreachable.
As I live in NL, I suggest I will invite you for a drink to tell you "thank you" in person. It is the best ship-building blog I have ever seen.
Good to hear you liked it and it inspired you to start the same model. It is a fantastic ship and you won't regret it.
Sounds fun to meet you and I can bring the model to show and discuss, good for new ideas for both of us.
I will send you a PM.
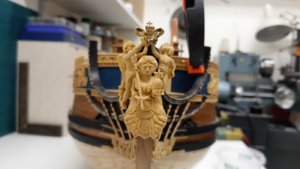
Finally after plenty hour of cutting, grinding and polishing the three figure heads are finished for dry fitting.
First the larger angel figure needed a second arm and a leg extension. I will spare you the bloody details .
.
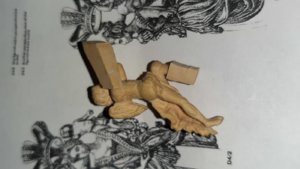
With this as a result before polishing and waxing.
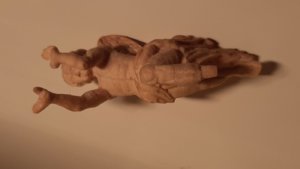
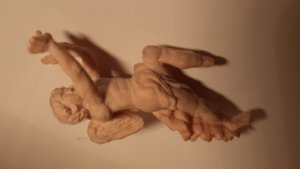
Finally dry fitting to see if everything fits. The small angel gets a 0.5 mm pin in its foot to fit it.
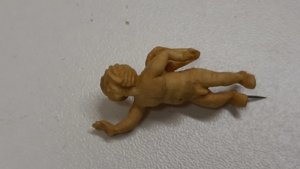
Then fitting everything in place.
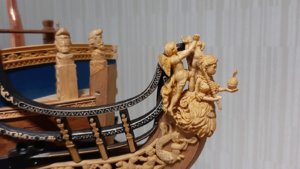
On top of the hands the crown will be fitted.
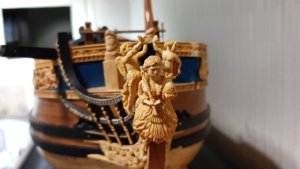
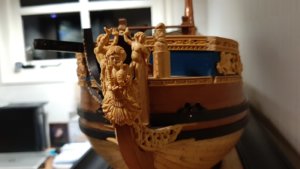
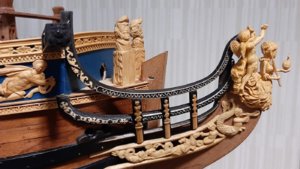
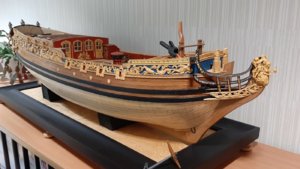
That was it for 2019.
To all of you many thx for following in 2019, more to come in 2020.
Have a great years end and looking forward to 2020.
First the larger angel figure needed a second arm and a leg extension. I will spare you the bloody details

With this as a result before polishing and waxing.


Finally dry fitting to see if everything fits. The small angel gets a 0.5 mm pin in its foot to fit it.

Then fitting everything in place.

On top of the hands the crown will be fitted.


That was it for 2019.
To all of you many thx for following in 2019, more to come in 2020.
Have a great years end and looking forward to 2020.
You are becoming very proficient at carving Maarten,excellent work 
Kind Regards
Nigel

Kind Regards
Nigel
HE SURE IS, ONE OF THE BVEST I HAVE SEEN, THE WHOLE BUILD IS JUST AMAZING. Don
I can only echo Nigel's wording! Great carving work! Bravo!
Marteen - woa outstanding indeed - this kind of work will never reach my fingers BUT so appreciate looking at the beautiful skills that
you bring to life with wood.
you bring to life with wood.
Many thx for your comments, your Vasa is a beauty also. Love the colors of the carvings.Marteen - woa outstanding indeed - this kind of work will never reach my fingers BUT so appreciate looking at the beautiful skills that
you bring to life with wood.
Well Maarten, what can I say that the guys have not already said, she is absolutely stunning, you have certainly gone the extra mile,
Wishing you a Happy Healthy Prosperous New Year,
best regards John,
Wishing you a Happy Healthy Prosperous New Year,
best regards John,
Finally the work railing on the ps side is also finished. After steaming them in the right shape I carved out the spaces into the two lower rails to fit the pillars. The pillars are doubled in thickness and will fit snug over the rails.
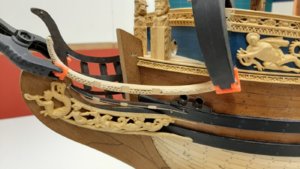
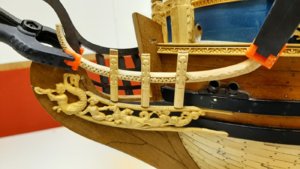
Now the top of the pillars is sanded to a correct length to make a tight fit with the top rail followed by coloring the rails with black ink.
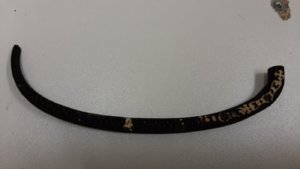
After the ink is dry the top layer of the wood in the carvings is scraped to remove the ink and a nice contrast appears.
All wood connection I enforced with brass pins and the top rail is fitted with burnished nails to the pillars.
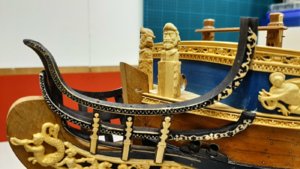
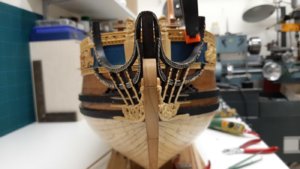
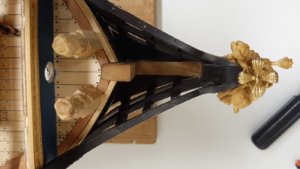
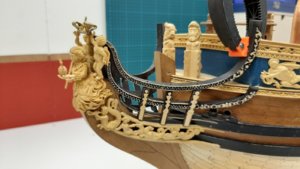
If the glue is dried I can apply some layers of oil to seal and polish it.
Then on to the next step which I think will be the rudder or maybe the poop deck, we'll see.


Now the top of the pillars is sanded to a correct length to make a tight fit with the top rail followed by coloring the rails with black ink.

After the ink is dry the top layer of the wood in the carvings is scraped to remove the ink and a nice contrast appears.
All wood connection I enforced with brass pins and the top rail is fitted with burnished nails to the pillars.


If the glue is dried I can apply some layers of oil to seal and polish it.
Then on to the next step which I think will be the rudder or maybe the poop deck, we'll see.
A TRUE WORK OF ART, THIS IS JUST AWSOME WORDS CAN NOT DESCRIBE IT. Don
A great technique with the ink, Maarten. Looks awesome!! On another hand, the man who carves all three figures, not to mention Awesome, could possibly carve the crown easily...  What do you think, shipwright?
- Joined
- Jan 9, 2020
- Messages
- 10,566
- Points
- 938

Dear Maarten
Every once in a very long while - something gets done that simply defies reason or belief. If I had not witnessed this build myself, I would not have believed it possible. You are an inspiration Sir!
Best regards
Heinrich
Every once in a very long while - something gets done that simply defies reason or belief. If I had not witnessed this build myself, I would not have believed it possible. You are an inspiration Sir!
Best regards
Heinrich


