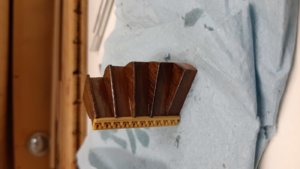
Thanks guys - your comments re the beeswax is much appreciated.
-

Win a Free Custom Engraved Brass Coin!!!
As a way to introduce our brass coins to the community, we will raffle off a free coin during the month of August. Follow link ABOVE for instructions for entering.
-

PRE-ORDER SHIPS IN SCALE TODAY!
The beloved Ships in Scale Magazine is back and charting a new course for 2026!
Discover new skills, new techniques, and new inspirations in every issue.
NOTE THAT OUR FIRST ISSUE WILL BE JAN/FEB 2026
You are using an out of date browser. It may not display this or other websites correctly.
You should upgrade or use an alternative browser.
You should upgrade or use an alternative browser.
HMS Royal Caroline kit ZHL 1/30
- Thread starter Maarten
- Start date
- Watchers 112
-
- Tags
- royal caroline zhl
Hi Janos,Maarten / John
I still did not work out a proper technik to finish Boxwood carvings for myself. Currently I use wipe-on Poly but not happy with it. This Beeswax seems to be interesting. My question is will the polished Beeswax not become dull after a while? And what is happening to the surace when is becomes dusty?
Janos
So far no issues with dust or reduction of shine.
The pictures below are of parts I finished and waxed approx 2 years ago. They still have a gloss and don't collect dust. Offcourse this is in the Dutch climate which differs from the temperatures in Australia, but also here we had last summer temperatures up to 37 deg C and still no issues with the beewax.
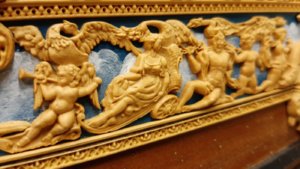
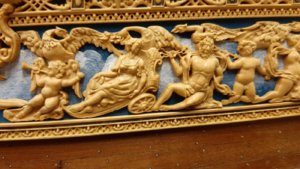
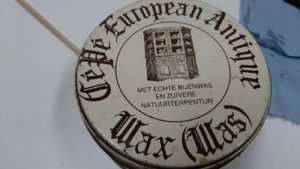
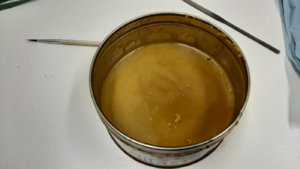
This is the beewax I use.
Thanks - I’ll try this out on my Phoenix.
- Joined
- Oct 15, 2017
- Messages
- 1,191
- Points
- 443

John/Marrten,G'day Paul, I'm the guy Maarten just mentioned, I wanted to take a different approach with a darker colour as I bought the kit with the Basic Pear wood carvings, see pics below, I hope you don't mind me posting them on your log Maarten,
View attachment 128861
This is the basic Pear wood stern carving,
View attachment 128862
The top part after a coat of the wax,
View attachment 128863
and after buffing,
View attachment 128864
and all the carving on the stern,
View attachment 128865
This is the wax I used, I did the same as Maarten and applied it with a toothbrush, my daughter gave me one of those little pots
that have a candle underneath and I dipped the toothbrush into the melted wax and applied it to the carvings using a hairdryer
to make sure it melted into all the little crevices etc, hope this with Maartens explanation helps you,
here is the link to my Royal Caroline build if you would like to take a look,
https://shipsofscale.com/sosforums/threads/zhl-royal-caroline-kit-scale-1-30.1310/page-g
best regards john,
.
Thank you for sharing your experiences and photos of the results. Explanations help, but with the added photographs showing the results, the story is complete. I've learned so much about finishing carvings in just a few posts you both shared.
My next steps is to find some beeswax, clear and even a few different tinted shades and test them out on some blank boxwood. Not intricate carvings, but maybe some carved basic shapes to see how the tinted beeswax reflex the light on top as well as in the undercuts.
Once I do this test, I'll post so others can see what finishes can be achieved. Of course I'll follow the same process you both did, including a medium buff.
Now it's time to spend some money on beeswax.
Thank you again.
Ken
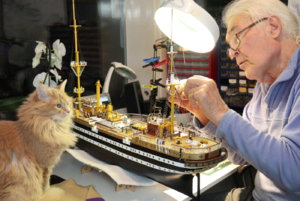
Guys, I am the most lucky of all of you, as I have seen the ship and Maarten in real life today.
He inspired me to publish the building blog of my HMS RC on this web site as well. It will be published here. Because of Maartens great job in building and blogging, I will not bother you with step-by-step blog, but I will concentrate more on the choices I make. E.g. I have decided to insert one inch of space in the middle of the ship to have less issues with space for carvings in the future. So, see you there.
He inspired me to publish the building blog of my HMS RC on this web site as well. It will be published here. Because of Maartens great job in building and blogging, I will not bother you with step-by-step blog, but I will concentrate more on the choices I make. E.g. I have decided to insert one inch of space in the middle of the ship to have less issues with space for carvings in the future. So, see you there.
Well, obviously you are lucky that you've seen Maarten's RC, what you may not know, however, that you are even more lucky to see Maarten himself!!! 
Welcome aboard SOS, Alex! ...and please, start your own build log, but don't cheat...step-by-step please! Every log in SOS is unique and very valuable for us. I am sure you did it 'your' own way!
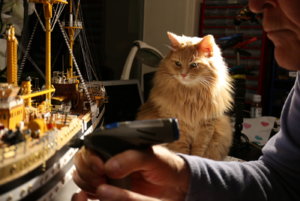
P.S. Nice cat, what is his\hers name?
Welcome aboard SOS, Alex! ...and please, start your own build log, but don't cheat...step-by-step please! Every log in SOS is unique and very valuable for us. I am sure you did it 'your' own way!
P.S. Nice cat, what is his\hers name?
Hello Alex (Aleksandr?) He is (the cat) - 'Simpatyshka'. I suspect, based on your story, this is your father? What ship model he is building? Looks like
Amerigo Vespucci or?
Amerigo Vespucci or?
Oh, Alex is good enough...Hello Alex (Aleksandr?)
I suspect, based on your story, this is your father? What ship model he is building? Looks like
Amerigo Vespucci or?
And, yes, this is my father, who is the "engine" of the process, working 12 hours per day, 7 days per week. My part is just to guide him...
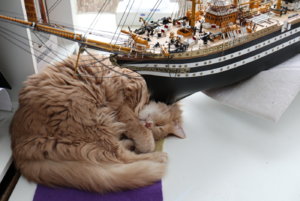
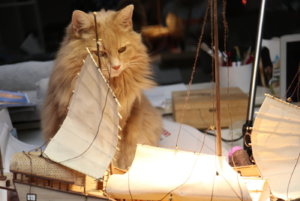
And yes, the cat started to play a star with the Amerigo Vespucci model, which was the model #4.
Dear @neptune, do you have a drawing/scheme of all these discrepancies and indication of all insertions which you suggest to add? I am at the point when I am going to cut the ship and do the changes, but I am very afraid to make a mistake because of some silly misunderstanding.Well just for my own satisfaction and for anyone who might build the Royal Caroline, I got out the drawings and measured them against the model I am building,
From the transom to the front of the figure head on the AOTship drawings the distance is 1100, and on the model the distance is 1055, so the model is 45mm shorter than the AOTship drawings. This causes some problems when attaching the carvings along the sides of the ship, I didn'nt know about this till I started attaching the carvings and subsequently I had to trim the carvings to get them to fit.
Hi Janos,
So far no issues with dust or reduction of shine.
The pictures below are of parts I finished and waxed approx 2 years ago. They still have a gloss and don't collect dust. Offcourse this is in the Dutch climate which differs from the temperatures in Australia, but also here we had last summer temperatures up to 37 deg C and still no issues with the beewax.
View attachment 128913
View attachment 128914
This is the beewax I use.
View attachment 128915
View attachment 128916
Thanks, Maarten! Impresszive look. I will try it.
Janos
G'day Alex, I have posted some info and pics on your log,Dear @neptune, do you have a drawing/scheme of all these discrepancies and indication of all insertions which you suggest to add? I am at the point when I am going to cut the ship and do the changes, but I am very afraid to make a mistake because of some silly misunderstanding.
best regards john,
Maarten / John
I still did not work out a proper technik to finish Boxwood carvings for myself. Currently I use wipe-on Poly but not happy with it. This Beeswax seems to be interesting. My question is will the polished Beeswax not become dull after a while? And what is happening to the surace when is becomes dusty?
Janos
G'day Janos, my carvings are just as polished as when I did them nearly three years ago,
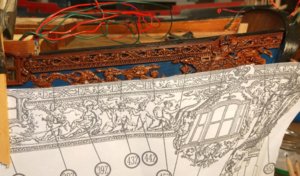
I think we should leave Maarten to his build log, thank you Maarten for being so Patience,
best regards john,
G'day Maarten I have down loaded some of your photo's of the bow rails to help me when i get around to her again, they are really nice photo's,
best regards john,
best regards john,
Hi John, if you need specific details let me know.G'day Maarten I have down loaded some of your photo's of the bow rails to help me when i get around to her again, they are really nice photo's,
best regards john,
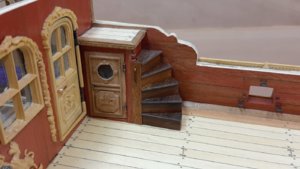
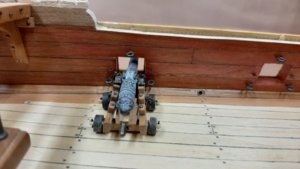
Finally something else then the galleon of the ship. First I added some of the brass eye bolts for the cannons. These are etsched brass parts which I burnished black. I thought to remake them from brass wire but finally decided they are acceptable.
After that, on to the PS stairs. This is build from 15 individual lasered pearwood parts to create a 5 steps spiral staircase.
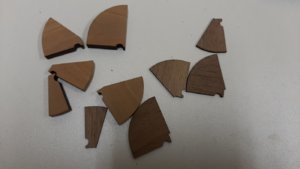
Three parts form one step.
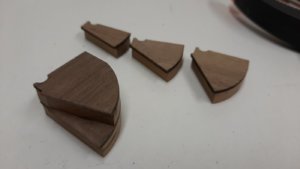
Building one wooden block.
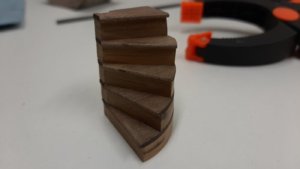
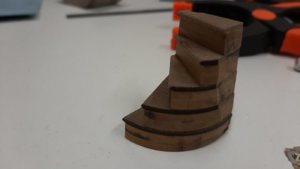
The outside I think I will cover with vertical planks of pear, but for this I still have to do some study how this was executed on British ships.
Finally dry fitting the stairs.
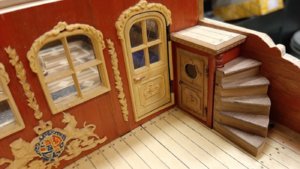

After that, on to the PS stairs. This is build from 15 individual lasered pearwood parts to create a 5 steps spiral staircase.

Three parts form one step.

Building one wooden block.


The outside I think I will cover with vertical planks of pear, but for this I still have to do some study how this was executed on British ships.
Finally dry fitting the stairs.

The stairs are looking very good - are these parts directly "out-of-the-box" or scratch?
Hi Uwe,The stairs are looking very good - are these parts directly "out-of-the-box" or scratch?
Direct out of the box, laser cut pear.
- Joined
- Jan 9, 2020
- Messages
- 10,566
- Points
- 938

@ Alex: The more build logs I watch, it seems to me that a cat is mandatory for a quality build. Any particular recommendation with regards to species? Lol!
@ Maarten: The beeswax is another thing I have learnt today. Watching your build log requires one to have a notepad by your side to record all the things one can learn!
@ Maarten: The beeswax is another thing I have learnt today. Watching your build log requires one to have a notepad by your side to record all the things one can learn!


