HMS Royal Caroline kit ZHL 1/30

G'day Uwe
I think you mean poop deck not gallion. I might be wrong.
Greg

Sorry, I used the german term, "gallion" means according Paaschs dictionary "From keel to truck" exactly "cutwater".
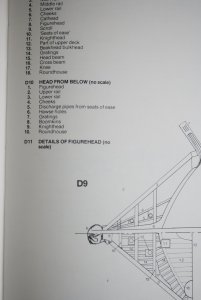
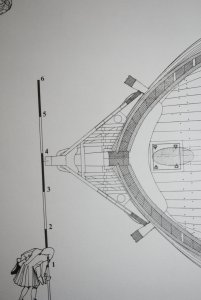
I wanted to mention, that the normal seats of ease are on the head of the ship, somewhere at the corners of the gratings installed between the stem and the different rails.......fastly made two photos to explain the location I ment.
First photo is the HMS Bellona, 10 years jounger than the Royal Caroline, copied from the book of B. Lavery from the Anatomy series (seat of ease is no. 10 in sketch D9) and the second is the La Salamandre. The seat of ease are the circles........therefore a not very relaxing area during heavy weather.......sorry for highjacking this thread
IMG_1854.JPG IMG_1855.JPG

Sorry for the wrong term I used in the post before
 
Hi gents, thx for the comments. I agree the brown stains bring up some questionmarks, maybe a dirty king? We had the same discussion here. It is from the oak coloured oil I used to paint the toilet and toilet floor. Maybe I will repaint them to make them a little bit more fancy.
About the lavatories on the galleon, in Dutch galjoen, these are not in the drawings of the Royal Caroline. I will se if I install these, will be part of some additional research.

Regs Maarten
 
...—
About the lavatories on the galleon, in Dutch galjoen, these are not in the drawings of the Royal Caroline. I will se if I install these, will be part of some additional research.
Regs Maarten

Good to read that you are using the same term.....
......I think it would be good to find out where the seats were on the ship. Somewhere the crew had to make their „business“ - in kits very often the seats of ease are not included or not prepared, maybe because a lot of modelers do not think about. I know from reading publications, that they were usually at the head / galleon......
On The HMS Endeavour, it was at the bow and that deck was called the poop deck!
Greg
 
On The HMS Endeavour, it was at the bow and that deck was called the poop deck!
Greg

You are correct. The bark Endeavour had no typical head or galleon with gratings to walk, so no possibilties to install.
We are on the same track....
 
He He......
I remembered, that I have an academical thesis somewhere which is explaining this detail in detail

The title of this thesis is

"The Development of external sanitary facilities aboard ships of the fifteenth to nineteenth century" written by Joe John Simmons in 1985

Enjoy...... ;)
 

Attachments

G'day Maarten and Uwe
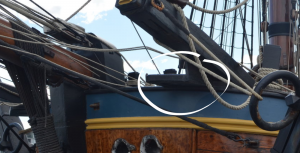
I don't know about the Royal Caroline, but with my research years ago on the HMS THE ENDEAVOUR, there were two boards attached to the bow rail and the cat which had a hole for the sailors to sit while doing their personal business.
That is why the bow on the bark was called the poop deck.

Studio_20180418_033443.png
This image shows the toilet seat on the port side marked with the white circle.
It would be interesting to see what the RC had.
Havagooday
Greg
 
Hi Uwek,

Thx for the document, maybe I can find a good solution for the crew of the RC from this one.

Maarten
 
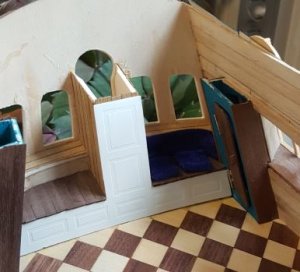
So back to building a cabin for a king. A changed my ideas again, since I started using etsching I thought to create panneled walls for the lower part of the cabin. This time it is single side etsching to create the pannels.
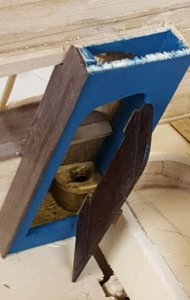
Before panneling, first the SB toilet had to fitted as well, see below.
SB Toilet.JPG
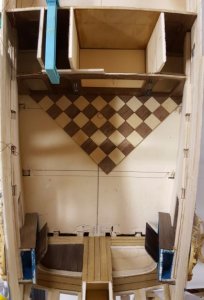
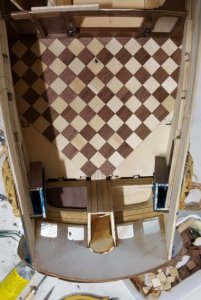
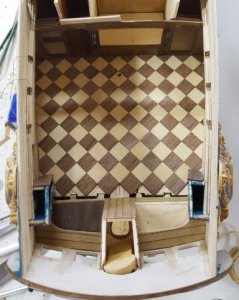
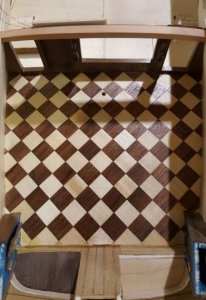
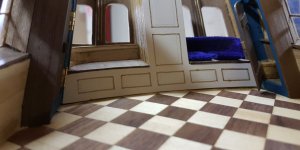
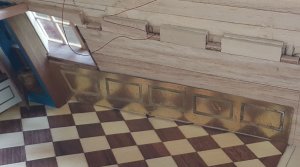
And I layed down the parquettery floor which was supplied with the kit for the main cabin, I am using this for the kings cabin and the hallways.
Floor 1.JPG
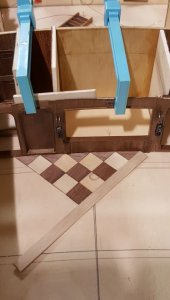
First set out a straight line in the length and middle of the ship, see the black line above. The use a straight piece of plank to fit the small squares along.
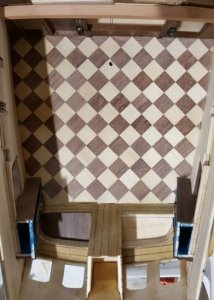
Then the process of laying down the floor is showed below.
Floor 2.JPG
Floor 3.JPG
Floor 4.JPG
Floor 5.JPG
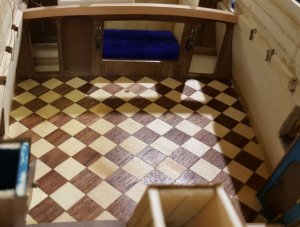
And finally the floor is oiled with a monocoat parqueterry floor oil, giving a nice warm natural colour.
Floor 6.JPG
Floor 7.JPG
To be continued with the panneling, and I made a real tapestry for the floor.

Maarten.
 
I don't believe the word "poop "as used in naval architecture has any relevance to any bodily function.Early Dutch naval terminology may be worth researching.Yes the "latrines" or" heads" for other ranks on the Endeavour was indeed at the bow.
 
Dear Maarten, your floor is looking great. Very accurate and not so easy to make -> symmetrical ->
We say in german „großes Kino“! Word by word translated „big cinema“ but I think the Dutch will understand. Very well done
 
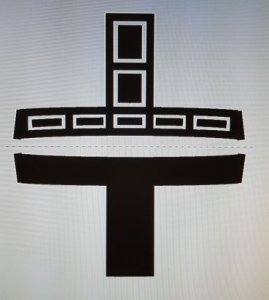
As mentioned after the floor it is up to the panels. First I made a drawing in Powerpoint with only the fwd side left open to etsch the panels.
Panel 1.JPG
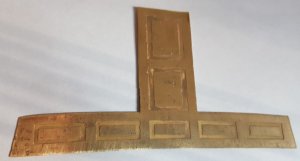
Then after etsching and sanding this is the result.
Panel 3.JPG
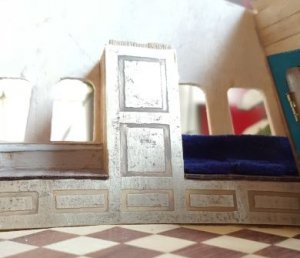
And fitting in place
Panel 2.JPG
The panel I have painted matt white with my Tamiya airbrush set and finished with golden lines around the panels outerside.
Panel 4.JPG
Panel 5.JPG
For the PS and SB sides I have also created panels.
Panel 6.JPG
The panels will be finished the same as the stern one and a top profile and a base board.
 
Dear Maarten, your floor is looking great. Very accurate and not so easy to make -> symmetrical ->
We say in german „großes Kino“! Word by word translated „big cinema“ but I think the Dutch will understand. Very well done
Hi Uwe,

Many thx for the comment, my wife is already saying I am making a posh dollhouse :-).
 
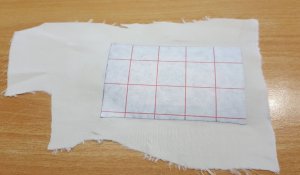
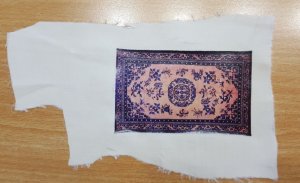
Now it is tapestry time. I still had some tranfer paper used for putting transferst on cotton T-shirts. On this I printed in my regular colour laser printer my choosen persian rug. and with an iron you iron it on.
Carpet 1.JPG
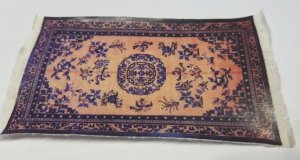
Then pull of the cover paper and here is the tailor made persian rug, much quicker then hand knitting.:-)
Carpet 2.JPG
The next is cutting it to size and remove the threads on the end to get these small rope ends on the sides.
Carpet 3.JPG
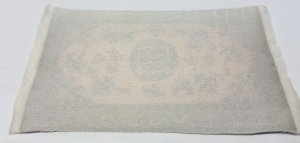
The rear side of the carpet is just the viscose type of cloth I used.
Carpet 4.JPG
Finally I have lightly sanded the top of the carpet to remove the gloss of the transfer to make it more real.

Next time the wall will be covered with wall paper and I will finish the stern bench etc.

Regards Maarten.
 
That's a brilliant idea to use tapestry on the floor. I might steal your idea as well, if you don't mind. I was planning to put the Royal Crest in the parqueterry floor, but this would be much easier.
I like your idea of etching the wooden panels. Brilliant idea again.
I have to stop now, before you get the modeling police after me for a major 'heist' of ideas.
Happymodeling
Greg
 
Back
Top