Impressive Maarten, to see a dovetail joint is amazing detail. Bravo!
-

Win a Free Custom Engraved Brass Coin!!!
As a way to introduce our brass coins to the community, we will raffle off a free coin during the month of August. Follow link ABOVE for instructions for entering.
-

PRE-ORDER SHIPS IN SCALE TODAY!
The beloved Ships in Scale Magazine is back and charting a new course for 2026!
Discover new skills, new techniques, and new inspirations in every issue.
NOTE THAT OUR FIRST ISSUE WILL BE JAN/FEB 2026
You are using an out of date browser. It may not display this or other websites correctly.
You should upgrade or use an alternative browser.
You should upgrade or use an alternative browser.
HMS Royal Caroline kit ZHL 1/30
- Thread starter Maarten
- Start date
- Watchers 112
-
- Tags
- royal caroline zhl
Fantastic job, Maarten!
At some stage I was also experimenting with Stockholm tar. The colour is great, and the end result is obviously most authentic, but I found two difficulties. One is that the finished rope is becoming very happily dusty in a short period of time and there is no way to remove the dust. The other is that however well the excess tar is removed from the rope, it still comes out in a liquid form if you put a knot onto the rope, either knotting is by itself or by another, connecting rope. This gives an unsightly finish - and the dusting effect is ever stronger.
I gave up using the Stockholm tar because of these reasons.
Janos
Last edited:
Hi gents,
Thx for the comments.
Janos did you also use siccative and oil in your stockholm tar? When I know stretch and twist the rope no fuild is getting out.
We'll see, maybe it is a once in a life time.
What do you use now?
Thx for the comments.
Janos did you also use siccative and oil in your stockholm tar? When I know stretch and twist the rope no fuild is getting out.
We'll see, maybe it is a once in a life time.
What do you use now?
Thank you Maarten,I am stealing some of your construction ideas though .I think I will do the waterways and maybe just a view planks like admirality style and keep the deck construction exposed.
Your ontario is really becoming a gem.
Hi gents,
Thx for the comments.
Janos did you also use siccative and oil in your stockholm tar? When I know stretch and twist the rope no fuild is getting out.
We'll see, maybe it is a once in a life time.
What do you use now?
No, I just used it in itself. This might be the reason.
Janos
Jumping back and forth over the deck of my RC O now started with the hatches and gratings.
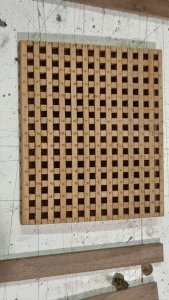
First the gratings and these are build from lasered strips of pear. Which are fixed to each other at a 90 deg. angle like in every kit. I made a template for this to create a exact 90 deg grating by glueing some scrap strips on a piece of paper in which the gratings are fully enclosed.
After dry fitting a full grating I put these in the template and cover these with multiple layers of shellac to glue everything together.
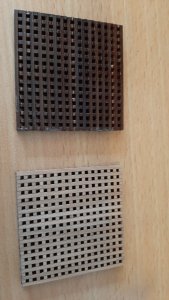
After drying of the gratings I drilled 0.6 mm holes in the joints and glued a brass pin in it to strengthen the construction.
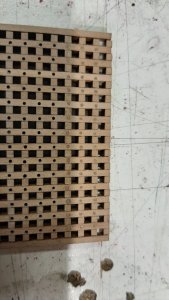
On the reverse side of the grating I removed the small pieces of wood between the strip running in the lenght of the hull, this as in the original construction the gratings are made from small beam along the width with planks in the lenght of the hull on top.
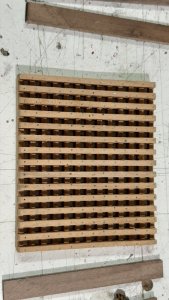
Now it is time for sanding. On my belt sander I sand it down to nearly half the thickness.
As the grating is bigger the I also cut it to the correct dimension. You can now nicely see the subtile effect of the brass pins.
Next step is the hatch coaming, made from lasered strips of walnut. As the hatches a slightly bollow I shaped these again on my belt sander.
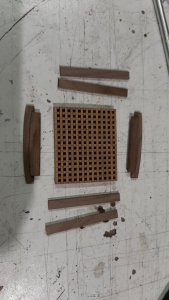
The grating I shaped accordingly by bending it after steaming.
Normally the hatch coaming is fixed to the deck with the grating loosely fitted in it providing acces to the deck below. As my battery case is below it I fixed the grating into the coaming and the coaming fits snug into the deck providing acces to my battery case.
When fitted this is not visible.
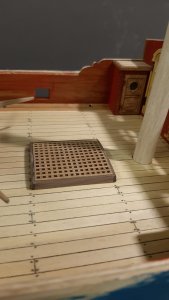
And the result after oiling it crrating a nice contrast between the walnut, pear and brass.
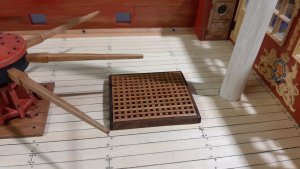
First the gratings and these are build from lasered strips of pear. Which are fixed to each other at a 90 deg. angle like in every kit. I made a template for this to create a exact 90 deg grating by glueing some scrap strips on a piece of paper in which the gratings are fully enclosed.
After dry fitting a full grating I put these in the template and cover these with multiple layers of shellac to glue everything together.

After drying of the gratings I drilled 0.6 mm holes in the joints and glued a brass pin in it to strengthen the construction.

On the reverse side of the grating I removed the small pieces of wood between the strip running in the lenght of the hull, this as in the original construction the gratings are made from small beam along the width with planks in the lenght of the hull on top.

Now it is time for sanding. On my belt sander I sand it down to nearly half the thickness.
As the grating is bigger the I also cut it to the correct dimension. You can now nicely see the subtile effect of the brass pins.

Next step is the hatch coaming, made from lasered strips of walnut. As the hatches a slightly bollow I shaped these again on my belt sander.

The grating I shaped accordingly by bending it after steaming.
Normally the hatch coaming is fixed to the deck with the grating loosely fitted in it providing acces to the deck below. As my battery case is below it I fixed the grating into the coaming and the coaming fits snug into the deck providing acces to my battery case.
When fitted this is not visible.

And the result after oiling it crrating a nice contrast between the walnut, pear and brass.

Every day learned something new, great tutorial. I always glue gratings together with diluted water PVA. The results vary, and some times It didn't glue all the way. Will try shellack next time. 

Very good result
G'day Maarten, just been catching up on your build, some very nice fine detailing you are doing, she is looking lovely,
best regards John,
best regards John,
Exceptional attention to detail Maarten. Great stuff.
Great work Maarten
Kind Regards
Nigel
Kind Regards
Nigel
After a nice Easter week of travelling around Iceland I was finally back in the shipyard this evening. Today it was about oiling my deck beams etc. And creating the terracotta insulation for the chimney. For this I used terracotta coloured air drying modeling clay.
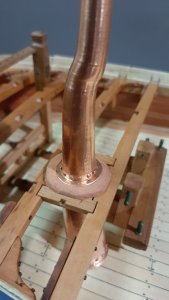
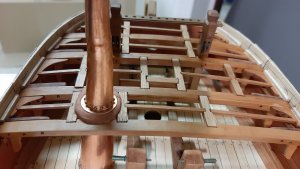
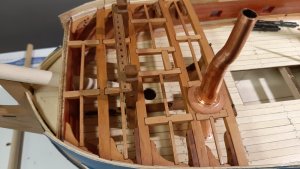
The deck deam will be finally fitted in a later stage as first the anchor cable should be fitted in place while the acces is still easy.
Hopefully I have some more time this week to make some progress the I will fit the laterns to the fwd deckbeam.


The deck deam will be finally fitted in a later stage as first the anchor cable should be fitted in place while the acces is still easy.
Hopefully I have some more time this week to make some progress the I will fit the laterns to the fwd deckbeam.
Very nice timber color under oil.
I have never seen that before, it does do a wonderful job though. Your framing looks great with it!
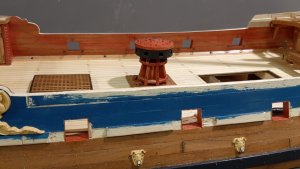
Now the fore castle deck constructin is nearly finished it is time to finish the bullwark in and the outside. I removed the temporary top whale which is replaced by a carved whale later on.
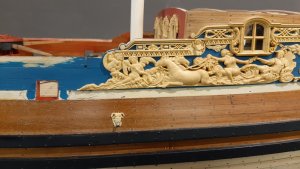
After that the top of the bullwark is trimmed to the correct height and shape.
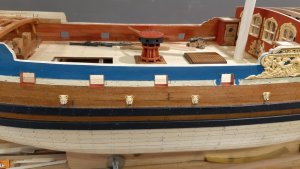
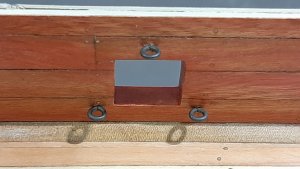
On the inside the eye bolts for the guns carriages are fitted, for the gun tackles 2 smaller eye bolts will be fitted next time as will be the eye bolt rings. The eye bolts are steel which I burnished black/blue rusty.
See you next time.

After that the top of the bullwark is trimmed to the correct height and shape.

On the inside the eye bolts for the guns carriages are fitted, for the gun tackles 2 smaller eye bolts will be fitted next time as will be the eye bolt rings. The eye bolts are steel which I burnished black/blue rusty.


See you next time.


