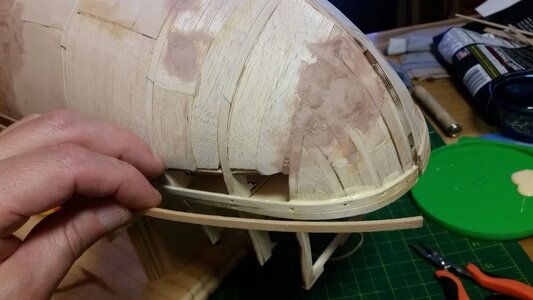
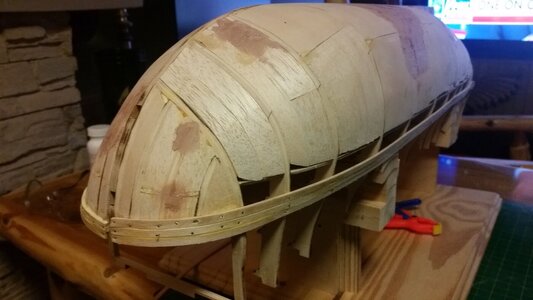
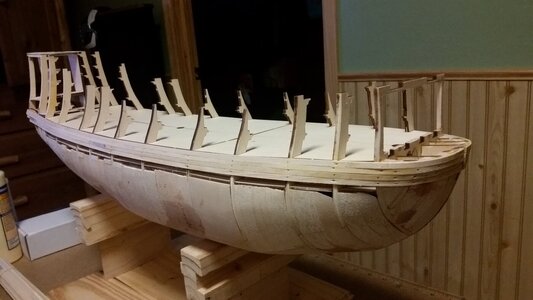
...talk about dedication....
-

Win a Free Custom Engraved Brass Coin!!!
As a way to introduce our brass coins to the community, we will raffle off a free coin during the month of August. Follow link ABOVE for instructions for entering.
-

PRE-ORDER SHIPS IN SCALE TODAY!
The beloved Ships in Scale Magazine is back and charting a new course for 2026!
Discover new skills, new techniques, and new inspirations in every issue.
NOTE THAT OUR FIRST ISSUE WILL BE JAN/FEB 2026
You are using an out of date browser. It may not display this or other websites correctly.
You should upgrade or use an alternative browser.
You should upgrade or use an alternative browser.
HMS Sovereign of the Seas - Bashing DeAgostini Beyond Believable Boundaries
- Thread starter DARIVS ARCHITECTVS
- Start date
- Watchers 105
Hey Kurt, I am so sorry to hear about your ongoing struggles. This must be really scary for you. I'm happy you are feeling better today and pray that you have turned the corner now. Go easy my friend - sanding sounds like a really bad idea. Maybe you could work on some dummy guns (I know that made you smile!).
...fight back and don't give up. You must believe in your soon recovery! הַחְלָמָה מְהִירָה
- Joined
- Apr 10, 2020
- Messages
- 654
- Points
- 353

Hello Kurt !
I had Covid 5 month ago and after some time I am near normal.Still my blood sugar is medium high after covid medication .
Avoid the acid brews that help the virus thrive
Not going into despair helps too !
Kind regards,Daniel
I had Covid 5 month ago and after some time I am near normal.Still my blood sugar is medium high after covid medication .
Avoid the acid brews that help the virus thrive
Not going into despair helps too !
Kind regards,Daniel
Had a good day since I got an oxygen concentrator machine with a 30' hose. Rough morning with weakness and the shakes, but a good meal fix that. Feeling on the road to recovery. Keeping the pneumonia under control. Did some more reading in McKay's book on SotS today. Saw more of his elaborations that I can't explain. He has an officers companionway ladder with booby hatch enclosure directly behind a basic companionway and they both lead down to the same deck below. Total waste of space and useless addition by all appearances. The booby hatch does not appear to be in any historical reference. Any thoughts?
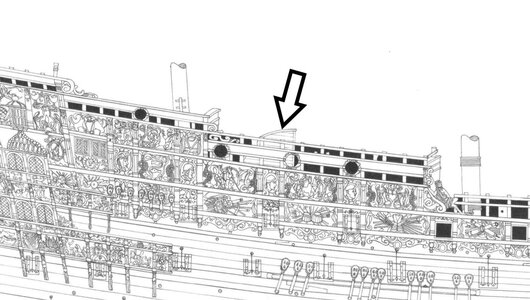


Hi Kurt,Had a good day since I got an oxygen concentrator machine with a 30' hose. Rough morning with weakness and the shakes, but a good meal fix that. Feeling on the road to recovery. Keeping the pneumonia under control. Did some more reading in McKay's book on SotS today. Saw more of his elaborations that I can't explain. He has an officers companionway ladder with booby hatch enclosure directly behind a basic companionway and they both lead down to the same deck below. Total waste of space and useless addition by all appearances. The booby hatch does not appear to be in any historical reference. Any thoughts?
View attachment 229175
View attachment 229176
Fully agree with you. See van de Veldes drawing.
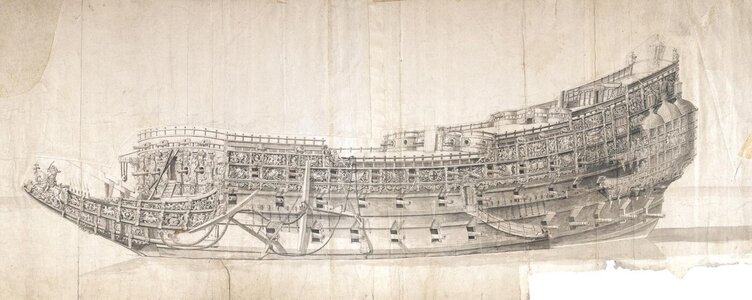
No booby hatch on his drawing so I would skip it.
McKay s officers companion way I do like but then I would skip the other companion way.
Hi Kurt
Firstly,I am very sorry to hear of your health issues.I went through Covid 12 months ago and looking back am surprised how ill I became within just a few days.At the time next to nothing was known about the virus.I was simply told if my breathing got worse to call an ambulance as I would need ventilation.At this point I was out of breath after a couple of steps and had constant chest pain, both my lungs ached all over and were capable of inflating properly.Very different to the localised sharp pain I felt when I had single Pneumonia three years prior.
What I would say to you though,I was also shocked at how I reached such a point then suddenly things started to clear and was able to do simple daily tasks.12 months on, the only legacy from Covid is I still haven't regained my sense of smell properly and also a bit of reevaluation of what is important in my life.That is why I spend little time online at the moment and I have completely withdrawn from using Facebook unless I need to message someone.I do hope to restart contributing to the forum at some point, but for the minute I just need a break.
In answer to your question,I agree with Maarten,this detail is best forgot and IMHO a figment of McKay's imagination.
Take care and get well soon
Nigel
So good to hear from you again, Nigel! I just learned that the oxygen concentration machine I am using is available for sale for only $650 online, found because I googled it. Miraculous invention! Had I known this a scant few days ago, I would have bought on outright and started using it to get my strength back much sooner, and the pneunomia that developed, light as it is, may have been avoided. It will be many weeks before the lungs recover capacity fully, and being as I am only 56 years old, they may recover fully. Taste and smell have retuned about 90%. I never suffered pneumonia to the point where it caused chest pain, which is a very serious and immediate threat to life, so I am grateful. Please look into us here at SoS from time to time. I missed your help and your contribution to my ship project.Hi Kurt
Firstly,I am very sorry to hear of your health issues.I went through Covid 12 months ago and looking back am surprised how ill I became within just a few days.At the time next to nothing was known about the virus.I was simply told if my breathing got worse to call an ambulance as I would need ventilation.At this point I was out of breath after a couple of steps and had constant chest pain, both my lungs ached all over and were capable of inflating properly.Very different to the localised sharp pain I felt when I had single Pneumonia three years prior.
What I would say to you though,I was also shocked at how I reached such a point then suddenly things started to clear and was able to do simple daily tasks.12 months on, the only legacy from Covid is I still haven't regained my sense of smell properly and also a bit of reevaluation of what is important in my life.That is why I spend little time online at the moment and I have completely withdrawn from using Facebook unless I need to message someone.I do hope to restart contributing to the forum at some point, but for the minute I just need a break.
In answer to your question,I agree with Maarten,this detail is best forgot and IMHO a figment of McKay's imagination.
Take care and get well soon
Nigel
Best Regards,
Kurt
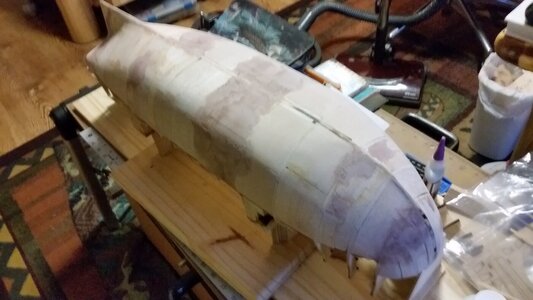
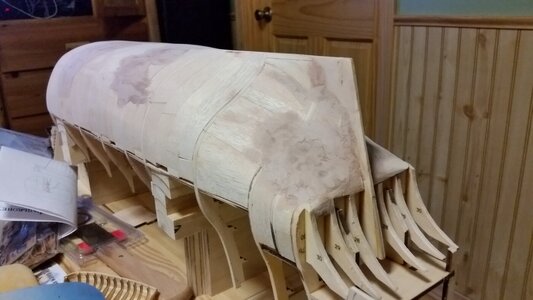
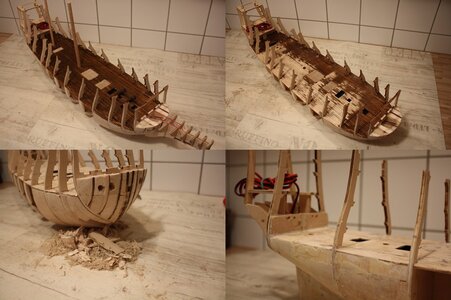
Got seriously bored today and did some more hull filling with wood filler, trying to get the curves just the way I want them. Each time you hold the hull up to the light, you see more flat spots to fill and curves to even out. After several iterations, the shape comes out perfect. I spent hours previously on the hull on La Couronne and the final results were fantastic. A shortcut here follows you to the end. The first planking layer will average out and hills and valleys I may have missed and provide a better view of the left-right symmetry later.


Last edited:
Glad to see you feeling up to ship modelling work. BTW - it looks hideous - like a whale sitting on the beach for three weeks - don't forget to apply planking...  .
.
Oh yeah it's hideous! But it will stay that way for a bit while I contemplate the next step. Perhaps lighting installation, stern gallery construction, whatever.Glad to see you feeling up to ship modelling work. BTW - it looks hideous - like a whale sitting on the beach for three weeks - don't forget to apply planking....
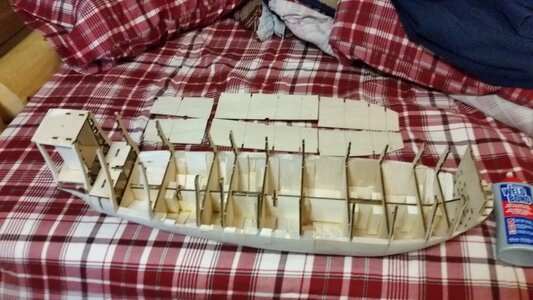
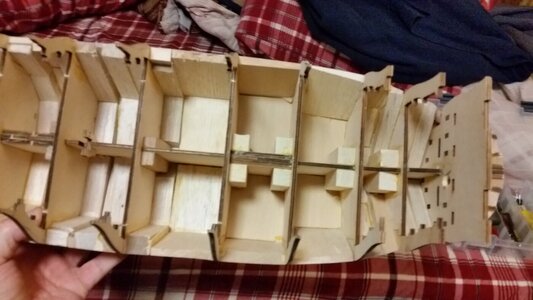
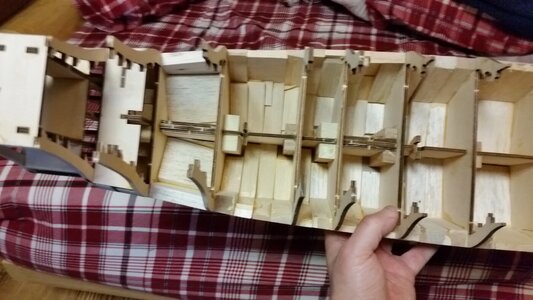
Simple update today. I glued and nailed the lower gun deck into the hull today. Everything still looks lined up, however a few of the upper frame extensions are bent slightly forward or aft because of the pressure of the balsa fill chunks, nothing that cannot be pulled back into place with careful measurements as hull planking strips are placed up the frames. I hope I didn't cut off access to space I need later, but we'll see. Aside from running a power cord out the bottom, I can't think of anything that needs to be worked on this low in the hull. If you can, shout out now before I go too much farther.
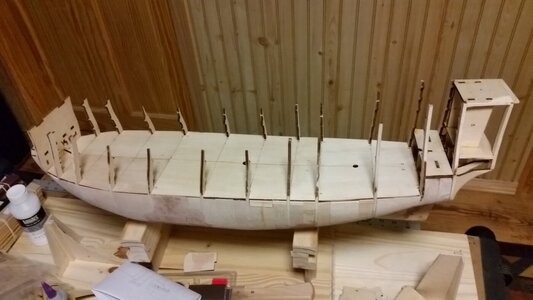


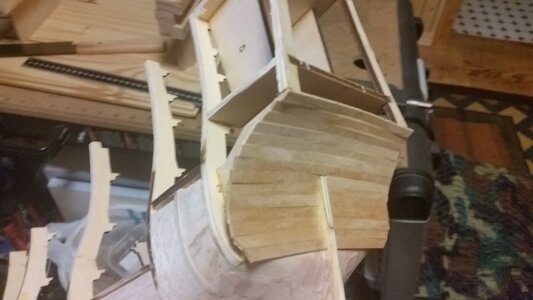
Started planking of the transom. I'll probably request covering this up and have to reopen it later to insert cannon decks and cannon, but whatever. I have to make some progress somewhere. I used 1x5mm lime wood left over from La Couronne instead of the crappy bamboo DeAgostini provides. That stuff is like bundles of soda straws with knots in it along each piece, and the edges are not even cut sharp, they are rounded. I do love using the Amati 10mm x 0.05mm diameter extra fine pins, part# 4036/10. If you don't bend them they are pretty reusable, and if you want, you can sink them all the way in, countersinking the heads, and leave them in there. Plus, they never split wood.
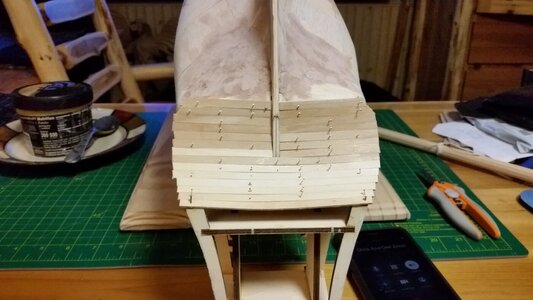


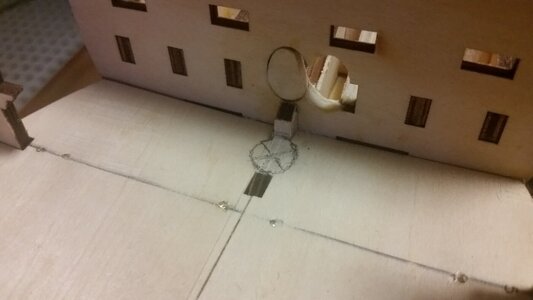
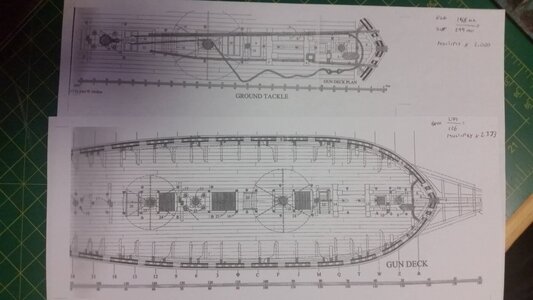
The nails were pulled from the rough transom planking, and the gun deck sanded to remove the rough edges where the deck pieces meet. Even though much of the detail will not be visible through the gun ports, I am preparing to plank the gun deck and create the basic ground tackle fittings, including capstans, support columns, pumps, and gangway ladders. The portions of the forward bulkhead will be removed in the same manner that Uwe did on his model with careful plunge cutting, see below. Next, the deck will be fully planked, and holes for the hatches down to the orlop deck will be marked and cut. It appears that the approach for this build will involve building up the exterior planking to provide the hull its shape, leaving a rather tight area inside that will require removal of frames once the outer shin of the ship holds the shape, then building the interior decks, guns and fittings one layer at a time, starting at the gun deck and moving upward.
Uwe, what were you doing with the stain on the deck? Did you re-scrape it off to leave the plank lines?
The area where the foremast is stepped has been established and marked.
John MacKay's deck plan will be used as the basis for building the ground tackle fittings from boxwood.
Brass pins removed from transom planking after drying.
Uwe, what were you doing with the stain on the deck? Did you re-scrape it off to leave the plank lines?

The area where the foremast is stepped has been established and marked.

John MacKay's deck plan will be used as the basis for building the ground tackle fittings from boxwood.

Brass pins removed from transom planking after drying.

Last edited:
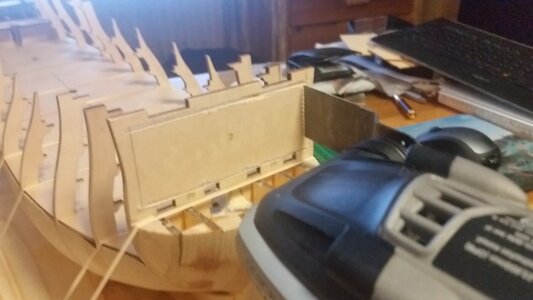
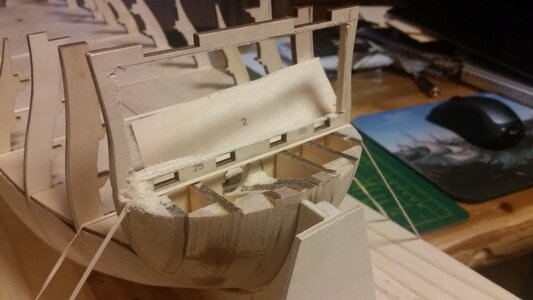
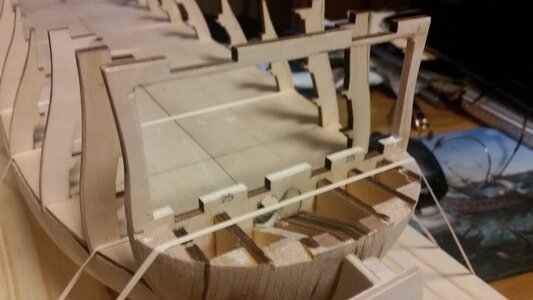
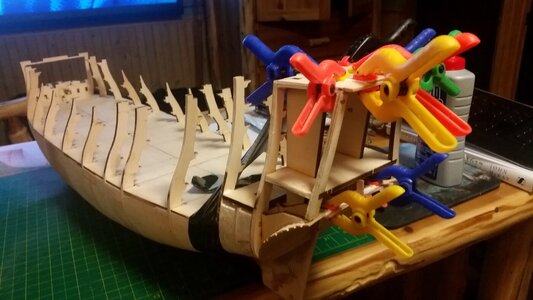
The beakshead bulkhead was largely removed as in Uwe's build today. I noticed some aggravating twists and misalignments in the upper frames which must be dealt with immediately. Top of the surface of the stern castle does not line up perfectly with the top edge of the beakshead bulkhead, since a small twist has developed. The poop deck will be shimmed to realign it, and some of the after upper frames are being bent to achieve symmetry. The top edge of the transom looked too curved, so more linden wood shims were installed that will later be sanded to provide a flatter curve at the top of the curve of the transom.


Hello Kurt,
From your last posts I deduce you are getting better.
Use a lot of protection when sanding, and that can affect your already weakened respiratory system
Please take care.
I love the fact that you are trying to make your life as normal as possible, including the ship you are building
Regards
Vicky
From your last posts I deduce you are getting better.
Use a lot of protection when sanding, and that can affect your already weakened respiratory system
Please take care.
I love the fact that you are trying to make your life as normal as possible, including the ship you are building
Regards
Vicky
Yes, I am on the mend. Lungs can breathe deeply once again, though there is some congestion down low. I am off the oxygen, which is fantastic! Extreme boredom has driven me to start the foundation work on the hull, trying to get things straight and project the build ahead ion my mind despite the fact that DeAgostini provides step by step instructions, but no sheets of overall plans, which are most useful in planning the work long term. I am basically scratch building at this point. Luckily fellow members like Uwe and Nigel have paved the way with several old photos to guide my steps, and all their changes are absolutely beautiful.Hello Kurt,
From your last posts I deduce you are getting better.
Use a lot of protection when sanding, and that can affect your already weakened respiratory system
Please take care.
I love the fact that you are trying to make your life as normal as possible, including the ship you are building
Regards
Vicky
Thanks for all your support, Vicky !
The first planking strip on the hull was installed on port and starboards sides today, but since it follows the upper gun deck, the entire upper gun deck assembly had to be temporarily installed so the location of these planks could be established. First, I needed planks. Instead of using the bamboo provided by DeAgostini, 1/16"x1/4" basswood strips were purchased from Midwest Products Company off eBay. However, these were too wide and I had to re-saw all 100 strips to a width of 4mm. I would have preferred fine grain linden wood, but bass wood will work and it's cheap.
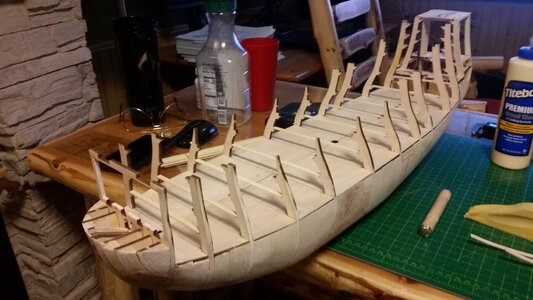
The bamboo from DeAgostini did make good temporary deck beams, and these were cut to length and lightly glued in place on the frame steps. The deck plywood pieces above were just pinned in place. All of this will be removed later.
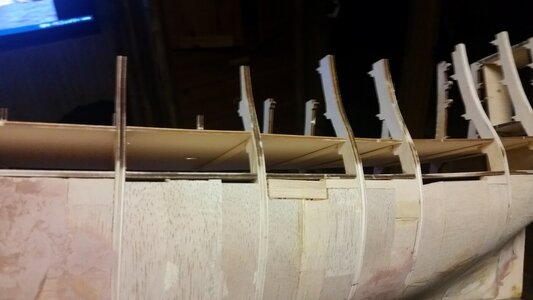
Deck pieces for upper gun deck in place.
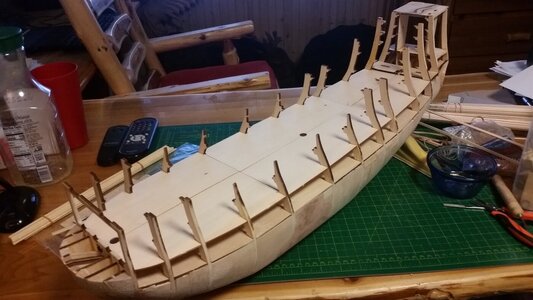
Now the real work can begin. The first plank is glued and pinned with the top edge level with the upper gun deck plywood.
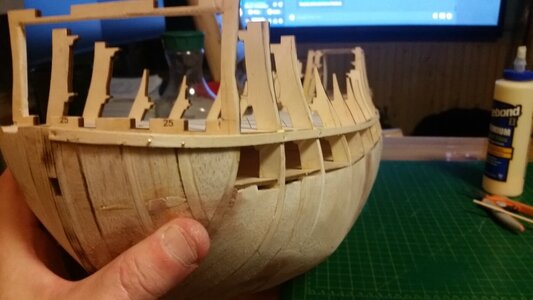
I was careful to get the curvature of the first plank in a smooth, even curve. This plank will set the position for most of the others, so you want to get it just right.
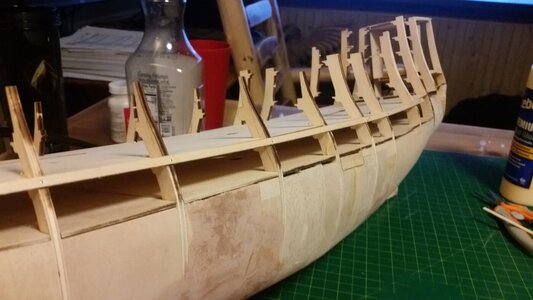
The second, shorter section of the first plank's end was slightly scarf jointed so it flows with the first piece. After doing the plank on the port side, the plank on the starboard side was installed. More planks will be installed below and above this one to lock the upper frames in position and begin to cover the sides and bottom of the hull.
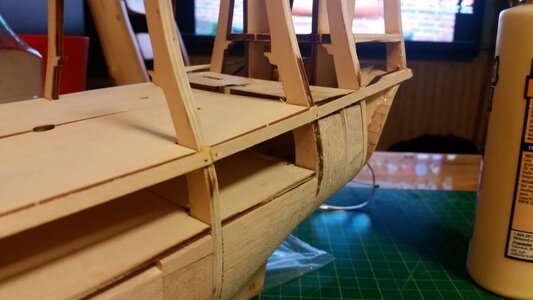

The bamboo from DeAgostini did make good temporary deck beams, and these were cut to length and lightly glued in place on the frame steps. The deck plywood pieces above were just pinned in place. All of this will be removed later.

Deck pieces for upper gun deck in place.

Now the real work can begin. The first plank is glued and pinned with the top edge level with the upper gun deck plywood.

I was careful to get the curvature of the first plank in a smooth, even curve. This plank will set the position for most of the others, so you want to get it just right.

The second, shorter section of the first plank's end was slightly scarf jointed so it flows with the first piece. After doing the plank on the port side, the plank on the starboard side was installed. More planks will be installed below and above this one to lock the upper frames in position and begin to cover the sides and bottom of the hull.

Those fillers at the bow seem to be really serving you well. I wasn't smart enough to do that when I crossed this horizon and made things harder on myself than necessary.


