-

Win a Free Custom Engraved Brass Coin!!!
As a way to introduce our brass coins to the community, we will raffle off a free coin during the month of August. Follow link ABOVE for instructions for entering.
-

PRE-ORDER SHIPS IN SCALE TODAY!
The beloved Ships in Scale Magazine is back and charting a new course for 2026!
Discover new skills, new techniques, and new inspirations in every issue.
NOTE THAT OUR FIRST ISSUE WILL BE JAN/FEB 2026
You are using an out of date browser. It may not display this or other websites correctly.
You should upgrade or use an alternative browser.
You should upgrade or use an alternative browser.
HMS Sovereign of the Seas - Bashing DeAgostini Beyond Believable Boundaries
- Thread starter DARIVS ARCHITECTVS
- Start date
- Watchers 105
Its always very satisfying to add some scratch details to the kit Kurt. Great work. 
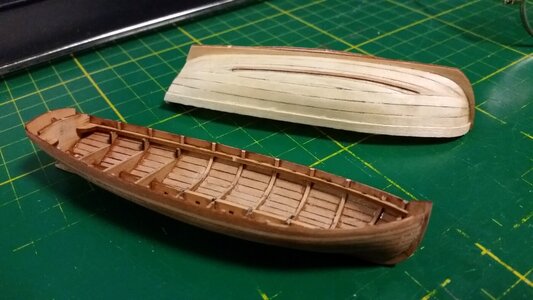
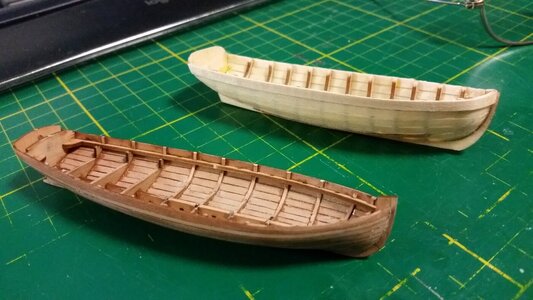
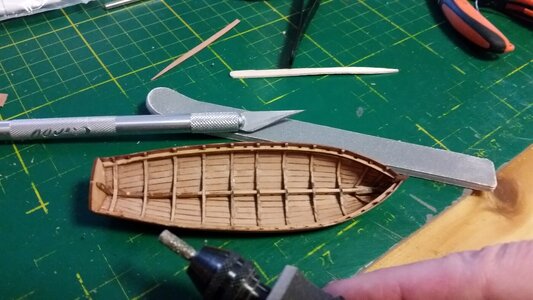
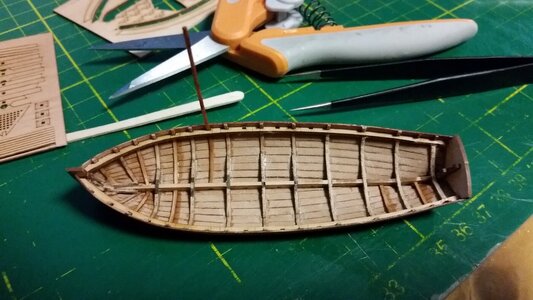
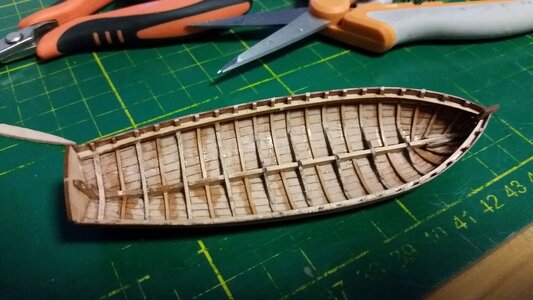
It sure is, Bryian! A few more steps in assembling the pinnace were completed today. The stern was modified to the style of the 17th century style, with the frame forward of the transom removed, frames forward of that reshaped, and more ribs were added. The stern thwart was remade in the other style as well. Next, I have to learn how to use an airbrush, so I can paint the interior of the boat maroon red. The floor boards will be natural, varnished wood, the gunwale and breasthook some other color I haven't chosen yet (perhaps white?), but there will be gold along the outer edge, and the exterior of the hull will be black with a white bottom. What color should the gunwale be?


Look at what Dave Stevens and Evy sent me! Beautiful wood samples! These are going to be so helpful selecting wood the hull and deck.
Thanks to both of you!
These samples came in the mail, courtesy of Dave Stevens at Lumberyard. They are rough sanded, and will darken and have more color saturation when varnished or oiled, but are a great start when trying to choose wood for your planking, masts, or fittings.
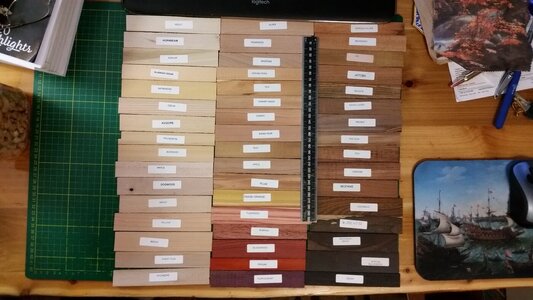
Thanks to both of you!
These samples came in the mail, courtesy of Dave Stevens at Lumberyard. They are rough sanded, and will darken and have more color saturation when varnished or oiled, but are a great start when trying to choose wood for your planking, masts, or fittings.

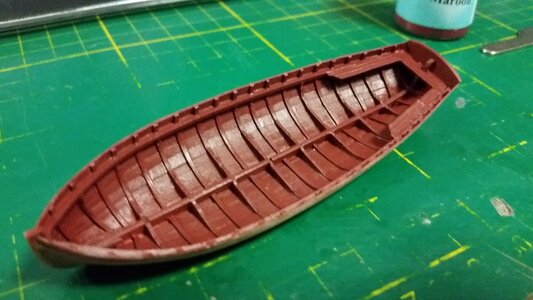
This is the very first time I've even used an airbrush, and I was terrified for years to try using one, not wanting to ruin a project. I always thought using one was rocket science. My neighbor gave me a really old compressor and air brush many years ago, and it sat out in the barn waiting to be used. Well, finally I pulled it down off the shelf, bought a pressure regulator for it, and watched a YouTube tutorial. Then, I set the air pressure for 1.5 bar, mixed up some acrylic paint in a small glass bowl with some airbrush medium bought from Amazon.com, poured the paint into the paint cup, and did some test painting on a piece of paper. Impressed with the result, I painted the boat interior with two coats of paint. Here is the result. A little heavy on the paint, but acceptable and far better than I could have done with a brush. I can't wait to finish the interior, paint the exterior black with a white bottom, then start adding more details.
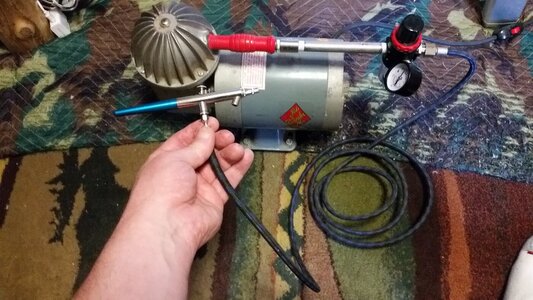
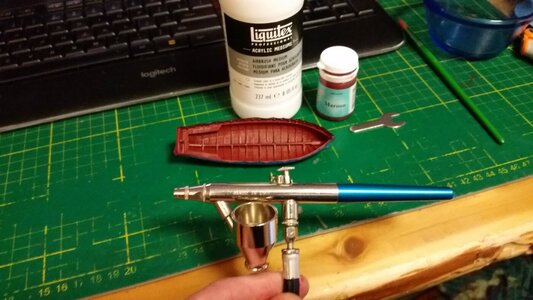
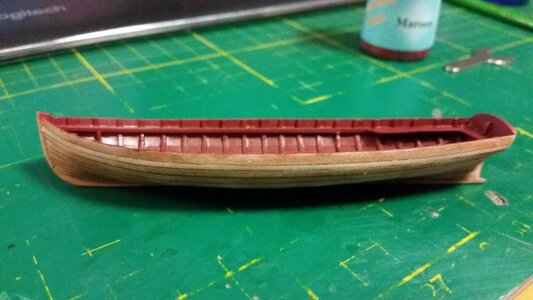


Fancy. Every day is an adventure in model building!
Yes, it's quite old, but seems to work for my purposes. I'll look into The Iwata if I can afford it.Kurt, that looks like an old Badger siphon airbrush, you should try an Iwata eclipse gravity feed - pricy but you can draw like a pencil or fan it out to about two inches... very versatile tool and lays down very light or heavy coats.
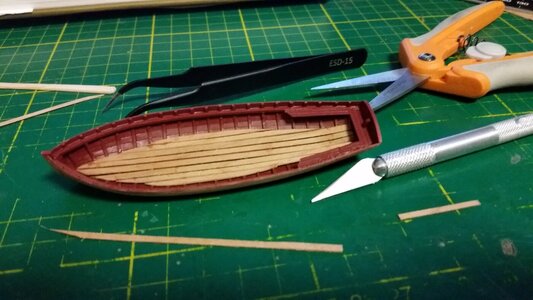
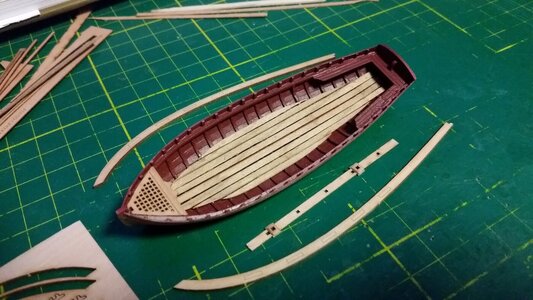
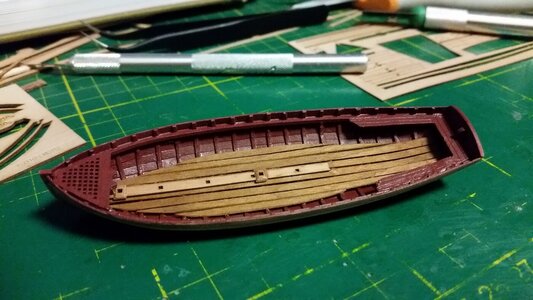
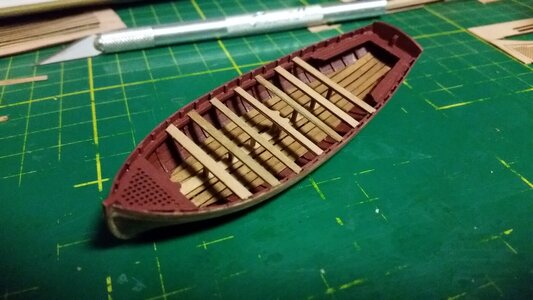
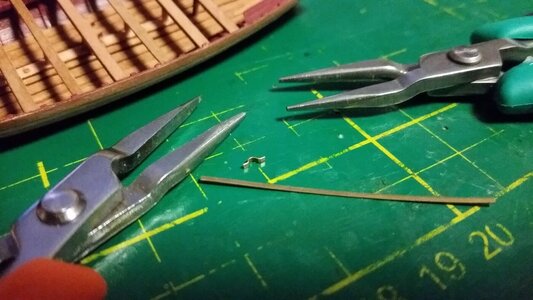
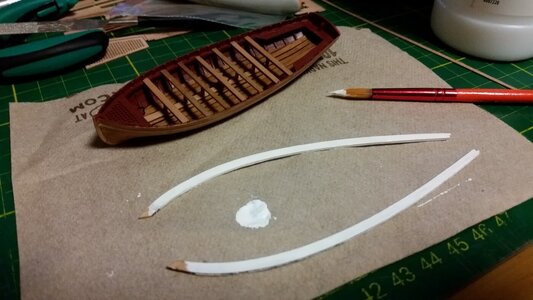
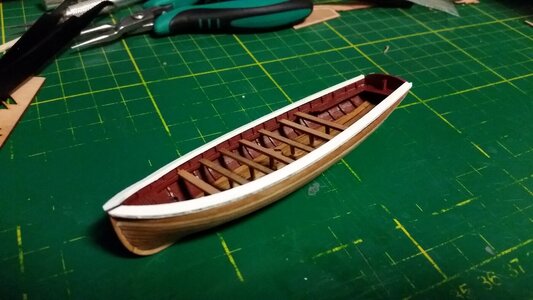
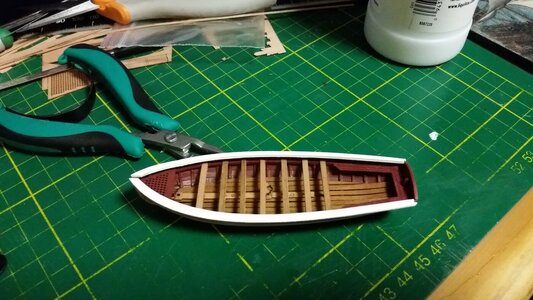
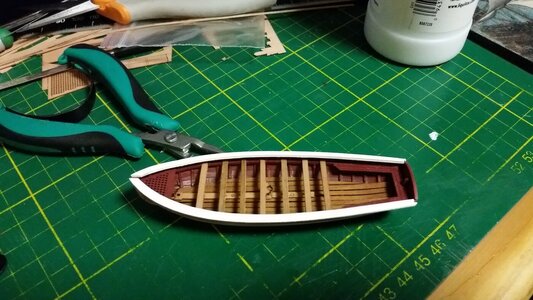
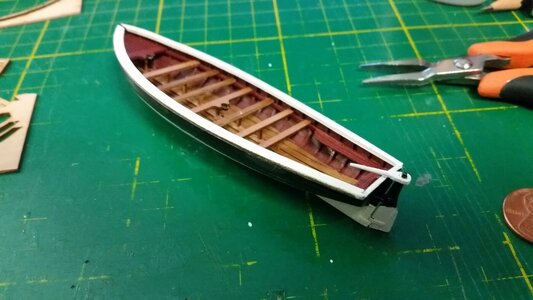
Lots more progress on the pinnace today. Some wood veneer was cut into strips and laid as the floor, along with the keelson which has the mast footings. Then thwarts were made with their stanchions and installed in custom locations. The mast support iron brackets were bent from thin brass strip, glued in position, then painted black. The gunwales were painted white and test fitted to the hull. More assembly of the rudder, addition of strakes on the hull, and hull painting are next.


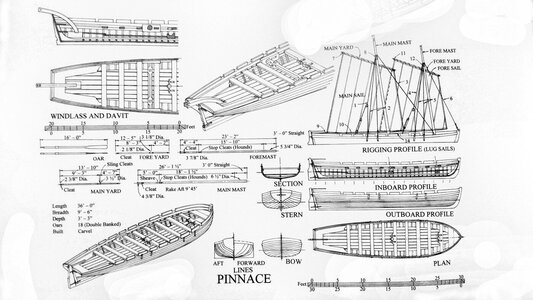
Nice updates - I had not seen that plate from McKay - good to know - I will also add one of those Russian long boat kits on the deck.
Do you intend to also add folded masts and rigging - I had not even thought of that hmmm??
Cheers,
Do you intend to also add folded masts and rigging - I had not even thought of that hmmm??
Cheers,
That Russian made kit is so nice, I am seriously considering adding the masts, jib boom, and furled up sails for the boat, designed for the boat to sail as a cutter. More detail = better model. Why stop short?Nice updates - I had not seen that plate from McKay - good to know - I will also add one of those Russian long boat kits on the deck.
Do you intend to also add folded masts and rigging - I had not even thought of that hmmm??
Cheers,
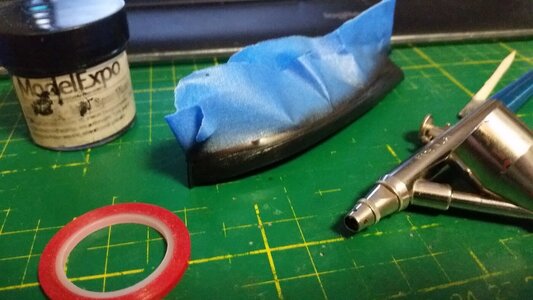
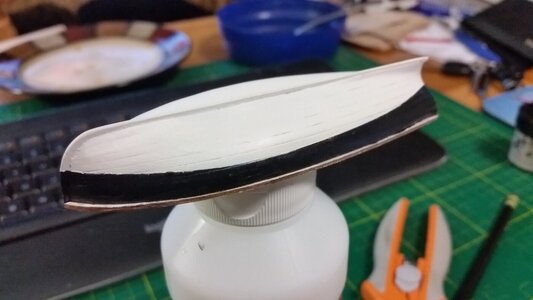
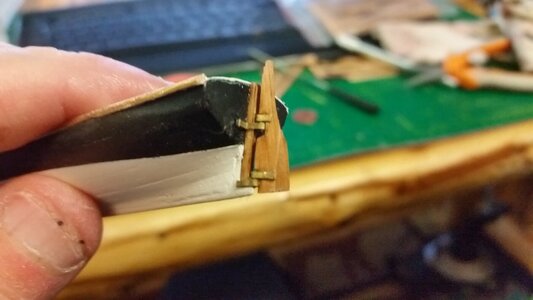
More work was performed on the pinnace today. The gunwales were attached after air brushing the hull black and white on the bottom. Touch up of the pain was done several times as work went along to fix areas occasionally damaged by handling and straighten lines between colors. The sternpost was glued to the transom. Then, the rudder pintles and gudgeons had to be made using the kit provided brass. However, be warned that the thin brass strip is work hardened, and if you want to bend into the rudder hardware parts, it will crack and break. So, use a propane torch to anneal and soften the brass flat strip. Heat it to a cherry red glow, and drop it into cold water. The brass will bend as soft as copper, and no worries of breakage.
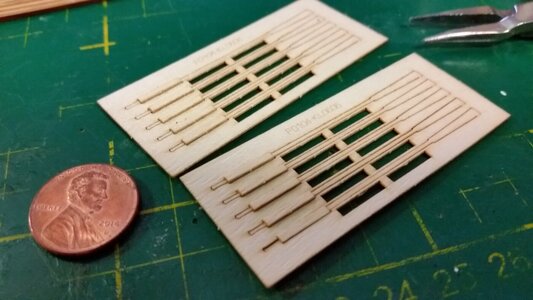
The parts were then easily formed with tiny needle nosed pliers, and the pintle pins were glued with CA glue into place before the pintles were attached to the hull with CA glue. The gudgeons on the rudder were fabricated and attached to the rudder. After test fitting the rudder and making sure it could turn freely, the sternpost, rudder, and rudder hardware were painted and the rudder set into place after drying.
Next, the keel extension that protrudes above the gunwale at the bow needs to be put on (I filed it far too short), the oarlocks need to be installed un the gunwale, and the masts and oars need to be finished and painted. Silkspan could be used to simulated the wrapped sails. Also, the masts and yards need to be sanded to round cross section. I would like to put a decorative strip of gold under the gunwale, but need to find something with small enough detail. Any Suggestions?
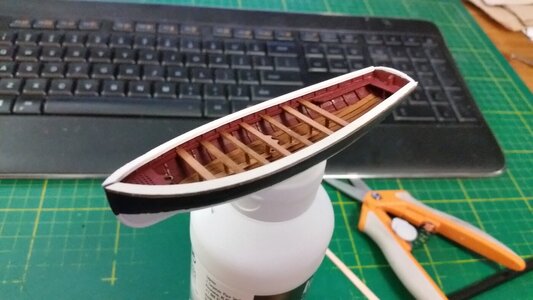
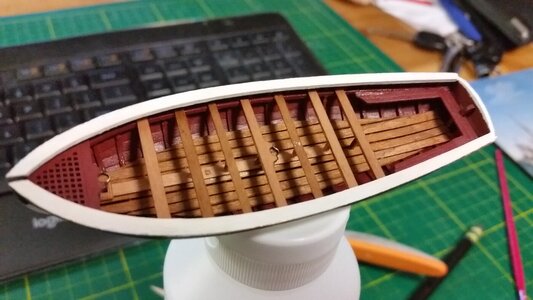
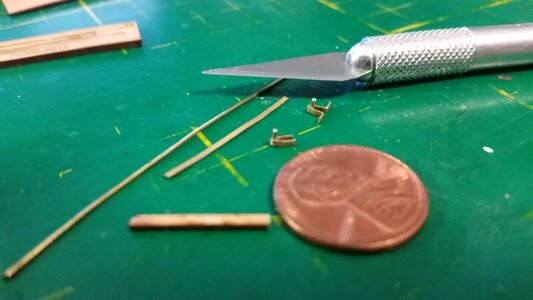
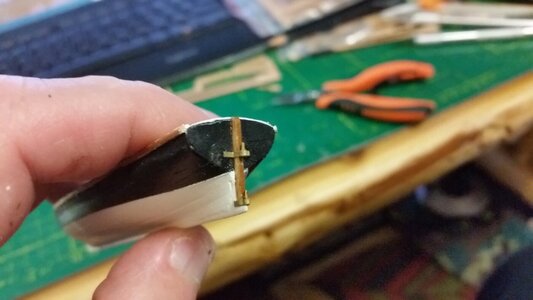


Hi, very nice.
I was looking at the cutting mat, which I envy, it really looks like a happy cutting mat that has been doing its work for a long time.
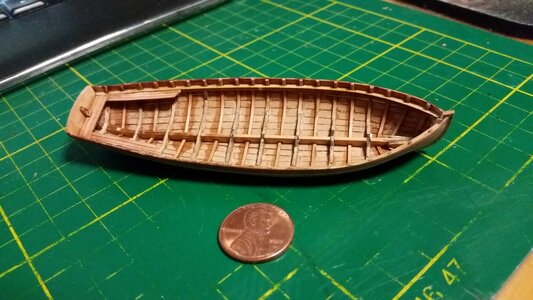
I got lost a little on the images, as the penny size does not make sense to me, I was guiding with the cutting mat.
From the first images it looks like its around 10cm long, but then I reached the pictures with the boat on the top of a bottle and on your hand, and looks small, small, small, so I went back to see the images on the cutting mat.
From the last picture I deduce that it's approx 2cm deep, and 10cm long, but on the bottle and on the hand looks smaller than that.
Maybe its my depth perception that is not working properly. Can you tell me its dimensions?
Cutting mats are cheap. There's no reason not to have one if you want to save your desk top. The penny is to help show scale, because the markings on the mat are worn off. The pinnace is 114mm long and 35mm wide. It's a modified Falkonet kit #F0310 from Russia.Hi, very nice.
I was looking at the cutting mat, which I envy, it really looks like a happy cutting mat that has been doing its work for a long time.
I got lost a little on the images, as the penny size does not make sense to me, I was guiding with the cutting mat.
From the first images it looks like its around 10cm long, but then I reached the pictures with the boat on the top of a bottle and on your hand, and looks small, small, small, so I went back to see the images on the cutting mat.
From the last picture I deduce that it's approx 2cm deep, and 10cm long, but on the bottle and on the hand looks smaller than that.
Maybe its my depth perception that is not working properly. Can you tell me its dimensions?
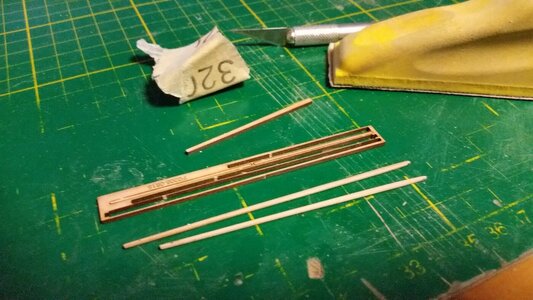
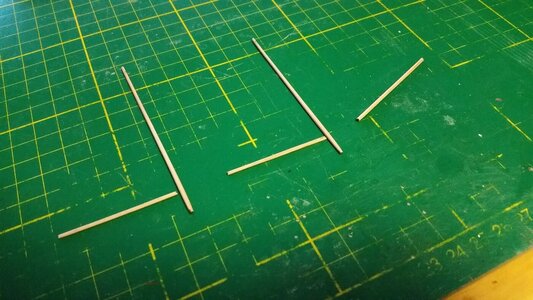
The masts, yards, and oars were added, but I'm not going to place the sails in the boat because they would obscure to much of the interior detail. The sails would have been stored below deck anyhow. The mast and yard pieces were rectangular in cross section, and had to be carefully sanded by hand until round. I was able to drill a hole in the top sheave of the main mast and fish the halyard through. The pinnace is finished. It's the most detailed piece I have ever made in wood. Falkonet really makes good stuff! I am thrilled with how nice it came out. Now if I can only do this level of detail on the ship...
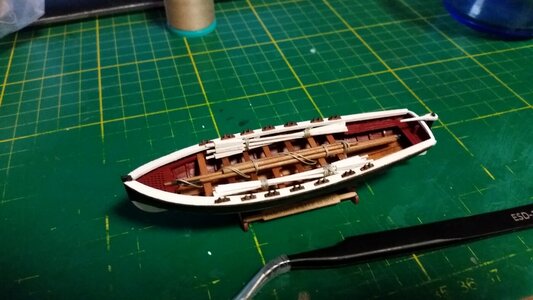
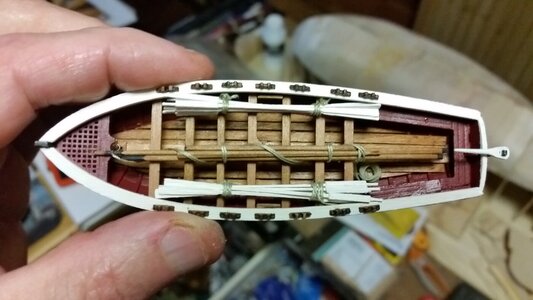


Simply amazing craftsmanship at this scale Kurt. As I have now been adding smaller bits and baubles to my build I appreciate how hard it is to preserve these details - and how lethargic the pace becomes. I work at a slightly larger scale than this ship's boat so I am truly impressed by what you have accomplished here. Bravo! By my calculations we'll be done in three years...or four...or maybe five...The masts, yards, and oars were added, but I'm not going to place the sails in the boat because they would obscure to much of the interior detail. The sails would have been stored below deck anyhow. The mast and yard pieces were rectangular in cross section, and had to be carefully sanded by hand until round. I was able to drill a hole in the top sheave of the main mast and fish the halyard through. The pinnace is finished. It's the most detailed piece I have ever made in wood. Falkonet really makes good stuff! I am thrilled with how nice it came out. Now if I can only do this level of detail on the ship...
View attachment 226580
View attachment 226581
View attachment 226582
View attachment 226583
- Joined
- Oct 15, 2017
- Messages
- 1,191
- Points
- 443

Great updates Kurt. I really like your work on the ship's boat. When you refer to the "Russian boats", are you talking about the Master Korabel boats? I've been looking for some scale (1/90) for my Santisima Trinidad project. Also, Kurt, I'm close to finishing the stern on my project which means I'm closer to installing that beautiful scroll work pieces you fabricated for me. I'm sure it will beautify an otherwise plain looking stern plate, which I scratch built. I will share some photos at some point so you can see the fruits of your labor as well.That Russian made kit is so nice, I am seriously considering adding the masts, jib boom, and furled up sails for the boat, designed for the boat to sail as a cutter. More detail = better model. Why stop short?
Cheers,
Ken
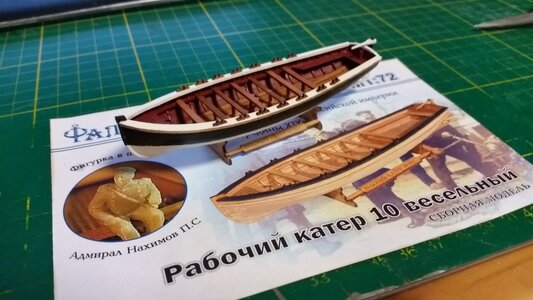
No, the boat was made by Falkonet, also Russian. Master Korabel also makes great kits. And I didn't provide you with any scroll work pieces. You must have confused me with the other Kurt on this forum. Falkonet appears to make kits in 1:24, 1:48, and 1:72 scale. The boat I used was 1:72, which is as close to the ship model's scale of 1:84 as I could find. Here is another style of 1:72 boat sold by Falkonet on ebay: Falkonet F1320Great updates Kurt. I really like your work on the ship's boat. When you refer to the "Russian boats", are you talking about the Master Korabel boats? I've been looking for some scale (1/90) for my Santisima Trinidad project. Also, Kurt, I'm close to finishing the stern on my project which means I'm closer to installing that beautiful scroll work pieces you fabricated for me. I'm sure it will beautify an otherwise plain looking stern plate, which I scratch built. I will share some photos at some point so you can see the fruits of your labor as well.
Cheers,
Ken
Last edited:
- Joined
- Oct 15, 2017
- Messages
- 1,191
- Points
- 443

Ok then. Thanks.No, the boat was made by Falkonet, also Russian. Master Korabel also makes great kits. And I didn't provide you with any scroll work pieces. You must have confused me with the other Kurt on this forum. Falkonet appears to make kits in 1:24, 1:48, and 1:72 scale. The boat I used was 1:72, which is as close to the ship model's scale of 1:84 as I could find. Here is another style of 1:72 boat sold by Falkonet on ebay: Falkonet F1320


