HMS Sovereign of the Seas - Bashing DeAgostini Beyond Believable Boundaries

Kurt

It will be frame -1 from memory.Try a plank against the frames and you will see what I mean unless they revised the shape.My partwork was the first batch.

Your pencil lines look to represent what I did.I had full planked the hull then made the changes.I gutted the hull then pulled the sides in to achieve the same shape.The hull form is ok midships, it was just the stern that needs flaring in at the top.You will need to fair the frames in such a way as to blend these alterations to the midship shape.Lots of gently sanding and a fairly stout strip as a guide will help as there is a very shallow radius in plan.

Regards

Nigel
 
Lots of modification on that kit;). It is a fact that they (the manufacturer) do not do the proper research to build a model accurate. They do drawing of a ship base on picture and approximation. A French correspondent that that I know told me a few y back that if they do correct research the price of a kit might be 10x
 
Lots of modification on that kit;). It is a fact that they (the manufacturer) do not do the proper research to build a model accurate. They do drawing of a ship base on picture and approximation. A French correspondent that that I know told me a few y back that if they do correct research the price of a kit might be 10x
What we are doing is bending and twisting the kit to fit the few antique paintings and drawings that are our primary sources. It is apparent that many of the features of these sources were incorporated into the kit, but many were not. We are closing the gap. Nigel is far ahead of me at this point, having completed his hull and is helping me catch up. Hopefully, the discussions on this build log will help others add accurate alterations and features to their kits. Kits are by definition, starting points. They are grossly simplified, both to allow new builders to build using simple techniques, and to allow inexpensive production of the kit itself. Unfortunately for all of us, scratch building remains the most accurate way to build, but takes more skill and lots more research a design development and it's up to the builder to make the kit more accurate. Kits are an awesome shortcut but still need improvements.
 
Last edited:
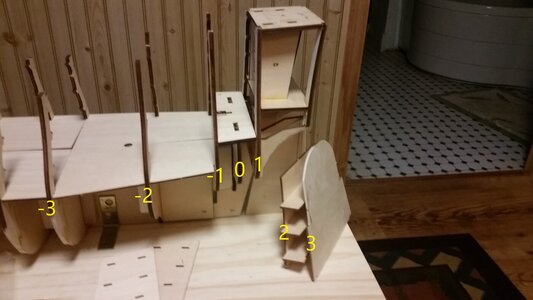
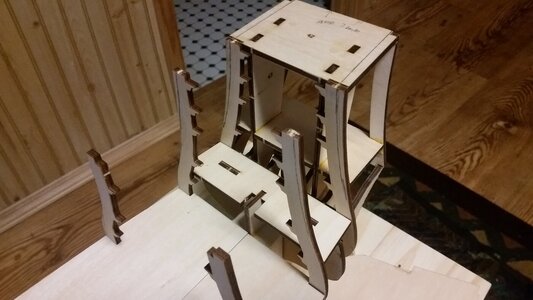
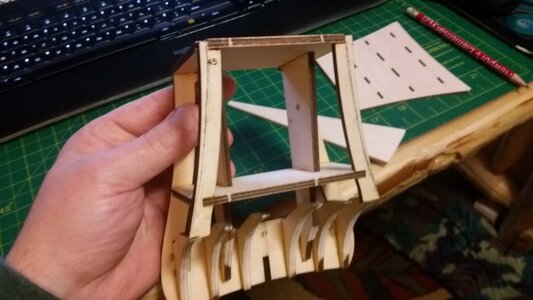
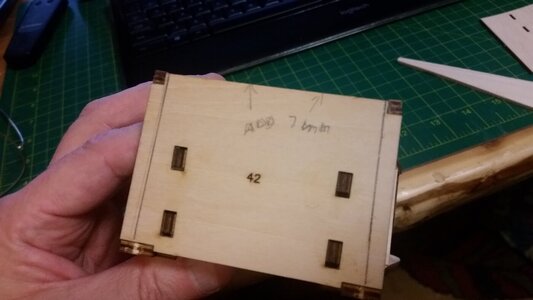
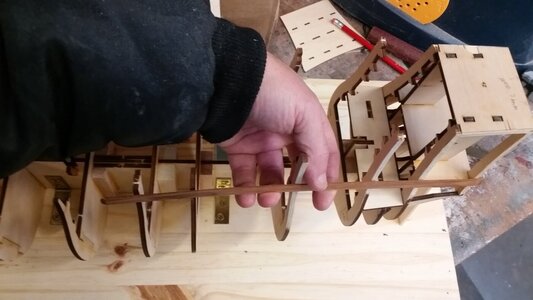
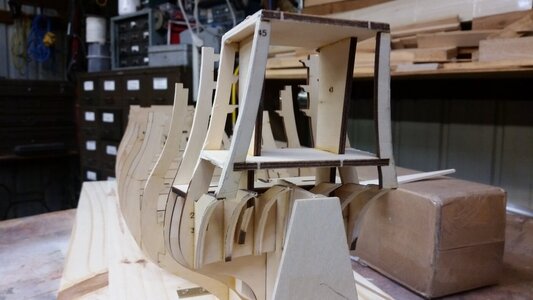
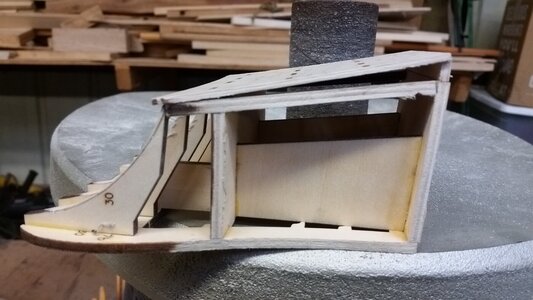
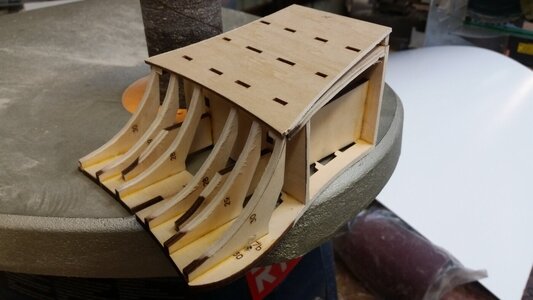
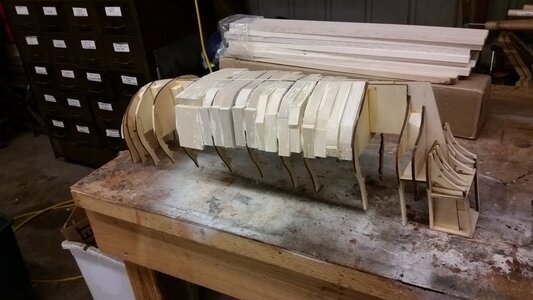
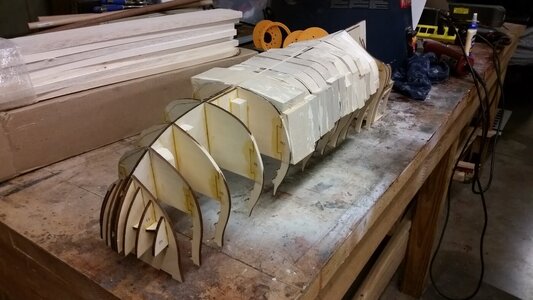
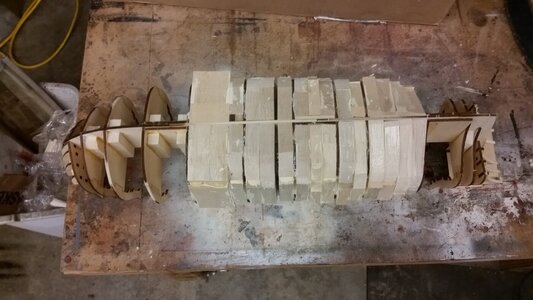
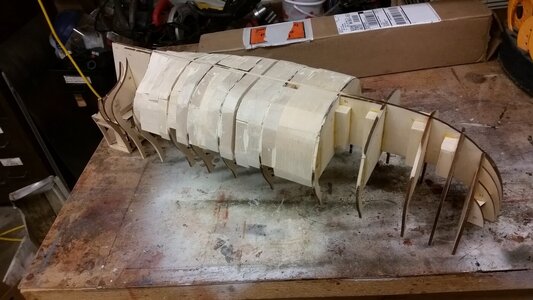
More alterations to the stern castle gallery parts were completed. The frames numbered -2 through 1, as numbered in the previous post, were reshaped using a drum sander. The stern castle parts are still loose and not yet glued in position to allow for further changes, including interior lighting. Balsa blocks were cut and used to fill in between the frames, starting at midships and moving toward the stem and the stern. They were rough sanded to get most of the corners and extra wood off, and to allow the keel to rest in the keel jig again. Most of the "L" brackets were removed, The plywood deck pieces were re-inserted into the hull while the glue on the balsa blocks continues to dry, and to test fit them to see if the balsa blocks shifted any of the frames out of position. The deck pieces fit more snugly due to shape variations, but there is no indication that any of the framed shifted far out of position. As the hull progresses, measurements will frequently be made to ensure the hull does not bend or twist before the first layer of planking.

041 Added Wood to Prepare for Stern Modification.jpg

042 Modified Stern.jpg

043 Discussing Frames to Alter with Nigel in Australia.jpg

044 Planning More Shape Changes.jpg

045 More Shape Changes.jpg

046 Plan to Extend Poop by 7mm.jpg

048 Check Curves With Wood Strip.jpg

049 Reshaping of Upper Stern Frames Complete.jpg

050 Plan to Reshape Upper Stern Piece.jpg

051 New Angle of Stern With Poop Deck Extension.jpg

052 New Angle of Stern With Poop Deck Extension.jpg

053 Begin Filling Hull With Balsa Blocks.jpg

054 Filling Hull With Balsa Blocks.jpg

055 Filling Hull With Balsa Blocks.jpg

055 Rough Sanded Balsa Filler.jpg

056 Keel Base Altered to Fit Hull.jpg
 
Last edited:
Kurt

I would say that a good part of me still believes that starting with a kit base and tweaking the design is perhaps easier than from scratch completely with this vessel.
If the builder is proficient and has access to 3D modelling software then great start from scratch, but you really need something 3D to be able to compare against the few references we have.
Blocking the hull out as you are doing and I did also enables easy visualisation of the form before planking.
As you say and I found out there are aspects of the hull shape that are pretty good but let down in other areas.It is almost as if Deagostini spent a lot of time on initial development then rushed the project to completion because they were running over budget.

Regards

Nigel
 
More alterations to the stern castle gallery parts were completed. The frames numbered -2 through 1, as numbered in the previous post, were reshaped using a drum sander. The stern castle parts are still loose and not yet glued in position to allow for further changes, including interior lighting. Balsa blocks were cut and used to fill in between the frames, starting at midships and moving toward the stem and the stern. They were rough sanded to get most of the corners and extra wood off, and to allow the keel to rest in the keel jig again. Most of the "L" brackets were removed, The plywood deck pieces were re-inserted into the hull while the glue on the balsa blocks continues to dry, and to test fit them to see if the balsa blocks shifted any of the frames out of position. The deck pieces fit more snugly due to shape variations, but there is no indication that any of the framed shifted far out of position. As the hull progresses, measurements will frequently be made to ensure the hull does not bend or twist before the first layer of planking.

View attachment 197624

View attachment 197625

View attachment 197626

View attachment 197627

View attachment 197628

View attachment 197629

View attachment 197630

View attachment 197631

View attachment 197632

View attachment 197633

View attachment 197634

View attachment 197635

View attachment 197636

View attachment 197637

View attachment 197638

View attachment 197639
Looking good Kurt! Hope there was a sweet sale on Balsa wood! It will definitely float...
 
Kurt

I would say that a good part of me still believes that starting with a kit base and tweaking the design is perhaps easier than from scratch completely with this vessel.
If the builder is proficient and has access to 3D modelling software then great start from scratch, but you really need something 3D to be able to compare against the few references we have.
Blocking the hull out as you are doing and I did also enables easy visualisation of the form before planking.
As you say and I found out there are aspects of the hull shape that are pretty good but let down in other areas.It is almost as if Deagostini spent a lot of time on initial development then rushed the project to completion because they were running over budget.

Regards

Nigel
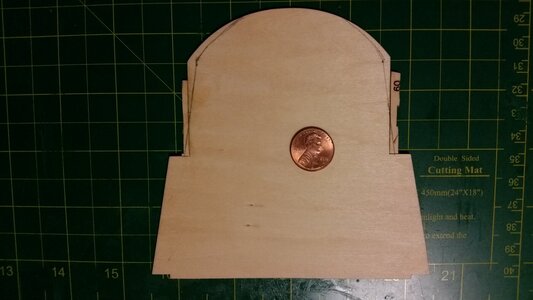
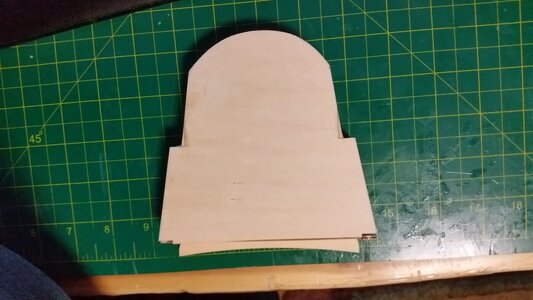
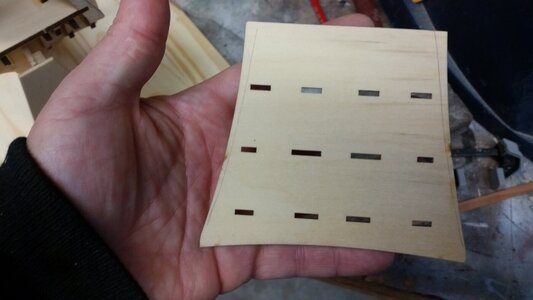
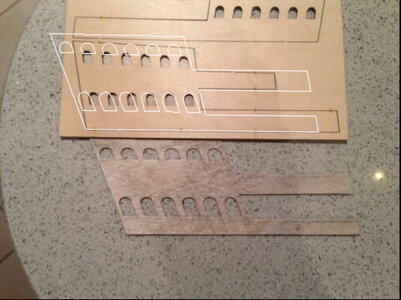
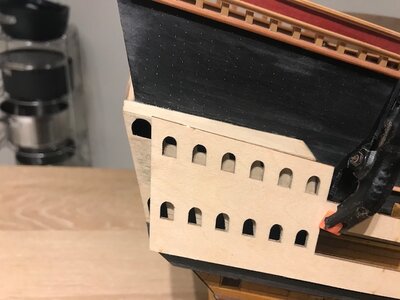
Is this translation of your side gallery template accurate? It appears taller than the kit parts, and I don't know if that is due to distortion in the photograph or not.

Side Gallery Project.jpg
 
Is this translation of your side gallery template accurate? It appears taller than the kit parts, and I don't know if that is due to distortion in the photograph or not.

View attachment 197728
Kurt
I would have to measure it,looong time since I took that pic.I will take some measurements this afternoon;)

Regards

Nigel
 
Kurt
I would have to measure it,looong time since I took that pic.I will take some measurements this afternoon;)

Regards

Nigel
Many thanks, Nigel. If you could take any other critical dimensions as well, I would greatly appreciate it. At present, measurements are being extrapolated from your photos, and a few critical dimensions can be determined, especially when the hit parts are displayed alongside like the last photo.
 
Kurt

Not got to it yet,one more nightshift to do tonight then off till Monday night.I will go to town with the tape measure and give you as much info as I can when I have finished work for the week.I would add the shape of the radius at the top of the kit stern transom is also way off.I cant remember if the overall height of this panel was increased.I will measure this for you also.

Regards

Nigel
As the Aussies are fond of saying, no worries! I truly appreciate you help. It's so important getting the dimensions straight are for the framework.
 
Last edited:
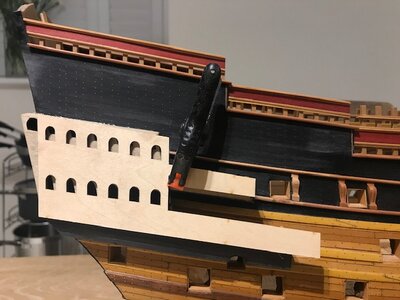
Hi Kurt

That picture I took must have really been at an angle.I have clamped the kit part to my model so you can see the differences.

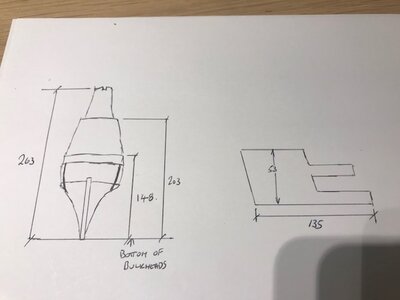
Also a few dimensions I thought you may find useful.Dimensions for the stern are dead vertical from what will be the base of your bulkheads

Regards

Nigel
View attachment 198690View attachment 198691View attachment 198692
Those dimensions are useful. Thanks Nigel! It appears that the angle of the stern is steeper than I estimated. Adjustments will be made. I prefer the steeper angle myself. It looks better.
 
Last edited:
Just a note to say that work on HMS Sovereign of the Seas will be postposed for a few months due to work taking up lots more time. Also, it's far too cold out in the shop to work. Today the high temperature was -32 C. My fingers stick to steel tools at that temperature and glue freezes in mere minutes. Not what I call comfortable. How the stern shape structure will be made is still in the planning stage, while the hull bottom is being filled with balsa blocks. Work will resume in a few months. Until then, please enjoy this movie of a dancing chicken.

 
Last edited:
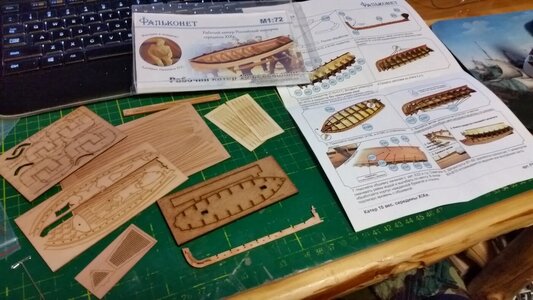
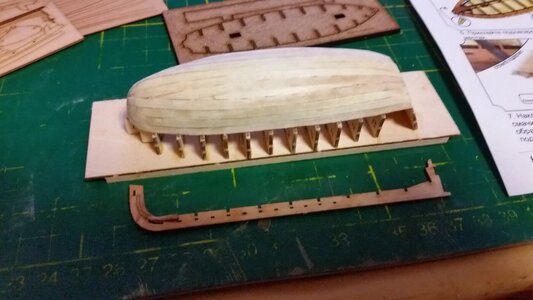
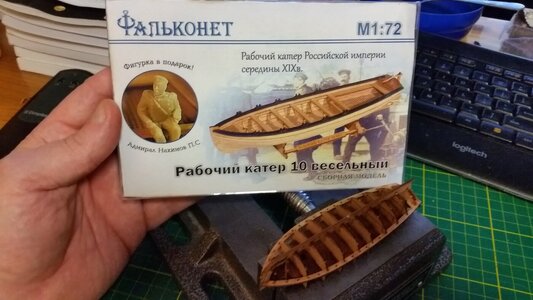
Work may be postponed on the Sovereign, but it begins on the pinnace which will be used on the Sovereign. Instead of using the boat provided with the DeAgostini kit, a ten-oared utility boat, F0310 from Falkonet, will be used. The Falkonet boats are the most detailed ones you can find, and the laser cut wooden pieces are the best quality. The parts are so very fine and delicate, but if you're careful, the boats are simply the best.

057 Falkonet Boat Kit F0310 Replaces DeAgostini Boat.jpg

Deagostini supplied boat (top) and Falkonet kit keel (bottom)
058 Original Boat (Top) & Falkonet Keel.jpg

059 Falkonet Kit.jpg

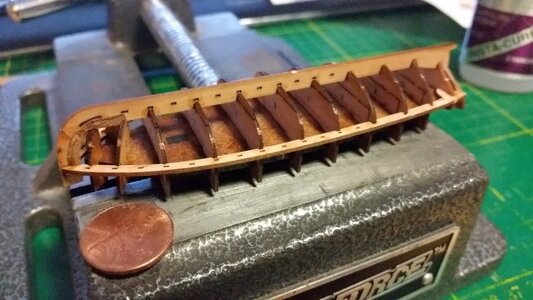
Fames and keel assembled in jig
060 Boat Frames and Keel in Jig.jpg
 
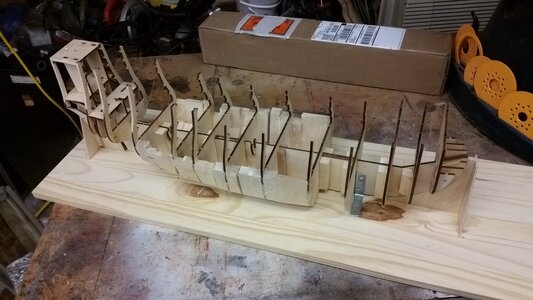
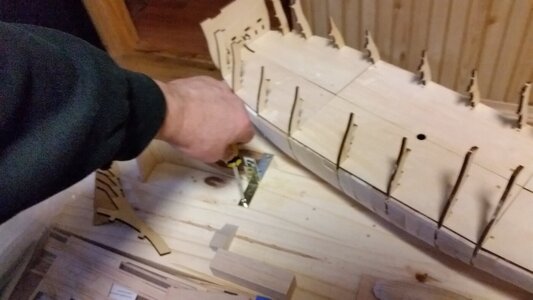
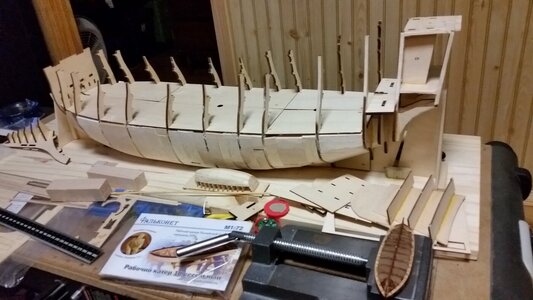
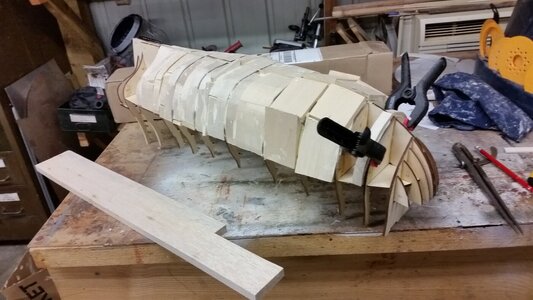
After months of zero progress, FINALLY the temperature got up to 45 degrees F., making it comfortable to work in the pole barn shop. More balsa blocks were fitted and glued in place and rough sanded using the benchtop belt sander, with great care not to dig into the edges of the bulkheads. The blocks often had cuts that were angled so they make full contact with the bulkheads at their edges. All the work was done without measurements by eye, which I can get away with after years of hand crafting things. Minor holes will not affect the first layer of planking at all. The balsa filling will prevent flat spots and hard bends around bulkhead edges, providing perfectly facet free curves in the hull, requiring little to no filling after installing the first layer of planks. The final "L" brackets were removed from the keel jig before the hull could go back in.

061 Continue Filling With Balsa Blocks.jpg

062 Remove False Keel Brackets.jpg

063 Looks Good so Far 1.jpg
 
After months of zero progress, FINALLY the temperature got up to 45 degrees F., making it comfortable to work in the pole barn shop. More balsa blocks were fitted and glued in place and rough sanded using the benchtop belt sander, with great care not to dig into the edges of the bulkheads. The blocks often had cuts that were angled so they make full contact with the bulkheads at their edges. All the work was done without measurements by eye, which I can get away with after years of hand crafting things. Minor holes will not affect the first layer of planking at all. The balsa filling will prevent flat spots and hard bends around bulkhead edges, providing perfectly facet free curves in the hull, requiring little to no filling after installing the first layer of planks. The final "L" brackets were removed from the keel jig before the hull could go back in.

View attachment 219873

View attachment 219874

View attachment 219875
Time for a proper heater? I work with a petroleum heater in the winter, my workshop is in our garage, works great.
dit-zijn-de-voordelen-van-een-zibro-kachel.jpg

Looking forward to your build.
 
Time for a proper heater? I work with a petroleum heater in the winter, my workshop is in our garage, works great.
View attachment 220040

Looking forward to your build.
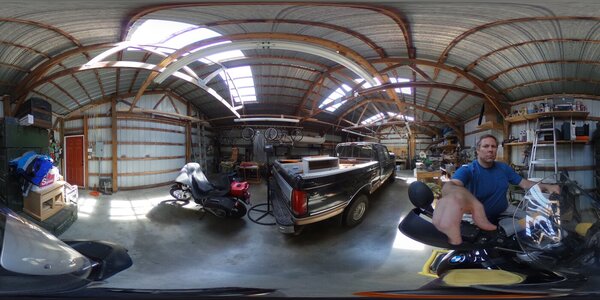
Heating my pole barn shop is a waste of time because it is vented all around the top edge of the walls where they meet the roof. Sheet metal doesn't hold heat all that well, and the barn is quite big. Here's a 360 degree picture of it.

Barn interior 360.JPG
 
Back
Top