HMS Sovereign of the Seas - Bashing DeAgostini Beyond Believable Boundaries

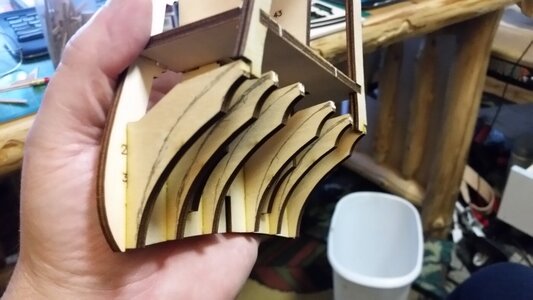
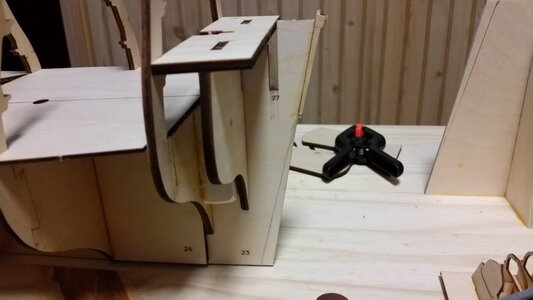
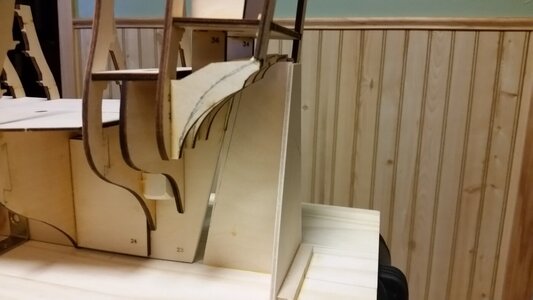
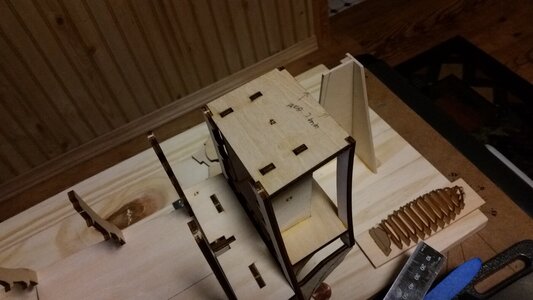
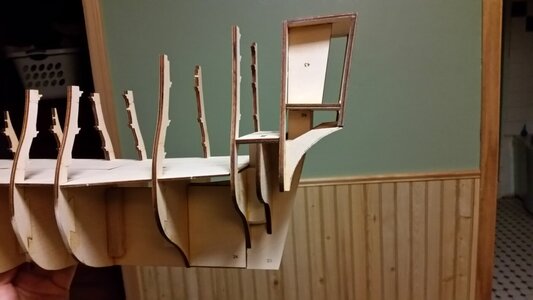
Crawling forward. The stern structure was partially assembled and test fit onto the hull frame. Before the side pieced are attached to the stern, the frames of the structure will be narrowed to a shape closer to that appearing in the Lely portrait of Peter Pett, also using measurements taken off Nigel's photos above as a guide. All of the individual magazine packs for the kit were opened and the instructions placed in binders on the bookshelf for reference. After looking at the cast metal decorations, they appear to have fine detail, mostly because they are a bit smaller than I expected. Their size indicated that few to none of the beautiful Amati cast decorations will fit on the DeAgostini model, which is disappointed because they are high quality. Since I also have the Amati plans, I wonder it I have the patience to make a second SotS model using them, when the DeAgostini model is finished? Some shortcut were noted in the rigging instructions while glancing through the magazines. The standing and running rigging are largely simplified, there are no triple parrels on the larger yardarms, only double rowed ones, and all the leech lines and bowlines are conspicuously missing, as are the nave lines for the parrels.

029 Test Fit Stern Structure.jpg

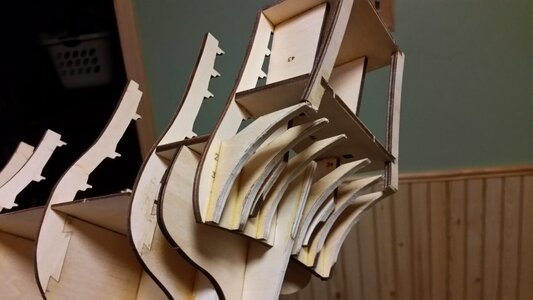
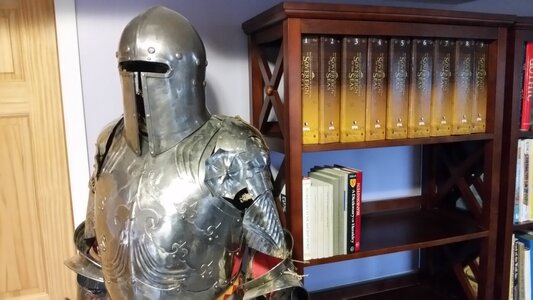
030 Place All Instruction Magazines in Binders.jpg
 
Hi Kurt

Remembering back.I photocopied the largest example of the Lely portrait.Then using my home printer kept running copies off at different scales in order to get the width between the lower Wales on the print match that of the model.This was then used as a template against the stern's SLOPING face.I say sloping because the Portrait's perspective is from ground level, not horizontal.The hull width at the Wales is as Deagostini supplies,I tapered it above this point to the top.I did adjust the angle of the stern face following the discussion in James Septon's book.

Kind Regards

Nigel
Funny, that's precisely how I'm approaching the stern design issue. I have Septon and will look up the angle of the stern and adjust accordingly. However, one can measure the angle from the side profile view of your model and get a decent estimate. If you still have the model, could you take some measurements at various heights at the stern? It would save lots of time. Frames forward of this would be adjusted base on that so the shape would flow properly. Many thanks for your help!
 
Hi Kurt

Yes still have the model, it was removed from mothballs this weekend to take those pictures and returned.I will not part with her, even if I do not continue as there was 3000 hours of work to get to that stage.Many of those were due to the model being modified retrospectively.
It will be next weekend before I get chance to get her out again and take more measurements.If you post a sketch of all the measurements you want,I can measure all you need next weekend.I can measure the angle of the Stern and rudder post(I think I changed this as well)

Kind Regards

Nigel
 
Kurt you have a nice project thereThumbsup
My huge model build time are long past no more space here anymore my minister of the interior will throw me to the wolf if I ever try to get big model like that or any more one in, I am just authorise to build small one and empting my stash of plastic kit (shut do not tell her she do not know about the Vosper 1/35 and my HO 229 1/32 I have hide:p) so I will just admire your.
 
Hi Kurt

Yes still have the model, it was removed from mothballs this weekend to take those pictures and returned.I will not part with her, even if I do not continue as there was 3000 hours of work to get to that stage.Many of those were due to the model being modified retrospectively.
It will be next weekend before I get chance to get her out again and take more measurements.If you post a sketch of all the measurements you want,I can measure all you need next weekend.I can measure the angle of the Stern and rudder post(I think I changed this as well)

Kind Regards

Nigel
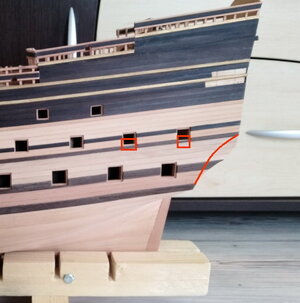
No hurry. My work on the frame is proceeding as information allows, and there's no rush. I estimated the change in rudder post angle taken from measurements of your photos, and have penciled in the next change, which is that transverse sweep of the upper transom from a double curve to a single one, seen below. When narrowing the upper frames, will the change in dimension require new upper frame support pieces, or just a thinning of the existing ones?

I noted in your build log that to planked the entire outside of the hull and then worked on the decks starting at the bottom. I can see that way any vertical repositioning of the gun ports can be reflected in the decks, after mapping the wale and gun positions on the outside of the hull. Seems like a logical progression. Like you, I will have to excavating the frame structure below the lower deck, and let the exterior of the hull dictate the position of the interior structure. The first step is establishing the shape and form of the exterior, one feature at a time.

Transom Reprofiling 2 & Gunport Repositioning.jpg

Upper stern sweep proposed changes
031 Draw Modification to the Sweep of the Upper Transom.jpg

Sternpost increased angle
032 Correct the Sternpost Angle.jpg

Sternpost angle changed, with frame support jig changed to match upper section of sternpost
033 Sternpost Modified and Jig Adjusted to Match.jpg

Proposed change to increase angle of stern by extending poop deck 7mm.
034 Top of Stern to be Extended 7mm to Increase Angle of Stern.jpg

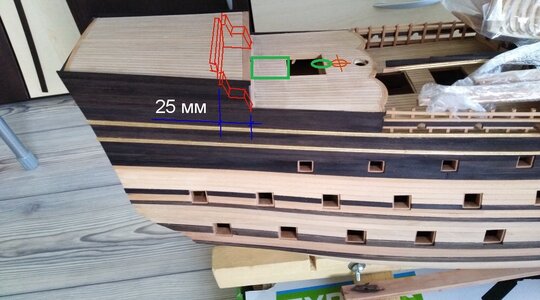
Proposed changes to gun ports and upper transom sweep
Transom Reprofiling 2 & Gunport Repositioning.jpg

This modification will also be incorporated
Poop Deck Ladders.jpg

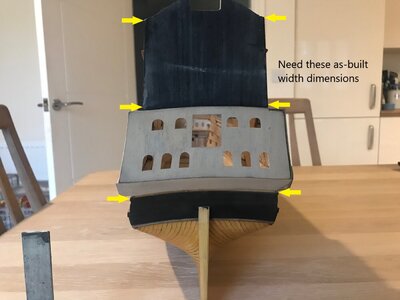
Nigel, I could use these dimensions when you get a chance. More requests will follow, and I am very grateful for your help.
035 Dimensions Nigel will Provide.jpg
 
Last edited:
Kurt you have a nice project thereThumbsup
My huge model build time are long past no more space here anymore my minister of the interior will throw me to the wolf if I ever try to get big model like that or any more one in, I am just authorise to build small one and empting my stash of plastic kit (shut do not tell her she do not know about the Vosper 1/35 and my HO 229 1/32 I have hide:p) so I will just admire your.
You have to make room for new projects by removing old ones. I have two suits of armor for sale to make room. La Couronne used up all my spare display space, so something has to go. Retirement is only 13 years away, and I have a huge collection of military guns, medieval weapons, armor and crossbows that will have to be reduced eventually. Things I do no use anymore due to changes in activities with age will be sold for whatever they go for. First will be the Italian 1520's suit of armor, the Italian export gothic armor I used in full contact combat, and a stainless Roman lorica and scutum, also used for combat. The days of wearing 120 pounds of plate armor and bashing heads in the field are behind me, but rediscovering the old love of model ships has be very excited. :D
 
Hi Kurt

All looks very good and very familiar to the processes I went through.The more you show,the more I remember.I remember reworking the formers as you did and remember that the tuck of my stern transitions onto the bottom of the arches you have just shaped.In effect it removed the square blunt bottoms you have on these pieces.
You can no longer see this on my model because all the framework was gutted in order to fit full internal decks in the future.One thing I would say is that is was a case of "caressing" the supplied hull form.No massive single change,but many small "tweaks" and the difference is quite dramatic.

Kind Regards

Nigel
I understand. The small changes add up to a completely new model. Vertical placement of the decks will be the most challenging. Right now, there is now external hull shape to measure gun port, wale, and decoration placement, so progress will have to be in the following order:

1) reshape the frames on external profile,
2) planks the exterior of the hull,
3) determine gun port, wale, and decoration positions and dimensions,
4) hollow out and modify frame internal profiles,
5) build internal bulwark support structures,
6) planking on bulwarks and bulkheads,
7) build deck supports and decks, establishing deck positions relative to established gun ports.
8) profit.

Please send me any pictures your may have from your build, since they are essential in keeping dimensions straight. I am also look at other build logs so many features will be combined into this model, but the hardest one is getting the essential parts established first, e.g. decks, gun ports, hull shape, wales, etc. One problem for me is making the external decorations accurate because I have no sculpting skills yet developed, and the metal castings are largely incorrect and oversimplified. I'll deal with that later. Thanks for getting me going in the right direction, Nigel. If you or anyone else on the forum have any comments on features, they will have the most impact now since framing and deck position are the foundation of this build.

Kurt
One helpful reference to look at is a painting of the Sovereign by Peter Pett, who build this ship. The painting shows the ship as designed and, therefore, before King Charles added some more guns to it. Nevertheless, it's a good portrayal of what the hull looked like. You can find it here:

 
One helpful reference to look at is a painting of the Sovereign by Peter Pett, who build this ship. The painting shows the ship as designed and, therefore, before King Charles added some more guns to it. Nevertheless, it's a good portrayal of what the hull looked like. You can find it here:

I have a high resolution picture of that painting. It's one source for modifying the model. It was made as a presentation, so it predates the ship's construction, so many details cannot be relied upon.

One question I have is, since the Lely Portrait of Peter Pett appears to show the hull as painted black all the way down to the waterline, should I paint the entire ship black? Is there any evidence, other than Charles I's orders to use black as the only color, for the typical model colors used today of black paint used only down to the top of the upper gun deck? I am asking about the ship's color as launched in 1637, not after the 1660 rebuild. Forget about the red on the hull exterior, which is unsubstantiated.
 
Last edited:
Not sure I'd paint the entire ship black. As Sephton notes, in these times, the idea was to protect the ship from getting eaten by worms below the water line. As you probably know, tallow was used in later years. At this time, some other sort of substance containing calcium carbonate was used. Calcium carbonate is white. Other additive may have made it an off-white (I apologize, but I can't seem to find the paper that analyzes some remnants of the substance).

Although the King added guns, specified black, and may have changed a few decorations around, he wouldn't have fiddled with the hull. He just didn't know enough to do that. So, Pett's painting of the hull, and especially the positioning of the quarter galleries (which agrees with how the Treatise says they should be built) is more reliable than, say, the Panye engraving.
 
Back
Top