HMS Sovereign of the Seas - Bashing DeAgostini Beyond Believable Boundaries

While Paul is speeding ahead with his Wasa build, I am mired in the details on my build of the Sovereign, trying to challenge myself not only in making tiny details, but in boring the hell out of myself with the tedious work that 100 guns brings when you build the most heavily armed vessel of the 17th century. I made a micro-step today in preparing the lower deck guns for installation.

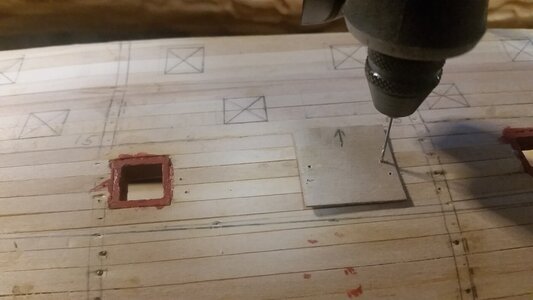
After much thinking about how to go about it, I made a small jig that was used to drill the holes for the breaching line eyebolts and the eyebolts which the gun tackles are hooked to. These holes were drilled through the hull with a Dremel with the jig used keep their position correct and consistent. The next task will be to make 47 more gun tackles using 2mm blocks and then rig them to the carriages.

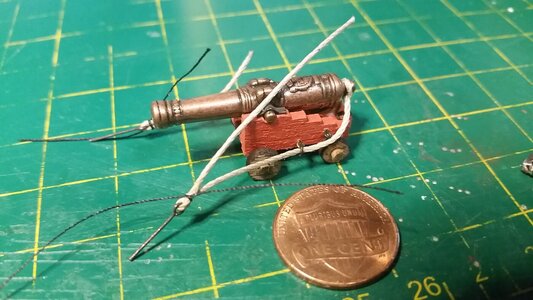
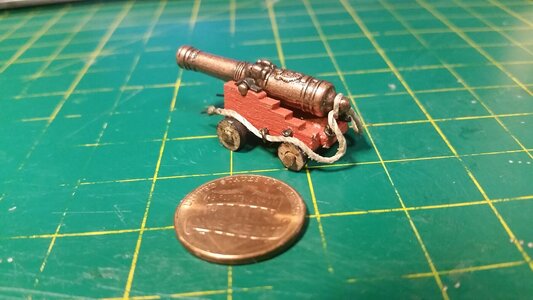
Taking a test gun, the first of twenty-four cannon of VII drakes, I made the breaching line and seized the eyebolts on each end with black thread, secured with PVA glue. Before that, I cut twenty-four 13mm long breaching lines from 0.08mm line left over from the La Couronne build. The line was fit to the carriage, running it through the breach line rings and gluing it to the cascabel. PVA glue was used to stiffen the breaching line, gluing it to the carriage wheels and creating the proper drooping appearance of the line to make it look more real.

The center square of wood for the jig is inserted into the gun port from the outside, ensuring consistent location of the drilled holes.
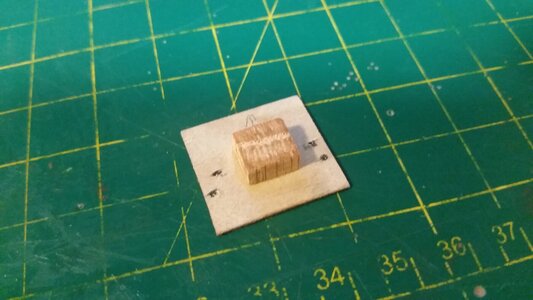
374 Make Jig to Drill Breach Line Eyebolt Holes.jpg

375 Drill Breaching Line and Gun Tackle Eyebolt Holes.jpg

376 Make Breaching Line and Sieze Eyebolts.jpg

377 First Cannon of VII Drake Breaching Line Done.jpg
 
I admire how you are mired in these details. I fully rigged only 14 guns and found it painful - even to the extent that I promised myself I would resist the urge to build a first rate ship of the line in the future.

I'm curious - what will you do on the exposed decks vis a vis cannon accessories? I have seen buckets, and cannonball boxes, and plunger/pusher tools... You are building at a smaller scale than me - but what are your thoughts about things like that? Worthwhile details or just chaos/clutter makers?
To the best of my knowledge, we know absolutely nothing about how buckets and cannonballs were stored on deck prior to clearing for action. On later ships there were triangles for stacks of shot, racks on the bulwarks, and divots around the gratings to hold round shot. Which ones will be used has not yet been determined. I hope someone here will speak out and provide an example from a contemporary English ship such as HMS Prince Royal from the time period so an educated guess can be made. All the cannon tools are planned to be made in miniature for the guns visible on the waist, forecastle and bridge decks. It would be best to get etched brass tools for the swap, worm, and ram, but I have not seen any available. There will also be buckets, and cannonballs. I haven't found buckets small enough to use, but it occurred to me that the percussion caps I use on my 1852 Colt dragoon revolver may work, after I take out the explosive, of course! As you go higher in the model, deck by deck, more details will be added. I will try to add such details as to make ship appear "lived in" but in a tidy way. If I had really nice sailor figures like the ones that Doris Obručová made from scratch, the ship would look a lot better.
 
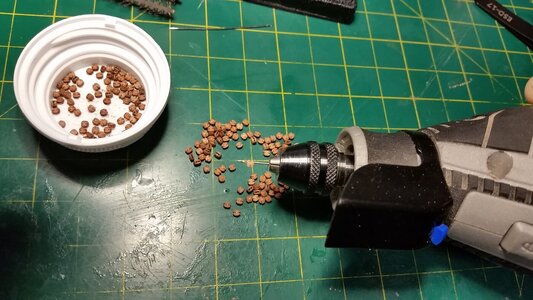
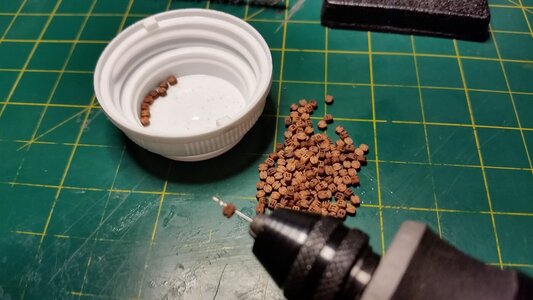
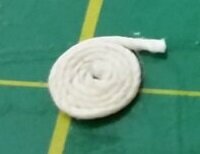
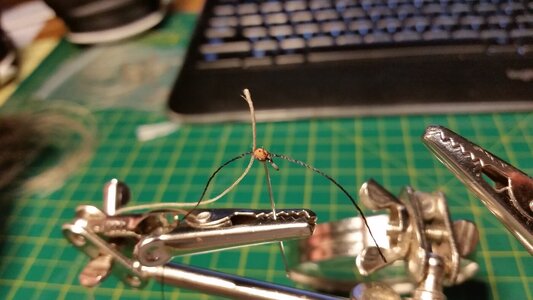
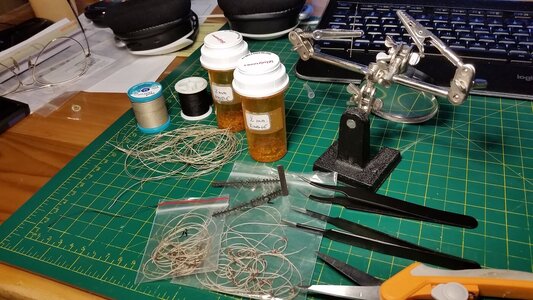
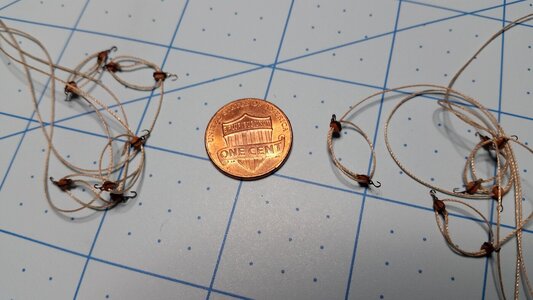
Got a small start on making gun tackles from 2mm blocks and hooks with black and tan thread. The holes in the 2mm blocks need enlarging a tiny bit so threading line stiffened with CA glue is possible. The holes are so close in tolerance that you have to cut the end of the stiffened thread at a sharp angle, creating a sharp point, or it won't pass through the block even with assistance using tweezers. Making 200 of these tackles, 100 passed left hand and 100 right hand loops through the block, will take many days.

Drilling 2mm single blocks
378 Enlarge Holes in 2mm Single Blocks.jpg

Drilling 2mm double blocks
379 Enlarge Holes in 2mm Double Blocks.jpg

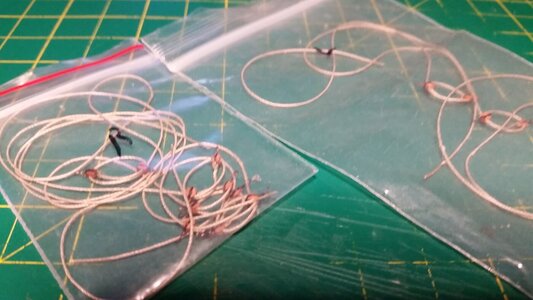
Collecting left and right handed gun tackles in bags
380 Start Making More Gun Tackles With 2mm Blocks and Hooks.jpg
 
Got a small start on making gun tackles from 2mm blocks and hooks with black and tan thread. The holes in the 2mm blocks need enlarging a tiny bit so threading line stiffened with CA glue is possible. The holes are so close in tolerance that you have to cut the end of the stiffened thread at a sharp angle, creating a sharp point, or it won't pass through the block even with assistance using tweezers. Making 200 of these tackles, 100 passed left hand and 100 right hand loops through the block, will take many days.

Drilling 2mm single blocks
View attachment 260156

Drilling 2mm double blocks
View attachment 260157

Collecting left and right handed gun tackles in bags
View attachment 260158
Pardon my ignorance, but are left and right hand tackles even a thing and if so, why?
 
Pardon my ignorance, but are left and right hand tackles even a thing and if so, why?
I have the same question as I use the same double block and only pass the line through the side of the double that when returned to the other hole would end up with the fall on either the right or left side. Nothing different in the double, just in how I thread it. Do you know of something that I am missing? Thanks. Rich (PT-2)
 
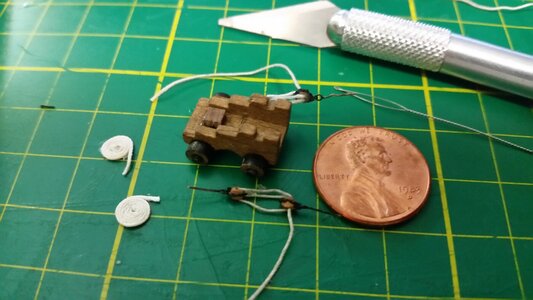
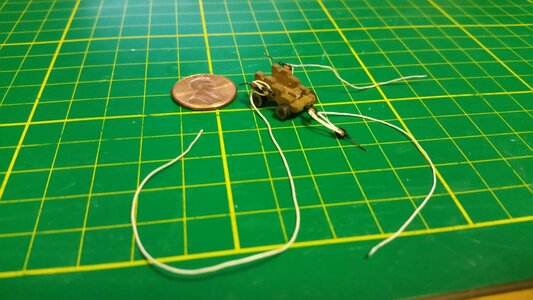
The difference is where the line emerges from the double block at the bulwark. The line emerges from the outboard sheave relative to the carriage, then leads to the rear of the carriage where the remaining line is faked or coiled on the deck. This prevents the tackle from being twisted or tangled and the line runs freely. I do not know for certain if this was commonly done, but as a sailor, it makes sense to arrange the run of the lines this way. If anyone has examples to the contrary, please comment.

The line on the right side of the carriage runs out the double block in a downward direction in the outermost sheave, on the right, then to the rear of the carriage.
101 Two Gun Tackle Sets Test Fit.jpg

The line on the left side of the carriage runs out the double block in a downward direction in the outermost sheave, on the left, then to the rear of the carriage.
102 Cannon Gun and Training Tackles Complete.jpg
 
The difference is where the line emerges from the double block at the bulwark. The line emerges from the outboard sheave relative to the carriage, then leads to the rear of the carriage where the remaining line is faked or coiled on the deck. This prevents the tackle from being twisted or tangled and the line runs freely. I do not know for certain if this was commonly done, but as a sailor, it makes sense to arrange the run of the lines this way. If anyone has examples to the contrary, please comment.

The line on the right side of the carriage runs out the double block in a downward direction in the outermost sheave, on the right, then to the rear of the carriage.
View attachment 260273

The line on the left side of the carriage runs out the double block in a downward direction in the outermost sheave, on the left, then to the rear of the carriage.
View attachment 260274
From what I understand you are talking about how the line is fed through a double block which is not any different from any other double block. . . just how the line if fed for the hand of the line. Did I miss something??? Rich
 
The difference is where the line emerges from the double block at the bulwark. The line emerges from the outboard sheave relative to the carriage, then leads to the rear of the carriage where the remaining line is faked or coiled on the deck. This prevents the tackle from being twisted or tangled and the line runs freely. I do not know for certain if this was commonly done, but as a sailor, it makes sense to arrange the run of the lines this way. If anyone has examples to the contrary, please comment.

The line on the right side of the carriage runs out the double block in a downward direction in the outermost sheave, on the right, then to the rear of the carriage.
View attachment 260273

The line on the left side of the carriage runs out the double block in a downward direction in the outermost sheave, on the left, then to the rear of the carriage.
View attachment 260274
Are you saying the line doesn’t have to cross another line while it’s going down to the deck this way? I’d have to be using some pretty powerful lenses to see the difference.
 
I’m using 2.5 mm blocks and can barely fit thread through them. How in the world did you find a bit small enough to go through that block? Amazing!
I have bits from 0,1 to 1,2 mm in steps of 0,05 mm. Bought them on Aliexpress. But I see them on Amazon and Ebay too.
 
Making 200 of these tackles, 100 passed left hand and 100 right hand loops through the block
Pfff, what a job.

101 Two Gun Tackle Sets Test Fit.jpg
The coils you have to make al the same way like these one you already made. Because you always have RH or Z-twist rope and there is only one way to roll it up like that. Roll it the other way you have to turn against the twist. Was this what you mean whit the loops?
 
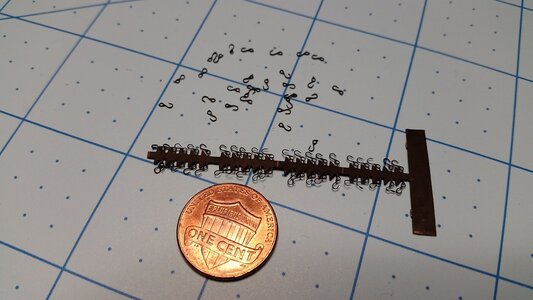
Still making gun tackles. The etched 3mm hooks are so tiny.

View attachment 260318

View attachment 260319
After slightly enlarging the holes in 2.5 the 3 seems like a cake walk. I have never tried 2 mm but can see the challenge in holding it for the drilling. WIth 2.5 and up after cleaning or enlarging the holes I still use the same drill but to fair them to better simulate the sheave inside for a better turned entry and exit fall of the line. Your patience is doing so many is commendable. Rich (PT-2)
 
Back
Top