-

Win a Free Custom Engraved Brass Coin!!!
As a way to introduce our brass coins to the community, we will raffle off a free coin during the month of August. Follow link ABOVE for instructions for entering.
-

PRE-ORDER SHIPS IN SCALE TODAY!
The beloved Ships in Scale Magazine is back and charting a new course for 2026!
Discover new skills, new techniques, and new inspirations in every issue.
NOTE THAT OUR FIRST ISSUE WILL BE JAN/FEB 2026
You are using an out of date browser. It may not display this or other websites correctly.
You should upgrade or use an alternative browser.
You should upgrade or use an alternative browser.
HMS Sovereign of the Seas - Bashing DeAgostini Beyond Believable Boundaries
- Thread starter DARIVS ARCHITECTVS
- Start date
- Watchers 105
I haven't heard from Nigel in a while. I hope he's okay.Guess this is dejavue for Nigel @NMBROOK
No you making me scaredLike when the bits come unglued while you’re tightening the halyards to the belaying pins.


My favorite ship modding tool...

GrantTyler... This is actually what I use. You can do precision plunge cuts with a steady hand.


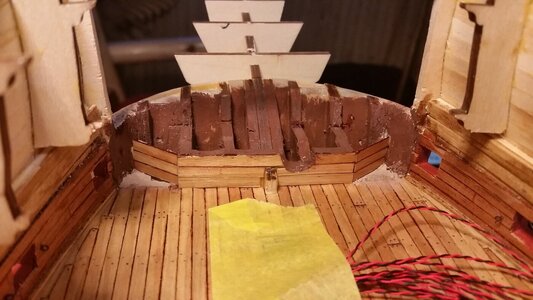
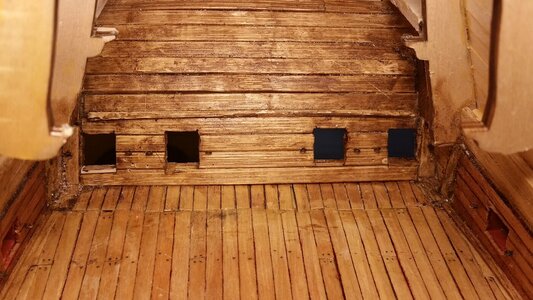
The next steps are even more fun. The remaining supports in the bow were repainted a lighter color of brown, and they look better. I may demolish and remove more of those supports later to improve the accuracy of that section some more, but I haven't decided yet. In the meantime, the counter was drilled for holes for eyelets for the stern chaser breeching lines and gun tackles. Eyelets for the gun tackles were installed.
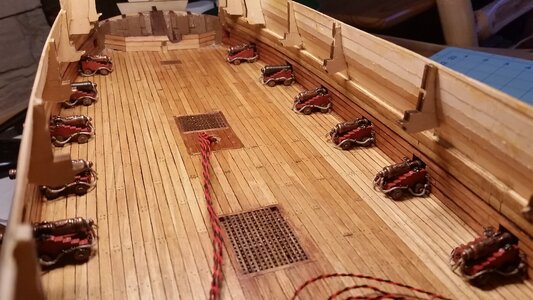
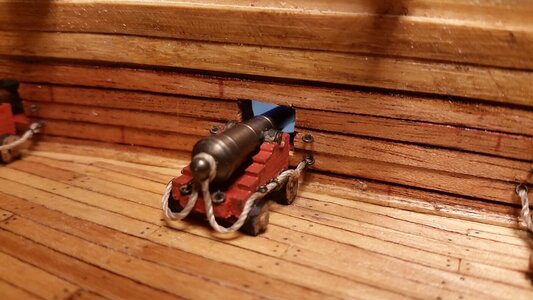
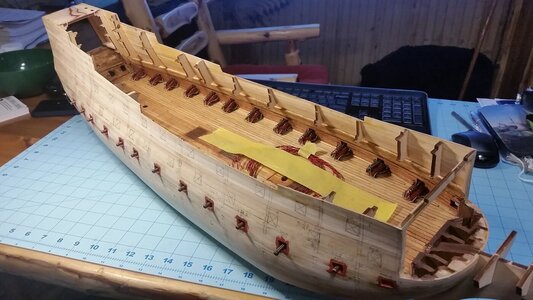
Now for the fun part. These cannons have been sitting in a box for weeks, and now it's time to install them. The carriages are glued to the deck. A few of them can barrels which appeared to be too high in the ports, so with a little sanding of the bottom two front wheels, the front ends of those carriages can be lowered a surprising amount. That was required because the deck was a very small amount too high relative to the ports, and there was some variation in the deck height from bow to stern. These variations were minor and adjustments could be made to take them into account. The breeching line eyelets are then glued in the holes with CA glue. Special attention was made ensuring that the breeching lines drape naturally. That's a detail that typically grabs my eye in photos of real gun carriages and it provides a lot of realism. Most of the carriages for the lower deck broadside were installed. The stern chase guns (only two since the corner guns are located in the broadside) will be fabricated later.
Next, the gun tackles will be installed after the rope coils are made. It's slowly starting to look like a warship.
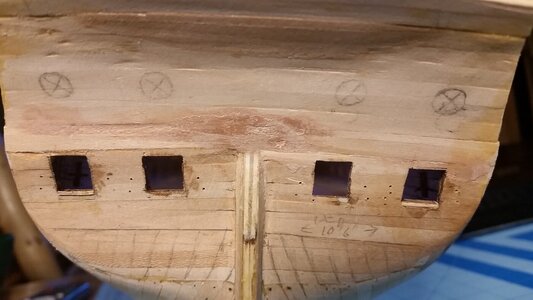
Eyebolts for gun tackles installed.
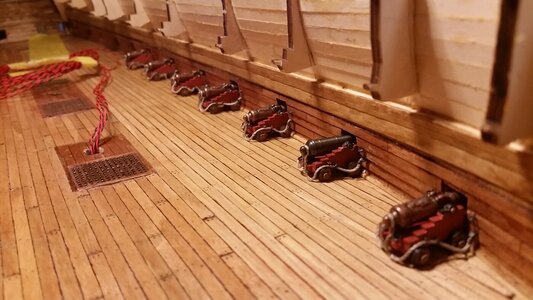
Guns installed, looking forward. Most are 9' cannon of VII drakes. The second guns from the bow are 11' demi cannon drakes. Different barrels were selected to make a distinction between the types of guns.
Close up of a one of the pair of demi cannon drakes.
Guns installed port side, looking aft.
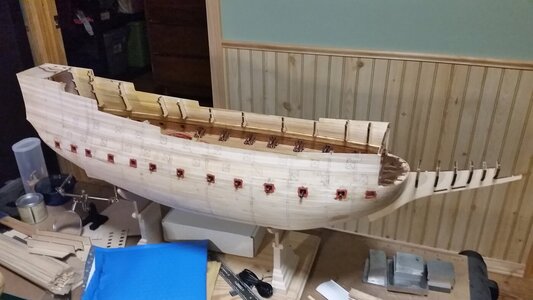
Progress so far.
Now for the fun part. These cannons have been sitting in a box for weeks, and now it's time to install them. The carriages are glued to the deck. A few of them can barrels which appeared to be too high in the ports, so with a little sanding of the bottom two front wheels, the front ends of those carriages can be lowered a surprising amount. That was required because the deck was a very small amount too high relative to the ports, and there was some variation in the deck height from bow to stern. These variations were minor and adjustments could be made to take them into account. The breeching line eyelets are then glued in the holes with CA glue. Special attention was made ensuring that the breeching lines drape naturally. That's a detail that typically grabs my eye in photos of real gun carriages and it provides a lot of realism. Most of the carriages for the lower deck broadside were installed. The stern chase guns (only two since the corner guns are located in the broadside) will be fabricated later.
Next, the gun tackles will be installed after the rope coils are made. It's slowly starting to look like a warship.

Eyebolts for gun tackles installed.

Guns installed, looking forward. Most are 9' cannon of VII drakes. The second guns from the bow are 11' demi cannon drakes. Different barrels were selected to make a distinction between the types of guns.

Close up of a one of the pair of demi cannon drakes.

Guns installed port side, looking aft.

Progress so far.

Last edited:
- Joined
- Sep 3, 2021
- Messages
- 5,199
- Points
- 738

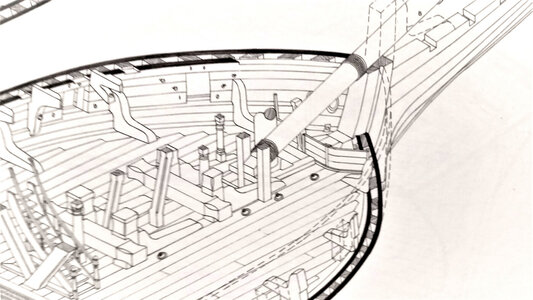
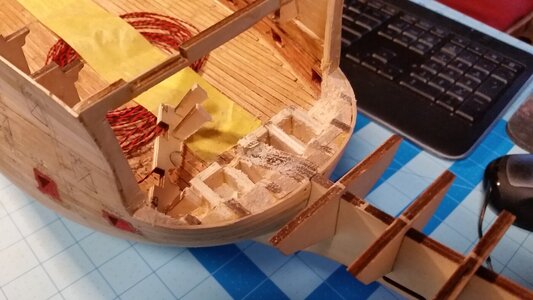
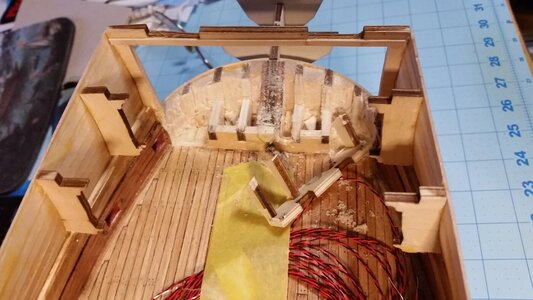
October 31st, Heinrich's response to your stern demolition: "The line is visually more aesthetic - great job! And as to drastic measures in drastic situations ... are you sure you do not have South African blood somewhere?"MORE DESTRUCTION!The bow was partially removed and replaced with a simple simulation of the manger. It's not as far forward as it should be, but it looks better than the support structure which was there before.
My response: "Please! Don't encourage him, before you know he cut his entire bow off because, well, whatever reason..."
Just about a week later and the bow is gone...
"Darius Architectus"; doesn't that translate into "daring modeler"?
All kidding aside, I admire your guts in cutting off bits and pieces, just because the results do not please you for whatever reason, rather than accepting defeat and a dissatisfying result.

Kind regards, Johan
Whacking out the bow, and that previous comment about encouraging me? Pure coincidence!October 31st, Heinrich's response to your stern demolition: "The line is visually more aesthetic - great job! And as to drastic measures in drastic situations ... are you sure you do not have South African blood somewhere?"
My response: "Please! Don't encourage him, before you know he cut his entire bow off because, well, whatever reason..."
Just about a week later and the bow is gone...
"Darius Architectus"; doesn't that translate into "daring modeler"?
All kidding aside, I admire your guts in cutting off bits and pieces, just because the results do not please you for whatever reason, rather than accepting defeat and a dissatisfying result.
Kind regards, Johan

When dealing with a kit that has internal structure which was 1) not meant to be seen and 2) inaccurate as a result of the first thing, inevitably you have to make drastic changes if you want to add internal details. Those changes are made AFTER the planking shell has its shape defined. Inaccurate supports of the planking are replaced with more historically accurate ones. Basically, parts of the ship are converted from POB to POF. Scratch builders get the internal support structure the way they want it from the beginning, and don't have to make sweeping changes. With a kit, you have to change a lot if you want add a lot.
That's why we call it BASHING.
(Of course, in the last few steps of my build, that term was taken literally)
Not everything is modelled perfectly accurate, such as the deck extensions were not re-planked properly, so there are a few corners cut. However, the most visible features will be well represented.
Last edited:
- Joined
- Sep 3, 2021
- Messages
- 5,199
- Points
- 738

Up till now I didn't dare to put a saw or chisel into a build I undertook and, admittedly, there are not many of those.Whacking out the bow, and that previous comment about encouraging me? Pure coincidence!If one of our members is willing to re-rig all his ratlines, removing a few internal supports isn't that big a deal. In the early, structure stages of production, it became apparent that you can recover from almost anything, except in the event the ship catches fire.
When dealing with a kit that has internal structure which was 1) not meant to be seen and 2) inaccurate as a result of the first thing, inevitably you have to make drastic changes if you want to add internal details. Those changes are made AFTER the planking shell has its shape defined. Inaccurate supports of the planking are replaced with more historically accurate ones. Basically, parts of the ship are converted from POB to POF. Scratch builders get the internal support structure the way they want it from the beginning, and don't have to make sweeping changes. With a kit, you have to change a lot if you want add a lot.
That's why we call it BASHING.
(Of course, in the last few steps of my build, that term was taken literally)
Not everything is modelled perfectly accurate, such as the deck extensions were not re-planked properly, so there are a few corners cut. However, the most visible features will be well represented.
What I did do was to remove and redo running and standing rigging just because of the fluffiness of the rope I used. The Admiral thought I lost my marbles. I also removed and reinstalled sails, just because the appearance was not pleasing my eyes...
- Joined
- May 27, 2021
- Messages
- 222
- Points
- 88

Please! Don't encourage him, before you know he cut his entire bow off because, well, whatever reason...
Hey, I have one of those.........hmm? I don't think so.GrantTyler... This is actually what I use. You can do precision plunge cuts with a steady hand.

I'm confused (again  ) Kurt. Don't you need your second hull planking on before these guns?
Usually, I would. However, the external surfaces of the hull will be worked on after the three decks and all their internals are built. Contemplation of the internals has revealed the need to shape the exterior, particularly while tryin to match the gun ports of the sides to the stern, which showed me that the entire stern needed reworking. If the external planking was completed, large changes to the structure would affect the pattern of that planking, and create a serious problem trying to resize and realign planks. Also, the bumps, bruises, and scratches you often see when handing the model are avoided.I'm confused (again) Kurt. Don't you need your second hull planking on before these guns?
Thinking ahead about the potential changes that may need to be made affects the sequence of steps you would usually make. In this case, the danger of hooking and breaking off cannon barrels and carriages has to be taken in order to completed the rigging of those guns, and the gun carriages must be complete before they are made inaccessible by added the knees and deck beams for supporting the deck above it. If the knees were in place, crowding the carriages, there would be now way to install the gun tackles on those tiny eyebolts on the bulwark, even with tweezers, because you couldn't get a clear line of sight to them. If you didn't have gun tackles and breeching lines to install, you could insert the barrels onto the carriages from outside the gun ports when gluing them down, like I did on the lower gun deck for La Couronne. Using dummy gun barrels removes all the problems of dealing with the guns and internals on the lower decks on a model. I can add the final planking later, working around the gun barrels, although it will be a bit more difficult.
Understood. I find myself spending an inordinate amount of time thinking about the proper order of doing things on the ship and this one caught my attention. My ship has entered a fragile stage at the midpoint - yours has entered that stage nearer to the beginning but I agree that there is no way around that if you want to have fully rigged guns and trimmed out internals on several decks. Yours will be a build for the ages if you (and it) survive the process!Usually, I would. However, the external surfaces of the hull will be worked on after the three decks and all their internals are built. Contemplation of the internals has revealed the need to shape the exterior, particularly while tryin to match the gun ports of the sides to the stern, which showed me that the entire stern needed reworking. If the external planking was completed, large changes to the structure would affect the pattern of that planking, and create a serious problem trying to resize and realign planks. Also, the bumps, bruises, and scratches you often see when handing the model are avoided.
Thinking ahead about the potential changes that may need to be made affects the sequence of steps you would usually make. In this case, the danger of hooking and breaking off cannon barrels and carriages has to be taken in order to completed the rigging of those guns, and the gun carriages must be complete before they are made inaccessible by added the knees and deck beams for supporting the deck above it. If the knees were in place, crowding the carriages, there would be now way to install the gun tackles on those tiny eyebolts on the bulwark, even with tweezers, because you couldn't get a clear line of sight to them. If you didn't have gun tackles and breeching lines to install, you could insert the barrels onto the carriages from outside the gun ports when gluing them down, like I did on the lower gun deck for La Couronne. Using dummy gun barrels removes all the problems of dealing with the guns and internals on the lower decks on a model. I can add the final planking later, working around the gun barrels, although it will be a bit more difficult.
I spend DAYS thinking about the next few steps before doing anything, thinking about the level of detail to add, features to use, and whether or not that next step will block access to later steps.Understood. I find myself spending an inordinate amount of time thinking about the proper order of doing things on the ship and this one caught my attention. My ship has entered a fragile stage at the midpoint - yours has entered that stage nearer to the beginning but I agree that there is no way around that if you want to have fully rigged guns and trimmed out internals on several decks. Yours will be a build for the ages if you (and it) survive the process!
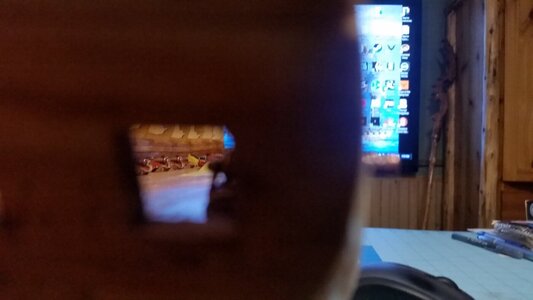
Today the rest of the broadside guns were installed on the lower gun deck. I am waiting for a few cannon barrels which were ordered to arrive so the stern chasers (two of them) can be fabricated. It just occurred to me that if I properly hinge the outboard chaser gun port lids such that they actually function, You can get a decent view of the entire gun deck, or at least the last half of it, with your view blocked by stanchions, the mizzen mast, and ladders. The LED lights should provide enough illumination to see well. I may not need to install a camera on this deck if the view is good enough. The upper gun deck chaser ports are too small to afford a good view past the guns in those locations.
The hard part is next, hooking and adjusting the gun tackles to the carriage and bulwark eyebolts.
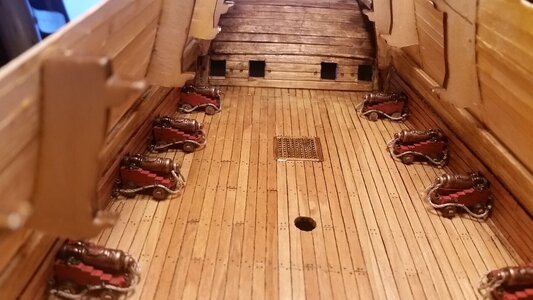
View from the unused starboard gun port.
View from the unused port gun port.
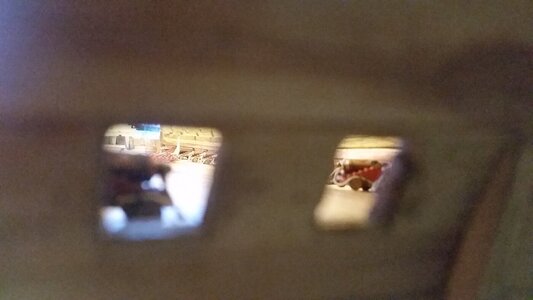
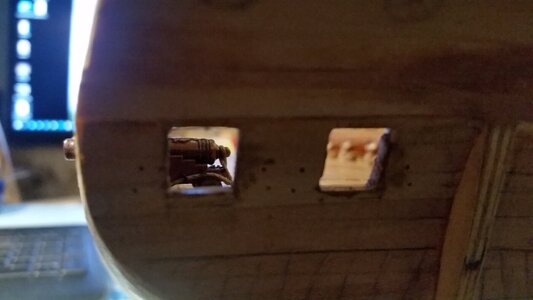
The hard part is next, hooking and adjusting the gun tackles to the carriage and bulwark eyebolts.


View from the unused starboard gun port.

View from the unused port gun port.


Last edited:
- Joined
- Oct 9, 2020
- Messages
- 2,233
- Points
- 488

That is great advice. I am no where near your level of experience but I am finding myself doing the same thing. Instructions usually suck so I am left to my own devices, hence lots of time for reflection and reading books.I spend DAYS thinking about the next few steps before doing anything, thinking about the level of detail to add, features to use, and whether or not that next step will block access to later steps.
Last edited by a moderator:
And then, you wind up tearing it apart anyway!I spend DAYS thinking about the next few steps before doing anything, thinking about the level of detail to add, features to use, and whether or not that next step will block access to later steps.

I started the long process of installing the gun tackles. Only three guns were finished today. The gun tackles being installed were from the first batch, the ones that have microscopic copper hooks tied to the blocks, not the etch brass ones which come with built-in strops. These are VERY delicate, and hard to work with. So, just to see how good my hands are, I tried putting them on the hardest carriage to reach, the one just forward of the stern. It took a long time, but I developed a techniques. All the work required small hobby tweezers under a bright light and a magnifying headset, of course. After bending one of the tiny hooks while trying to tighten the line in the tackle, I learned to add a bit of CA on a long stick and cement the hooks to the eyebolts first. Then the tweezers could be used to gently tighten the tackles to the proper length and tension. Because I am using real hooks on eyebolts instead of just eyebolts on each end the tackle, the tackles are much more delicate than the one which were used on La Couronne. The results are pretty convincing, as good as I can get on a 30mm long gun! My work tends to be less neat than others, but I make up for that in addition of details.
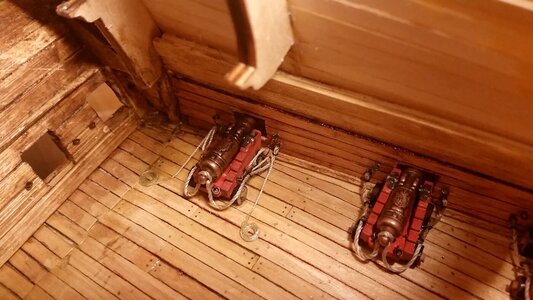
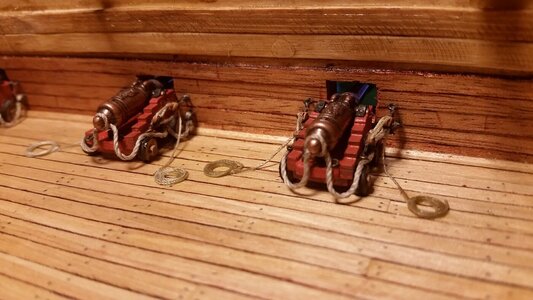


These look really great Kurt. I discovered the same need to add a baby drop of CA to hold the hooks in place while I got the rest sorted out - though I had the advantage of easy access... I know you work hard at keeping the ropes looking natural...mission accomplished my friend!


