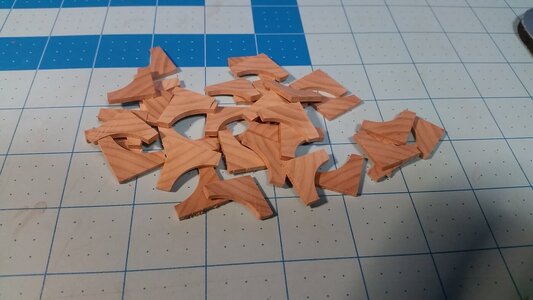
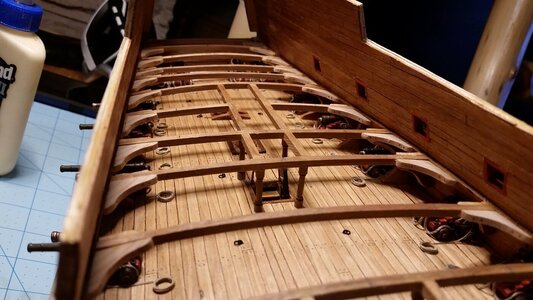
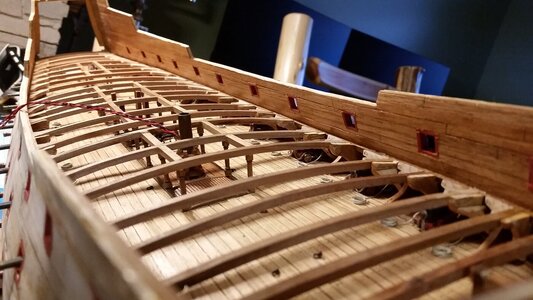
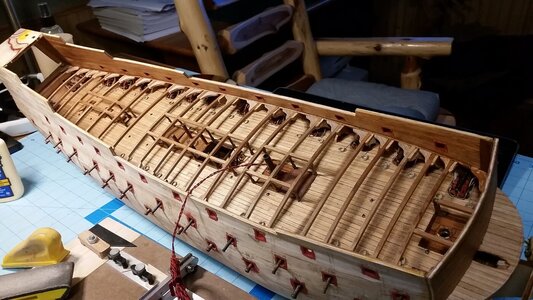
That’s enough knees for a caterpillar! 
-

Win a Free Custom Engraved Brass Coin!!!
As a way to introduce our brass coins to the community, we will raffle off a free coin during the month of August. Follow link ABOVE for instructions for entering.
-

PRE-ORDER SHIPS IN SCALE TODAY!
The beloved Ships in Scale Magazine is back and charting a new course for 2026!
Discover new skills, new techniques, and new inspirations in every issue.
NOTE THAT OUR FIRST ISSUE WILL BE JAN/FEB 2026
You are using an out of date browser. It may not display this or other websites correctly.
You should upgrade or use an alternative browser.
You should upgrade or use an alternative browser.
HMS Sovereign of the Seas - Bashing DeAgostini Beyond Believable Boundaries
- Thread starter DARIVS ARCHITECTVS
- Start date
- Watchers 105
My snow Bengal cat, Leopold, stepped on my ship today, breaking off the whipstaff and taking out one of the beams... effecting repairs. 
Hmm. He would make a lovely (albeit expensive) doorstop...
You can't threaten the kitty on account of my wife...Hmm. He would make a lovely (albeit expensive) doorstop...
This has been an abysmal year for the loss of talented musicians.Agree with all the above, all about the journey not arriving at the destinationMusic is good for the repetive jobs.Depeche Mode for me for a while after learning of the passing of Andy Fletcher,their keyboard player yesterday
Kind Regards
Nigel
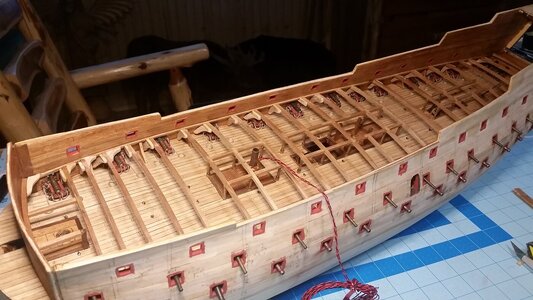
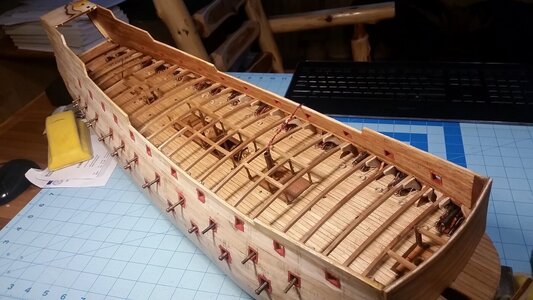
The hanging knees and dagger knees were completed today and a coat of satin finish was applied to them to blend in the color. The lodging knees were started, and there are 46 of them, so it will take a while to get them all made.
Starboard side hanging and dagger knees.
Port side hanging and dagger knees.
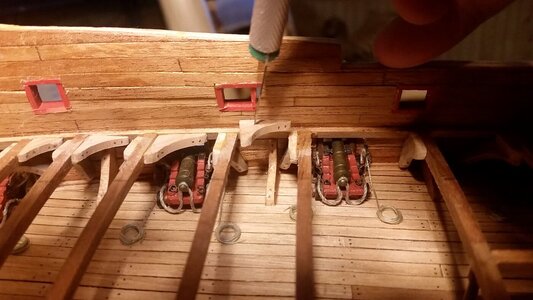
Test fitting a lodging knee. Stick it on the end of a pike like you would that damned cat that damaged the model yesterday so it's easy to position.
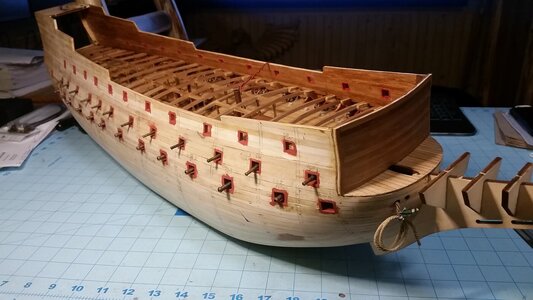
Progress so far.
Starboard side hanging and dagger knees.

Port side hanging and dagger knees.

Test fitting a lodging knee. Stick it on the end of a pike like you would that damned cat that damaged the model yesterday so it's easy to position.

Progress so far.

Interesting way of making the knees - with a very good result
Quick and dirty.Interesting way of making the knees - with a very good result

All the lodging knees were completed on the starboard side today. The process for making and installing the knees is detailed below.
Estimate the angle between the bulwark and the beam where the knee will be installed and chop the piece to that angle.
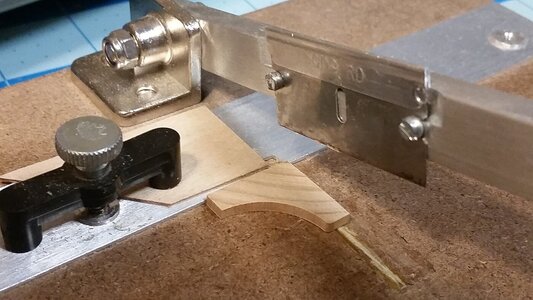
Knee with the excess material chopped off. The knee should be test fit in the model and the angle, which is just over or just under 90 degrees, should be adjusted to fit.
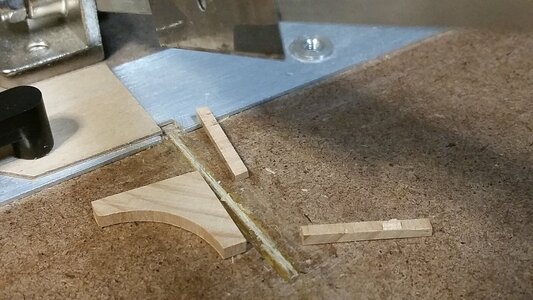
Miter the corners off the ends.
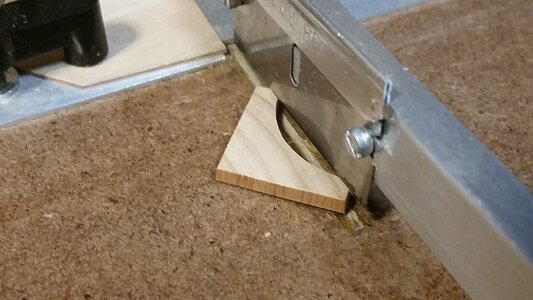
Roughly shaped knee ready for final sanding.
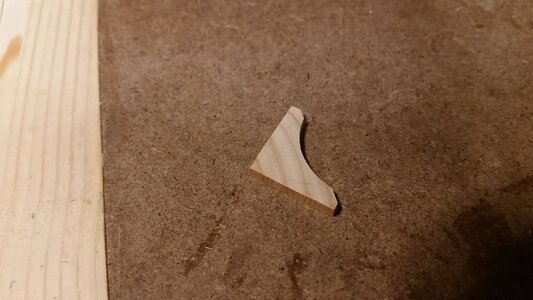
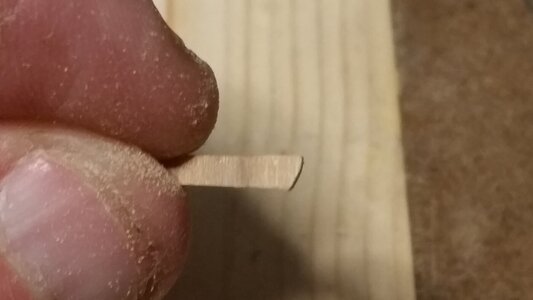
Round the ends with a sanding block.
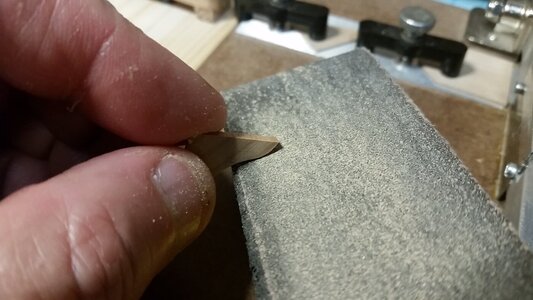
Sand the edge which contacts the bulwark to match the vertical angle of the hull at the place where the knee will be installed. This will change depending on the location of the knee.
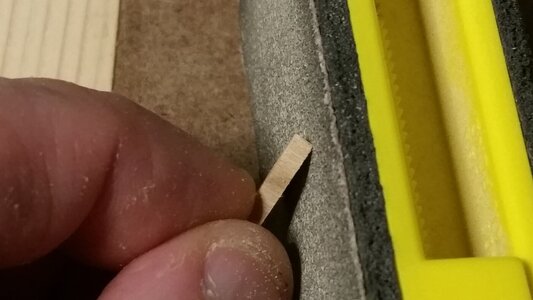
This edge is angled to match the vertical angle of the bulwark.
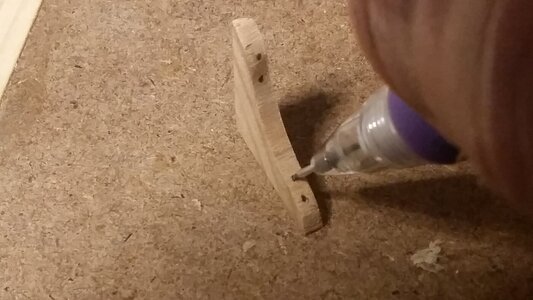
Mark the bolt heads with a pencil for added detail.
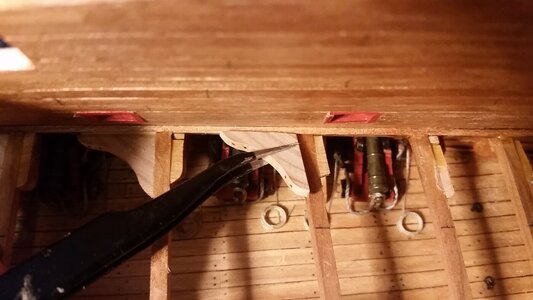
Test fit the knee to check the fit between the bulwark and the beam. Adjust the angle as necessary. When the angle matches, the knee will be very secure when glued in place.
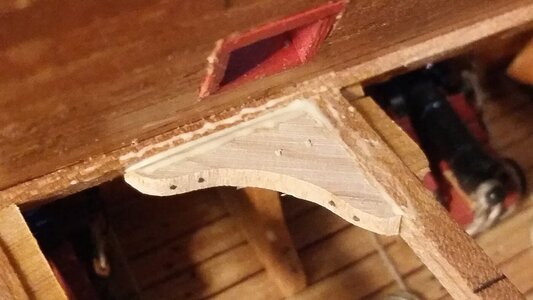
Finished knee glued in place.
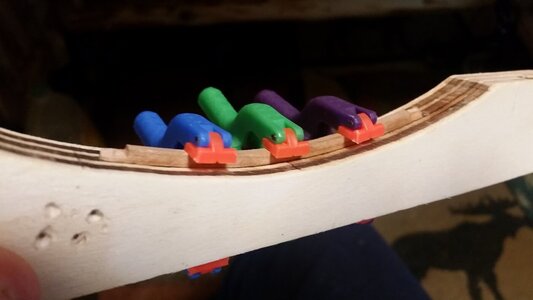
Cut a 3x3mm piece of cherry wood, soak in water, then clamp into the form to bend it to make the camber. This beam will be the last one, closest to the transom.
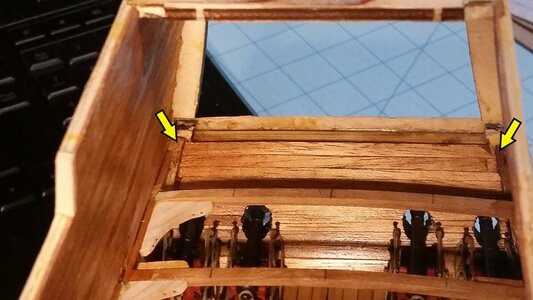
The last beam on this deck will go here, between the arrows.
New beam placed over an existing beam to check the curvature.
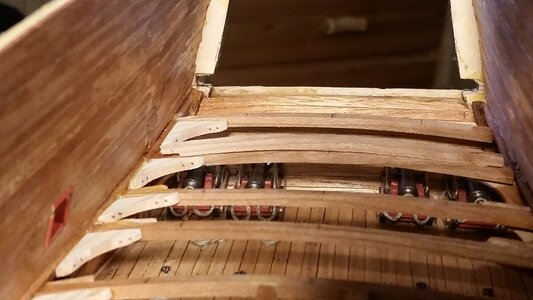
Aftermost beam glued in place.
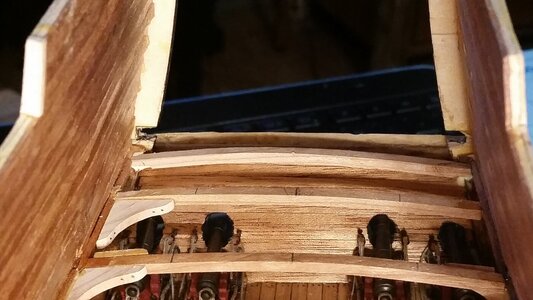
Cut, shape and sand the last lodging knees, port and starboard.
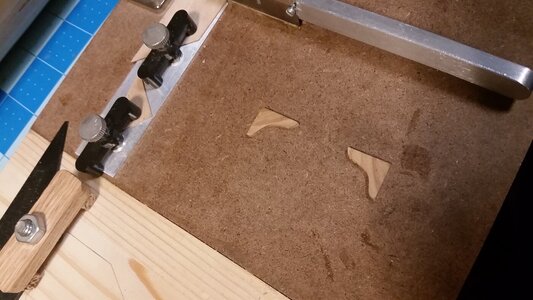
Test fit the last lodging knee.
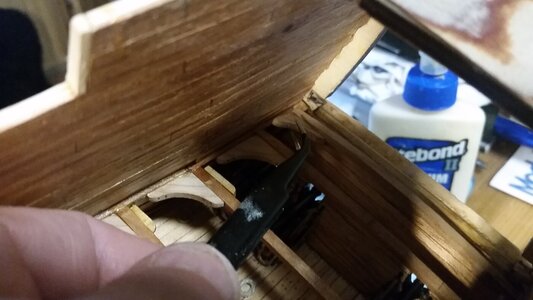
Last lodging knee on starboard side glued in place.
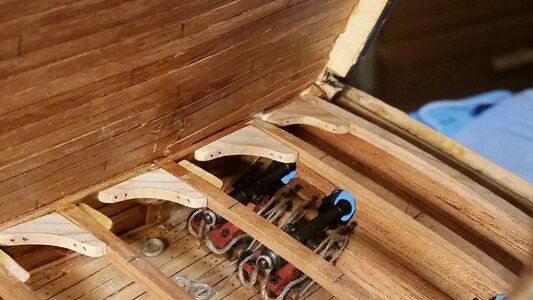
Progress so far.
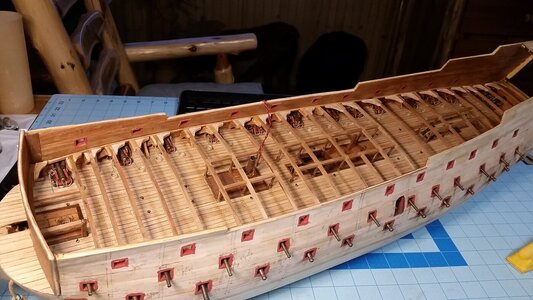
Estimate the angle between the bulwark and the beam where the knee will be installed and chop the piece to that angle.

Knee with the excess material chopped off. The knee should be test fit in the model and the angle, which is just over or just under 90 degrees, should be adjusted to fit.

Miter the corners off the ends.

Roughly shaped knee ready for final sanding.

Round the ends with a sanding block.

Sand the edge which contacts the bulwark to match the vertical angle of the hull at the place where the knee will be installed. This will change depending on the location of the knee.

This edge is angled to match the vertical angle of the bulwark.

Mark the bolt heads with a pencil for added detail.

Test fit the knee to check the fit between the bulwark and the beam. Adjust the angle as necessary. When the angle matches, the knee will be very secure when glued in place.

Finished knee glued in place.

Cut a 3x3mm piece of cherry wood, soak in water, then clamp into the form to bend it to make the camber. This beam will be the last one, closest to the transom.

The last beam on this deck will go here, between the arrows.

New beam placed over an existing beam to check the curvature.

Aftermost beam glued in place.

Cut, shape and sand the last lodging knees, port and starboard.

Test fit the last lodging knee.

Last lodging knee on starboard side glued in place.

Progress so far.

Are you sure you don’t kneed more knees?
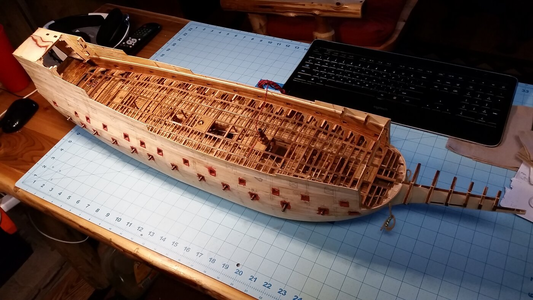
Of course. You can never have enough. But wait until you see the carlings and ledges! The fun is just beginning. This is what the deck structure for the middle gun deck looked like before it was covered over with deck planking. The upper gun deck structure in progress now will be similar.Are you sure you don’t kneed more knees?
Last edited:
Fantastisch!
- Joined
- Sep 3, 2021
- Messages
- 5,199
- Points
- 738

Monnikenwerk, just plain monnikenwerk! Kudos though, it just looks stunning.Of course. You can never have enough. But wait until you see the carlings and ledges! The fun is just beginning. This is what the deck structure for the middle gun deck looked like before it was covered over with deck planking. The upper gun deck structure in progress now will be similar.
View attachment 312734
Well planned, well executed, and I must say well documented.All the lodging knees were completed on the starboard side today. The process for making and installing the knees is detailed below.
Estimate the angle between the bulwark and the beam where the knee will be installed and chop the piece to that angle.
View attachment 312716
Knee with the excess material chopped off. The knee should be test fit in the model and the angle, which is just over or just under 90 degrees, should be adjusted to fit.
View attachment 312717
Miter the corners off the ends.
View attachment 312718
Roughly shaped knee ready for final sanding.
View attachment 312719
Round the ends with a sanding block.
View attachment 312720
Sand the edge which contacts the bulwark to match the vertical angle of the hull at the place where the knee will be installed. This will change depending on the location of the knee.
View attachment 312721
This edge is angled to match the vertical angle of the bulwark.
View attachment 312722
Mark the bolt heads with a pencil for added detail.
View attachment 312723
Test fit the knee to check the fit between the bulwark and the beam. Adjust the angle as necessary. When the angle matches, the knee will be very secure when glued in place.
View attachment 312724
Finished knee glued in place.
View attachment 312725
Cut a 3x3mm piece of cherry wood, soak in water, then clamp into the form to bend it to make the camber. This beam will be the last one, closest to the transom.
View attachment 312726
The last beam on this deck will go here, between the arrows.
View attachment 312727
New beam placed over an existing beam to check the curvature.
View attachment 312728
Aftermost beam glued in place.
View attachment 312729
Cut, shape and sand the last lodging knees, port and starboard.
View attachment 312730
Test fit the last lodging knee.
View attachment 312731
Last lodging knee on starboard side glued in place.
View attachment 312732
Progress so far.
View attachment 312733
Outstanding!Of course. You can never have enough. But wait until you see the carlings and ledges! The fun is just beginning. This is what the deck structure for the middle gun deck looked like before it was covered over with deck planking. The upper gun deck structure in progress now will be similar.
View attachment 312734
Bashing deagostini beyond believable boundaries.
Yup. That about covers it.
Yup. That about covers it.
Yeah Paul. If you look at the top, that's exactly what the thread says.Bashing deagostini beyond believable boundaries.
Yup. That about covers it.


