HMS Sovereign of the Seas - Bashing DeAgostini Beyond Believable Boundaries

Okay, fixed that little problem was going to add the sternpost, except there was something in the way... So, What do we need?
MORE DESTRUCTION! :D

The extension of the keel was installed first, along with an extension of the false keel.
1071 Correct Keel Length by Adding Extension.JPG

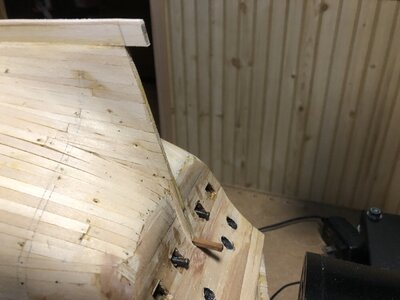
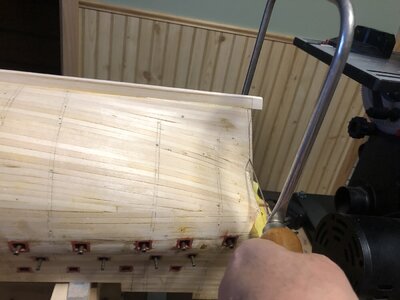
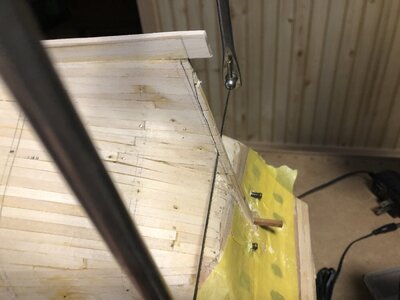
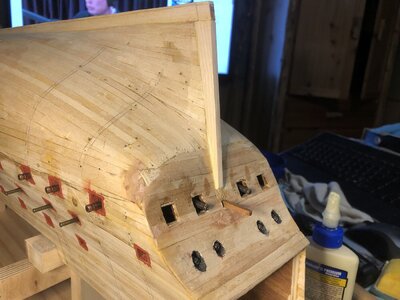
Out comes the saw! The sternpost needs to appear to be coming out of the transom, so that plywood keel needs to be trimmed back to make room for proper hardwood.
1072 Cut Away False Keel Plywood.JPG

Keep hacking away. . .
1073 Still Cutting.JPG

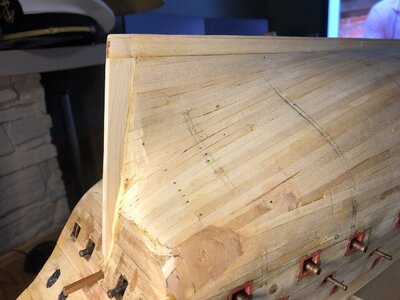
After some filing and sanding, a sternpost was cut out from maple wood and glued in place after some shaping.
1074 Install Maple Sternpost.JPG

Not bad for a quick fix. One the glue dries it will be rock solid, then some more sanding of the deadwood planking will fair it in with the sternpost.
1075 Sternpost.JPG
 
I’ve seen some models where they don’t Put first layer of planks in the deadwood area. They just use the thin veneer planks and they still have to cut out the area to accommodate the veneer
 
I’ve seen some models where they don’t Put first layer of planks in the deadwood area. They just use the thin veneer planks and they still have to cut out the area to accommodate the veneer
It's understandable why first planking may not be used there. Because of the thin keel, the first planking for this model will have to be sanded away near the the keel and some of the underlying ply will also have to be removed to make room for the thickness of the final planking. This was not a problem on my last model because the keel itself part of the false keel or spine of the entire model, and was overlaid with veneer itself. This keel, being added as solid hardwood, will require some careful chisel work to ensure that once the final planking is laid, the surfaces of the planking and the keel are even at the deadwood. This is one of the carryover features of using this rather simplistic kit design. Making the features come out right is going to take some extra scratch work.
 
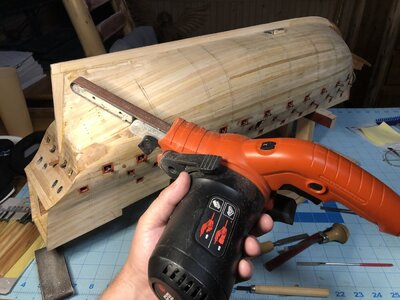
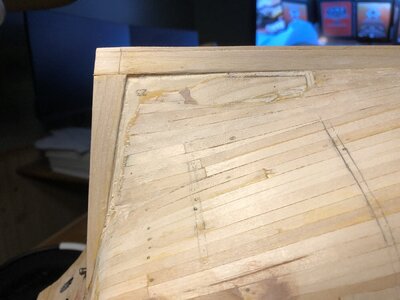
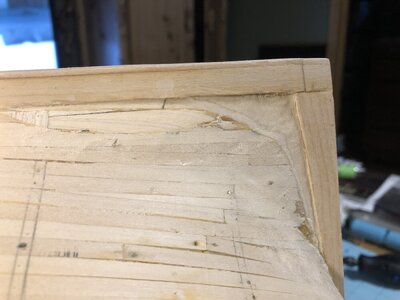
To make the final planking flush with the keel and sternpost, the deadwood needed to be chiseled and sanded to make it lower than the keel. A 1/2" hand held belt sander did the rough work, removing high spots. The wood along the heel was removed with carving tools and the areas sanded smooth. It doesn't have to look pretty, but the shape has to be right. Overlaying the first planking as it was would make the keel and sternpost appear too thin.

1076 Rough Sand Deadwood For Final Planking.JPG

1077 Deadwood Rebated Near Keel and Sternpost.JPG

1078 Deadwood Rebated Stbd Side.JPG
 
Well Kurt I just spent the last little bit catching up on your build and I stand in awe of your methods of construction. Your false keel construction was fascinating and looks great. You have inspired me to scratch build a much better capstan than the one I have now so have added it to my list. Great photos of you and your buddy hiking in that beautiful location too.
 
Well Kurt I just spent the last little bit catching up on your build and I stand in awe of your methods of construction. Your false keel construction was fascinating and looks great. You have inspired me to scratch build a much better capstan than the one I have now so have added it to my list. Great photos of you and your buddy hiking in that beautiful location too.
Good morning Daniel- True story. Kurts work is inspiring- if I had to follow your example and Kurts inspiration I would have to rebuild my entire Victory ;) . I love the construction methods and detail here it is an educational experience. Cheers Grant
 
Good morning Daniel- True story. Kurts work is inspiring- if I had to follow your example and Kurts inspiration I would have to rebuild my entire Victory ;) . I love the construction methods and detail here it is an educational experience. Cheers Grant
The more I look at the kit parts and compare the model to information in books, the more parts get replaced and the more changes are made to the ship. Each change brings it a bit close to where the model should be. It's slow because it takes time to think about how to make each change. Glad you're along with me on this journey of research and construction.
 
Last edited:
Time to rig more cannons. Ugh.
NOT QUITE YET. I want to establish where the wales are using pinstripe tape, and begin drawing outlines where the galleries will go and the cell outlines that surround each decoration. I'm trying to reconcile where the internal decks will go relative to the window and gallery doors. This will take LOTS of study, and probably result in changes to the deck "steps" in the stern castle.
 
Well Kurt I just spent the last little bit catching up on your build and I stand in awe of your methods of construction. Your false keel construction was fascinating and looks great. You have inspired me to scratch build a much better capstan than the one I have now so have added it to my list. Great photos of you and your buddy hiking in that beautiful location too.
Thanks Daniel! I'm not afraid of cutting things, reshaping things, or making additions to a model AS LONG AS I have a research source to back it up, whether it be a picture, a reference book, an old painting, or even a feature from someone else's blog which was verified by other sources. Experience with tools like the band saw and sanding block, and figuring out the easiest methods with the tools I have makes the work go rather fast. Not being afraid of mistakes, and accepting that there will be some things that need total re-working takes away the fear of bashing. People are always too afraid to take on a complex project because mistakes will be be made, many of them easily fixed, some of them serious. If that stops you, then you can't achieve great things by your own choice. Example: I forgot to make the whipstaff and decked over the structure that the whipstaff needed to be held it. But, after some thought, a way of getting that feature into the ship was figured out, but it meant boring holes in the hull in carefully measured locations, and attaching the whipstaff to the tiller with out much access. Many would just skip the whole thing and made a false whipstaff to preserve the detail. No way. I wanted a WORKING whipstaff, because it's fun to play with. Thinking outside the box allows you to fix what most would think unfixable and salvage projects that most would discard in disgust.

The work on the Sovereign is not all that precise in that there are always things that are a little uneven, or gaps on the edges of an inlay, or a rather poor wood finish because I don't know finishing all that well, but it's getting the details as close as I can that occupies most of my efforts. One should remember that a lot in a kit is just wrong or oversimplified. I've bene using cheaper porous woods like basswood for structural work, and walnut, mahogany and cherry on finished areas, and they just don't look as good as shiny polished boxwood, but I don't have any boxwood, so the finish suffers. When you use crappy wood like basswood or plywood on viewable finished areas, like most kits supply, it looks like crap unless painted, so you don't get any wood grain to show off. I also need to learn how to weather things a bit so the model doesn't look like a model, and more like a real ship in miniature. I'm going to try washes in dark colors to bring out some details. I was thinking that after painting the bottom greyish white, washing the entire bottom with thinned brown or black paint would bring out some grain contrast, and hopefully the plank lines just a small bit, so the hull doesn't look like it was molded in plastic. I have no experience weathering, so it's going to be interesting.
She was a glorious ship. Especially when she was spanking new.
 
Back
Top