-

Win a Free Custom Engraved Brass Coin!!!
As a way to introduce our brass coins to the community, we will raffle off a free coin during the month of August. Follow link ABOVE for instructions for entering.
-

PRE-ORDER SHIPS IN SCALE TODAY!
The beloved Ships in Scale Magazine is back and charting a new course for 2026!
Discover new skills, new techniques, and new inspirations in every issue.
NOTE THAT OUR FIRST ISSUE WILL BE JAN/FEB 2026
You are using an out of date browser. It may not display this or other websites correctly.
You should upgrade or use an alternative browser.
You should upgrade or use an alternative browser.
HMS Vanguard 1787 1:72 scale by ADoyon - First Build
- Thread starter ADoyon
- Start date
- Watchers 52
-
- Tags
- amati vanguard victory models
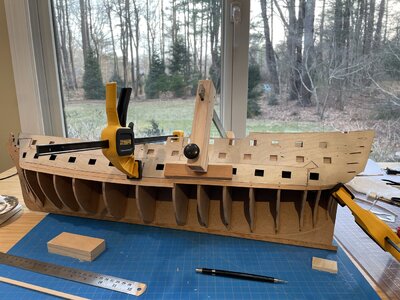
Well Done, but I Miss STERN and Bowfiller for much easier planking in stern and bow -sorry-View attachment 220867
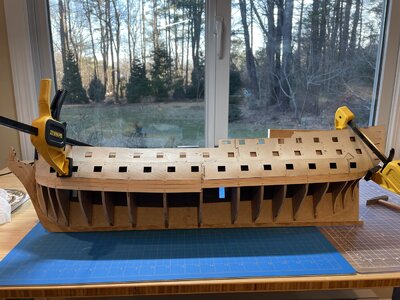
View attachment 220868
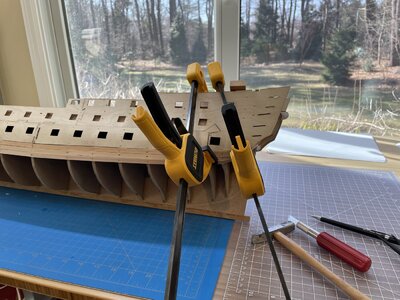
View attachment 220869
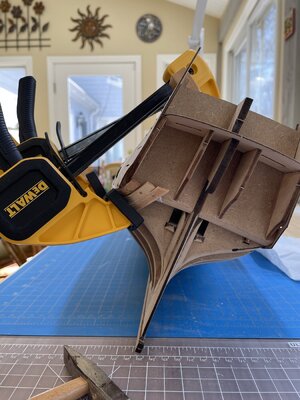
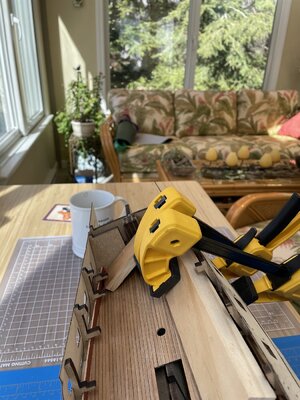
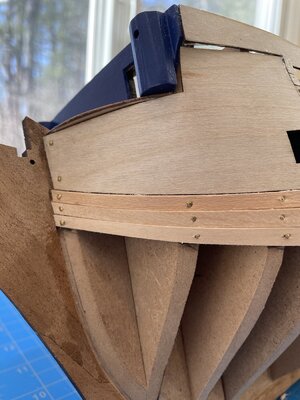
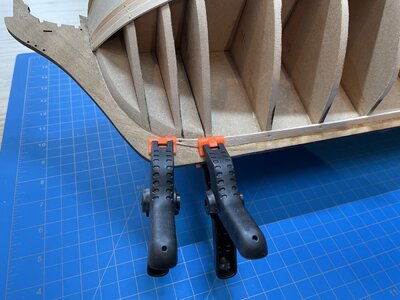
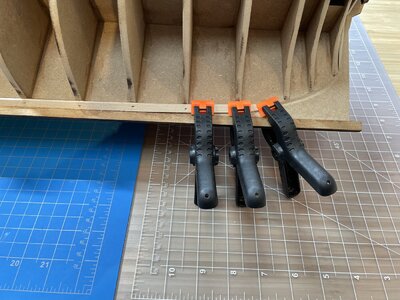
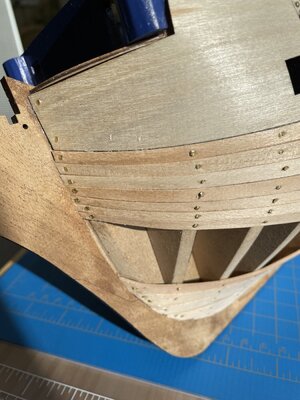
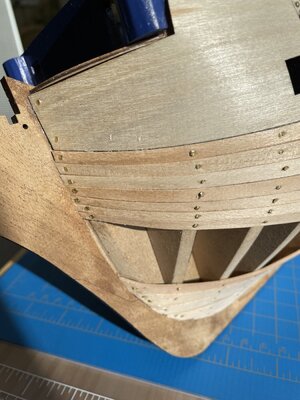
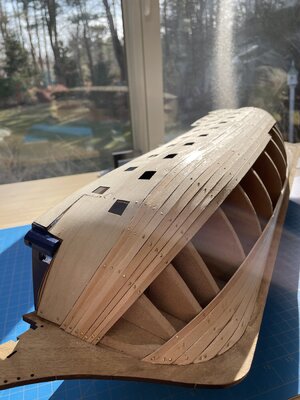
Bending the 1.5 mm x 7 mm lime wood at the stern is not easy even after soaking overnight. There is a twist and sharp bend upward. The small nails will not hold the planks in place while the glue sets. I needed to find a way to clamp.
Hello El Capi,Well Done, but I Miss STERN and Bowfiller for much easier planking in stern and bow -sorry-
I’m aware that many modelers have included filler blocks between bulkheads in the build logs that I’ve seen. This is not mentioned in the kit’s instructions and I wonder why. Maybe this is one of those improvisions that come with experience to make things easier. I thought about adding filler blocks but judging the thickness of the lime wood planks with the spacing of bulkheads at bow and stern I felt I could achieve a smooth bend especially at the bow. I’m also following Bob Hunt’s practicum and he doesn’t use filler blocks at the bow. However, he was having problems with the bend at the stern. He started without a filler block and didn’t like the way planks were bending. He then cut a section of the planks to the last two bulkheads and made a filler block to fit aft of the last bulkhead and re-planked that short section. I started to shape a filler block but felt that I was fussing too much to get a smooth curve. I might have to do the same thing. I’m only three planks in at the stern, so I’ll give this more thought before I move on. El Capi I very much appreciate your comment. This is my first build and I welcome all comments as I hope to learn from SOS members. Thank you.
...improvisationsHello El Capi,
I’m aware that many modelers have included filler blocks between bulkheads in the build logs that I’ve seen. This is not mentioned in the kit’s instructions and I wonder why. Maybe this is one of those improvisions that come with experience to make things easier. I thought about adding filler blocks but judging the thickness of the lime wood planks with the spacing of bulkheads at bow and stern I felt I could achieve a smooth bend especially at the bow. I’m also following Bob Hunt’s practicum and he doesn’t use filler blocks at the bow. However, he was having problems with the bend at the stern. He started without a filler block and didn’t like the way planks were bending. He then cut a section of the planks to the last two bulkheads and made a filler block to fit aft of the last bulkhead and re-planked that short section. I started to shape a filler block but felt that I was fussing too much to get a smooth curve. I might have to do the same thing. I’m only three planks in at the stern, so I’ll give this more thought before I move on. El Capi I very much appreciate your comment. This is my first build and I welcome all comments as I hope to learn from SOS members. Thank you.
- Joined
- Dec 16, 2016
- Messages
- 1,180
- Points
- 493

Hi ADoyon. With regard to the severe bend at the stern I’ve found that if you stand the planks in a thermos flask of boiling water for about an hour before you need them and then using the shaft of a soldering iron, not the tip, you can bend up to 2mm thick planks to quite a curve easily. It’s the steam inside the wood that makes them playable so as you go just keep wetting them. You can see how sharp a curve you can get if you look at the stern and rails on my HMS Ajax log. I think that you can get away with having to use filler blocks.
Hi from Spain. Why Kits manufacturers are not including filler blocks IS a question of price mainly- Today there so many and rather cheap products on the market. You use plastic Wood. Giving a massage you can easy Mold it. Add a little more than needed. Steam a plank in your Kitchen and bend it more and less of the upper part first, as you here has the curve giving. Little by little with some pressure, you can now mould it. Let it dry and it will get nearly Stone hard but can shave with a Dremel by hand -sandpaper-. You have now a BIG area to Glue. The is a paper in the NET about how to calculate the right curve in various points -using the waterlines but do not get it more difficult, than it is. The beauty in our hobby. I do mot longer build 78 Years old wu is to use your head and NOT believing only on the Instruction Manuals. I have now been building since early 1960 with no laser cut, no electric saw, no Dremels etc, so at that time you had to help yourselvesHello El Capi,
I’m aware that many modelers have included filler blocks between bulkheads in the build logs that I’ve seen. This is not mentioned in the kit’s instructions and I wonder why. Maybe this is one of those improvisions that come with experience to make things easier. I thought about adding filler blocks but judging the thickness of the lime wood planks with the spacing of bulkheads at bow and stern I felt I could achieve a smooth bend especially at the bow. I’m also following Bob Hunt’s practicum and he doesn’t use filler blocks at the bow. However, he was having problems with the bend at the stern. He started without a filler block and didn’t like the way planks were bending. He then cut a section of the planks to the last two bulkheads and made a filler block to fit aft of the last bulkhead and re-planked that short section. I started to shape a filler block but felt that I was fussing too much to get a smooth curve. I might have to do the same thing. I’m only three planks in at the stern, so I’ll give this more thought before I move on. El Capi I very much appreciate your comment. This is my first build and I welcome all comments as I hope to learn from SOS members. Thank you.
As not building anymore I am making -not a book- but a piece here on my computer with the title of_How to build a ship model from A-Z as I would do it, as I am NOT a great believer of the Build Instruction- THERE ARE ABSOLUTELY NO INSTRUCTION without failures. There are two newcomers building the same type of Ship: Montañes -one from and the other one from Turkey with two unyil know EXTRAORDINARY -partly with my help build
You are right about curving the Planks, BUT there will always be a very wick point there. It can over the Year easily break - if this happens, you will remember meHi ADoyon. With regard to the severe bend at the stern I’ve found that if you stand the planks in a thermos flask of boiling water for about an hour before you need them and then using the shaft of a soldering iron, not the tip, you can bend up to 2mm thick planks to quite a curve easily. It’s the steam inside the wood that makes them playable so as you go just keep wetting them. You can see how sharp a curve you can get if you look at the stern and rails on my HMS Ajax log. I think that you can get away with having to use filler blocks.
Hi, with or without the filler block I'm also very much into the idea that by wetting the planks (with cold water you need several hours) and then using the shaft of the soldering iron you can make fairly severe bends that will be permanent once the plank cols down.
Cheers
Björn
Cheers
Björn
Be careful with using cold water or even lukewarm water as water can 1000 of bacterias or more, with penetrating the tiny holes in the planks -this apart the planks suck up water, with change in volume, which later on-depending of room temperature, will try to go back to it naturally form. Very few know here that the planks (tree etc) are build op of 3 Macro Sugar Molecule, where Cellulose is well known, then Hemi-,Cellulose-which Brewers, Distillers has them, as it thinking the liquid, with a lower yield as the outcome. Each one is between 40 to 60% each (depending on the sort of trees. the 3Th one is Lignin¡. Lignin is the Glue, that add all 3 Sugars together.. Lignin is the only part which nearly cannot be destroyed, whereas to other kan change form by heat: Steam, a light wet plank over solding Tip or the dry Bending. Take an empty can (from Beans or) said fast so it does not move, as it will be extremely hot. How- Insert in the can opening a few Candlelight (those you see in Chinese Restatrant= It works wonderfullyHi, with or without the filler block I'm also very much into the idea that by wetting the planks (with cold water you need several hours) and then using the shaft of the soldering iron you can make fairly severe bends that will be permanent once the plank cols down.
Cheers
Björn
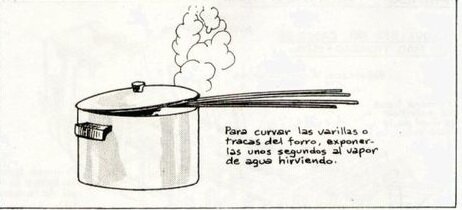
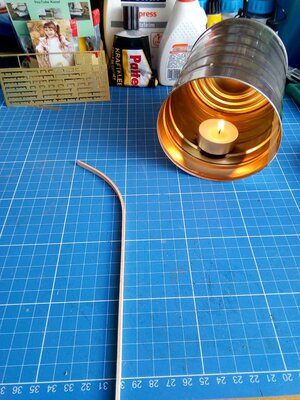
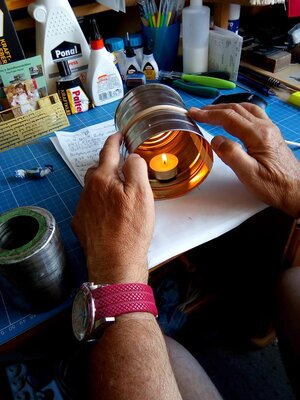
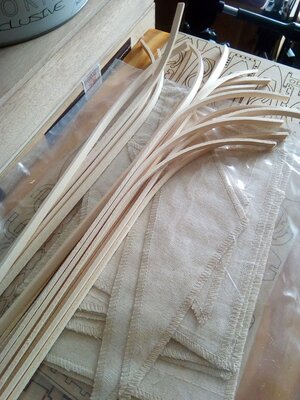
Be careful with using cold water or even lukewarm water as water can 1000 of bacterias or more, with penetrating the tiny holes in the planks -this apart the planks suck up water, with change in volume, which later on-depending of room temperature, will try to go back to it naturally form. Very few know here that the planks (tree etc) are build op of 3 Macro Sugar Molecule, where Cellulose is well known, then Hemi-,Cellulose-which Brewers, Distillers has them, as it thinking the liquid, with a lower yield as the outcome. Each one is between 40 to 60% each (depending on the sort of trees. the 3Th one is Lignin¡. Lignin is the Glue, that add all 3 Sugars together.. Lignin is the only part which nearly cannot be destroyed, whereas to other kan change form by heat: Steam, a light wet plank over solding Tip or the dry Bending. Take an empty can (from Beans or) said fast so it does not move, as it will be extremely hot. How- Insert in the can opening a few Candlelight (those you see in Chinese Restatrant= It works wonderfully
El Capi,Be careful with using cold water or even lukewarm water as water can 1000 of bacterias or more, with penetrating the tiny holes in the planks -this apart the planks suck up water, with change in volume, which later on-depending of room temperature, will try to go back to it naturally form. Very few know here that the planks (tree etc) are build op of 3 Macro Sugar Molecule, where Cellulose is well known, then Hemi-,Cellulose-which Brewers, Distillers has them, as it thinking the liquid, with a lower yield as the outcome. Each one is between 40 to 60% each (depending on the sort of trees. the 3Th one is Lignin¡. Lignin is the Glue, that add all 3 Sugars together.. Lignin is the only part which nearly cannot be destroyed, whereas to other kan change form by heat: Steam, a light wet plank over solding Tip or the dry Bending. Take an empty can (from Beans or) said fast so it does not move, as it will be extremely hot. How- Insert in the can opening a few Candlelight (those you see in Chinese Restatrant= It works wonderfully
Thanks so much for the helpful tips on bending planks and for the very informative information. I really appreciate your comments.
Thanks Ken for the tip on how you bend planks using a soldering iron and for your confidence that I may be able to do this without a filler block.Hi, I’ve been doing it this way successfully for years without problems, if the planks are glued down and not flexing why would they just break.
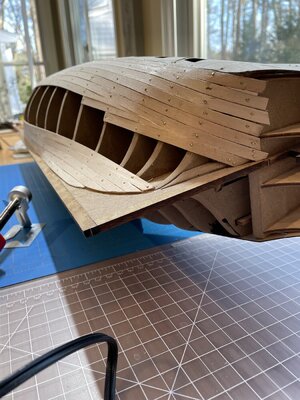
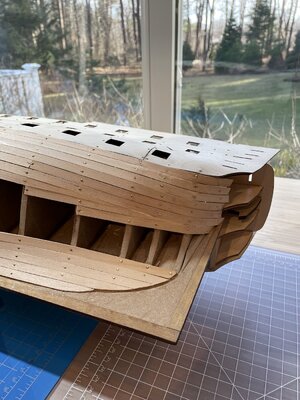
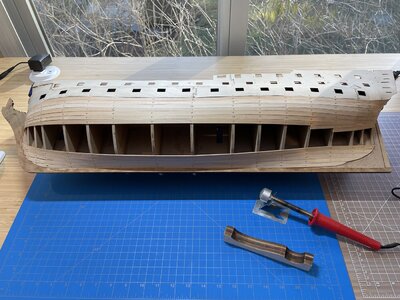
Ok, so this is where I'm at now. I tried bending the planks using the plank bender shown in the photo using the shaft. I was able to get a tighter bend. Thanks Ken for the tip on using a soldering iron. I do have a soldering iron (70 watts) but the shaft of this plank bender (30 watts) seems to work well. I didn't add the filler block in part from my experience working with wood and glue on various projects and nothing has come apart yet. Some of my projects include custom built-in bookcases/cabinets, an oak spiral staircase and bent spiral hand rail and some custom made oak handrails. I do appreciate El Capi's recommendation for filler blocks and the additional surface area they provide for the glue. Filler blocks would certainly be stronger, but felt like I wanted to get moving on this project and finish in my lifetime. Please, however, anyone who is watching feel free to comment good or bad. I am learning from SOS members as I move forward.
Thanks again everyone, Andre.
Hi Doyon, you really took on a ambitions project to start with, but really nice work so far. It looks as if you might be bending the upper planks downwards a bit and therefore getting a small bulge on them between the 3rd and 4th bulkhead. But with filler and sandpaper you should be able to have a good base for the second planking. I also included some basic guidelines for the planking that I got sent to me (stolen with pride).
Cheers
Björn
Cheers
Björn
Attachments
YOU ARE ALLWAYS WELCOMEEl Capi,
Thanks so much for the helpful tips on bending planks and for the very informative information. I really appreciate your comments.


