-

Win a Free Custom Engraved Brass Coin!!!
As a way to introduce our brass coins to the community, we will raffle off a free coin during the month of August. Follow link ABOVE for instructions for entering.
-

PRE-ORDER SHIPS IN SCALE TODAY!
The beloved Ships in Scale Magazine is back and charting a new course for 2026!
Discover new skills, new techniques, and new inspirations in every issue.
NOTE THAT OUR FIRST ISSUE WILL BE JAN/FEB 2026
You are using an out of date browser. It may not display this or other websites correctly.
You should upgrade or use an alternative browser.
You should upgrade or use an alternative browser.
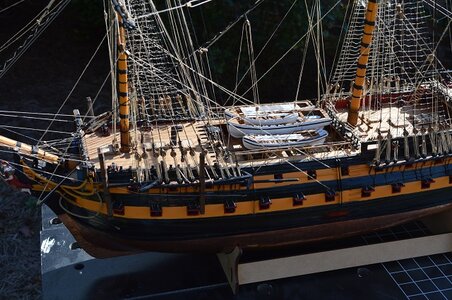
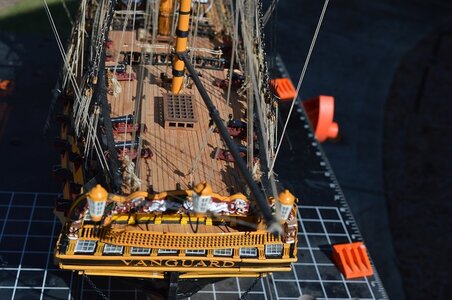
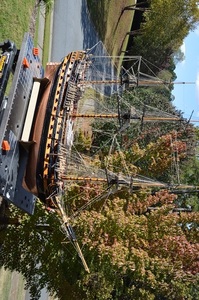
HMS Vanguard 1787 1:72 scale by ADoyon - First Build
- Thread starter ADoyon
- Start date
- Watchers 53
-
- Tags
- amati vanguard victory models
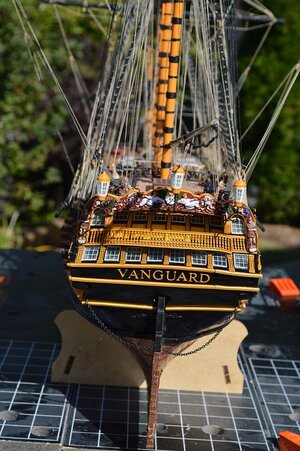
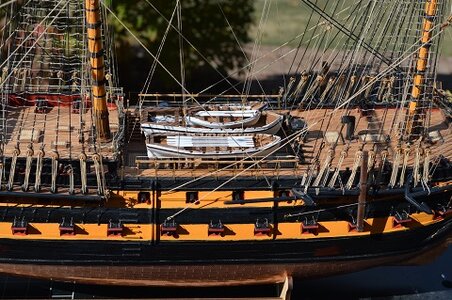
Theo, thanks so much for sharing your photos! You have a beautiful model. I'm also following Bob Hunt's practicum. He fills in with many details that are not explained in the kit's instructions. I have read through the practicum once and re-reading as I build. This is my first build and I know I'll have many questions moving forward. Hope to be able to reach out to you and the wider audience in the SOS community for solutions. I'll keep posting as I progress.Thought you might like to see my finished model. I loved building this ship. Would do it again! Used Bob Hunts practicum.
Thank you so much for your kind comments! I would also recommend you build the Constitution with his Practicum. That practicum was extremely detailed. I learned so much from that practicum I feel I could take on any project!Theo, thanks so much for sharing your photos! You have a beautiful model. I'm also following Bob Hunt's practicum. He fills in with many details that are not explained in the kit's instructions. I have read through the practicum once and re-reading as I build. This is my first build and I know I'll have many questions moving forward. Hope to be able to reach out to you and the wider audience in the SOS community for solutions. I'll keep posting as I progress.
Hi Theo,Thank you so much for your kind comments! I would also recommend you build the Constitution with his Practicum. That practicum was extremely detailed. I learned so much from that practicum I feel I could take on any project!
Yes, the Constitution is a ship model I'm interested in building. It would be nice to be able to build a model of the world's oldest commissioned naval vessel still afloat. Bob Hunt did mention to me that his Constitution practicum offers the most detailed explanation on rigging. I'm so impressed with his Vanguard practicum that I'm inclined to purchase his complete College Special of 15 ship model practicums, which includes the Constitution as well as the HMS Victory which I have not started.
Hi Andre you are progressing quickly with your build. I have used a sharpie for my planking it is quick and easy but some of the lines can be inconsistent for my next ship I'll be checking other methods. I like the sample on the left also, keep up the good work.View attachment 209570
Something I learned on the SOS forums and build logs; how to darken the edges of deck planking to simulate caulking. Here are three samples…the left is darkened with an artist’s soft charcoal stick; the middle has no darkening, and the right is darkened with an artist’s permanent ink marker. I am looking for a subtle darkening that adds a little more definition to the planking, similar to what I see in Paul’s, dockattner, beautiful build of the Vasa. I think that anything that is too bold to catch your eye would be unrealistic. I think I’ll go with the left…charcoal stick.
For those of you are following me, I should have properly introduced myself in the beginning. If anyone is wondering, the A for ADoyon is Andre.
Tony
Last edited:
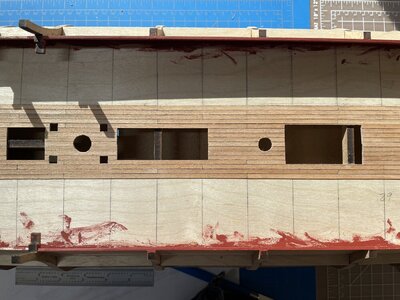
Planking the upper gun deck I decided to darken the planking strips using my wife’s artist charcoal stick. I’m also laying the planking strips in a butt shift pattern with a 1,3,2,4 cadence. My planking strips are 5 inches long. Lines drawn on the deck are 1 ¼ inches apart for the butt shift pattern. At 1:72 scale my 3.2 mm wide x 5-inch-long strips are 9 inches wide x 30 feet long full size. I don’t know what the actual size of the ship’s planks were, but my dimensions seem reasonable and look pleasing to my eye. Something I started to think about late in my planking effort was cleaning the deck off afterward. The soft charcoal stick has a tendency to shed powdered charcoal when rubbing along the edges of the planks. I now have powdered charcoal mixed with glue on the surface. I then started to wipe the planks between my forefinger and thumb using a tissue to remove excess powdered charcoal from the surfaces. I think that helped a bit.
Very tidy work my friend!View attachment 214397
Planking the upper gun deck I decided to darken the planking strips using my wife’s artist charcoal stick. I’m also laying the planking strips in a butt shift pattern with a 1,3,2,4 cadence. My planking strips are 5 inches long. Lines drawn on the deck are 1 ¼ inches apart for the butt shift pattern. At 1:72 scale my 3.2 mm wide x 5-inch-long strips are 9 inches wide x 30 feet long full size. I don’t know what the actual size of the ship’s planks were, but my dimensions seem reasonable and look pleasing to my eye. Something I started to think about late in my planking effort was cleaning the deck off afterward. The soft charcoal stick has a tendency to shed powdered charcoal when rubbing along the edges of the planks. I now have powdered charcoal mixed with glue on the surface. I then started to wipe the planks between my forefinger and thumb using a tissue to remove excess powdered charcoal from the surfaces. I think that helped a bit.
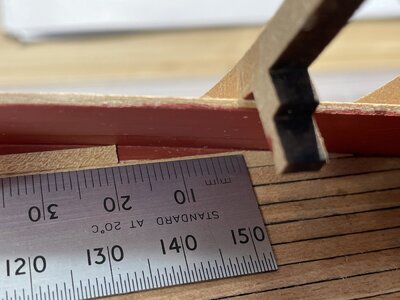
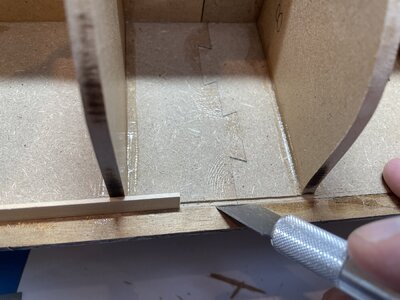
Since I decided to plank the inner wall before planking the deck, I now had to fit the planks against the wall. It turned out to be easier than I first imagined. I slid the plank until it stopped at the wall and measured the distance that needed to be trimmed. Marking the location on the plank I drew a line using my straight edge and tipping the pencil to create a slight arc. Whittled away most of it using my #11 X-Acto and then a little sanding to get the fit.
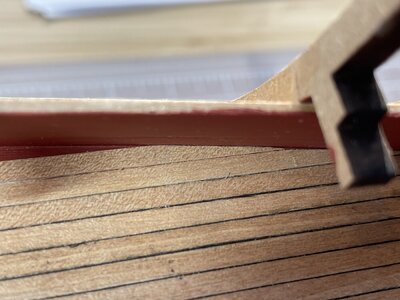
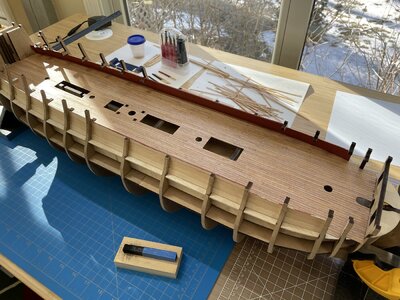
Finished planking the upper gun deck. In the foreground is the soft charcoal stick I used to darken the plank’s edges. I only darkened one end and one edge and paid close attention when laying the planks so that the darkened edges were always in the same direction: fore end and starboard edge. When I finished, I realized I had a slight problem. In an effort to push the planks tight against the previous plank, it caused the edge of the plank to rise up a bit above the surface in a few places. It was especially noticeable when I looked at the darkened edge. I found that I could smooth off that high edge by holding a #11 blade in both hands at a slight angle to the surface and plane the edge smooth. This worked better than sanding.
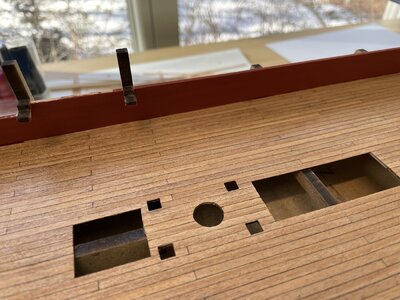
For the finish I am crediting Bob Hunt’s practicum. First sanded the deck with 120 grit sandpaper. Then applied a coat of Minwax Polycrylic Gloss. Scraped the Polycrylic off with a #22 X-Acto blade to smooth off the high areas without affecting adjacent planks. Sanded again with 120, 220 and 320 sandpaper. Wiped the deck clean and applied one coat of Minwax Wipe-On Poly Satin.
Wow! This is a really beautiful deck! I'm sure you are very pleased. Well done!View attachment 214421
Finished planking the upper gun deck. In the foreground is the soft charcoal stick I used to darken the plank’s edges. I only darkened one end and one edge and paid close attention when laying the planks so that the darkened edges were always in the same direction: fore end and starboard edge. When I finished, I realized I had a slight problem. In an effort to push the planks tight against the previous plank, it caused the edge of the plank to rise up a bit above the surface in a few places. It was especially noticeable when I looked at the darkened edge. I found that I could smooth off that high edge by holding a #11 blade in both hands at a slight angle to the surface and plane the edge smooth. This worked better than sanding.
View attachment 214422
For the finish I am crediting Bob Hunt’s practicum. First sanded the deck with 120 grit sandpaper. Then applied a coat of Minwax Polycrylic Gloss. Scraped the Polycrylic off with a #22 X-Acto blade to smooth off the high areas without affecting adjacent planks. Sanded again with 120, 220 and 320 sandpaper. Wiped the deck clean and applied one coat of Minwax Wipe-On Poly Satin.
Paul, thanks very much. At first I had some doubts about staining the deck with the powdered charcoal, but I do prefer the look of the darkened edges. I'm pleased with the way it turned out and most importantly my wife said it looks great!Wow! This is a really beautiful deck! I'm sure you are very pleased. Well done!
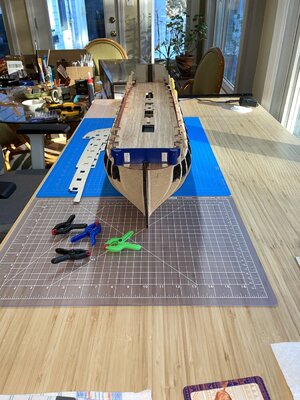
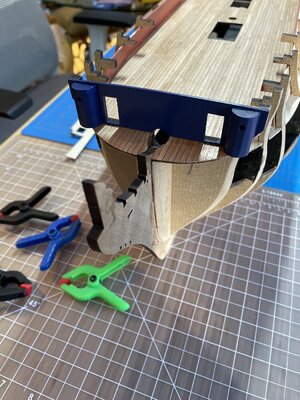
Planked the bow deck and installed the bulkhead assembly. I decided to paint this assembly prior to installation to avoid getting paint on the deck but also because I wanted to try out my new air brush…first time using an air brush. I’m pleased with the results, no brush strokes and a nice finish. For those who are wondering, I am using Caldercraft Admiralty Paint Set for the HMS Vanguard. The paints were designed to match the colors used in Nelson’s Navy and match those colors still in use on the HMS Victory in Portsmouth, England.
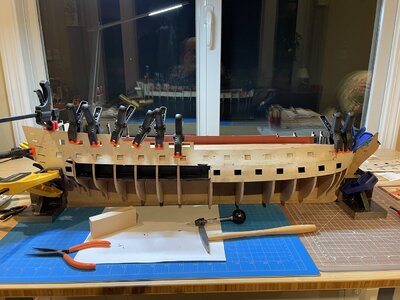
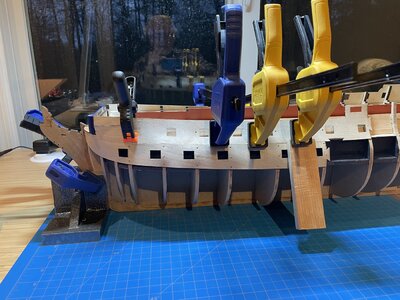
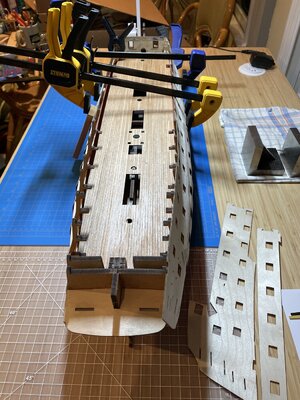
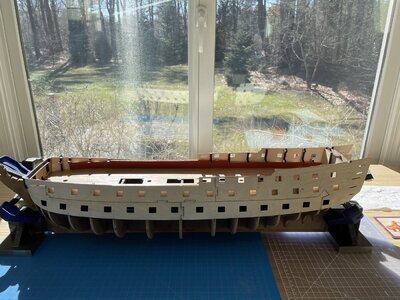
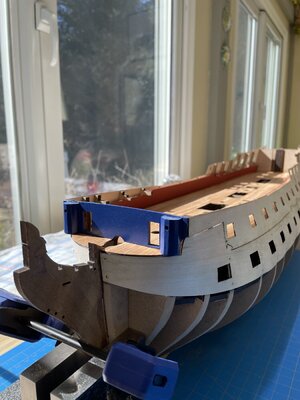
Now installing the Gun port patterns. The Gun port patterns are 1 mm thick plywood and the lower bow section had to be soaked in water for a few hours to make the bend around the bow. Making that bend was not difficult. The difficult part of this installation was getting the plywood parts to conform tight against the curves of the bulkheads, especially the convex sections. I soaked the lower sections in water on the starboard side that I first worked on. The difficulty is trying to hold the piece in position while nailing with those small nails. Clamping was a bit of a challenge because I didn’t have the proper clamps to reach across the beam. I also noticed that after parts had dried and the glue was set that there is a bit of lateral waviness along the lower edge between the bulkheads; bottom edge bows out between bulkheads in a few areas. Not sure how I will fix that problem yet. I’ll have to see how that first layer of planking lays next to the plywood edge.
Lou, thanks very much for the comment and also for the tip on edge darkening. My wife does have the the HB graphite artists pencils and I'll give them a try to see how it compares. I still have more decking to complete.Adoyon, your build is awesome! Your deck came out nice, another option on the edge darkening is to use an HB graphite artists pencil - less messy than the charcoal and still gives a great deep black line, sands nicer too...
- Joined
- Dec 16, 2016
- Messages
- 1,181
- Points
- 493

Hi ADoyon, A nice ship and a good start that you’re making to your model, an ambitious choice but you seem to have it well in hand. Now never mind the ship, I wish that I had that view from my modelling room, I’d be there all day not just to build either. Good luck with your project.
Ken, thanks so much for the kind comment. This is our sunroom and the view is looking out on our backyard. With lots of glass and three skylights it offers the most light in our home. My wife was a little concerned that I would be taking over the room, but she is very supportive of my setup and she still has a place to sit and enjoy the room.Hi ADoyon, A nice ship and a good start that you’re making to your model, an ambitious choice but you seem to have it well in hand. Now never mind the ship, I wish that I had that view from my modelling room, I’d be there all day not just to build either. Good luck with your project.
