HMS Vanguard 1787 1:72 scale by ADoyon - First Build

Joined
Jan 2, 2021
Messages
135
Points
143

Location
Duxbury, Massachusetts
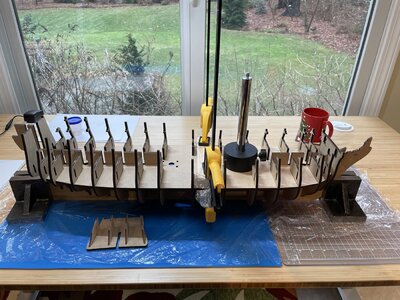
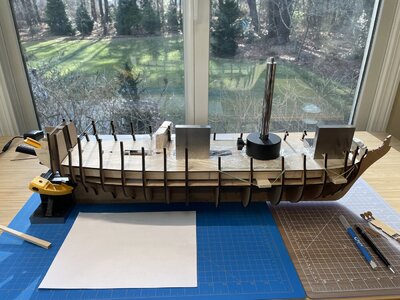
First Build: Amati HMS Vanguard 1787, 1:72 scale. I appreciate the opportunity to share my first build with the SOS community. I have very limited experience with wood ship modeling and hope to receive valuable advice from members. So, all tips and comments are welcome. A little background about myself: I am a retired engineer, age 74, and now find that I have some time to to spend on a build. I started building the Billing Boats Cutty Sark model 50 years ago, but never finished and gave that kit away. Also, about the same time I purchased the Mantua Sergal HMS Victory, which I still have and have not started. The HMS Victory looks a bit daunting with plans in Italian and limited instructions in English. I became interested in building a model of the BlueJacket version of the USS Constitution since I live 30 miles south of Boston and I can visit the ship often. While researching wood ship modeling on the internet I found Robert Hunt’s Practicums on building various wood model kits. I contacted Bob to ask his opinion about this kit. He mentioned that the BlueJacket version is the 1812 configuration and the actual ship as configured today may not be helpful. The BlueJacket kit is also at a smaller scale than the Vanguard which makes the build a little more difficult. Bob suggested that if I really wanted to build a large complex kit to build the Amati HMS Vanguard and to purchase his practicum on building the kit. I did purchase his practicum and realize that it will be of considerable value to my effort. He explains all steps in great detail with techniques and tools to use. I believe his website, www.lauckstreetshipyard.com, is a valuable resource for novice ship modelers. I will be following the kit’s instructions as well as Bob Hunt’s practicum. So, now on with the build…IMG_0960.jpgIMG_0971.jpg
 
You have selected a difficult and very ambitious model for a first build, but there's plenty of friendly advice here if you get into trouble with it. :)

.
 
Thank you to all who are commenting my first build. I have a little more confidence that this project may turn out well knowing SOS members are looking over my shoulder.

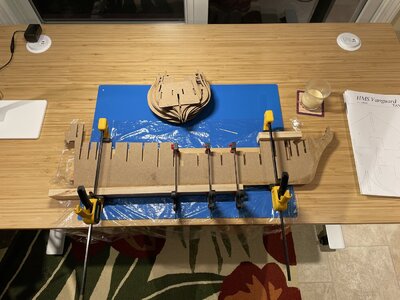
I have a question regarding the first photo. The kit's instructions called for gluing the two sections of the false keel as well as the walnut stem and keel strips pieces. The instructions advise to sand the aft keel at both edges to ensure that the thickness of the first and second planking is flush with the stern post. However, the instructions do not address cutting a keel or stem rabbet. Looking at some build logs it looks like the planking is completed prior to installing the keel and stem pieces. I assume cutting the rabbet is something I need to do. Any advice would be helpful. I do have some small chisels and can take the time to carve the rabbet. I’m just wondering what the experts do.
 
Hello @ADoyon, I'm a first time builder myself so I'll pull up a chair to follow your build! Looks like a great start so far!
Paul
Hello Paul,
I took a look at your current build of the Vasa. It is amazing and a much more ambitious build than my project! I hope to have the skills you demonstrate in your build and will be following you as you progress.
 
I have been relying heavily on the SOS forum members. If you do the same you will be well cared for!
IMG_0974.jpg
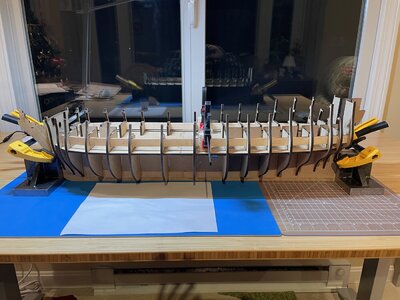
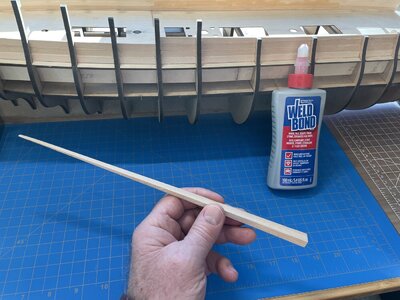
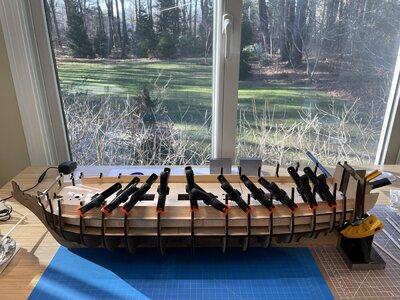
Inserting the 3mm plywood barrel strips through the bulkhead slots was not quite as difficult as I thought it would be. I did soak the strips in water for about four hours. Getting the barrel strip into the last bulkhead was the only difficult part. I needed to sand the leading inside edge of the barrel strip a bit since trying to push the strip at an angle through the slot makes the effective width wider than the slot. I used super long nosed angle tip pliers to bend and pull the strip while pushing at the opposite end.
 
IMG_0976.jpg
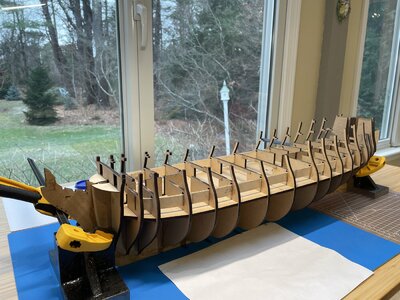
I ran into my first problem while trying to glue the barrel strips to the bulkhead slots. I was having a difficult time positioning the clamps with one side bearing against the outside edge of the bulkhead and the inside bearing against the barrel strip. The clamps were having a tendency to be sliding off. While trying to position a clamp it slipped out of my fingers and shot off like a slingshot snapping off the top of a bulkhead tab. I needed to come up with a better solution. I made some tapered shims from a cedar shingle to wedge the barrel strip tight against the bulkhead slot as shown in my photo.
 
IMG_0995.jpg
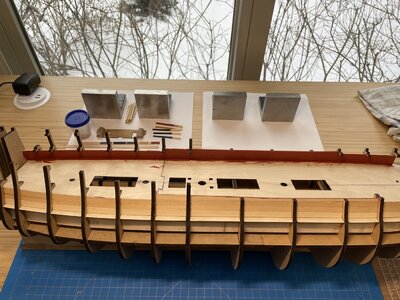
Planking the inner wall of the upper gun deck. Here I am deviating from the kit’s instructions. The instructions call for planking the gun deck with the Tanganyika strips before planking the inner wall. However, the inner wall will require some sanding as well as painting and I did not want to risk damage to the finished deck. I realize this will take more time to fit the deck planking against the inner wall and hope that it will provide a nice sharp definition between the deck and the inner wall. I will paint the inner wall before planking the deck. Just want to add a note that this in inline with the procedure shown in Bob Hunt’s practicum.
 
IMG_1015.jpg
I now appreciate the decision I made to plank the inner wall of the upper gun deck before planking the gun deck with the Tanganyika strips. There was more sanding than I anticipated. It would have been difficult to do with the finished deck in place and then painting afterward. Because of the curvature and slope of the inner wall it was difficult to get the planks to lay flush with each other. I finished with two coats of paint and sanding lightly between coats with 400 grit sandpaper.
 
IMG_1022.jpg
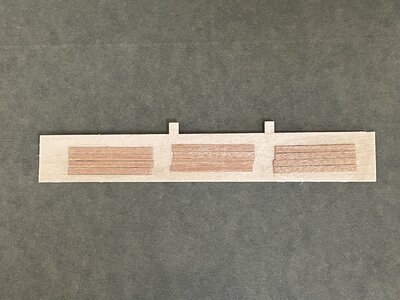
Something I learned on the SOS forums and build logs; how to darken the edges of deck planking to simulate caulking. Here are three samples…the left is darkened with an artist’s soft charcoal stick; the middle has no darkening, and the right is darkened with an artist’s permanent ink marker. I am looking for a subtle darkening that adds a little more definition to the planking, similar to what I see in Paul’s, dockattner, beautiful build of the Vasa. I think that anything that is too bold to catch your eye would be unrealistic. I think I’ll go with the left…charcoal stick.
For those of you are following me, I should have properly introduced myself in the beginning. If anyone is wondering, the A for ADoyon is Andre.
 
Hello, Andre.
I like the left sample as well. However, it is advisable to test with a final finish. Depending on the final finish, you prefer it may give you different results. Also, stain, should you accept to use it, plays a vital role in the final color.
 
View attachment 209570
Something I learned on the SOS forums and build logs; how to darken the edges of deck planking to simulate caulking. Here are three samples…the left is darkened with an artist’s soft charcoal stick; the middle has no darkening, and the right is darkened with an artist’s permanent ink marker. I am looking for a subtle darkening that adds a little more definition to the planking, similar to what I see in Paul’s, dockattner, beautiful build of the Vasa. I think that anything that is too bold to catch your eye would be unrealistic. I think I’ll go with the left…charcoal stick.
For those of you are following me, I should have properly introduced myself in the beginning. If anyone is wondering, the A for ADoyon is Andre.
Hello Andre, while I am new to this model building business I have been keen to take careful note of scale. At 1:72 (my Vasa is 1:65) I too prefer the lighter sample on the left. If you were at 1:48 now I start to prefer the one on the right - and at 1:30 perhaps some even more bold. Based on your build to date and the careful thinking you are doing I'm sure you are well-aware of what I have just written - so I guess I am just trying to be affirming and not pretending to teach you something you already know! Keep up the good work - I am enjoying following your build.
 
Hello, Andre.
I like the left sample as well. However, it is advisable to test with a final finish. Depending on the final finish, you prefer it may give you different results. Also, stain, should you accept to use it, plays a vital role in the final color.
Thanks very much Jim. I appreciate your opinion and will test the samples with the final finish.
 
Hello Andre, while I am new to this model building business I have been keen to take careful note of scale. At 1:72 (my Vasa is 1:65) I too prefer the lighter sample on the left. If you were at 1:48 now I start to prefer the one on the right - and at 1:30 perhaps some even more bold. Based on your build to date and the careful thinking you are doing I'm sure you are well-aware of what I have just written - so I guess I am just trying to be affirming and not pretending to teach you something you already know! Keep up the good work - I am enjoying following your build.
untitled-0034 2.jpg
Hi Paul,
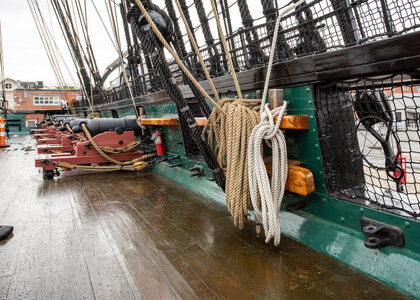
Thinking about scale, I started to wonder what the caulking looked like on a real ship. I have visited the USS Constitution 1797 several times and was aware of deck planking but never paid attention to or noticed the caulking. The photo taken on one of my visits shows the caulking width to be very narrow relative to the width of the planks. So, this confirms my thoughts that a subtle darkening at 1:72 scale is appropriate. Thank you for input.
 
Mayflower - 1.jpg
I thought posting a few photos of the Mayflower II might be interesting to SOS members who are modeling early 17th century ships such as the Vasa. The original Mayflower ship carried the Pilgrims to America in 1620 and was built prior to 1609. Mayflower II is a full-scale reproduction of the original Mayflower and was built in Brixham, England 1955-1957 and sailed from England to Plymouth, Massachusetts in 1957 without a propulsion engine. I took these photos last August 2020 as she was returning to home port in Plymouth, MA after a three-year $11.2 million restoration project.
 
Back
Top