HMS Victory [1805] 1:79 by serikoff. Started with Mantua -> Upgraded with John McKay's Anatomy.

If you are referring to the worming, parceling and serving, in the end the only thing that can be seen is the serving so if you skip the worming and parceling, only you will know. :)
Allan
It's still a long way off, I'll figure it out when I get there)))

Not wine, winegear (essig). Mix it with salt and then "paint" the copper with it. You can even remove the patina with this mixture and start over.

Dirk
Difficulties in translation. Is there any place where I can watch or read this, or a picture of this product? Because I know what salt is, and the second thing is that the translator is writing some nonsense)))
 
Part 22

08.2024


Well, the final part (there will be three posts in total), and my journal will be complete. From here on, I'll be working in real-time. By the way, I'm currently working on the gallery, and it's turning out quite well, but more on that later. For now, let's return to the head of the ship.

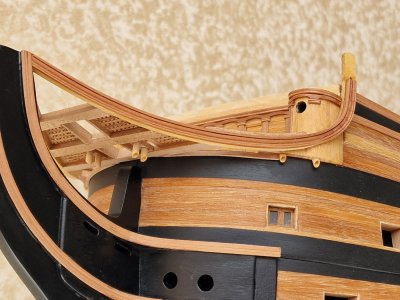
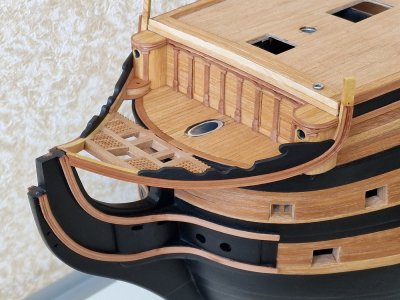
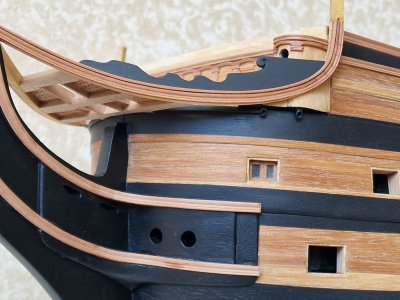
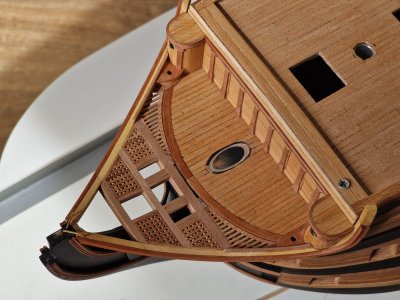
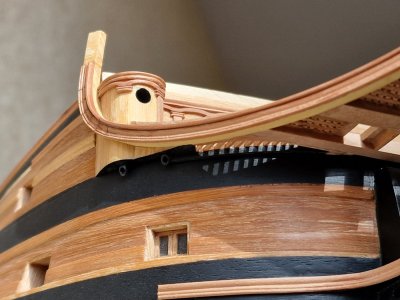
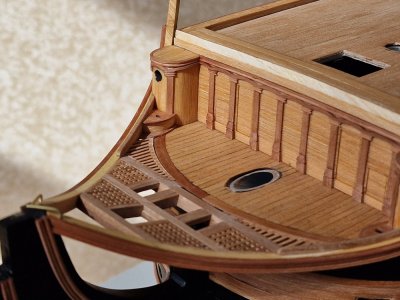
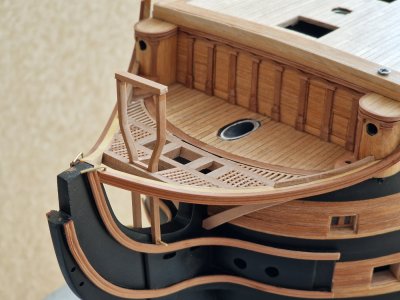
I continue adding details to the bow. The knightheads are still unfinished, and I've also carved an ornate railing that will be painted.

HMS Victory 589.jpg
HMS Victory 590.jpg

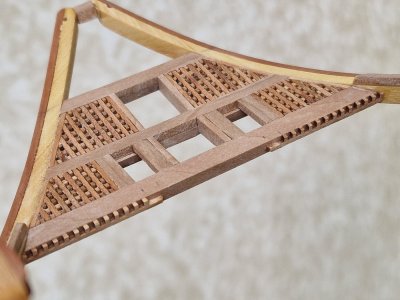
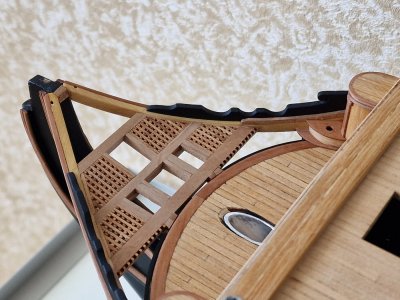
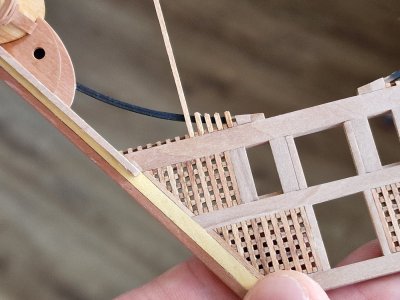
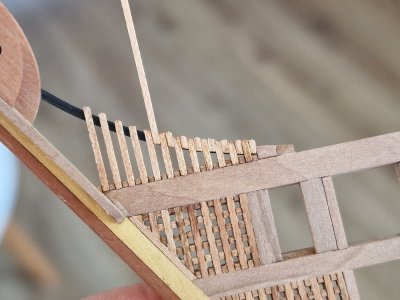
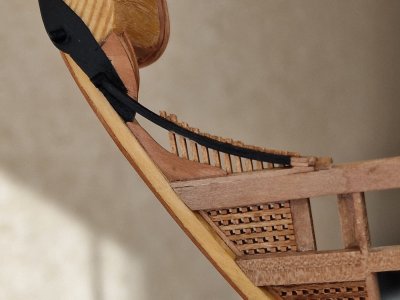
Returning to the grates, I created a base to secure the longitudinal slats—more details on those will follow.

HMS Victory 591.jpg

Afterward, I completed work on the "sewage" system and the details that follow the contours of the hull. Now, everything is ready for painting.

HMS Victory 592.jpg
HMS Victory 593.jpg
HMS Victory 594.jpg
HMS Victory 595.jpg
HMS Victory 596.jpg

Continuing with the grates, the remaining empty triangles need to be filled in.

HMS Victory 597.jpg
HMS Victory 598.jpg
HMS Victory 599.jpg
HMS Victory 600.jpg
HMS Victory 601.jpg
HMS Victory 602.jpg

There are still two more publications about the bow ahead, and the ship's front is starting to take shape more and more clearly
...
 
Thanks for the tip. But I tried all kinds of vinegars, but I didn't like the result. Very unpredictable, spotty and not the color I want. Waiting for my order of patina-it and will try it. All hopes are on it.

You might then not used enough salt. As you could see on my Syren the copper got exact the patina you want. You should try again :-)

Your build is beautiful btw !! :-)

Dirk
 
When I first came to SoS almost everything I looked at seemed to be brilliantly made. It was quite intimidating. As I continued to look at the models and to work on my own Alert I began to see more clearly. To discriminate. Now I observe the differences between each builder. We each have our own style, and some are more to my taste than others. That doesn’t mean that they are better, just that they appeal to me in some way.

I like your Victory very much. I like the way you become interested in a particular part of it and work and work at it like a dog with a bone, determined to extract the maximum satisfaction. I like that you try unusual ideas like your aluminium cored masts. I like the results I see growing post by post. I like that you aren’t scared to guess when there’s no information available, as with the toilet pipes.

It’s exactly the way I think about my models. :D

The two big differences between us are that you have a lot more experience than I and are a considerably more skilled woodworker. Your results are a fine example to me of what can be done. One day, I’ll be doing it that well too. Meanwhile, Bravo Sergei, Bravo!
 
You might then not used enough salt. As you could see on my Syren the copper got exact the patina you want. You should try again :-)

Your build is beautiful btw !! :-)

Dirk
Thank you. Maybe. I will definitely try it if the drug I am waiting for by mail cannot produce the desired result. I will then contact you for precise instructions))


When I first came to SoS almost everything I looked at seemed to be brilliantly made. It was quite intimidating. As I continued to look at the models and to work on my own Alert I began to see more clearly. To discriminate. Now I observe the differences between each builder. We each have our own style, and some are more to my taste than others. That doesn’t mean that they are better, just that they appeal to me in some way.

I like your Victory very much. I like the way you become interested in a particular part of it and work and work at it like a dog with a bone, determined to extract the maximum satisfaction. I like that you try unusual ideas like your aluminium cored masts. I like the results I see growing post by post. I like that you aren’t scared to guess when there’s no information available, as with the toilet pipes.

It’s exactly the way I think about my models. :D

The two big differences between us are that you have a lot more experience than I and are a considerably more skilled woodworker. Your results are a fine example to me of what can be done. One day, I’ll be doing it that well too. Meanwhile, Bravo Sergei, Bravo!

Thank you so much for such kind words!!! You know, when I look at modelers who do things better than I do, it sometimes gets me down—I lose motivation and don’t want to work on anything... Well, at least that’s how it used to be. But then I give myself time to reset, come back to my ship, and think… "It’s not that bad! There’s room to grow, but it’s not complete nonsense either, and that’s already a win!"

Yes, sometimes, after finishing a successful detail, you feel a pleasant sense of accomplishment. But then, when you notice traces of glue or some unevenness, it’s disheartening again. It’s like riding waves—sometimes it’s good, and other times not so much.

What frustrates me the most, though, is experimenting with oil or bitumen coatings and not achieving the ideal result I want to see. It’s particularly upsetting because you rely on those tests to give you confidence that the final model won’t be ruined. That fear of spoiling the model is what bothers me the most.

So, you’re not alone in this; we all expect a little more from ourselves than we’re currently capable of, and that’s a good thing—it pushes us to improve.

You mentioned experience, and yes, it’s crucial, but it’s also important to upgrade the conditions for your hobby along the way. Getting better tools, improving your workspace, and making things more convenient—that’s all part of it.

As for me, I’m stuck a bit in that regard. I work in what we call a “makeshift” way—what you might describe as “slapped together with scraps and duct tape.” But that makes it even more satisfying when something actually turns out well! ;)


To the piggy bank :)
Thank you! I don't have some photos))
 
08.2024

While I continue working on the stern (and I must say, the results are truly surprising), today I present the penultimate entry of my diary.

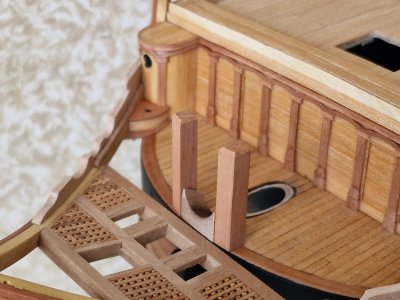
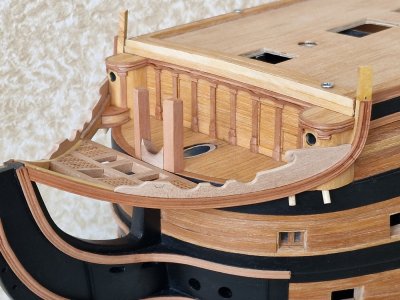
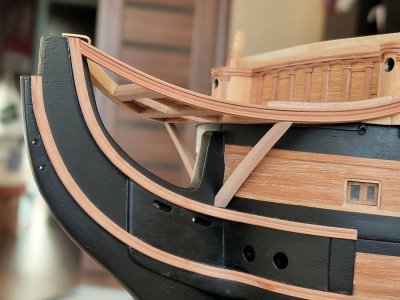
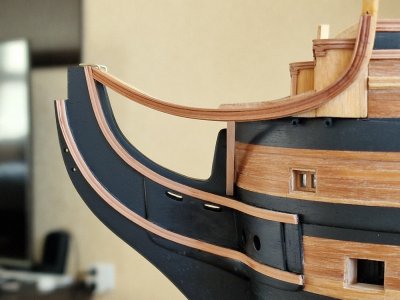
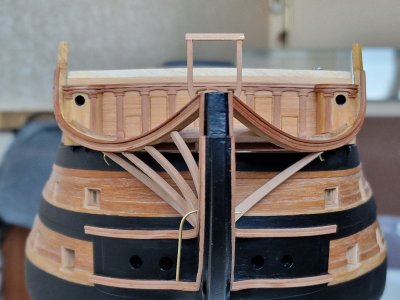
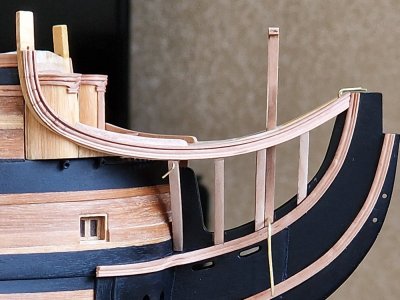
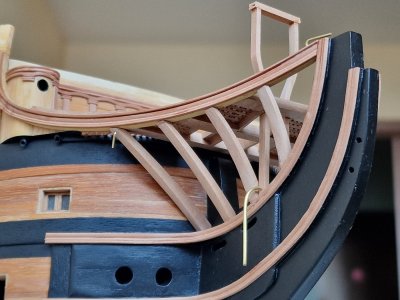
This time, I tackled the most challenging elements of the headrails.
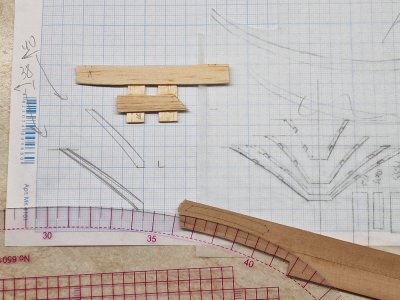
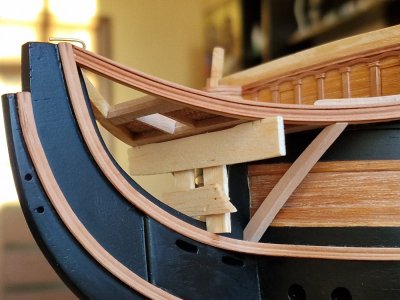
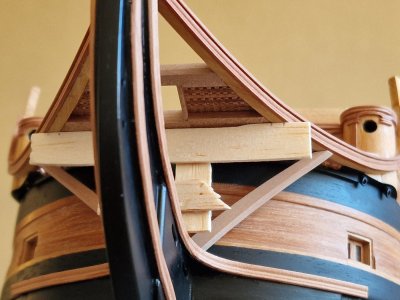
I’m not sure what these supports are officially called, but they certainly gave me quite a bit of trouble. The main difficulty, as always, was the lack of detailed plans. There are front and side view illustrations, but the individual components themselves are missing.
As a result, everything had to be determined through trial and error: measure, test fit, cut, test fit, adjust, test fit, adjust again, test fit once more, and finally—"ah, it fits!"—only to repeat the entire process about 100,500 times. ROTF

HMS Victory 603.jpg
HMS Victory 604.jpg

Not only did all these stanchions have to be perfectly vertical and evenly spaced, but there also needed to be enough room to later attach decorative planks to them. Considering the inaccuracies in the drawings, this process became a game of guessing the exact dimensions and transferring the measurements using a jig like this one.
With its help, I marked the positions of the stanchion points and connected them using a ruler to approximate the curves derived from the plans. This method allowed me to fine-tune the placement and achieve a balanced result despite the challenges.

HMS Victory 605.jpg
HMS Victory 606.jpg
HMS Victory 607в.jpg

Currently, the situation with the contours is as follows. For now, I've only created templates and decided to pause work on them due to the sheer complexity of the process. This break was necessary to step away from the endless corrections and reworks.
Despite all the challenges, the alignment is there, and what's left is to craft the final pieces based on the templates and their mirrored counterparts. This pause allows me to approach the next stage with fresh energy and focus.

HMS Victory 607.jpg
HMS Victory 608.jpg

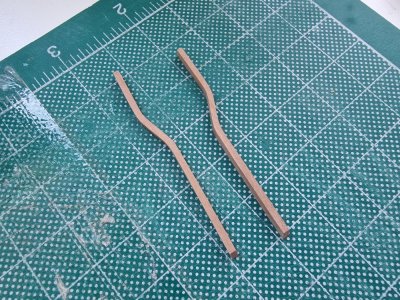
The part extending upward from the bow area also proved to be quite challenging. Initially, I planned to bend it into the required shape, but after several attempts, I realized that this method wasn't feasible. The bending angles were too close to each other, and while I was bending one side, the heat would cause the other to straighten out.
As a result, I had to craft the shape by cutting it directly from a single strip of wood. This approach turned out to be more effective and precise for achieving the desired form.

HMS Victory 609.jpg

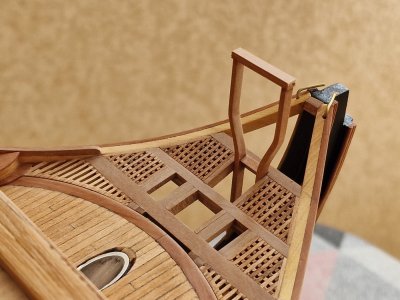
Next, I glued the parts together using a strip in the central section. To ensure stability, I secured the bottom with wire and temporarily attached a horizontal strip at the top. This horizontal strip is only temporary and will be removed later when the upper ladder is fixed in place.

HMS Victory 610.jpg
HMS Victory 611.jpg
HMS Victory 612.jpg

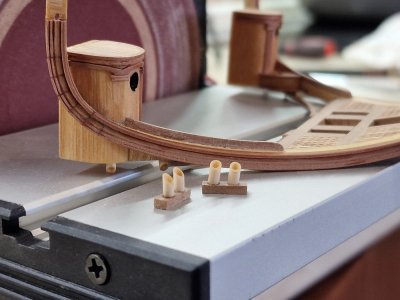
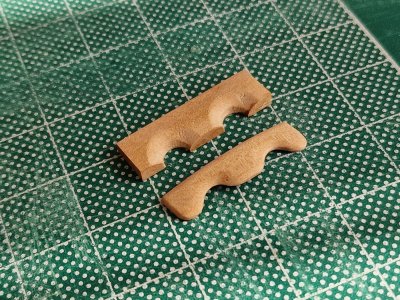
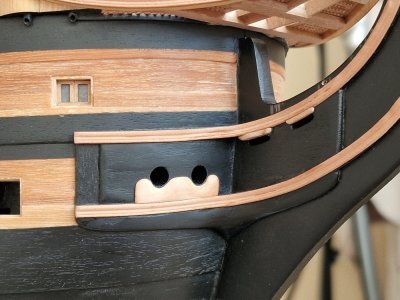
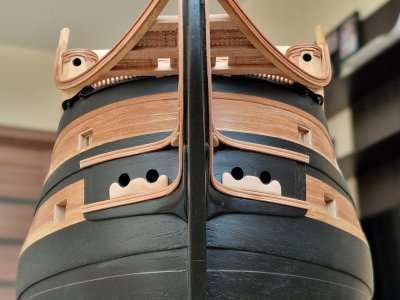
While pausing work on the posts, I decided to make the "pads" for the anchor chain holes. I started by drilling two holes in a rectangular blank and then flared them. Afterward, I cut the blank into two parts, creating both the left and right pieces. Using files and sandpaper, I shaped them into curved and rounded forms. Finally, I glued them in place, along with the supports for the standing rigging ropes of the bowsprit.

HMS Victory 613.jpg
HMS Victory 615.jpg
HMS Victory 614.jpg

That's all for now, tomorrow there will be a final diary post...
 
Thank you. Maybe. I will definitely try it if the drug I am waiting for by mail cannot produce the desired result. I will then contact you for precise instructions))


Thank you so much for such kind words!!! You know, when I look at modelers who do things better than I do, it sometimes gets me down—I lose motivation and don’t want to work on anything... Well, at least that’s how it used to be. But then I give myself time to reset, come back to my ship, and think… "It’s not that bad! There’s room to grow, but it’s not complete nonsense either, and that’s already a win!"

Yes, sometimes, after finishing a successful detail, you feel a pleasant sense of accomplishment. But then, when you notice traces of glue or some unevenness, it’s disheartening again. It’s like riding waves—sometimes it’s good, and other times not so much.

What frustrates me the most, though, is experimenting with oil or bitumen coatings and not achieving the ideal result I want to see. It’s particularly upsetting because you rely on those tests to give you confidence that the final model won’t be ruined. That fear of spoiling the model is what bothers me the most.

So, you’re not alone in this; we all expect a little more from ourselves than we’re currently capable of, and that’s a good thing—it pushes us to improve.

You mentioned experience, and yes, it’s crucial, but it’s also important to upgrade the conditions for your hobby along the way. Getting better tools, improving your workspace, and making things more convenient—that’s all part of it.

As for me, I’m stuck a bit in that regard. I work in what we call a “makeshift” way—what you might describe as “slapped together with scraps and duct tape.” But that makes it even more satisfying when something actually turns out well! ;)


Thank you! I don't have some photos))
Thank you for the wise, kind and encouraging words of wisdom. I must add, considering the exquisite quality of your work, coming from you these comments are as humbling as they are encouraging.
As an answer to you, Doc Atner, and others of your caliber, we all do the best with what we have, God given, and otherwise.

Pete
 
Last edited:
This is astonishingly good freehand work! Bravo Sergey!
Thank you, since I hear it from you))

Thank you for the wise, kind and encouraging words of wisdom. I must add, considering the exquisite quality of your work, coming from you these comments are as humbling as they are encouraging.
As an answer to you, Doc Atner, and others of your caliber, we all do the best with what we have, God given, and otherwise.

Pete
If I had more free time and opportunity, I would make myself a decent workshop... my dreams))

That is a great deal of fine woodworking!
This is already the limit of my minimum size of parts. Everything that is smaller and will be painted, I will print.

… are called bolsters in English and the holes are hawse holes. :)
Difficulties in translation. When the question is about translating ordinary words, it is still okay, but as soon as terms come, that's it, the Translator leaves the chat))
 
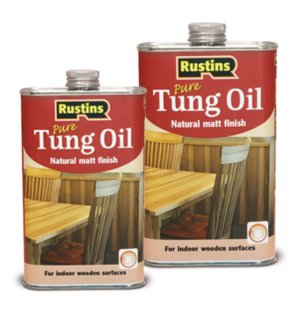
Hello everyone! Today, I’ll try to post the final part about the head rails... But for now, I wanted to share some news. Once again, I’ll be testing some samples, as I’ve ordered tung oil. I’m waiting for delivery, but unfortunately, I’ve run out of pearwood veneer, and I can’t remember where I got it. Now I’ll have to look for it elsewhere.

I think I’ll move away from teak oil—it has its pros, but also some cons. The way it interacts with bitumen has its nuances, which I’ll discuss later. Tung oil appeals to me because it’s matte and allows for gluing over it. In short, I’ll test it and then do a big comparison of three oils: linseed, teak, and tung. I’m also missing Danish oil, but who knows, maybe I’ll try that one too eventually. Still, I hope tung oil will be the one I settle on—as long as the tests meet my expectations.

тунг.JPG
 
Back
Top