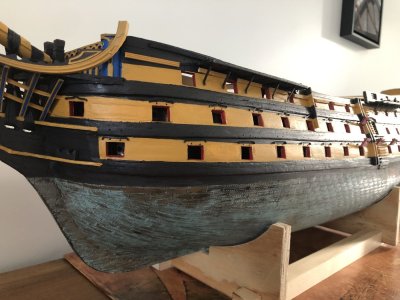
HMS Victory [1805] 1:79 by serikoff. Started with Mantua -> Upgraded with John McKay's Anatomy.

Oh, how I wish I could visit the HMS Victory, but only in its finished state; I know it’s currently undergoing extensive renovations.

It is, but in places that makes it more interesting. When I was there some of the planking had been removed revealing the frames below for the first time in centuries.
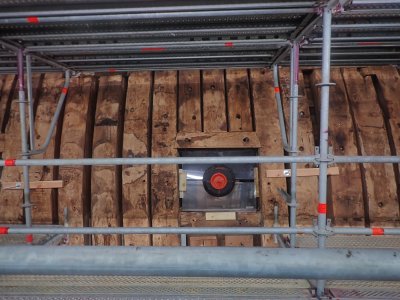
P3110035.JPG

There is very little space between the frames. Now I understand why cannonballs bounced off.

It’s very strange. I did all the work on the cladding this way. I don’t like to wait long. When I have time, I want to accomplish as much as possible.

I agree! I only discovered this technique by accident. I put it on line and hardly anyone had heard of it! It means you can do planking in half the time, maybe a quarter and no clamping or waiting.
 
It is, but in places that makes it more interesting. When I was there some of the planking had been removed revealing the frames below for the first time in centuries.

View attachment 477118

There is very little space between the frames. Now I understand why cannonballs bounced off.


I agree! I only discovered this technique by accident. I put it on line and hardly anyone had heard of it! It means you can do planking in half the time, maybe a quarter and no clamping or waiting.
Yes, it's very interesting to see how it works and what it looks like inside. It's great that the museum is being restored to give it a new life.

This technique isn't complicated, but it requires skills. You can tell when the strip has been glued by the sizzling sound. And you're right, this method speeds up the work significantly. I didn't use clamps at all during the sheathing, only in a few cases.
 
Welcome Sergey!
you have done wonderful work on the victory, I will keep following with great curiosity
stay safe and enjoy from the process
Thank you very much! Who else but us knows and appreciates the time when there is peaceful sky. Likewise, my friend. I’m also subscribed to you))) I wasn't registered yet when I saw your post. I will definitely come back to you and give you lots of likes! ))) By the way, the Alart is a very beautiful little ship, and the kit is simply fantastic. I would love to build it if I had the time. It’s a really high-quality kit, and I recommended it to my beginner friend.
 
Thank you very much! Who else but us knows and appreciates the time when there is peaceful sky. Likewise, my friend. I’m also subscribed to you))) I wasn't registered yet when I saw your post. I will definitely come back to you and give you lots of likes! ))) By the way, the Alart is a very beautiful little ship, and the kit is simply fantastic. I would love to build it if I had the time. It’s a really high-quality kit, and I recommended it to my beginner friend.
Thank you very much Sergey for the kind words
Our two nations and peoples wish for peace and security in our country :)
I wish you and your family days of peace and tranquility , that you can return to a peaceful and normal life.
 
Sergey,

Firstly, I have very much enjoyed reading your Build description and under extremely difficult conditions. The situation with Ukraine is impossible to understand from a ‘free’ country such as I am fortunate enough to live in and your achievements as you describe are truly inspirational.

Secondly, I am building the Jotika Victory currently and if I can assist you in any way, please contact me. My build log is on SOS, although currently in a state of very slow advance because I am a) at the coppering stage which is a long exercise and b) currently travelling until mid-November.

Attempting a build of Victory with only initial plans, adjusting and allowing for errors in scales etc, is an incredibly difficult task. It essentially defines a ‘scratch’ build, albeit using an existing kit design.

I will continue to follow your build with great interest. Thank you for bringing it to us,

Regards,

PeterG
 
Большое спасибо, Сергей, за добрые слова
Our two nations and peoples wish for peace and security in our country :)
I wish you and your family days of peace and tranquility , that you can return to a peaceful and normal life.
This is a very interesting and informative build thread. Your work is very accurate and innovative.

Thank you for sharing with us on SoS.

Please stay safe and productive and continue to post your pictures and comments.

Michael thanks you.

Thank you, friends! It's very nice to hear your kind wishes. Let's hope that this nightmare will end soon, and peace will come.
 
Sergey,

Firstly, I have very much enjoyed reading your Build description and under extremely difficult conditions. The situation with Ukraine is impossible to understand from a ‘free’ country such as I am fortunate enough to live in and your achievements as you describe are truly inspirational.

Secondly, I am building the Jotika Victory currently and if I can assist you in any way, please contact me. My build log is on SOS, although currently in a state of very slow advance because I am a) at the coppering stage which is a long exercise and b) currently travelling until mid-November.

Attempting a build of Victory with only initial plans, adjusting and allowing for errors in scales etc, is an incredibly difficult task. It essentially defines a ‘scratch’ build, albeit using an existing kit design.

I will continue to follow your build with great interest. Thank you for bringing it to us,

Regards,

PeterG
Thank you for your high praise. I will also be keeping an eye on your progress. Thank you for your kind wishes. I'm eagerly awaiting victory and peace as well. But I try not to get discouraged—the ship takes up all my attention, and I don't have much time to dwell on negative thoughts. If I have any questions, I'll know where to turn.

Laskavo prosymo!
Дякую!
 
Bonjour à tous et particulièrement à vous SERIKOFF,
J'ai mois aussi le kit SERGAL de 1970 du HMS VICTORY 1/78 que j'avais commencé en 1980.
J'avais fait la coque et elle est resté dans un carton pendant quarante ans.
Je l'ai repris il y a quelques années pour la refaire sur un certains nombre de détails qui n'étaient pas bien faits de ma part ou mal conçus de la part de SERGAL.
Depuis, je n'utilise plus le kit et les plans de SERGALIMG_3364.JPG mais les livres de Mac KEY et de Mac GOWAN, sans oublier LONGBRIDGE. Ce sont pour moi trois livres de référence sur le VICTORY.
J'ai mis en pause le chantier depuis quelques temps, mais je vais m'y remettre l'année prochaine.
En attendant, voici une photo de la coque.
Je vais suivre avec attention votre chantier.
Merci à vous pour vos explications et photos.
 
Part 4

10.2010


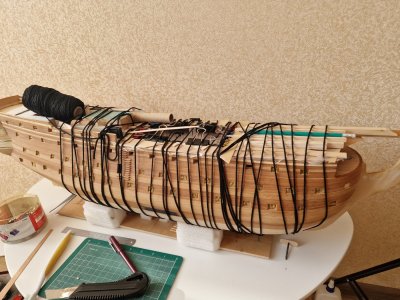
My entire build progressed in intervals. There were times when I would work non-stop for days, and then there were long breaks. After the first major pause of about six months, I resumed planking the lower part of the hull with inserts. The inserts were made of balsa wood. This wood is easy to work with yet strong enough to withstand sanding without warping.
View attachment 476511

Step by step, all the gaps were filled.
View attachment 476514
View attachment 476515
View attachment 476516
View attachment 476517
View attachment 476518

After completing the filling, I covered the large openings with tape and began shaping this faceted structure into smoother, rounded forms.
View attachment 476520
View attachment 476521
View attachment 476522

This was just an intermediate step before the puttying and final sanding. However, even at this stage, I was already satisfied with the result.
The hull now consists of 700 parts and weighs over 2.1 kg—definitely not something you can carry around for long!
...
This reminds me of my first efforts at plank on bulkhead construction. Having learned on solid hull construction, I "cheated" by doing exactly the same thing with filler pieces, then fairing them. Not knowing any better, I thought it was "cheating". Still, with planking over with veneer strips I always got prettiy nice results. I am glad to see the affirmation of your process. Hey! Whatever works Exclamation-Mark Thumbs-Up
 
Last edited:
Bonjour à tous et particulièrement à vous SERIKOFF,
J'ai mois aussi le kit SERGAL de 1970 du HMS VICTORY 1/78 que j'avais commencé en 1980.
J'avais fait la coque et elle est resté dans un carton pendant quarante ans.
Je l'ai repris il y a quelques années pour la refaire sur un certains nombre de détails qui n'étaient pas bien faits de ma part ou mal conçus de la part de SERGAL.
Depuis, je n'utilise plus le kit et les plans de SERGALView attachment 477244 mais les livres de Mac KEY et de Mac GOWAN, sans oublier LONGBRIDGE. Ce sont pour moi trois livres de référence sur le VICTORY.
J'ai mis en pause le chantier depuis quelques temps, mais je vais m'y remettre l'année prochaine.
En attendant, voici une photo de la coque.
Je vais suivre avec attention votre chantier.
Merci à vous pour vos explications et photos.
Haha, you've outdone me in that regard! 40 years, that's a joke! Well, I wish you to eventually finish the build and even start a new project. Thank you for your feedback, it made me smile.))

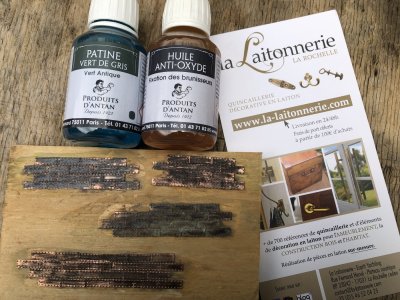
What did you use to coat the copper plating?

This reminds me of my first efforts at plank on bulkhead construction learning on solid hull construction I "cheated by doing exactly the same thing with fillers pierces, then fairing them. Not knowing any better, I thought it was "cheating". Still, with planking over with veneer strips I always got prettiy nice results. I am glsd to see the affirmation of your process. Hey! Whatever works Exclamation-Mark Thumbs-Up
All of this once again confirms that it doesn't matter how you do something; the result is what counts. In the end, you'll only be judged by your results. Thank you for your feedback.

Wow! spectacular results so far. And so VERY instructive! I am really enjoying following this build

Pete.
Thank you very much! I'm doing my best, and I'm glad you liked it.
 
Voila ce que j'ai utilisé pour l'oxydation avec effet "vert de gris" :
1 - application au pinceau de l'oxydant sans dilution = l'effet vert de gris apparait en quelques minutes.
2 - quand l'oxydant est bien sec = application du stabilisant pour stopper l'oxydation.
J'ai essayé différents produits, celui que j'ai mis en photo est le meilleur résultat.

IMG_1757.JPG
 
It's what we call the planks cut to the shape of anchor stocks, as you have done with the wales, Sergey.
Тhanks for explaining Thumbsup

Voila ce que j'ai utilisé pour l'oxydation avec effet "vert de gris" :
1 - application au pinceau de l'oxydant sans dilution = l'effet vert de gris apparait en quelques minutes.
2 - quand l'oxydant est bien sec = application du stabilisant pour stopper l'oxydation.
J'ai essayé différents produits, celui que j'ai mis en photo est le meilleur résultat.

View attachment 477313
I also have several experiments on copper patination. I will tell you about it in detail later in the review. Thank you for sharing your experiments.
 
Last edited:
Part 10

05.2023


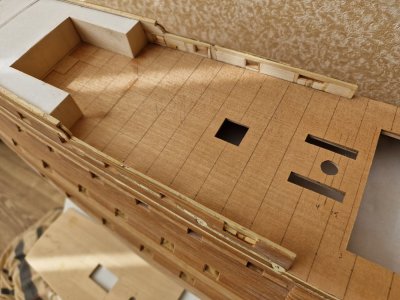
Well, let's continue with the decks. Up next is the quarterdeck.
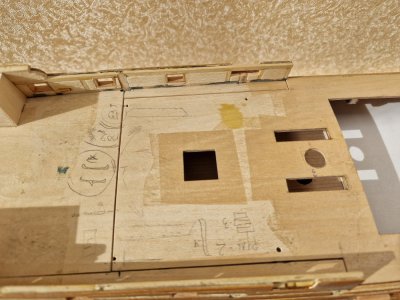
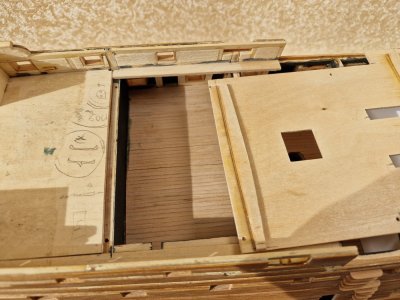
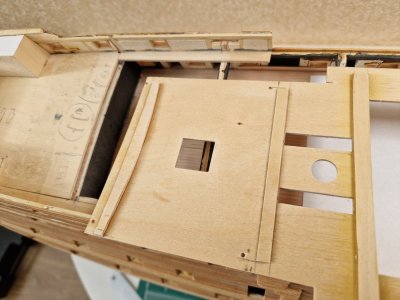
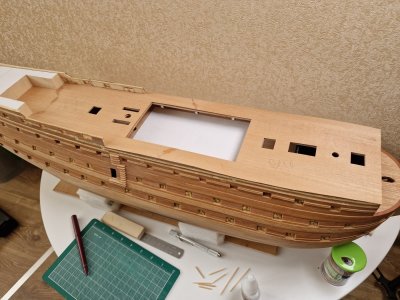
As I mentioned earlier, I divided this deck into two halves. The rear part is glued statically, while the front part will be removable. I also reinforced the inner section to strengthen the curve of the deck.

HMS Victory 213.jpg
HMS Victory 214.jpg
HMS Victory 215.jpg

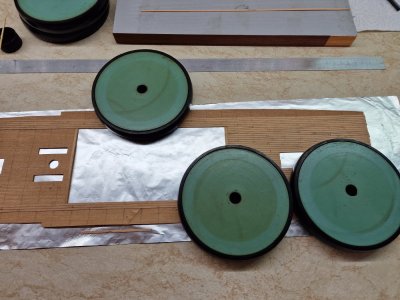
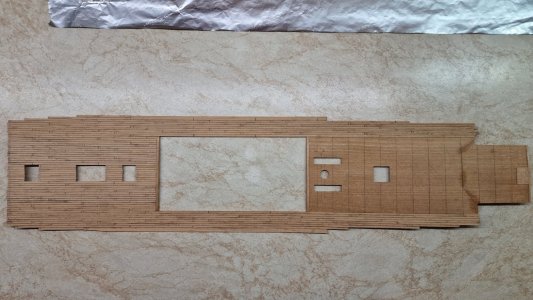
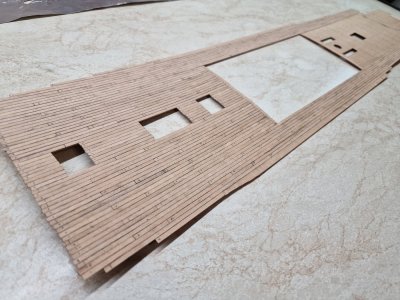
Then I cut and glued a base from veneer for the deck planking. The planks will be glued onto this base, and the entire assembly, with the planks attached, will be adhered to the main plywood section.
HMS Victory 216.jpg

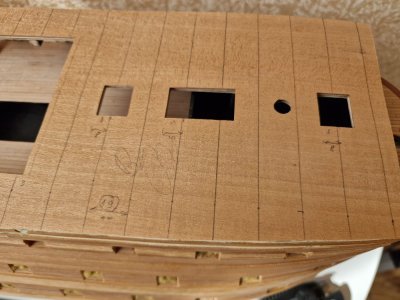
I didn't want to glue the planks directly onto the hull. It's inconvenient and difficult to sand. By doing it this way, I can glue everything on the table, comfortably. I marked the base for the planking with a deck plank length of 80 mm. I kept everything consistent across all the decks, only adjusting slightly at the ends and where the hatch openings were. I understand that the beam spacing varies on each deck, and even in the anatomy, things don't always match up perfectly. But since this model isn't for a competition, I allow myself these simplifications. The beam spacing ended up being 19 mm.
HMS Victory 217.jpg
HMS Victory 218.jpg

After that, I started planking the deck. I used both weight presses and the iron to help with the process. I'll go into more detail about the method when I work on the poop deck.
HMS Victory 219.jpg
HMS Victory 220.jpg
HMS Victory 221.jpg

After the glue dried, I shaped the edges of the deck and glued it onto the plywood base on the ship. I had to use every tool at my disposal since the surface was uneven, and a simple flat weight wouldn’t work. )))
HMS Victory 231.jpg
...
 
Back
Top