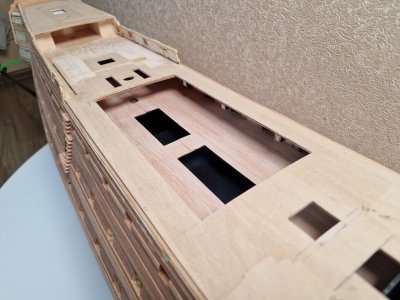
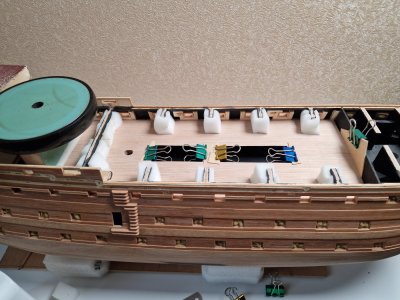
HMS Victory [1805] 1:79 by serikoff. Started with Mantua -> Upgraded with John McKay's Anatomy.

Part 8

10.2012


HMS Victory 163.jpg

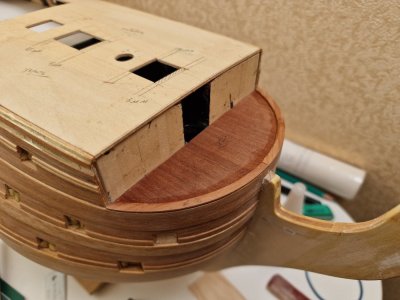
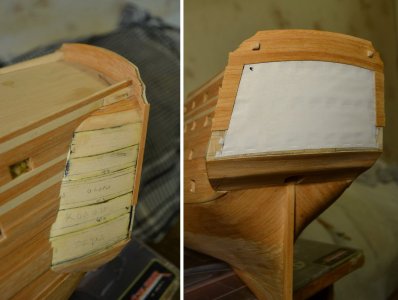
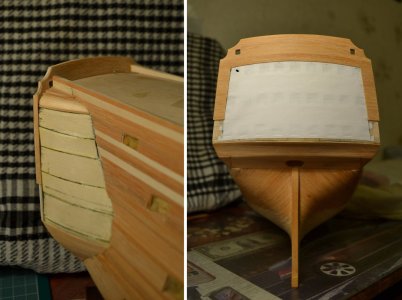
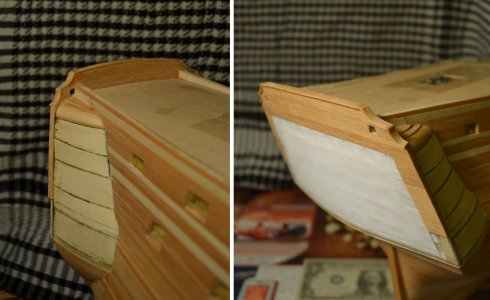
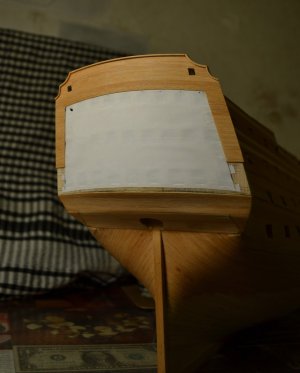
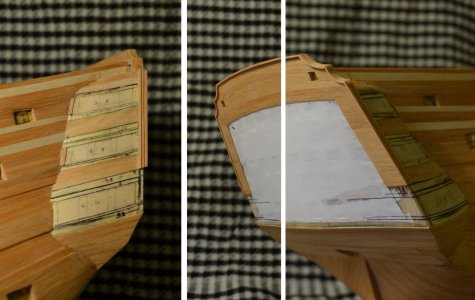
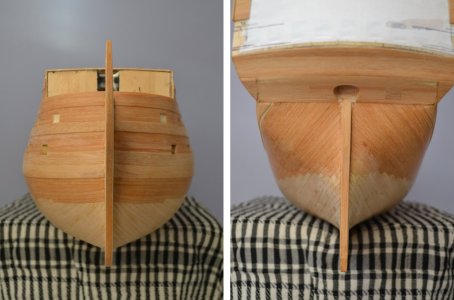
Progress was extremely slow at that time due to my heavy workload. I completed the area beneath the stern.
HMS Victory 164.jpg

11.2012

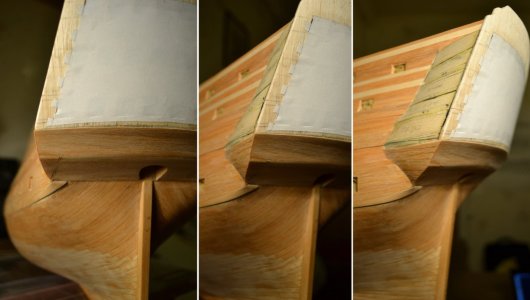
I also completed all the surfaces that will be painted. The stern is practically ready. After painting, all that’s left is to decorate it, install the windows, and add the columns.

HMS Victory 165.jpg
HMS Victory 166.jpg
HMS Victory 167.jpg
HMS Victory 168.jpg
HMS Victory 169.jpg
...
 
12.2012

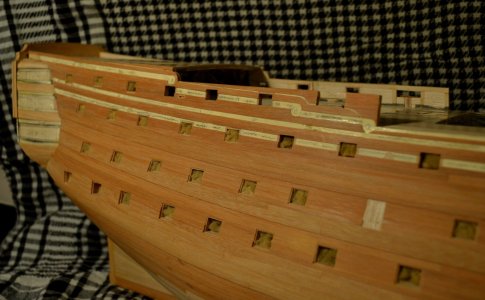
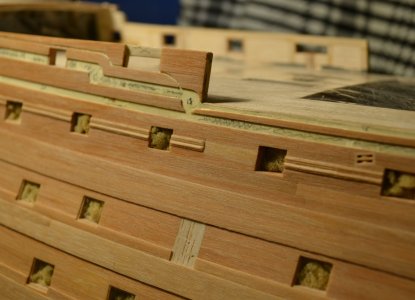
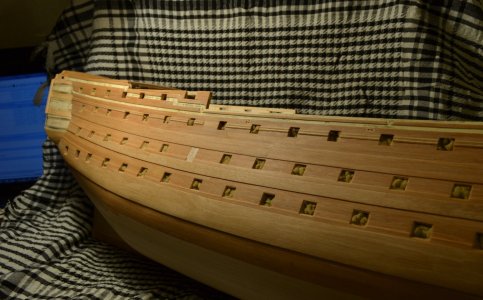
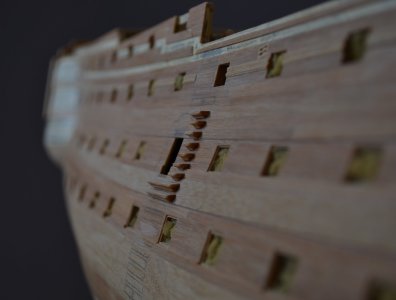
After finishing work on the stern, I moved on to the rails. According to the anatomy, there are many different types, but at this scale, it's hard to see the exact details, so I tried to replicate something as close as possible. To begin, I removed all the temporary planks.
HMS Victory 170.jpg

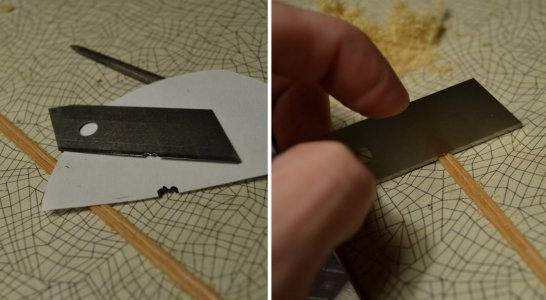
I made the shaped planks (or rails) using a simple method: by scraping. First, I cut the profile into the knife blade, and then, by running the blade perpendicularly over the wood, I removed layers until the plank took on the desired profile.
HMS Victory 171.jpg
HMS Victory 172.jpg
HMS Victory 173.jpg

____________________________________________________________

11.2013


After almost a YEAR, I finally got back to working on the model. Moving, renovations, and travel... There were times when I didn’t have either the time or the space to work on it.

But here's what I managed to accomplish back then:
After a closer look at the ship's anatomy, I decided to adjust a few details:
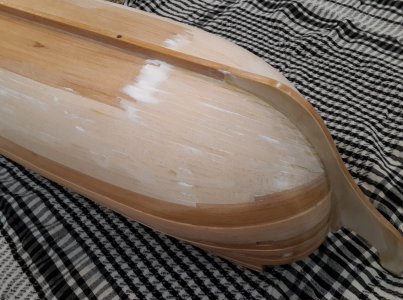
  • I reshaped the knighthead to be trapezoidal (tapered from 6.5 mm to 4.5 mm at the base),
  • I slimmed down the sternpost from 7 mm to 5 mm vertically, and along the keel for 7 cm, tapering it down to 5 mm.
  • I will correct the stem later.
HMS Victory 174.jpg

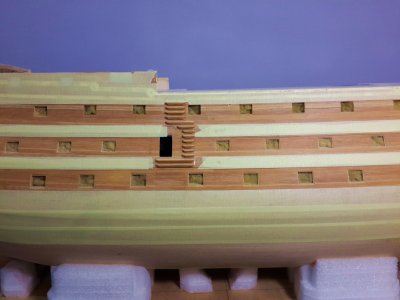
For a change of pace, I decided to start working on the stairs. (Spoiler alert: I didn’t finish them any time soon)...
HMS Victory 175.jpg

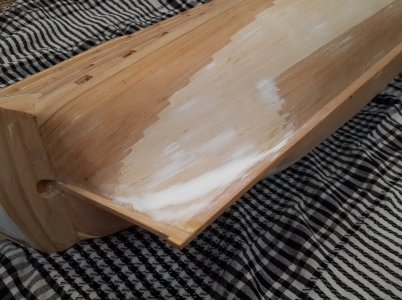
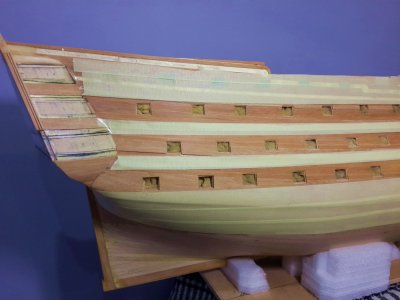
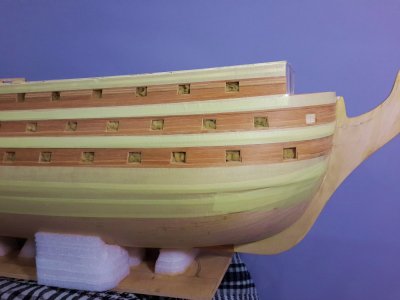
While preparing for painting, I decided to smooth out the surface below the waterline (KWL) once again.
HMS Victory 180.jpg
HMS Victory 181.jpg

I initially outlined the paint lines with tape... But the model never got painted—for many years!
HMS Victory 177.jpg
HMS Victory 178.jpg
HMS Victory 179.jpg

____________________________________________________________________

For almost 10 years, I didn’t touch the ship at all. I even moved it to my parents' house, where it stayed wrapped in packaging film all that time. I wasn’t sure if it would sit there for another decade. There was no time for hobbies whatsoever—I spent all my free time traveling. But when the war began and borders were closed, that was taken from me. I already mentioned this in the first post, so I won't repeat myself. In short, after all this time, I’ve returned.
Eight parts are already behind us, and there are 14 more ahead, covering the current state of construction.
So, there’s still plenty to show you!

...
 
I wanted to ask you some questions, but as it is a retrospective log, I'll wait till you show her current stage. I'm repeating myself, but I like your detailed descriptions
 
Hello Sergey,

I am enjoying your work very much and your ship is coming along beautifully. I also enjoy your commentary with your pictures.

Bill
Thank you for your compliment. I try to focus on the most interesting parts without filling up space with unnecessary details. There’s even more exciting content coming soon)))
I wanted to ask you some questions, but as it is a retrospective log, I'll wait till you show her current stage. I'm repeating myself, but I like your detailed descriptions
Thank you. If you have any urgent questions, feel free to ask, and I’ll do my best to answer them. But you’re right, there’s still a lot to come))
 
12.2012

After finishing work on the stern, I moved on to the rails. According to the anatomy, there are many different types, but at this scale, it's hard to see the exact details, so I tried to replicate something as close as possible. To begin, I removed all the temporary planks.
View attachment 476834

I made the shaped planks (or rails) using a simple method: by scraping. First, I cut the profile into the knife blade, and then, by running the blade perpendicularly over the wood, I removed layers until the plank took on the desired profile.
View attachment 476845
View attachment 476846
View attachment 476847

____________________________________________________________

11.2013


After almost a YEAR, I finally got back to working on the model. Moving, renovations, and travel... There were times when I didn’t have either the time or the space to work on it.

But here's what I managed to accomplish back then:
After a closer look at the ship's anatomy, I decided to adjust a few details:
  • I reshaped the knighthead to be trapezoidal (tapered from 6.5 mm to 4.5 mm at the base),
  • I slimmed down the sternpost from 7 mm to 5 mm vertically, and along the keel for 7 cm, tapering it down to 5 mm.
  • I will correct the stem later.
View attachment 476848

For a change of pace, I decided to start working on the stairs. (Spoiler alert: I didn’t finish them any time soon)...
View attachment 476849

While preparing for painting, I decided to smooth out the surface below the waterline (KWL) once again.
View attachment 476850
View attachment 476851

I initially outlined the paint lines with tape... But the model never got painted—for many years!
View attachment 476852
View attachment 476853
View attachment 476854

____________________________________________________________________

For almost 10 years, I didn’t touch the ship at all. I even moved it to my parents' house, where it stayed wrapped in packaging film all that time. I wasn’t sure if it would sit there for another decade. There was no time for hobbies whatsoever—I spent all my free time traveling. But when the war began and borders were closed, that was taken from me. I already mentioned this in the first post, so I won't repeat myself. In short, after all this time, I’ve returned.
Eight parts are already behind us, and there are 14 more ahead, covering the current state of construction.
So, there’s still plenty to show you!

...
Good morning Sergey. Wow what a transformation. My first build was the Mantua Victory and it is a very inaccurate depiction of the Victory. What you have done bringing in the Mackay accuracy is brilliant. Wonderful planking and craftsmanship. Cheers Grant
 
Good morning Sergey. Wow what a transformation. My first build was the Mantua Victory and it is a very inaccurate depiction of the Victory. What you have done bringing in the Mackay accuracy is brilliant. Wonderful planking and craftsmanship. Cheers Grant
Thank you for the praise. Yes, the kits come with significant simplifications. Once I understood the plans, I realized that I just needed to follow the guide. The next stage is the deck, and from that point, I followed the anatomy closely, making sure not to accumulate any errors.
 
Good Morning from New Jersey, USA. WOW! That is absolutely awsome work. THANK YOU!
Thank you for your high praise.

This is an epic tale of an epic build. I’m enjoying reading it very much.
Thank you very much. A new part is coming soon.

Welcome Sergey! Thank you for sharing your work and your story. It's a stark reminder to many of us how lucky we are just to be safe in our lives. I look forward to you sharing your continued work on your Victory.
Thank you for your support. You are right. I would have never believed what is happening now if someone had told me this three years ago. Thank you for your feedback.

In your signature, you list current and completed projects. As a suggestion, you could add links to those projects in your signature. That way, people can easily find your work. I’d love to take a look at your builds!

This is astonishingly good!
Thank you very much!
 
Part 8

04.2023


As I mentioned earlier, I hadn’t worked on the battleship model for 10 years.
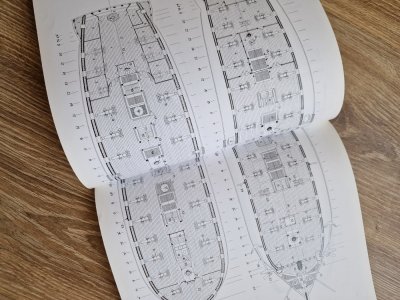
But due to the war, I took the model from my parents' house and started calculating the decks. In most kits, the decking is overly simplified. The planks included are too wide for the scale—sometimes 2 or even 3 times wider. Since 2023, I’ve fully transitioned to using John McKay's 'Anatomy of the Ship.' I had scans of the book from the internet, but I still ordered a copy through friends in the USA, as it wasn’t available in Ukraine. As I mentioned before, I scanned this book and combined the necessary fragments to print the plans. It came out to 4 sheets, but I think I already talked about that))). So, armed with calipers, I started calculating the proportions of the deck planks.
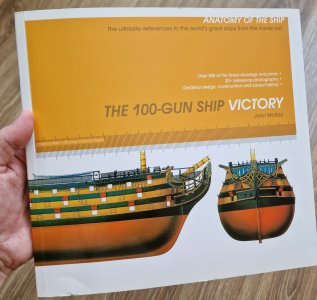
HMS Victory 189.jpg HMS Victory 190.jpg

But I'll talk about that a bit later. For now, I’ve made some changes to the hull.
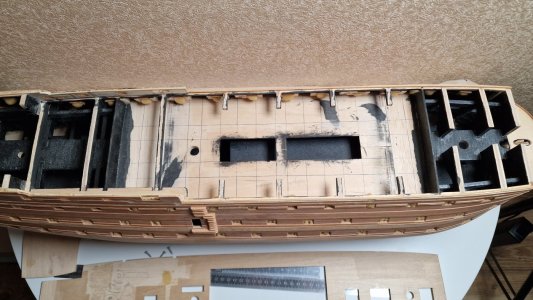
HMS Victory 182.jpg

The changes will affect the upper deck. I didn’t make any changes to the front part. The wall here will remain. The space between the front two pairs of ports was designated for the sick bay. This wall was constructed to provide warmth and comfort to the wounded or sick. I will continue to work on this wall.
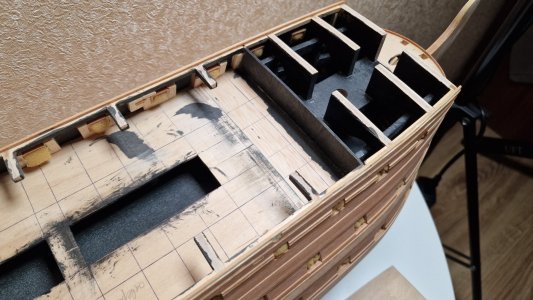
HMS Victory 183.jpg

As for the rear wall, I moved it back by one more port. This way, all the ports between the partitions will remain without covers, while the ones in front and behind the partitions will have covers.
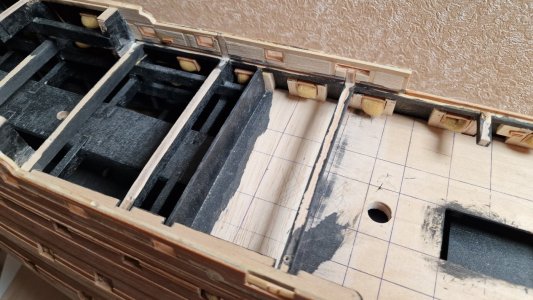
HMS Victory 184.jpg

For this, I removed the wall again and trimmed small sections from the two planks that hold the dummy cannons.
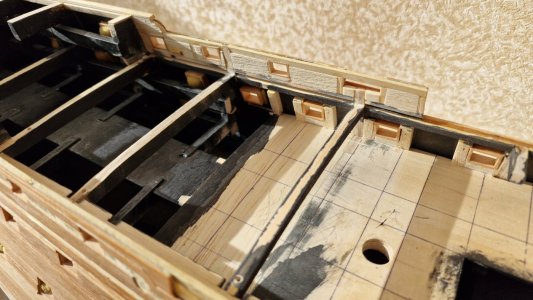
HMS Victory 185.jpg

Then I extended the deck and installed a new bulkhead.
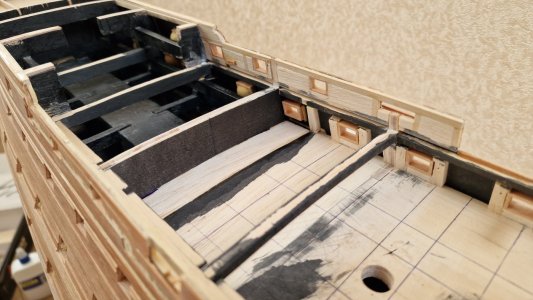
HMS Victory 186.jpg

In this case, my mistake was that I should have installed the wall behind the frame. Because there is little space between it and the gun. However, visually it appears very deep and will not be visible.

After that, I divided the quarterdeck into two parts along this frame and glued the rear part in its place. The front part will be removable.
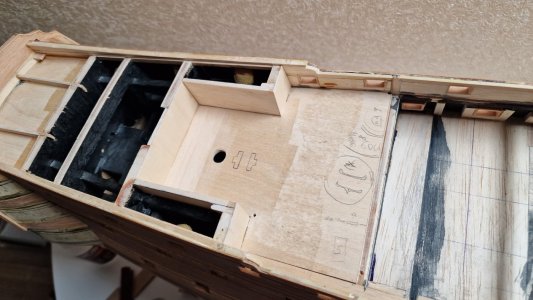
HMS Victory 187.jpg

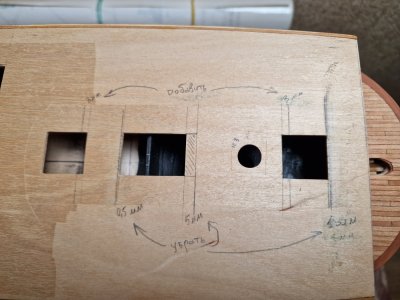
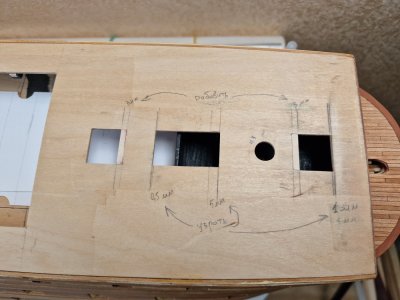
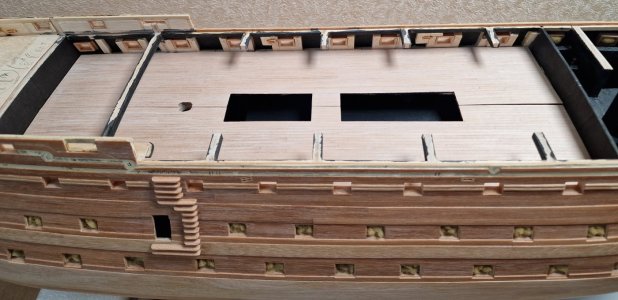
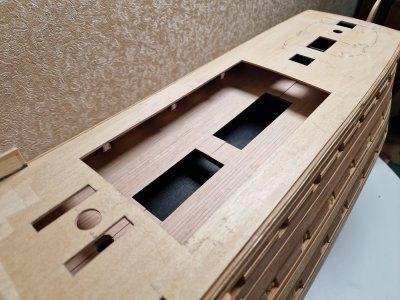
And as a small detail, I slightly adjusted the openings for the lower hatches leading to the middle deck. It will not have any cladding, just painted black, as this area will hardly be visible.
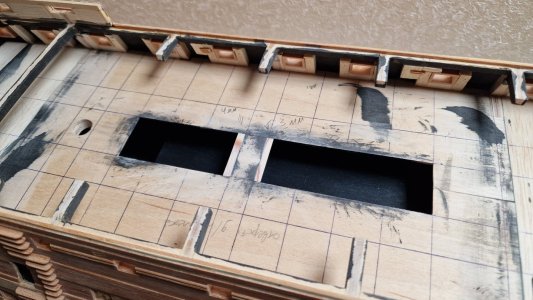
HMS Victory 188.jpg

In the photo above, you can see that I have already marked the connections of the deck boards. Based on the printed drawings from the anatomy book, I measured the width and length of the deck board. For my scale of 1:79, these dimensions were 2.5x80 mm.

05.2023

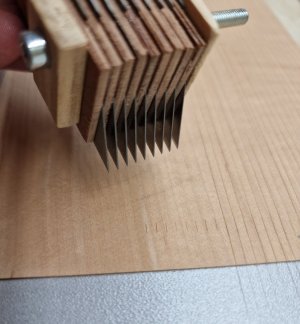
I used pear veneer for the cladding. Unfortunately, I didn't have solid material of that type. I don’t enjoy working with veneer, but it is what it is. To measure these 2.5 mm evenly, I created a jig. Measuring 2.5 mm can be quite inconvenient, and sooner or later, errors creep in. This jig was very helpful for me.
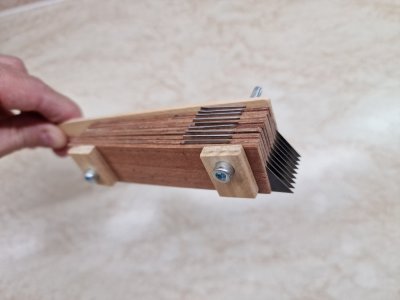
HMS Victory 192.jpg

The device is very primitive. The thickness between the blades of the utility knife is static, and the distance between the tips of the blades is exactly 2.5 mm.
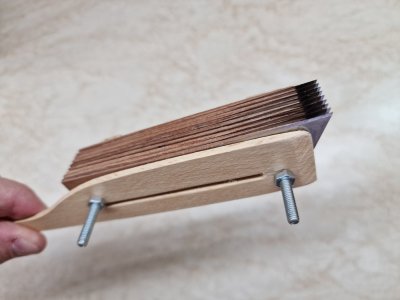
HMS Victory 193.jpg

Then I mark multiple distances with a puncture at the same time.
HMS Victory 194.jpg

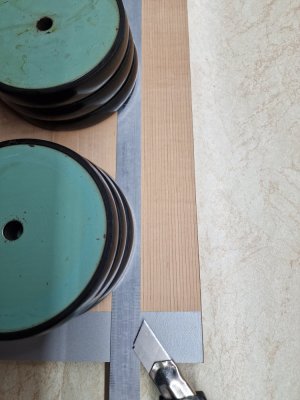
I cut the veneer in the usual way—using a knife along a ruler. It took a long time, but it was effective! By the way, the veneer was glued with double-sided tape, and the ruler was additionally fixed with weights from dumbbells.
HMS Victory 195.jpg

I started testing on the small deck of the galley. I didn’t do it without mistakes, which I will discuss later.

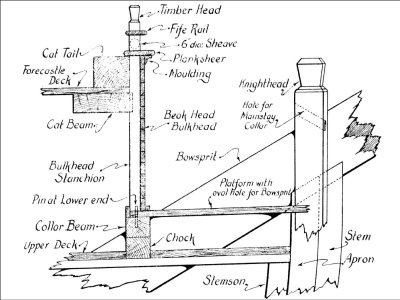
First, I prepared the base. By the way, there is a significant error in the anatomy drawings. It appears in almost all "boxes" and later caused me some problems. The mistake is that the deck on the galley is not a continuation of the deck with the guns, but rather an additional level above the deck.
М.JPG

But at that moment, I didn't notice this and, accordingly, worked without this small deck. However, looking ahead, everything turned out fine anyway. Many people do it that way.

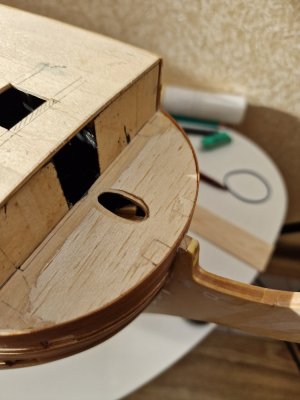
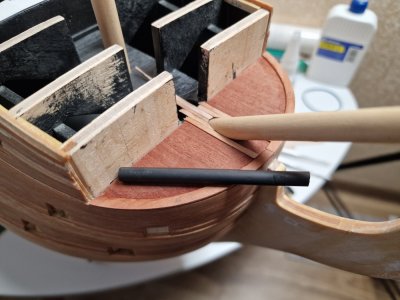
First, I raised the front edge to replicate the curve of the deck and covered the holes for the knighthead. After that, I made a plate to which I will glue the decking.
HMS Victory 197.jpg
HMS Victory 198.jpg

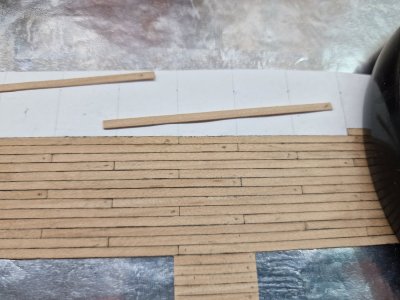
I cut holes for the bowsprit and started laying the deck. Below, I will explain the technology I used for gluing. (The black cylinder is a charcoal pencil; later in the text, it will become clear why I used it.)
HMS Victory 199.jpg

And the first mistake was that I needed to glue all the veneer strips in one direction, without flipping them 180 degrees or upside down. Because in the dry version, everything seemed more or less fine, but...
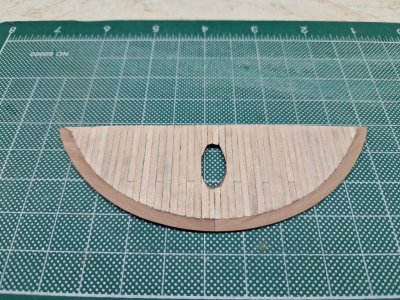
HMS Victory 200.jpg

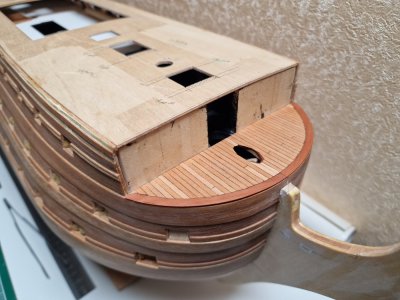
...after applying the oil, the color became pronounced. And due to the difference in the grain, some strips started to stand out from the overall mass.
HMS Victory 201.jpg

It's good that I applied oil to this fragment and noticed it early, rather than after I had finished all the decks. The second positive aspect is that this deck is not very visible, and looking ahead, under three layers of oil and after some time, the difference was not so noticeable. However, it's still important to follow the principle. I will describe below how I marked the strips of veneer to glue them strictly one way, without flipping them either vertically or horizontally.
...
 
At first a warm welcome on the SoS, Sergey.
For almost 10 years, I didn’t touch the ship at all.
A deja-vu for me: I had also a part of a model for many years on a bookshelf. But on a moment the right time was there to start again. After removing the dust a new start with new energy.
Nice to see your ‘looking back steps’ and filling the logs till your current state.
Regards, Peter
 
05.2023

At the same time, I continued to refine the hull according to the anatomy drawings. I adjusted the old proportions of the openings from the kit to match the correct dimensions. Quarterdeck...
Before:
HMS Victory 202.jpg

After:
HMS Victory 203.jpg

Finally, the decking is done.
While laying the planks, I marked a dot on one side to ensure they all faced the same direction, avoiding any color differences.
HMS Victory 204.jpg

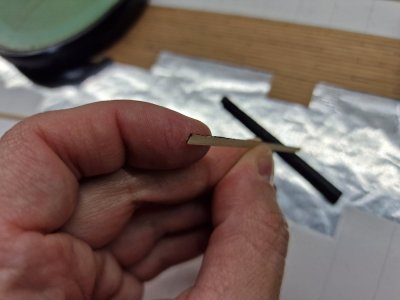
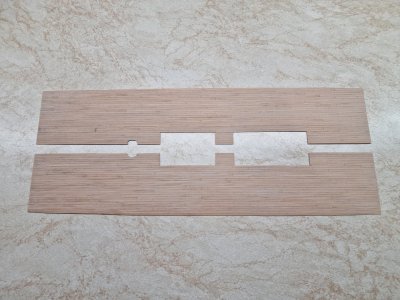
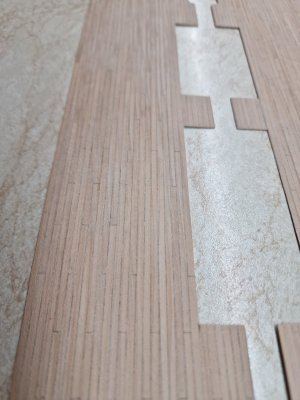
For convenience, I glued the upper deck in two parts on a paper base, separately from the main deck. This allowed me to properly sand the surface and easily attach the strips. I created the caulking effect using a regular charcoal pencil, coloring one long edge and one short edge on one side.
HMS Victory 205.jpg

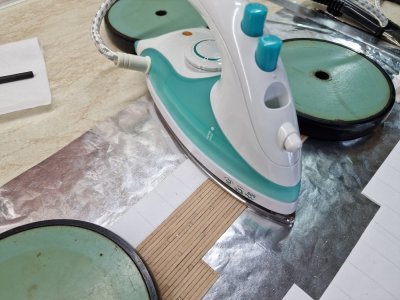
I glued the strips using PVA and a hot iron, welding them in place to speed up the process.
HMS Victory 206.jpg

After sanding and fitting, the two halves of the deck were glued in place. To speed up the process, the area that won’t be visible was glued without joints. Please forgive me for that )))
HMS Victory 207.jpg
HMS Victory 208.jpg

HMS Victory 209 o.jpg

HMS Victory 210.jpg
HMS Victory 211.jpg
HMS Victory 212.jpg

Next up is the quarterdeck.
To be continued.
 
I marked the strips of veneer to glue them strictly one way, without flipping them either vertically or horizontally.

Great work!

It is interesting that I deliberately flip them both ways to make a random pattern on the deck. I like that effect. However, I can tell you that your way is more like the Victory as she lies at Portsmouth. I was there six months ago and all the deck planks are an identical grey colour.

I guess your charcoal is for the caulking between the planks?

Interesting thing with the deck planking. Why would changing the direction of the planking present this much visual difference? Could you scrape the decking and make this go away? Or did you mix in planks from different source panels? As you know there is pink pear (steamed) and natural pear...

Try it with some planks, many woods, especially white ones, refract the light differently due to the different orientation of the internal microscopic tubes or veins, (the phloem and xylem) which are filled with the varnish. It works with wet wood too but not in such a pronounced way.
 
At first a warm welcome on the SoS, Sergey.

A deja-vu for me: I had also a part of a model for many years on a bookshelf. But on a moment the right time was there to start again. After removing the dust a new start with new energy.
Nice to see your ‘looking back steps’ and filling the logs till your current state.
Regards, Peter
Thank you for your warm words. Yes, there are times when many years pass, but the desire does not fade away. It's interesting to experience it again, as if for the first time.

Interesting thing with the deck planking. Why would changing the direction of the planking present this much visual difference? Could you scrape the decking and make this go away? Or did you mix in planks from different source panels? As you know there is pink pear (steamed) and natural pear...
This is one piece of veneer. The effect occurs because this is not a board but veneer. When cutting veneer, the layers of the fibers are different from those when cutting a board. Therefore, when flipping the same piece, the color changes depending on the direction of the fibers. For example, if I photograph my deck from one side and then from the other, the colors in the photos will differ. I will provide detailed explanations about this in my experiments.

Great work!

It is interesting that I deliberately flip them both ways to make a random pattern on the deck. I like that effect. However, I can tell you that your way is more like the Victory as she lies at Portsmouth. I was there six months ago and all the deck planks are an identical grey colour.

I guess your charcoal is for the caulking between the planks?


Try it with some planks, many woods, especially white ones, refract the light differently due to the different orientation of the internal microscopic tubes or veins, (the phloem and xylem) which are filled with the varnish. It works with wet wood too but not in such a pronounced way.
Absolutely correct! 2/2!! )) In my case, uniformity is indeed more preferable. Oh, how I wish I could visit the HMS Victory, but only in its finished state; I know it’s currently undergoing extensive renovations.

Heat setting PVA and wood glue is a great time saver but not much used in UK.
It’s very strange. I did all the work on the cladding this way. I don’t like to wait long. When I have time, I want to accomplish as much as possible.
 
Last edited:
Back
Top