
• SUBSCRIBE TO SHIPS IN SCALE TODAY!

    The beloved Ships in Scale Magazine is back and charting a new course for 2026!
    Discover new skills, new techniques, and new inspirations in every issue.

    NOTE THAT OUR NEXT ISSUE WILL BE July/August 2026
  • Win a Free Custom Engraved Brass Coin!!!
    As a way to introduce our brass coins to the community, we will raffle off a free coin during the month of August. Follow link ABOVE for instructions for entering.

HMS Victory: Artsanía Latina 1:84 anatomy model

Joined
Apr 29, 2022
Messages
12
Points
48

Location
Dublin, Ireland
When I was about 14, my grandfather brought me to Portsmouth to see HMS Victory. I remember the long train journey from my grandparents home in Haywards Heath, taking over two hours. But when we finally arrived, I was in awe at her size, complexity and grace. The journey back again flew by as I read and then re-read a booklet on her, musing over what it must have been like to actually sail on her. I spent the remainder of my month's UK holiday building the Airfix model of her, hand painted and with the rigging made from sprue stretched over a candle. I would be embarrassed now by the low quality of my teenage work, but she held pride of place on the top of my bemused grandparents’ maple living room cabinet for many years.

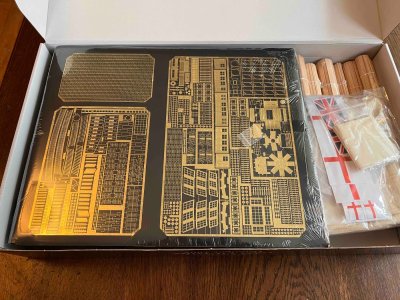
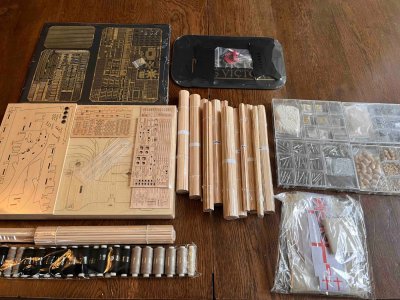
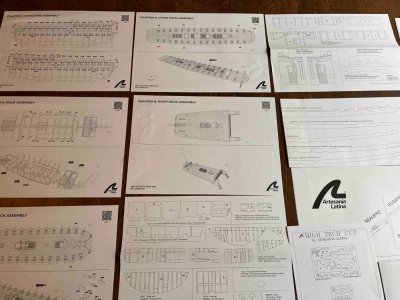
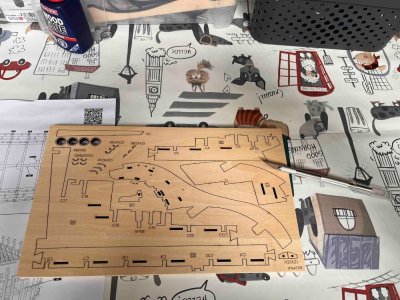
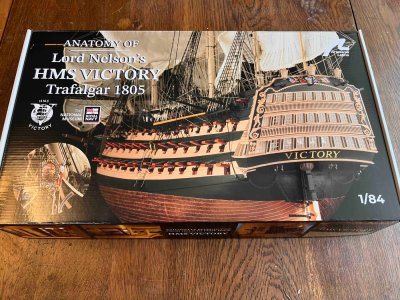
Now, fifty-five years later and retired, I am going to try again. With a slight trepidation I’ve plunged in and bought the Artsanía Latina 1:84 anatomy model of HMS Victory. I’ve always been a keen amateur modeller, chiefly with plastic kits but also a couple of wooden kit ships (including the Artsanía Latina San Francisco model), although rarely had much time during my working career. This new project will be my largest and -- inevitably -- longest I’ve ever undertaken.

My chief sources include of course the excellent forums here on Ships Of Scale, and Youtube video playlists, of those of you who have gone before me, capturing so many useful tips and a few “gotchas” as you’ve progressed. I don’t intend to duplicate here the recommendations and lessons of others, but hope I can nevertheless contribute a few small things of value to those who come after us and take the plunge themselves.

My first chief reference book is Alan McGowan’s “HMS Victory: Her Construction, Career and Restoration”. It includes an intriguing collection of essays on the decision to build and commission her, her service in the Royal Navy, and the discoveries and work during her current ten-year restoration which started in 2022. There are many photographs, and a valuable set of detailed drawings. Although an expensive book, I believe it well worth the investment, particularly in the context of the Artsanía Latina anatomy model.

My second reference is Thomas Gropp’s “Rigging First-Rate Ships of the Royal Navy, circa 1805: Modeler’s Rigging Handbook”. Published just last September, it contains a huge set of Blender (3D design software) drawings completely detailing the rigging of HMS Victory. The author has conducted extensive research including of course multiple visits to Plymouth. I am really looking forward to the rigging phase although naturally it will be many months from now until I get there.
 
Last edited:
Nice to see you getting back into the hobby and you picked a good kit to start on!

Use the search tool and enter kit name and see what others have posted about this kit.
 
Hi Chris
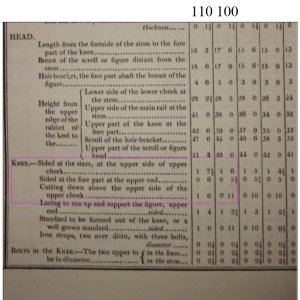
This may be of no concern to you but maybe interesting anyway. Is the sheet of wood in your post #3 plywood or is it solid? The reason I ask is that when the knee is tapered both downwards to match the breadth of the forward end of the keel and also towards the fore part of the knee going from 18 inches at the stem to less than 6 inches at the forward edge, plywood layers might show. I hope this is making sense :)
Allan

From folio XLVIII in David Steel's The Elements and Practice of Naval Architecture. The first two columns are for 110 gun and 100 gun ships.
1776276457332.jpeg
 
Thanks Alan, helpful!

Plywood unfortunately. I'm planning to gently smooth the plywood edges, and then paint to hopefully cover up each plywood sandwich. I've almost got to a point in the build where it would make sense to do this before proceeding further.
 
A bit off topic, but during a visit with friends in London, one of them was kind enough to take me on a day trip to Portsmouth to see the Victory. If they ever do forensics below deck, they'll find some more recent addition of DNA remnants. Specifically, of my forehead when I smacked it into one of the overhead cross beams. Man, the lower deck ceiling height was low on that girl. :-) Well... all decks were low clearance in that era, regardless of what ship you were in.
 
When I was about 14, my grandfather brought me to Plymouth to see HMS Victory. I remember the long train journey from my grandparents home in Haywards Heath, taking over two hours. But when we finally arrived, I was in awe at her size, complexity and grace. The journey back again flew by as I read and then re-read a booklet on her, musing over what it must have been like to actually sail on her. I spent the remainder of my month's UK holiday building the Airfix model of her, hand painted and with the rigging made from sprue stretched over a candle. I would be embarrassed now by the low quality of my teenage work, but she held pride of place on the top of my bemused grandparents’ maple living room cabinet for many years.

Now, fifty-five years later and retired, I am going to try again. With a slight trepidation I’ve plunged in and bought the Artsanía Latina 1:84 anatomy model of HMS Victory. I’ve always been a keen amateur modeller, chiefly with plastic kits but also a couple of wooden kit ships (including the Artsanía Latina San Francisco model), although rarely had much time during my working career. This new project will be my largest and -- inevitably -- longest I’ve ever undertaken.

My chief sources include of course the excellent forums here on Ships Of Scale, and Youtube video playlists, of those of you who have gone before me, capturing so many useful tips and a few “gotchas” as you’ve progressed. I don’t intend to duplicate here the recommendations and lessons of others, but hope I can nevertheless contribute a few small things of value to those who come after us and take the plunge themselves.

My first chief reference book is Alan McGowan’s “HMS Victory: Her Construction, Career and Restoration”. It includes an intriguing collection of essays on the decision to build and commission her, her service in the Royal Navy, and the discoveries and work during her current ten-year restoration which started in 2022. There are many photographs, and a valuable set of detailed drawings. Although an expensive book, I believe it well worth the investment, particularly in the context of the Artsanía Latina anatomy model.

My second reference is Thomas Gropp’s “Rigging First-Rate Ships of the Royal Navy, circa 1805: Modeler’s Rigging Handbook”. Published just last September, it contains a huge set of Blender (3D design software) drawings completely detailing the rigging of HMS Victory. The author has conducted extensive research including of course multiple visits to Plymouth. I am really looking forward to the rigging phase although naturally it will be many months from now until I get there.
Unless they found a way to drag it overland, it's in Portsmouth. FYI
 
Unless they found a way to drag it overland, it's in Portsmouth. FYI
That was a tough day! Hottest day of the year and we only took one crate of HSB with us. We were dog tired by the time we got to the top of Portsdown hill, stopped for a roly, but then she groaned and creaked and came tanking down the A27 by 'erself! Like greased ducksh*t!! We hung on to the ropes but we overshot North End and ended up in the mud at Farlington Marshes.
So we left her there and went for a pub crawl down Albert Road and went to finish the job Sunday morning. By then she was covered in 657 grafitti! Kids, no respect, and who taught them that foul language??
From there it was easy, just waited for the tide, sailed her out of Langstone and along the seafront.
Thought we'd give the crowd a show and let off a few cannonballs. They were loving it and we had a whale of a time....until we destroyed the chippy kiosk at Billy Manning's! Big trouble!
Into Pompey harbour and a perfect glide into the dock and job done.
And you tell that t'young folk nowadays.....
 
That was a tough day! Hottest day of the year and we only took one crate of HSB with us. We were dog tired by the time we got to the top of Portsdown hill, stopped for a roly, but then she groaned and creaked and came tanking down the A27 by 'erself! Like greased ducksh*t!! We hung on to the ropes but we overshot North End and ended up in the mud at Farlington Marshes.
So we left her there and went for a pub crawl down Albert Road and went to finish the job Sunday morning. By then she was covered in 657 grafitti! Kids, no respect, and who taught them that foul language??
From there it was easy, just waited for the tide, sailed her out of Langstone and along the seafront.
Thought we'd give the crowd a show and let off a few cannonballs. They were loving it and we had a whale of a time....until we destroyed the chippy kiosk at Billy Manning's! Big trouble!
Into Pompey harbour and a perfect glide into the dock and job done.
And you tell that t'young folk nowadays.....
Extra tot of Rum to the men for their efforts!
 
Stage One

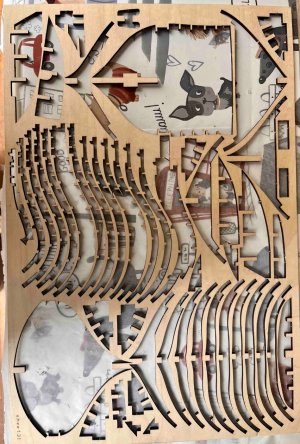
Finished the first stage, of the 87 listed by Artsenía Latina. About 350 parts in place so far!

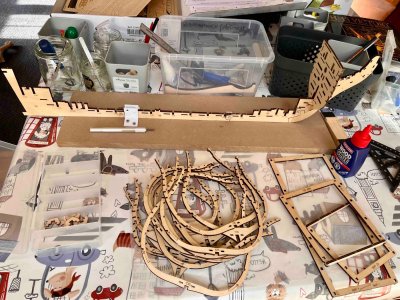
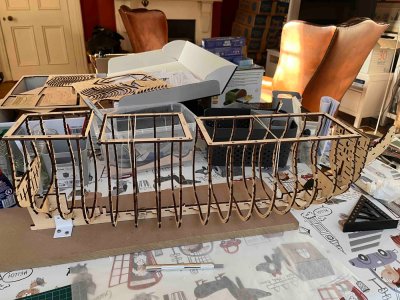
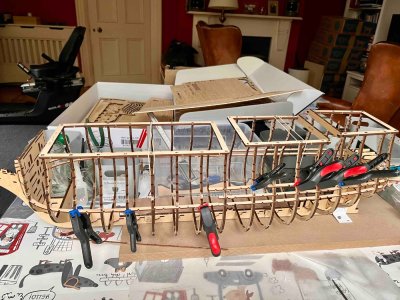
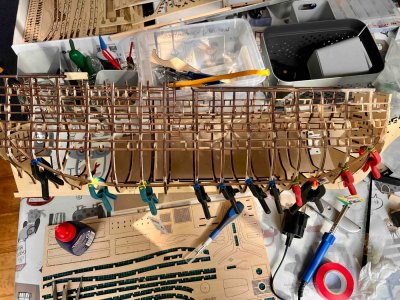
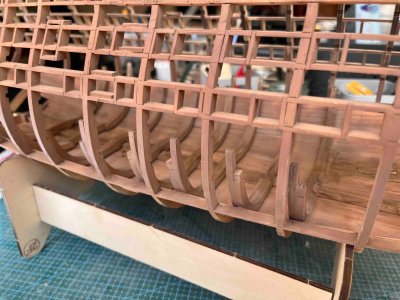
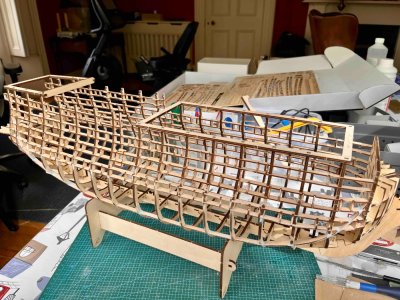
The build has been reasonably straight forward up to now. The initial skeleton with only the frames, keel, stern and bow bulkheads was very fragile. I decided to build all the 15 frames first, before then glueing them all at the same time onto the keel, rather than build and attach each separately, as per the video. That way, I could attach the three top templates to the top of the frames and ensure the frames were all mutually aligned before the glue set.

Attaching the longitudinal “ribs” was simple, and helped stabilise the frames. My understanding is that Victory does not actually have these ribs per se, but instead uses multi-layer planking to achieve longitudinal strength. Victory also has some 90 or so frames, far more than the 15 of the kit!

The vertical gunport comings were easy to insert, but tedious with over 200 of them. I have reverse-action tweezers, which helped a lot. I had to keep focussed to ensure that I didn’t place any of them upside down, a challenge as my mind wandered as I repetitively glued so many in.

The final curved “rib” from stern to bow which lower bounds the “viewport” on the starboard side was quite fragile to bend into shape, even using a plank bender, because of the cut-outs needed in it to slot it into the frames.

I then filled in some of the gaps with putty, and gave a first sanding.

The Artsenía Latina instructional videos postpone sanding of the hull before planking, until video 16. I was tempted to prepare the hull now but then realised that once the hold and orlop deck are in as per the sequence in the videos, they’ll strengthen the lower parts of the frames before heavy sanding. Nevertheless I am slightly concerned by postponing the sanding, and also the sawing away of the rib portions on the starboard side viewport between the frames and gunports (as per video 16). I am worried because small parts in the hold and orlop deck - for example perhaps the hold storage barrels - may fall off during the vibration due to the later sanding and sawing. I’ll just have to ensure that all parts are well glued, and try and be as gentle as I can when I get to the hull preparation in due course.

IMG_2163.jpg

IMG_2165.jpg

IMG_2166.jpg

IMG_2177.jpg

IMG_2179.jpg
 
Stage Two

Finished the second stage, of the 87 listed by Artsenía Latina. Aboout 150 parts this stage, so now 500 in place so far.

I realised at the start of this stage that I had made quite a bad mistake in the previous step!! I had prematurely fitted the bow stem, part TJ.A, whilst assembling the skeleton. In fact this should not be fitted until way way later at stage 21. I think I just got carried away in my enthusiasm of the build and wasn’t concentrating... It was about a week after I fitted it before I realised my mistake, so the glue was well cured by then. I considered trying to weaken the glue and possibly using wire-saw separation to try and break the glue, but quickly realised I would probably do more damage than it was worth. It will mean that when I get to planking the bow, it will be harder than it should be. I will have to carefully measure and fit each plank to the bow, probably using tape or string to get the correct length. Ho hum.

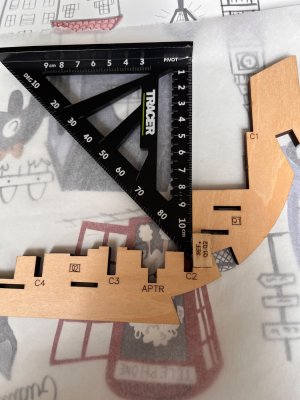
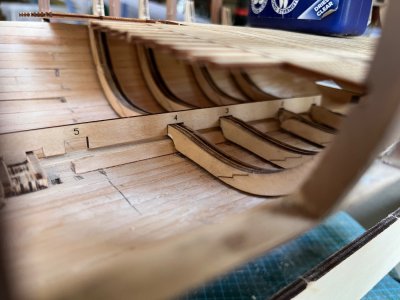
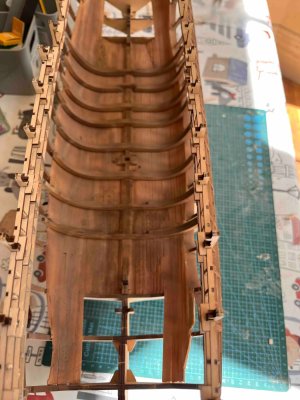
Apart from that bad error, this stage was reasonably straight forward. I was quite paranoid about ensuring that the knee frames are in exactly the correct place to fit into their slots in the orlop deck. The stage 2 video uses pencil lines drawn from a dry fitted template piece, H3, to do this. However I thought a better approach would be to adapt H3 so that I could dry slot it over each of the eight knee frames as the glue dried for each of them, ensuring that they are in the correct place to fit the orlop deck, see my photo.

I tried using the metal scraper to shape the WS1 triangular planks along keelson as the video instructs, but found it very difficult and awkward to use. I abandoned the scraper, and used my table sander instead to shape the WS1 pieces.

I noticed that the video (at the 2.12 mark) instructs you to trim the internal planking just up to the lower edge of the housing slots in the ribs for the orlop beams. After doing this as instructed, when I then dry fitted the orlop deck, I realised that doing this has then left about a millimetre gap underneath the (port side of) the orlop deck, from the bottom to the top of the orlop beams. It probably does not matter, since the internal port side will larger be hidden in any case and the gap will be dark behind the (external) portside hull planking But when I get to fitting the orlop deck, I might just fit the gaps using some basswood slices as needed.

I then painted the hold deck, frames and knees trying to simulate aged old oak, and add some grime effect to the bilge area. Much of the bilge area will soon be covered by ballast and stowage and fittings, but I did it anyway.

IMG_2205.jpg

IMG_2209.jpg

IMG_2210.jpg
 
Last edited:
Solid work Chris. I'm sure the premature fitting of the bow stem won't give you too much pain. Maybe cut and shape the end that sits against the stem part first, then when you are happy trim your plank to the correct length at the other end.
T
 
Back
Top