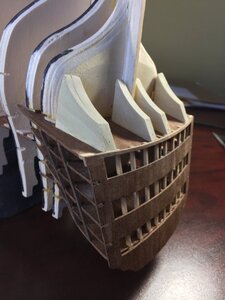
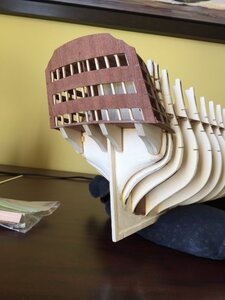
HMS Victory by Y.T.- Mamoli - 1:90 scale

Welcome to SOS family. So glad that you are doing a log.:p:cool:
Looking great so far Y.T.. By the way what is your first name, so we call you that.
I be bring my chair and take up the front row centre position with your next post.
Happymodeling
Greg
 
Welcome to SOS family. So glad that you are doing a log.:p:cool:
Looking great so far Y.T.. By the way what is your first name, so we call you that.
I be bring my chair and take up the front row centre position with your next post.
Happymodeling
Greg
Thanks Greg, My name is Yuriy. I am located in Toronto, Canada. Now I continue my work log.
 
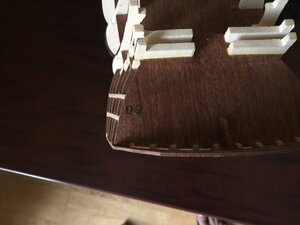
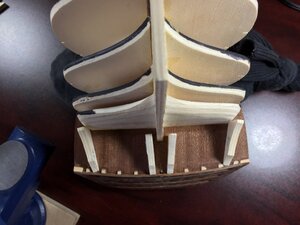
I had to cut a new fore mast opening in a first deck as the hole Mamoli drilled is off by about 5 mm.
default_wallbash.gif
I accepted the fore mast hole in the upper deck as a true one and adjusted opening in the first deck accordingly. Besides I had to cut a part of an inner keel to accept the bottom of a fore mast according to master Mamoli plans. The keel plywood was not cut in line with their master design.


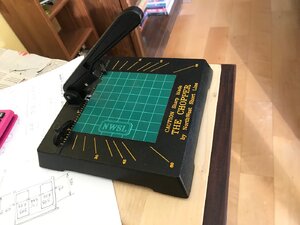
This is an "automation" of cutting deck planks. Recommend this. It improves speed and quality of planks cut.


*****************By the way after using this jig I must attest that this "tool" is huge productivity improvement.

Update 2020-06-25
+++Original picture is now lost with deleting my log at MSW. This is what I use for plank cutting now. Highly recommended.
IMG_0907.jpg
 
Last edited:
I found lots of inconsistencies and omissions in Mamoli's instructions.

My latest issue is the wood for deck planking is not enough to cover all decks. They missed to provide about 5 strips of 0.5 x 4 mm Tanganyika. I am not planning to buy more or replace whole deck planking wood. I have to decide where are the least noticeable places where I can not install planking or install different color planking (I have some spare 0.5 x 5 white color planks). It looks as only place where it is not possible to see a deck finish is on the battery deck at very rear. Portion of deck in red rectangle on pic below will not be covered with deck planks. Any thoughts?


Update 2020-06-25
+++Original picture is now lost when MSW deleted my log there.
 
Last edited:
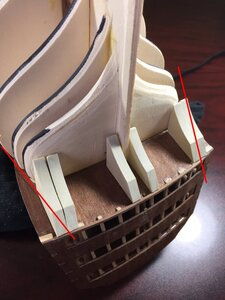
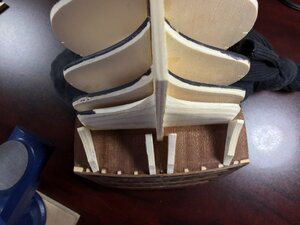
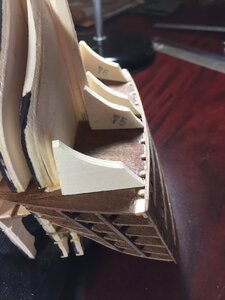
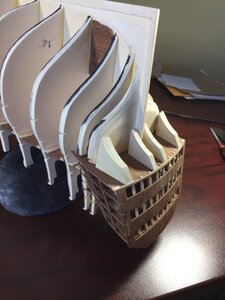
I have one more story to tell today. This cast metal item called "transom" by Mamoli (Sorry I do not know how it is called in Navy), it was awfully curved. These other two metal items called "turrets" by Mamoly, they were of much shorter height than the transom. Also the turrets they were kind of cast completely wrong as they were not standing enough "proud" of the transom. I assumed I cannot use these things as they are. It had been capturing my mind for a long time before I figured out how to use these items. First I tried to unbend the transom. It snapped apart straight away. What a tragedy
default_wallbash.gif
.

 
I however expected this item to break apart. I could not use it curved as is anyways. I took a piece of thin plywood and glued all broken parts of transom to it. After this I glued some 2mm wood strips on the sides of the transom in order to have the turrets look natural with the transom. After this I glued the turrets on. After this I glued small pieces of wood under turrets. After this I filed all thing so it looks as one assembly. See below.

 
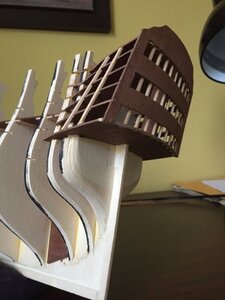
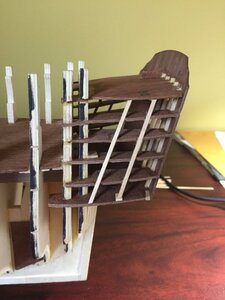
I believe Mamoli stern quarters have a fundamental design problem. This week I had been looking at parts for stern quarters. I was putting them together (no glue) and taking them apart about 20 times. Per Mamoli design the main stern gallery piece has no lower windows sill. I was not able to put these parts together in such a way that I was satisfied with appearance of the sill-less lower windows. The part in horizontal plane at the bottom of stern gallery never provided a proper curvature to create a lower windows sill. At the end I came to conclusion I had to rework Mamoli stern gallery part by attaching my own sill for lower windows. First I curved stern gallery part plywood with clothes pressing iron. Then I took 2 mm x 2 mm square profile. I bent it in 2 planes with an iron to form a proper curvature. I glued it to stern gallery part. I put the assembly on and was very satisfied with results. Next step is gluing main stern quarters parts permanently and installing the 8 side parts forming the curvature for the sides of stern quarters. When I put them together first time these parts were all over the place and will have to go through lots of filing unless through a complete re-engineering. Note on stern quarters assembly picture below nothing is yet glued so the gaps you see.


Well. I feel rather uncomfortable criticizing this Mamoli kit as it can hurt somebody's feelings. Some former Mamoli people may be reading this forum. Some people here might have been involved in developing this kit. I want to apologize if what I said about the kit was taken as an offense. Again I feel sorry. ...But I have to say that this type of assembly kits where it is obvious that there are lots of design mistakes and which do not come together well, these are getting out of time and fashion. The people of today do not want to buy problems. I do like challenges but I do not want to find constantly problem after problem about a product I purchased. I start getting frustrated. I say to myself why I did not buy a BETTER kit where all items would come together well. Now I understand why Mamoli Victory was discontinued.
Above comments however do not distract me from a challenge to complete this kit and to do it well.
 
OK. Enough of complaints. I had done some work on stern this week and am very satisfied with results. I am happy I added the lower windows sill. I glued all stern parts together. I re-positioned some of vertical 2x2 reinforcement columns so they would be exactly behind of the window separator pieces and not visible. Later I realized it was not necessary to hide these 2x2s as my windows will not be transparent into the internals of the stern. About my idea of the windows is in the next posts.


IMG_5347.thumb.JPG.98432087c0c1836f37f1182931ffa7a7.jpgIMG_5351.thumb.JPG.9779583a0630ced9398e0b707db4eee2.jpg
 
Last edited:
Now the windows. I dislike the Mamoli's idea of the stern windows. They want me to cut out the strips of window rows out of a blue plastic sheet you see on picture. They want me to glue these into the stern window openings on the back and sides. It will work but it will look cheap. This will be in contrast with beautiful cast metal ornamentation provided by Mamoli which are going to be painted gold on black. My idea is to use these blue plastic sheets as a template for cutting out the same size strips of the transparent hard plastic sheet I show on picture below. I would provide some white paper (as a toilet paper) behind this transparent plastic to serve as window curtains. This will be beautiful and it will hide stern unsightly internals. What do you thing of this?


I still am debating on how I would do horizontal and vertical lines on the "glass". Main issue for me here is to ensure these lines are considerably thinner than the window frames. This is pretty difficult to do as frames are already 1 mm thick, so lined are to be 0.5mm. I saw no such thin wood profile available. Ideas were: 1) use metal wire, cut in pieces, paint yellow and glue on; 2) use some plastic thread and do same as with the metal wire (this would be easier to work with than metal wire); 3) print complete windows on 3D printer (will not be done as expensive); 4) Use 1x1 square wood profile, cut to required lengths and split them into four 0.5x0.5 profiles with Exacto knife, paint and glue on.

Regards

Yuriy
 
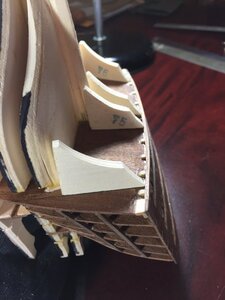
Hi. This is my new entry. This week I dedicated trying to understand how the stern below windows looks like. This took time. At some times I was failing to see the 3D picture of it. Later I understood that with Mamoli stern profile parts #75 and #76 I will not be able to do what I want doing. Mind gaps between back of part 75 and the stern frame. This is also does not match with Mamoli instructions.
No. I do not say I would not get some Victory hull shape with original parts 75 and 76. I am saying I would not get what I wanted the Victory hull should look like.


IMG_5459.thumb.JPG.6fa176582fe77790850eff9abb3e3bfe.jpgIMG_5460.thumb.JPG.c58ddff21253082d0c8fbd858e495099.jpg
 
Last edited:
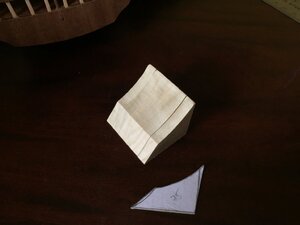
So I decided to re-engineer parts 75 and 76. First I realized I do not need two different parts 75 and 76. I just need one. So I traced a template from original Mamoli drawing. I cut it out and made a stencil by gluing it to a cardboard. I re-engineered this item following the hull shape. Then I took a piece of timber and cut out six identical parts as you see below.

IMG_5464.thumb.JPG.3e331a1b287234469c94260798c93186.jpg
 
Last edited:
Back
Top