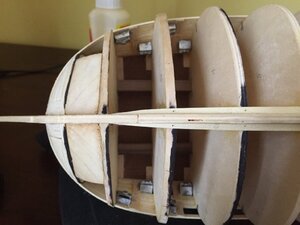
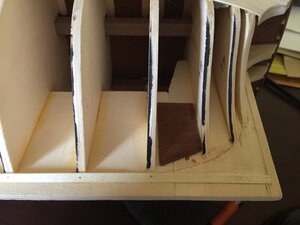
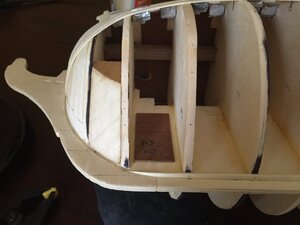
HMS Victory by Y.T.- Mamoli - 1:90 scale

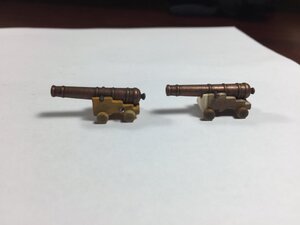
I got 2 sizes of cannons: smaller and larger. I got only one size carriages in the kit. Here is how larger cannon looks like sitting on the carriage. Carriage looks so small compared to cannon. Actually assembly tends to tipping over to the front due to unbalance. Or may be they are not so bad? What do you think?


IMG_5720.thumb.JPG.7c72dd832f80c410316a1e83fe1198f5.jpg
 
Last edited:
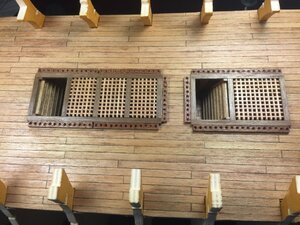
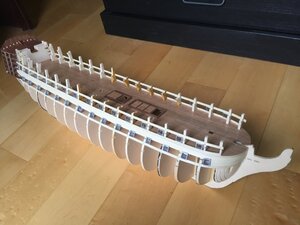
The hull became a bit more beautiful. Also I did not understand why Mamoli instructions call for gratings to be installed before the decking planks. To me this would be more difficult and hard to do it nice. I decided decking to go first. Gratings will go over the decking. The wood under gratings I painted black ahead of time to create an image of a "hollow space".

IMG_5610.thumb.JPG.c5c35e1b56d39ee162a6ec86b4eab44a.jpg
 
Last edited:
Grating pieces came together well enough. I tried my best to assemble as many grating decks as possible from material I got. I managed to make total of 14. Last two ones were a handicapped ones made of broken parts. I submerged them into diluted carpenters glue now a second time as they were annoyingly breaking up here and there when I was filing them off.

 
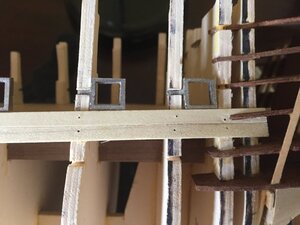
By the way I forgot to tell that I filed off to proper shape all gun port molded parts provided in the kit. Parts were very roughly cast so shaping them was unavoidable. Even more so I found most of these gun port frames out of square so I bent them up to be square with pliers. I made them all handed as required by kit by snipping off appropriate prongs on either left or right side. Took me a couple of days.

 
And also I had to close up all of slots intended by Mamoli to accept cast port frames. I had to do so as the height of slots they cut were not matching with height of cannons supplied.
 
Last edited:
I have problem building cannon ball shelves around deck gratings. Wood strip is 1 x 3 mm walnut. Need to drill round cavities for cannon balls with 1.5mm drill. Wood splits and chips off all the time. I already tried drilling with 3 drill sizes as in sequence: 0.6 mm then 1mm then 1.5 mm. I secured strip into a vice. All this did not help. May be someone knows a technique how to overcome this problem?

Thanks


Problem with cannon ball shelves is resolved. I had to ask for help and got excellent suggestions which I all used. See below.
 
Another issue with the kit. I counted how many cannon ball notches instructions call for. Number is 164. There were only 110 cannon balls in the kit. Why all these missing items?
 
The first plank (sheer strake) is glued on. Yeeeeeah!
default_biggrin.png
I bent it with a regular clothes pressing iron. Plank was dry when I bent it. Iron was filled with water so it also steamed the plank. Interesting. I read of 1001 methods of bending planks known to men. I tried many of them personally. I did it with incisions on the wood, with curling iron on water soaked wood and so on. I purchased expensive plank bending equipment as Aeropiccola plank bender for about $60 but I found that the easiest way to do it is just with a common iron. No need to wet the planks as iron provides hot steam , I can bend a plank in a few seconds, I will not over-burn the wood as iron has temperature settings and I can not only bend in a regular plane but also in side plane to some degree also. Note though that all this exercise I do on the large piece of wood board. This makes it happen! I did not yet try Aeropiccola but I am not sure I need ever use it as iron is the best.
 
Last edited:
Some progress. Actually I did lots of thinking and planning before I even put my first plank. I am a kind that measures 10 times before cutting once. So many things were crossing my mind: gun deck port heights to high or too low, do I align my first plank with gun deck line or else, do I care first plank (strake) is full width on the bow or cut it out at the bow to align with gun deck ports and so on and so forth. Actually I took a day off on Friday just to do some progress on the ship hull. Most of that Friday I was rather contemplating how to do things instead of actually working on the hull. I got frustrated by the end of the day that I did too little. All this planning time though was well spent. Next day knowing how I am going to proceed I did 3 times more job on the hull just within a few hours.
What you see on picture below are planks glued on but the metal port pieces are not glued on yet. Metal ports will be glued on later with epoxy 2 parts adhesive - this thing works really good for me when metal should be glued to wood or else.
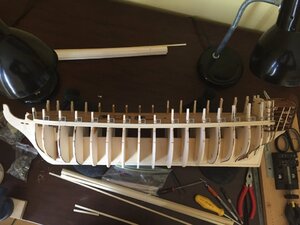
Also I forgot to mention I had to put some more wood on a few of bulkhead frames - planks were having a gap to them - I had to fix this.

IMG_5621.thumb.JPG.90e1789024727c55900dd716fc2ee83a.jpgIMG_5616.thumb.JPG.f1a7ea8793d8bcdc57a4584afbf02bd5.jpg
 
Last edited:
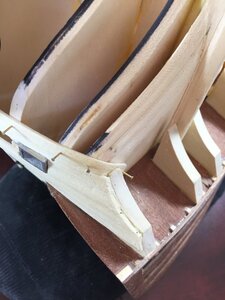
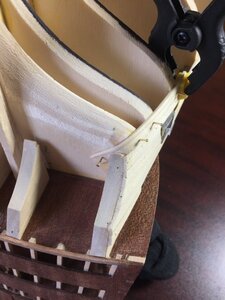
This was actually one and major issue I was worried about when I decided to build Victory. This is the plank adjacent to last straight plank at the stern. This plank had to make a very sharp turn and curve under the stern lowest quarter deck. I am very happy as I did it today and it appeared to be looking not so bad at all. After some filing will look even better. Cheers!
default_cheers.gif


IMG_5629.thumb.JPG.ab8417ac5d2fcc3b29f091fd52caed50.jpgIMG_5632.thumb.JPG.a64c89553c4ef47f007c3f2322090a87.jpg
 
Last edited:
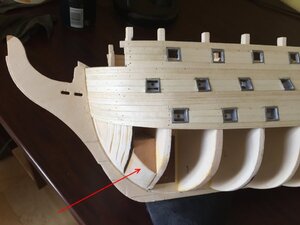
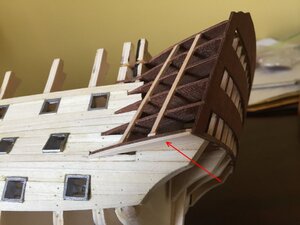
I added a piece of plywood at place shown by arrow below. I need this for two purposes: a) because I had to level the plane indicated with arrow to a plank I added at the bottom of "transom", bb) stern quarter windows at the hull sides (bottom ones) appeared to be too short height-wise so a piece of plywood gives the bottom window a necessary height.

IMG_5642.thumb.JPG.1f6eb3e4da0734b935ac9baeba85f5af.jpg
 
Last edited:
I normally always install a keel plank. I do not know other way to plank a hull. After I have keel and shear strake planks installed I full in a big gap between them. So this is what I did this time again. I installed a keel plank on both sides. I consider this a big achievement worth celebration. Which I did as well.
default_cheers.gif


IMG_5646.thumb.JPG.71b6ce0d98f22226dbf34aa51fab5dda.jpgIMG_5645.thumb.JPG.c3df3c9a0c58bbe8aeed6dc742ea1e80.jpgIMG_5644.thumb.JPG.38e501d9e92dcbfa954c841a2767b6f1.jpg
 
Last edited:
Back
Top