HMS Victory by Y.T.- Mamoli - 1:90 scale

Joined
Sep 3, 2018
Messages
1,241
Points
443

Location
Toronto, Canada
This is a copy of build log started back in March this year 2018:
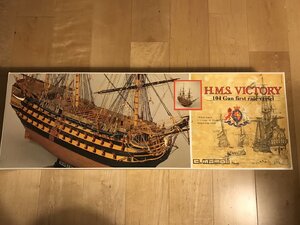
decided to build HMS Victory by Mamoli 1:90 scale. Reasons? I wanted to build a model which is a) relatively complex; b)not too large so I can work on it in my condo (moved out of house a few years ago); c) of a beautiful and historically important ship. Choice fell on Victory. Selected Mamoli kit because of scale, price and nice cast details. Let us see how it goes. Here is a kit. I believe it is circa 2006. I got it from eBay for total of about US $400 after paying import tax to Canada. E12A61F9-4850-4265-88CA-1B554316DFFF.jpeg
 
Last edited:
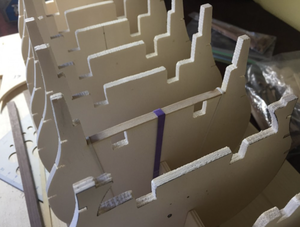
This evening was dedicated to adjusting 18 frames vertically in order for ship hull to have a proper body curvatures. I want all curves of my model to be smooth with no bumps. This is probably one of most important operations in building of a hull of a kit model. This is very difficult to do with these 18 manufactured frames as they cut very inaccurately - I would say they are cut all over the place. It is a shame to have them cut so inaccurately in the age of CNC machining. Because of inaccuracy of frames I have difficulty to decide which reference points to take for vertical adjustment. Frame common reference points to select can be:

a) surface for attaching a deck?

b)a side line going through notches cut for attaching cast gun ports?

c) the frame very bottom points?

I put all frames into a keel and sat with the model for many hours measuring, re aligning and vertically re positioning these frames. I found that none of above reference points can be taken as 100% reference. I had to come up with a compromise which makes a), b)and c) references to be not too much off practical sense. Below is a picture showing what I came up with. See the thread inserted into gun port notches. The thread curvature aligned itself not so badly. Each frame bottoms are not much too off as well. Top surfaces for gluing decks are not 100% level but are going to be pretty easy to fix with filing the wood off or adding some wood on a few frames. This is the way I will glue this together tomorrow. Have a good night.


I purchased new carpenters glue called EXPRESS as it dries in 10 minutes. This is great help. Also the bottle and the applicator on it are very convenient.

Here I am gluing frames. In order to prevent distortion I am doing this operation one frame at a time putting all assembly together each time including aligning longitudinal bars.
 
I found that one (just one) of the frames is missing some "meat" on one side. I found that looking along the skeleton of a hull I made so far. I have to add some wood on this frame so I do not have a dent in my hull body. For this purpose I normally use a wooden coffee stirring sticks available in dollar stores. Here is a picture of what I have now. I cut out a required piece of wooden strip and placed it in water for about 30 minutes. I curved this wet wooden strip on the frame and attached it with small nails. I always pre-drill a hole in wood before I insert a nail. See below. After the wood strip dried out I take it out, apply glue and re attach with nails.

 
Last evening I spent leveling frame top surfaces to be perfect level and properly curved along the hull to accept 1st deck. Today I was trying to set 1st level deck onto the frames. I had lots of deck trimming to do in order them to fit onto the frames. This resulted in some unpleasant gaps around deck and the frames. By the way this deck piece on the front I complained about that it would not fit unless cut, I managed to insert it with no application of water. Just some tweaking with the deck filing in this and that place. Bad thing is now all 1st level deck pieces are sitting on but there are pretty large gaps in some places around the frames .This however should be not big issue. This is why I love to work with wood. On wood ALL IS FIXABLE. I will add some support strips and lay over other wood pieces to be level with the surface of 1st deck. See decks are on the hull but not yet glued on. I will glue later.

 
While working on design of rabbet groove required I think I found a much bigger problem with this kit. I believe design of stern galleries, the portion of it right below the bottom deck of the gallery will not look good. It will not assume proper curvatures of the hull. Stern will look especially bad at the point I marked with red arrow.
 
Here is how my rabbet notch work coming along. More work awaiting at the stern area as there the notch becomes a 3D shape. And yes, I cut it with just an Exacto #11 knife and very small file tool. This is most touchy part of rabbet cutting - at the back part of keel. It is not yet a "final cut" but I am getting there.

 
I found that a few plywood pieces Mamoli provided for gluing in the front of the hull are a) some not right shape b)not sufficient to properly shape the hull. I decided to add a piece of pine wood on each side. I preliminarily faired the hull. See what I got:
 
Back
Top